


Whether you’re making a garment from scratch, or modifying a ready-to-wear item, belt loops are handy design details that keep belts in place around your middle.
Belt loops can be applied as the garment is being constructed, allowing the lower raw edges to be tucked into the lower waistband seam, or they can be applied after the garment is completed.
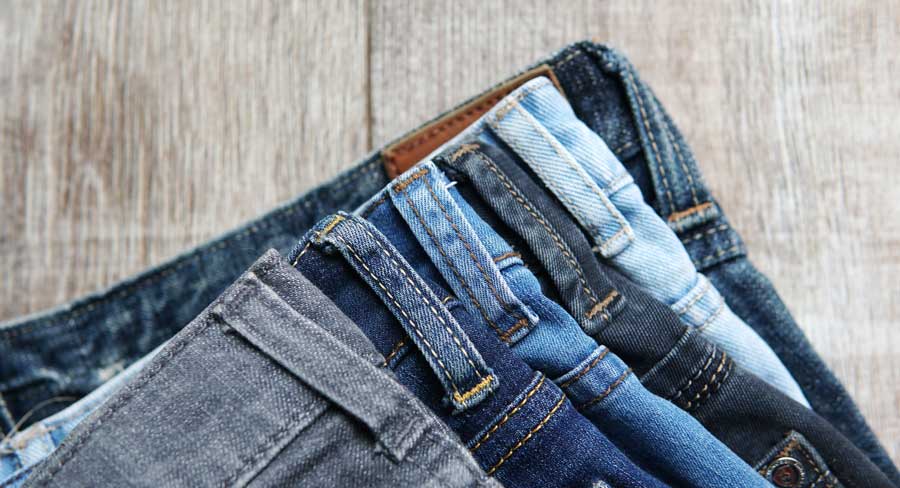
Take a look at your favorite jeans, and you’ll likely see the belt loops attached with bar tacks at the upper and lower folded-under edges, providing a decorative detail.
There are multiple ways to make belt loops, but the function is the same.
Loop Language
The first decision is how many loops do you need. If you’re looking at jeans or other pants with a waistband, you’ll usually place belt loops at the sides, fronts and back of the garment. Some men’s pants have two or three back belt loops to hold things in place. If you’re looking to support a belt on a dress or coat, usually just using a loop at each side is sufficient as the belt isn’t holding the garment in place like it does on pants.
- Determine the finished length of the loop. Measure the width of the belt you intend to use, then add 1” to that number. This allows enough length for finishing the ends, and a little ease for the belt thickness. Note that many jeans belt loop lower edges are positioned below the waistband seam to accommodate wider belts.
- Multiply this length by the number of loops desired and add 1” to determine the cut length of the fabric strip.
- Determine the desired finished width of the loop—usually ½” or less, but they can be wider. Multiply that measurement by four to determine the strip cut width.
- Instead of sewing separate tiny loop pieces, it’s easier to sew one long strip, then cut them apart after stitching.
- On lightweight fabrics, fuse interfacing to the back of the fabric strip before sewing the loops.
- To construct the loops, press the strip in half matching the long raw edges. Unfold and re-press the long edges to the center, then press in half again.
- Edgestitch both long edges, then cut the loops into the determined lengths. If you want, add a row of stitching down the middle too—a nice touch if loops are wider, or even showcase a decorative stitch.
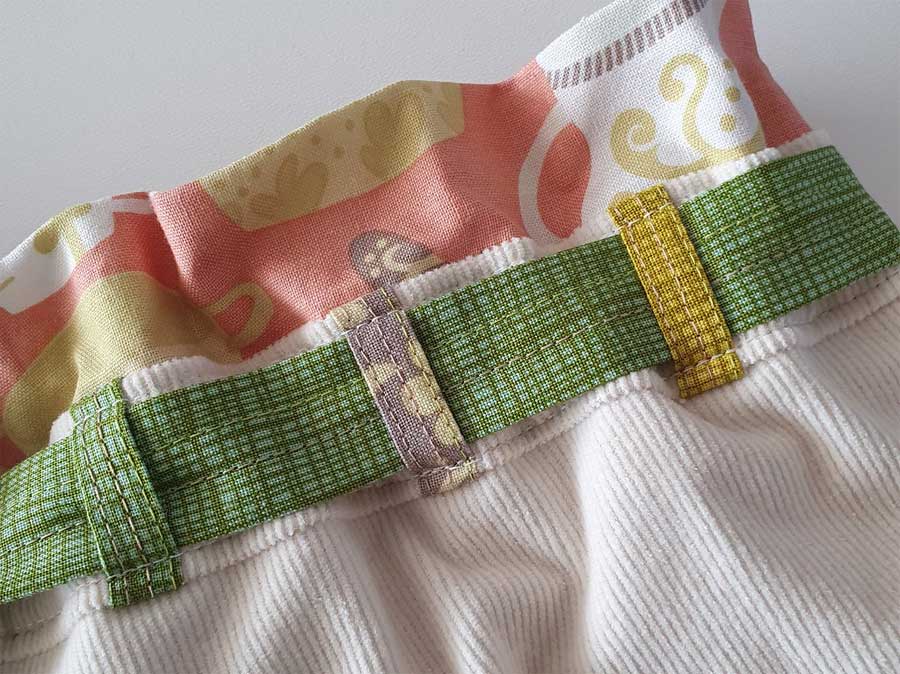
To apply the loops to a finished garment, press under ¼” at each end. Position the loops spanning the waistband area of the garment in the desired location, leaving a bit of ease under the loop to accommodate the belt thickness. Sew across each loop end, backstitching for security. If desired, set the machine for a bartack to secure the ends in place mimicking the look of jeans detailing.
If you’re making the garment, include the lower end of the belt loops in the waistband seaming, then tack them at the top when the waistband is completed.
Other Options
Belt loops can also be made simply using thread and a basic crochet stitch. The works well for dresses with fabric belts or sashes, where there’s little strain on the loop itself.
If you prefer not to edgestitch the loop strip, simply insert a narrow strip of fusible web to hold the pressed-under layers together.
If you’re making a lot of belt loops, check with your machine dealer to see if there’s a specific attachment for this function that folds and stitches in one operation.
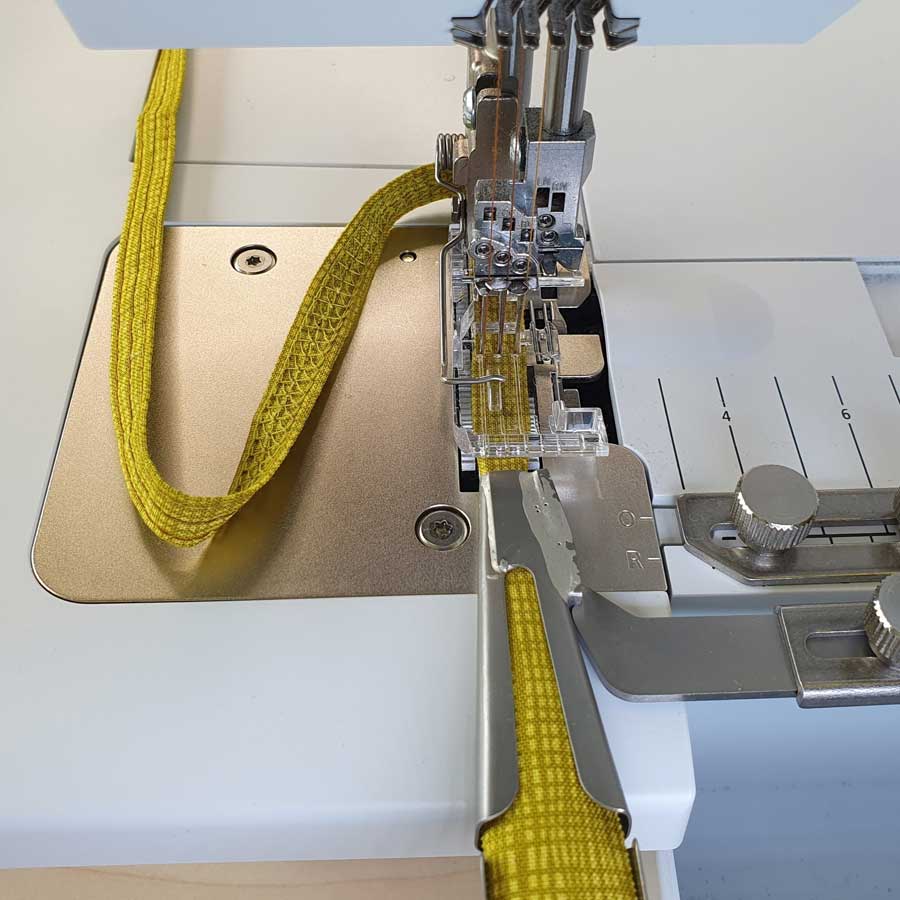
A quicker construction option is to create the loops on the serger. Cut the fabric strip twice as wide as the desired finished loop, serge the long edges, then insert a narrow piece of fusible web as you press both long edges to the wrong side. This makes a slightly lighter weight belt loop as you’re eliminating some fabric layers from the original method, making it ideal for heavy fabrics like coating or denim.
~Linda Griepentrog is the owner of G Wiz Creative Services and she does writing, editing and designing for companies in the sewing, crafting and quilting industries. In addition, she escorts fabric shopping tours to Hong Kong. She lives at the Oregon Coast with her husband Keith, and three dogs, Yohnuh, Abby, and Lizzie. Contact her at gwizdesigns@aol.com.
