American Sewing Guild (ASG)

Visit our blog Visit the ASG Facebook page Visit ASG on Pinterest Visit ASG's YouTube channel Visit ASG on Instagram
  • Home
  • Join ASG
    • Join Online
    • Chapter Locations
    • Member Benefits
    • Member Brochure
    • Join by Mail
  • Education & Classes
  • Resources
    • Contests & Awards
    • Giving Back
    • Hall of Fame
    • Travel and Tours
    • Measurement Chart
  • Shop
    • ASG Store
    • Chapter Products
    • Video Resources
  • Blog
  • About
    • About Us
    • Donate to ASG
    • ASG Sensitivity Statement
    • FAQ’s
    • Start a Chapter
  • Contact
  • Member Login
    • Login First!
    • Members Only
    • Leadership Only
    • Website FAQ’s
    • Logout
  •  

August 14, 2026

Sleeve Setting

Whether you’re a beginner or an experienced sewer, sleeves can be a little intimidating—whose idea was it to try and fit a rounded curve into an armhole anyway?
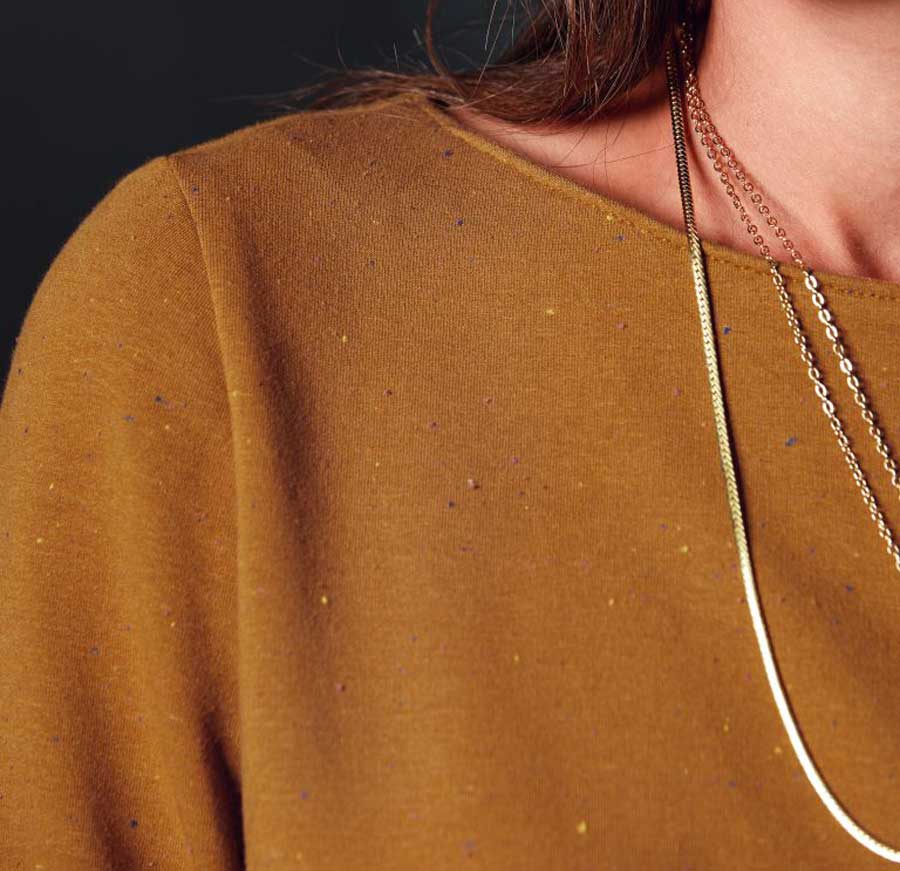
Sleeve image

No matter what type of garment you’re creating—from coat to T-shirt—you’ll likely be facing one of two types of sleeves: either one with a rounded cap or one with a flat cap. (Raglan is another type of sleeve, but requires a different insertion method.)

Rounded caps are found in more tailored and fitted garments and are commonly called set-in sleeves, while flat caps (aka shirt sleeves) are found in more sporty garments, menswear and kids’ clothes, and getting them into your garment requires different strategies.
Flat cap sleeve

Set-in Sleeves

The shape of a rounded sleeve cap allows for ease to fit over the shoulder curve and upper arm area. If you measure the seamline of the garment and you measure the seamline of the upper sleeve, you’ll find that the sleeve is longer. That means you’ll need to ease the fullness into the smaller garment opening.

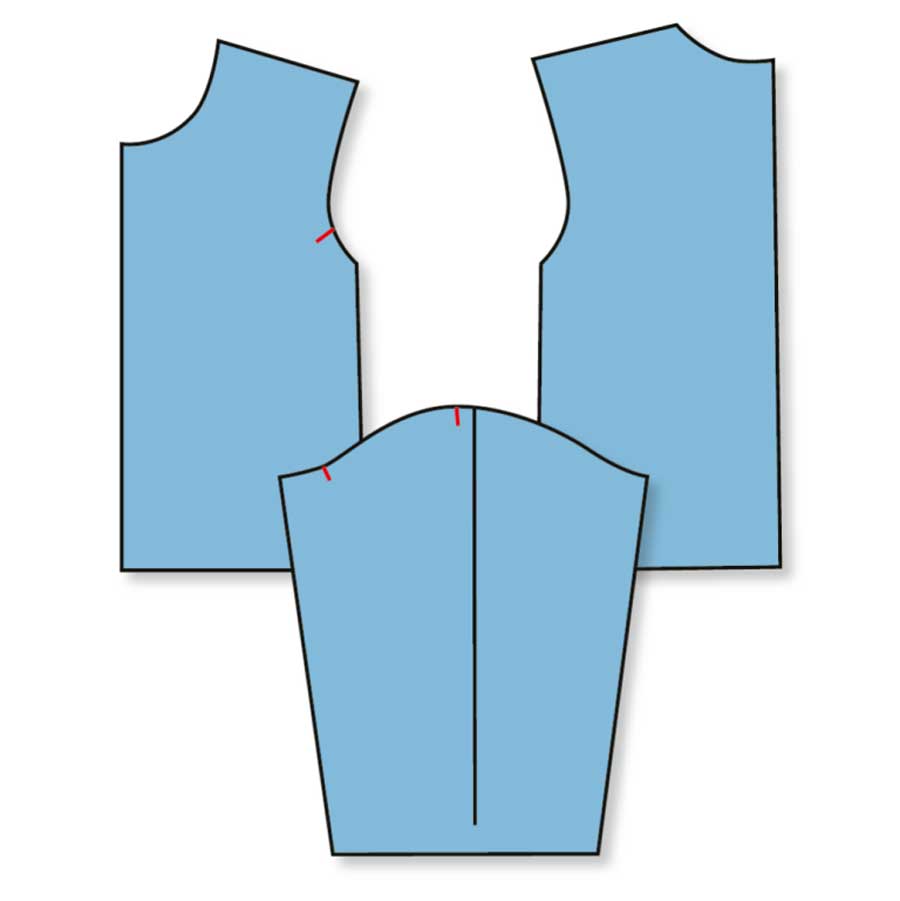
A rounded sleeve cap has important pattern markings—at the shoulder and part way along the sleeve cap both front and back, including placement notches. These are key for distributing the ease.
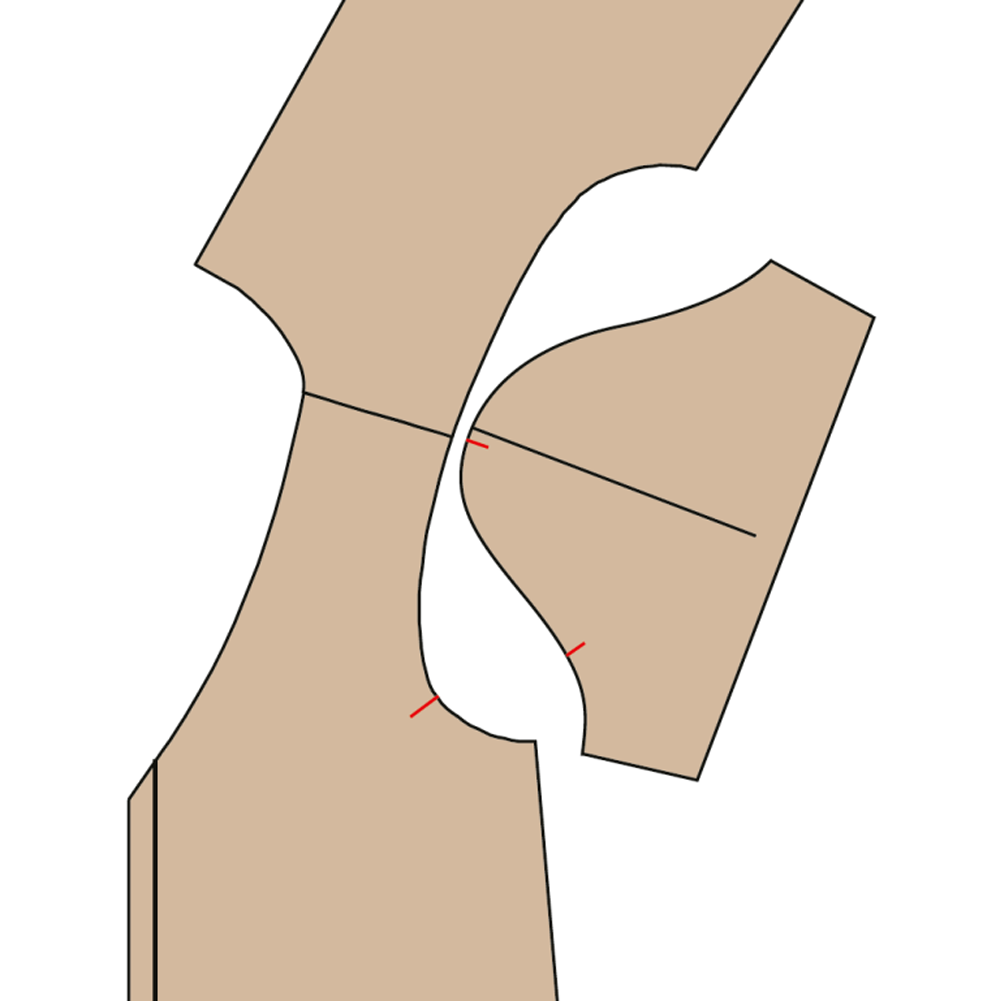
Rounded cap sleeve with markings

The area below the armhole notches on the sleeve should fit the armhole itself with no ease, as the ease area is concentrated at the top portion of the sleeve, above the notches.

To evenly distribute the sleeve cap ease, stitch a line of basting length stitches 1/8” inside and outside the seamline from notch to notch—do not backstitch, but instead leave the thread tails long enough to pull.
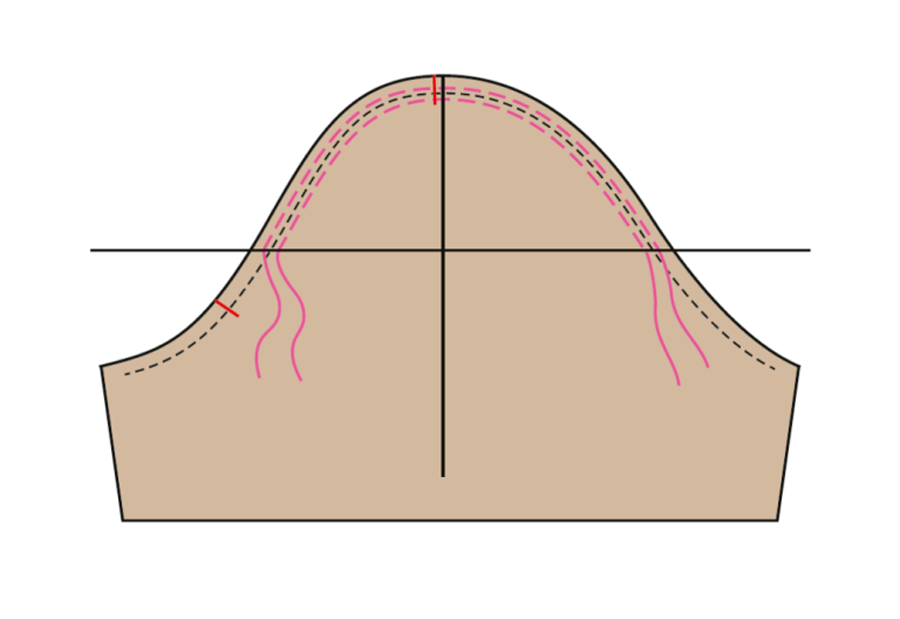
Ease lines

The first step in insertion is to sew the underarm sleeve seam and the corresponding garment shoulder and underarm seam, and press both open. With right sides together, place the sleeve inside the armhole opening and pin at the notches, seamline, shoulder point and corresponding markings on the cap. Gently pull on the bobbin threads of the ease line to fit the sleeve to the armhole size, working from the notch area to the shoulder.
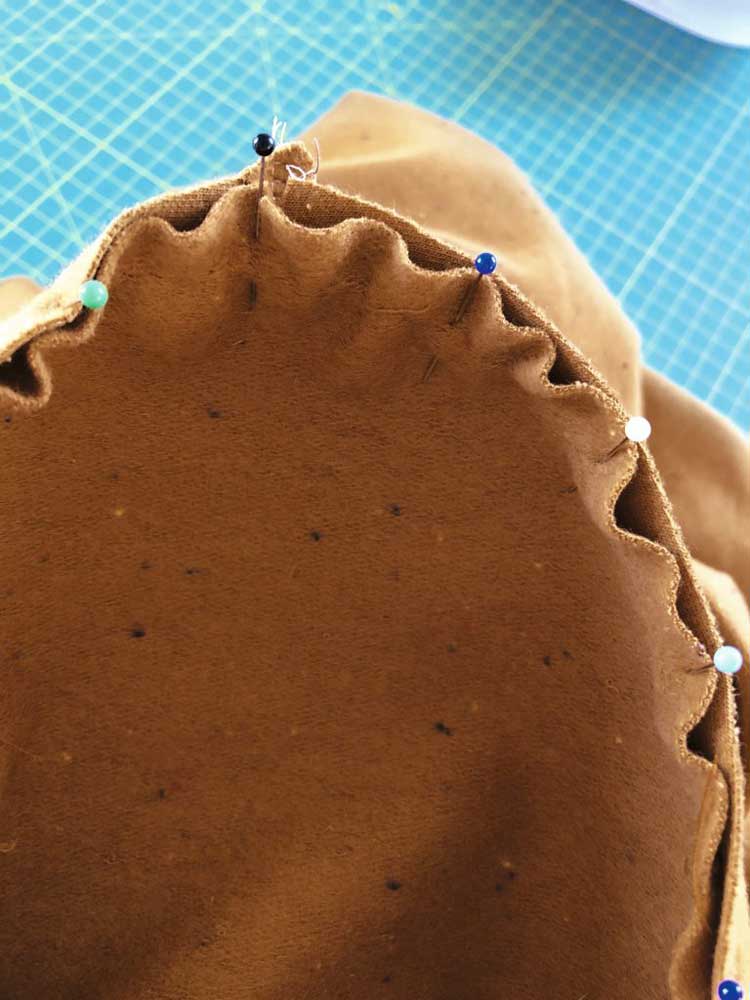
If your machine has a free-arm, this is the place to use it, as the sleeve opening can fit over it for easier access.

Beginning at the underarm seam, stitch the sleeve in place adjusting the ease as needed to fit and being careful to avoid any puckers. Sew with the sleeve side up to control the ease.

Reinforce the lower armhole with a second line of stitching ¼” inside the seamline. Trim the seam allowances below the notches, but leave the seam allowances intact in the cap area to fill out the sleeve head. Push the upper sleeve seam allowances toward the sleeve, but don’t press this area as it will flatten, eliminating the ease you just carefully created. Remove any visible basting.

If you’re working on a tailored garment with a two-piece sleeve, follow the pattern guidesheet to sew the undersleeve to the top sleeve before inserting it into the garment.

Flat Sleeve Insertion

Shirt sleeves have the same markings as their set-in cousins—notches front and back, a shoulder marking and often some intermediate marks as well. This type of sleeve is put in prior to sewing the garment side seams and sleeve underarm seam. No ease line is necessary for this type of sleeve—simply match the notches and other marks, right sides together, and stitch with the sleeve side up.
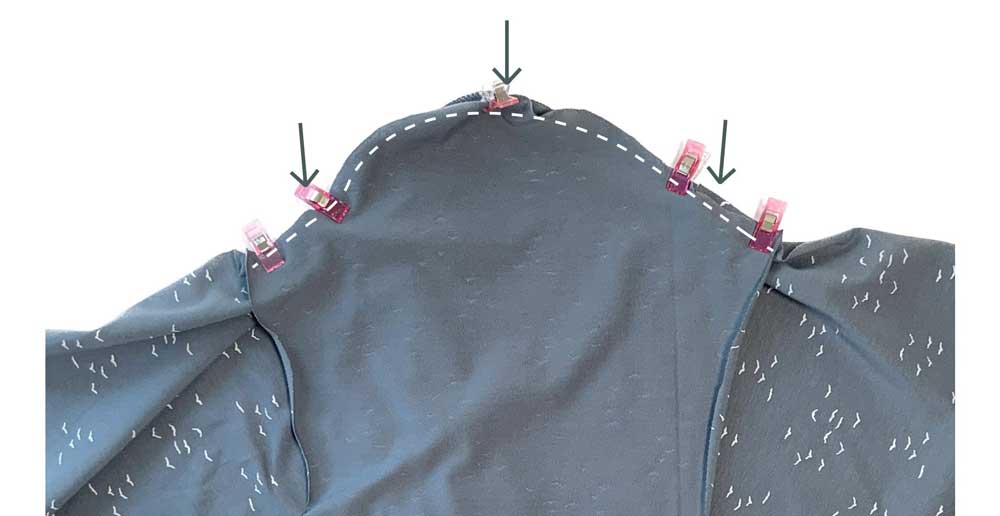
Flat cap sleeve, ready to sew

Shirt sleeves can easily be inserted with a serger or conventional machine. If you choose the latter, sew a second line of stitching, either zigzag or straight just inside the seamline and trim off the extra seam allowance.

With right sides together, match the garment underarm seams, hemline and sleeve hem, then sew the seam continuously. Finish and trim as for the sleeve cap area.
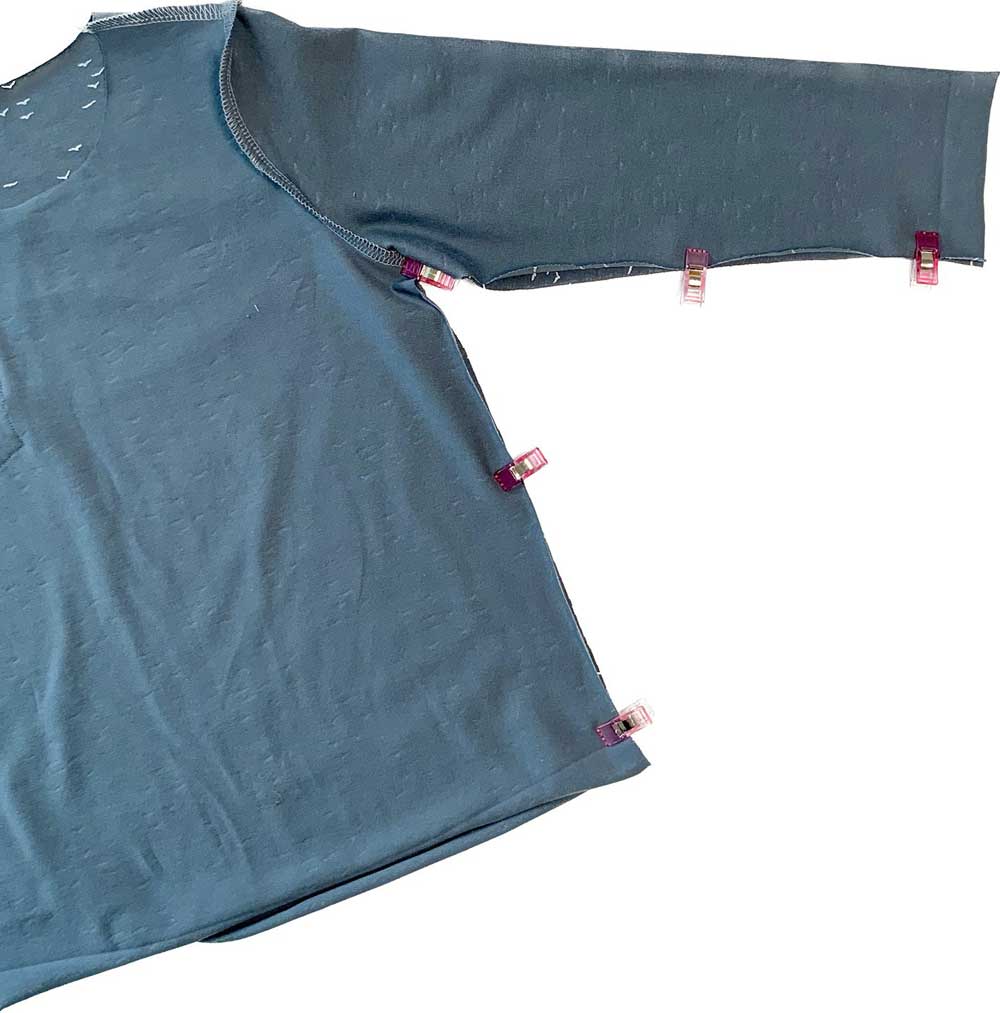
Flat cap sleeve side seam

All images provided courtesy of Bernina


~Linda Griepentrog is the owner of G Wiz Creative Services and she does writing, editing and designing for companies in the sewing, crafting and quilting industries. In addition, she escorts fabric shopping tours to Hong Kong. She lives at the Oregon Coast with her husband Keith, and three dogs, Yohnuh, Abby, and Lizzie. Contact her at gwizdesigns@aol.com.

Tagged With: garment sewing, sewing tips, sleeves

April 24, 2026

The Zipper Files: Holding It All Together

When purchasing a zipper, you may notice several different types of these handy sliders. We don’t think much about them, but zippers are more complex than we know.

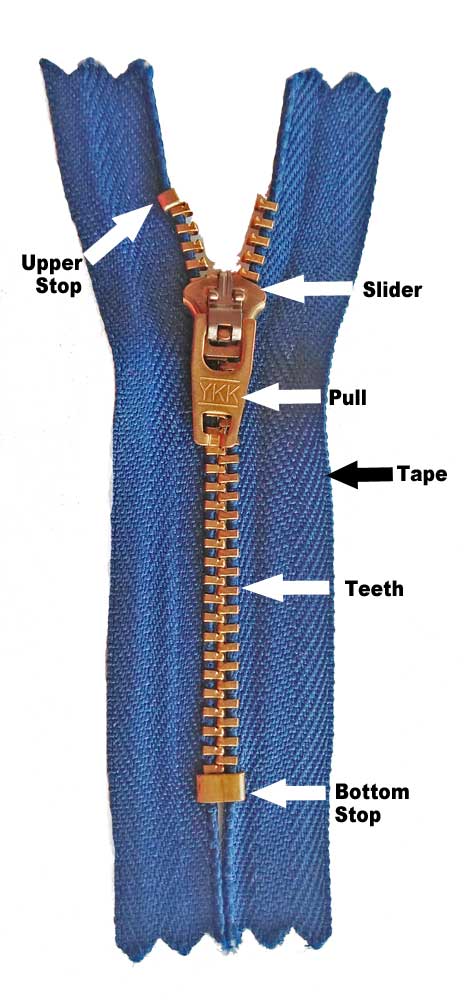
Zipper Parts

Zipper Types

  • All-purpose zippers are closed at the bottom and open at the top, making them useful for plackets openings.
  • Invisible zippers are specially made so that the coils roll under the zipper tape hiding them when inserted into a seam. Only the pull shows with proper application.
  • Jacket zippers are heavier and they separate at the bottom so you can put on the garment.
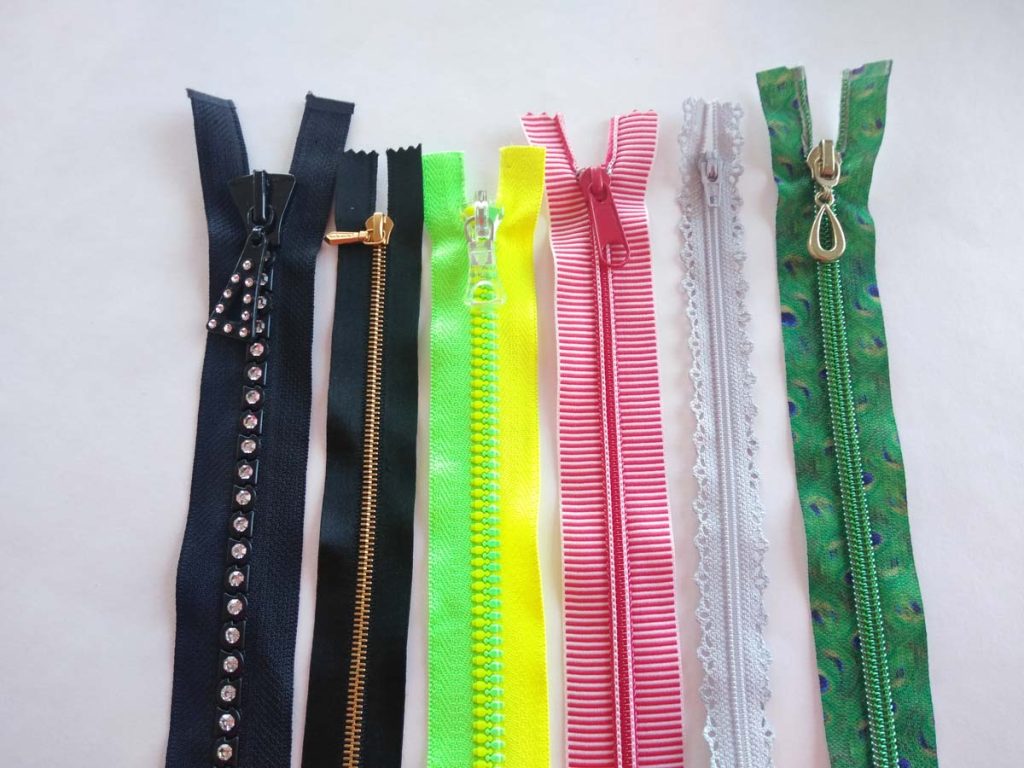
  • Novelty zippers include those with die-cut tape edges like lace, novelty zipper tapes like stripes, prints, vinyl or satin; multi-color teeth, and even rhinestone teeth (2).
  • Purse zippers can have one or two pulls, but are heavier weight than all-purpose ones. If the zipper has two pulls, they meet in the middle to allow for more convenient bag opening.
  • Specialty zippers include those that may have waterproof coverings (for tents and outdoor gear), extra-long zippers for sleeping bags, tents, etc.; and upholstery zippers.
  • Sport-weight zippers may or may not separate but are heavier than regular zippers, but not as heavy as jacket styles.
  • Two-way zippers are also suitable for jackets, but they have two pulls—one opening from the top, and the other from the bottom.
Novelty zippers

Zipper Coils

  • The teeth of the zipper can be metal, plastic, nylon or polyester, depending on the brand or the type of slider you’re purchasing.
  • Metal zippers, often used in workwear and jeans, are difficult to shorten so be sure to purchase the proper length needed for your project.
  • Molded plastic teeth are applied to the zipper tape individually, while softer nylon or polyester zipper teeth are often made from a continuous coil. The latter two can be sewn across for easy length adjustments, and they’re flexible for curved areas.

Size Matters

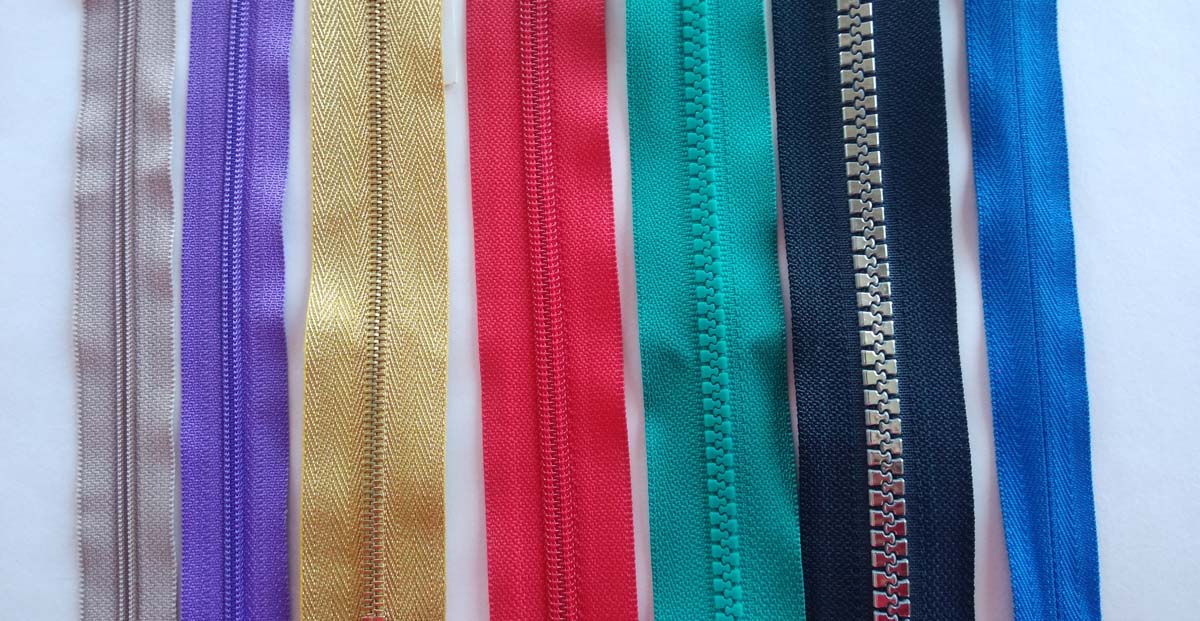
Zipper teeth come in various sizes and those sizes aren’t necessarily related to the width of the zipper tape to which they’re applied. The coil sizes are as expressed at numbers—#3, #5, etc. That number refers to the approximate width of the closed zipper teeth in millimeters (3).

(Left to right) Sizes 2.5, 3, 4.5, 5 coil, 5 molded, 8 and invisible
  • Sizes #3-#5 are most commonly used for garment sewing, while sizes #7-#10 find their home in bags, luggage and outdoor gear.
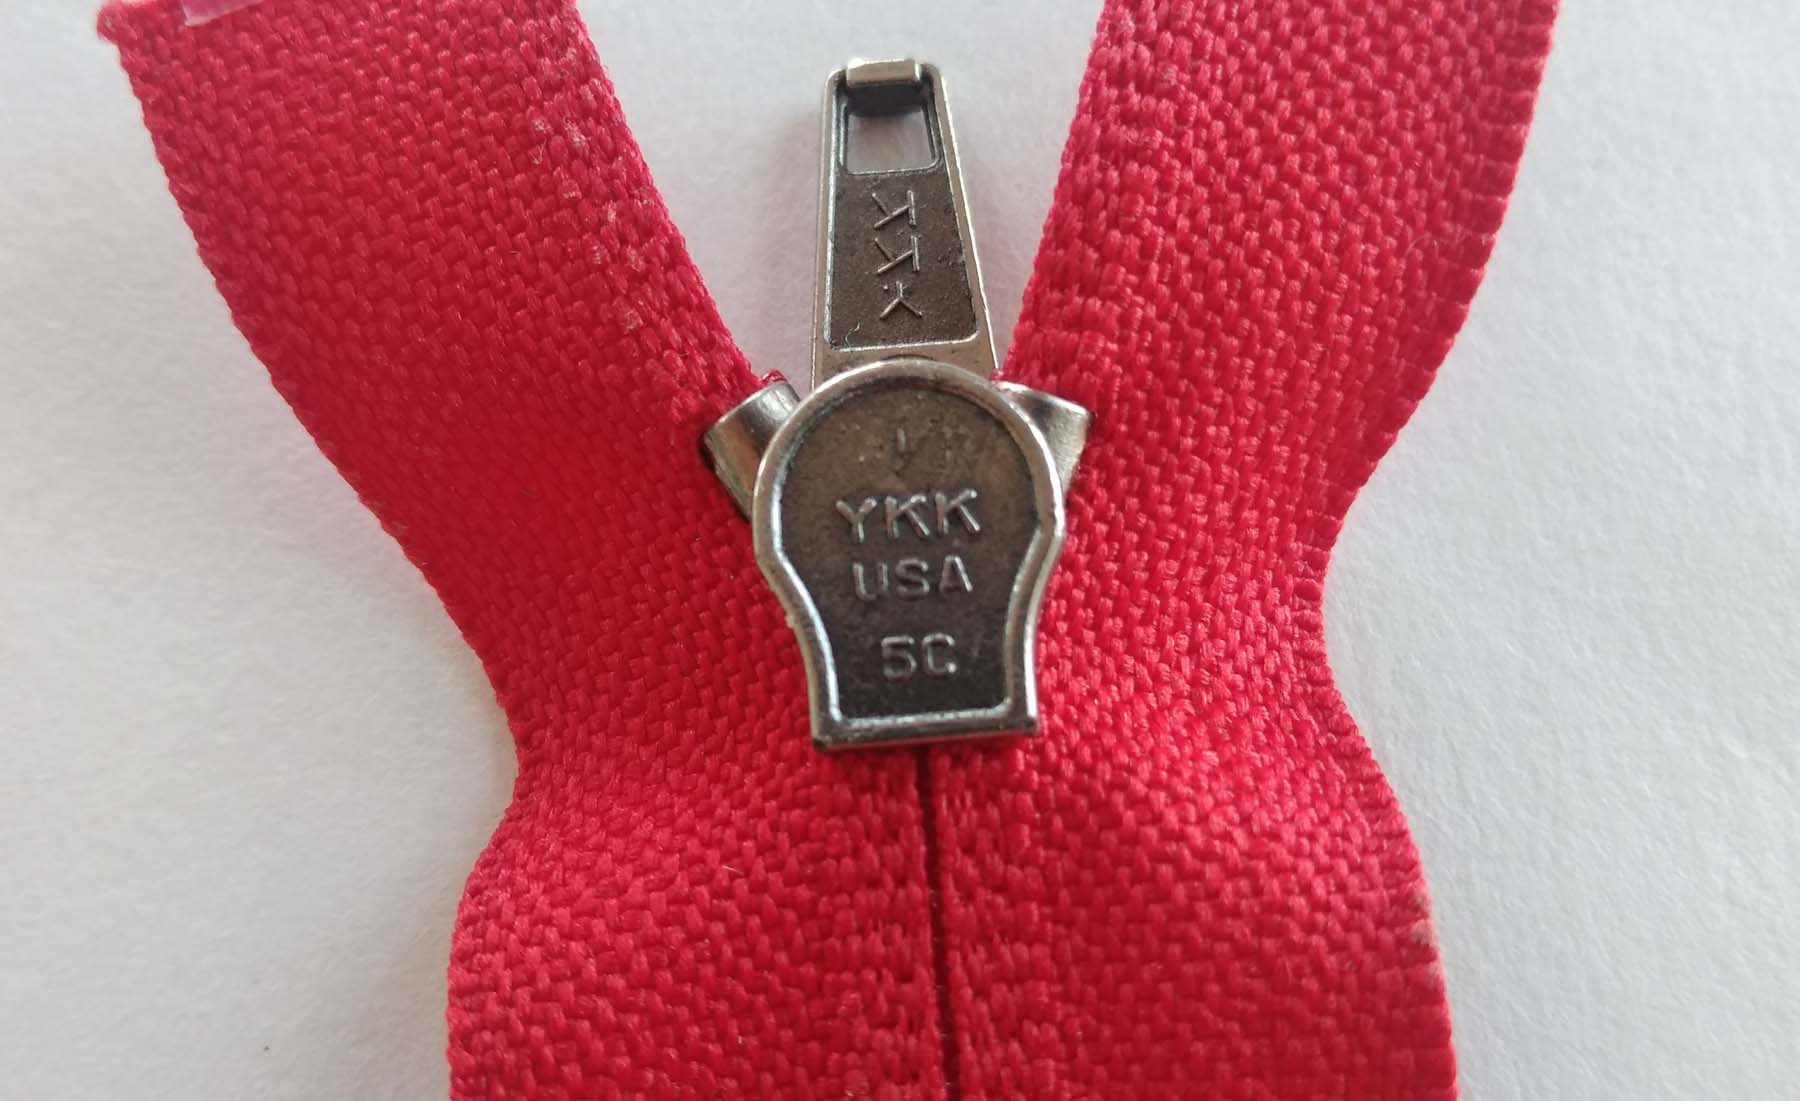
  • How do you know the zipper size? Depending on the brand, there may be a number on the underside of the zipper slider; others aren’t marked and you simply need to measure the closed coil width.
  • If you’re ordering zippers online, many sellers indicate the teeth size so you have an idea of the proportion and strength to match with the intended use. Some vendors also offer a zipper color chart for specific brands.
  • The length of a pre-made zipper is measured from the top stop to the bottom stop, not the tape length.
  • Zippering can also be purchased by the yard to allow for customization—simply measure the length you need, and add the pull(s).

Zipper Applications

Depending on where you’re installing a zipper, the application and finished look can vary.

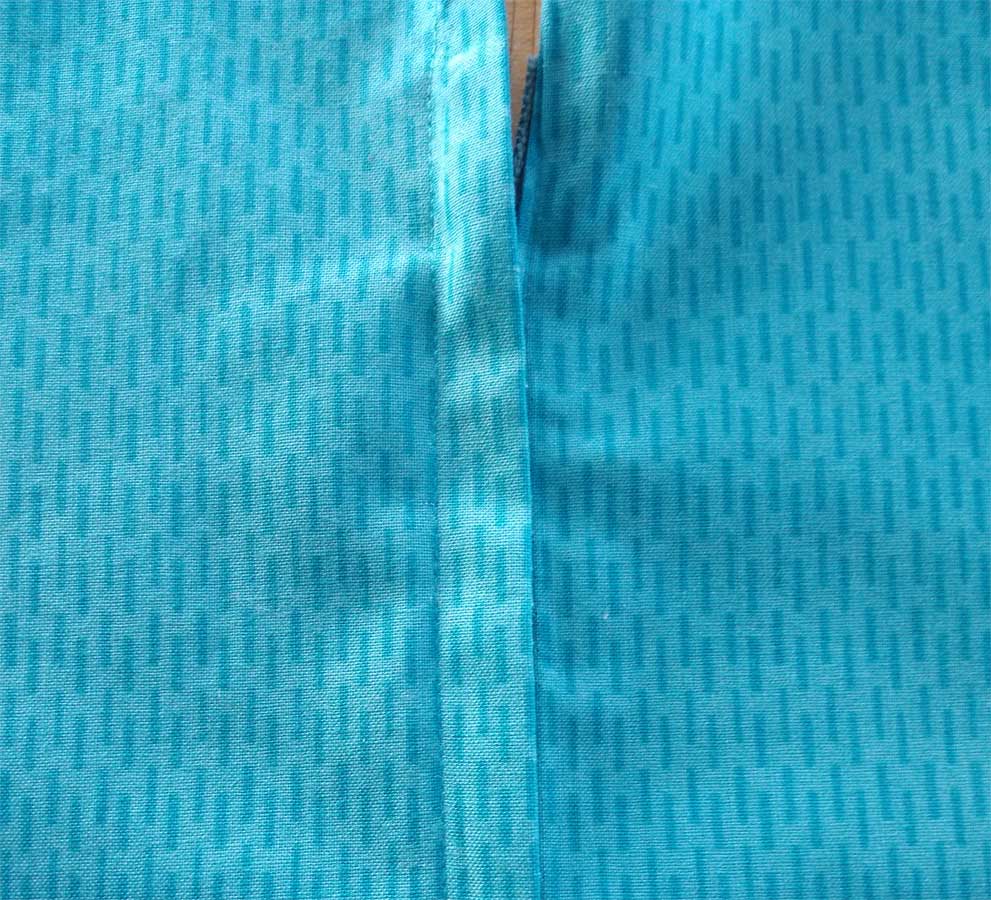
A centered application, as its name suggests, has fabric folds meeting in the center over the teeth.

Centered zippers

A lapped application features one side of the placket overlapping the other side to hide the zipper teeth.

Lapped zipper

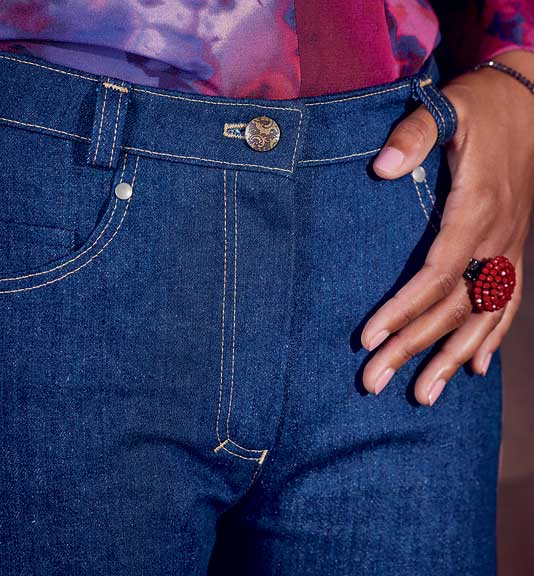
A fly-front application covers the entire zipper with a flap of fabric.

Fly-front zipper

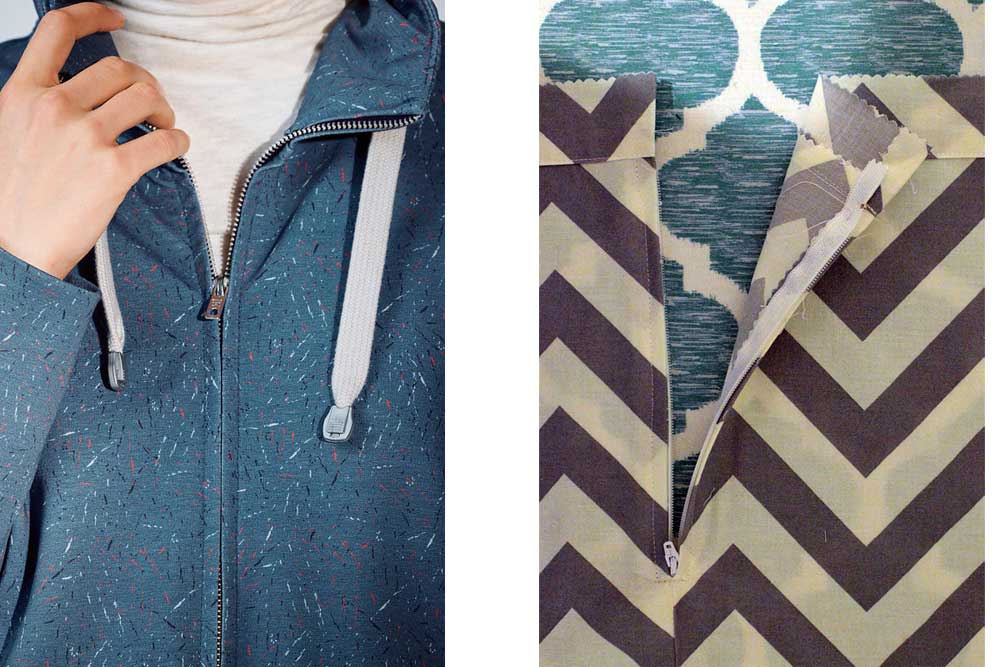
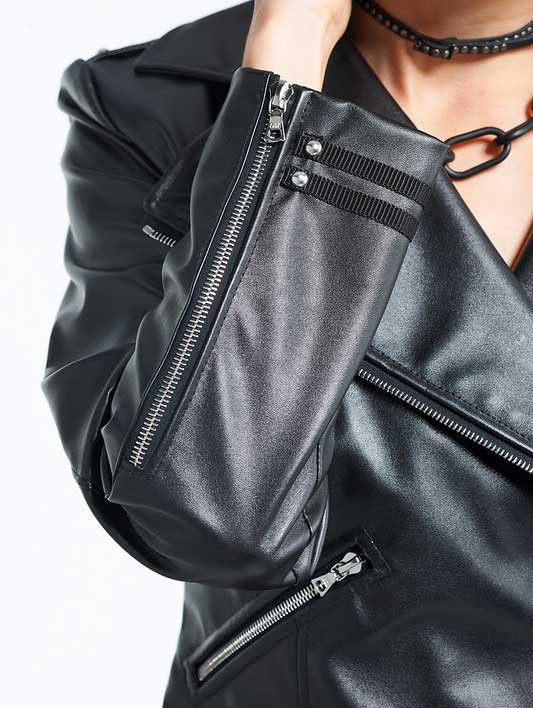
An exposed zipper showcases the zipper teeth and pull, or the entire zipper tape.

Exposed zipper

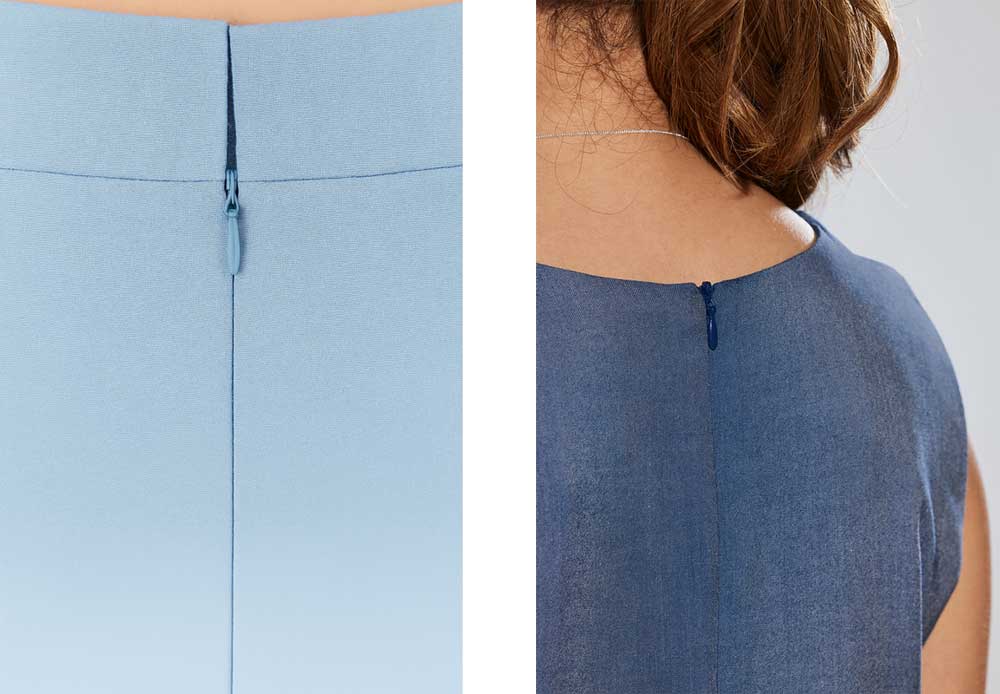
An invisible zipper application hides the entire zipper and only the pull is visible. A specific zipper is required for this look.

Invisible zipper

Note: select images provided by Bernina


~Linda Griepentrog is the owner of G Wiz Creative Services and she does writing, editing and designing for companies in the sewing, crafting and quilting industries. In addition, she escorts fabric shopping tours to Hong Kong. She lives at the Oregon Coast with her husband Keith, and three dogs, Yohnuh, Abby, and Lizzie. Contact her at gwizdesigns@aol.com.

Tagged With: garment sewing, zippers

November 14, 2025

Gabbing about Gussets

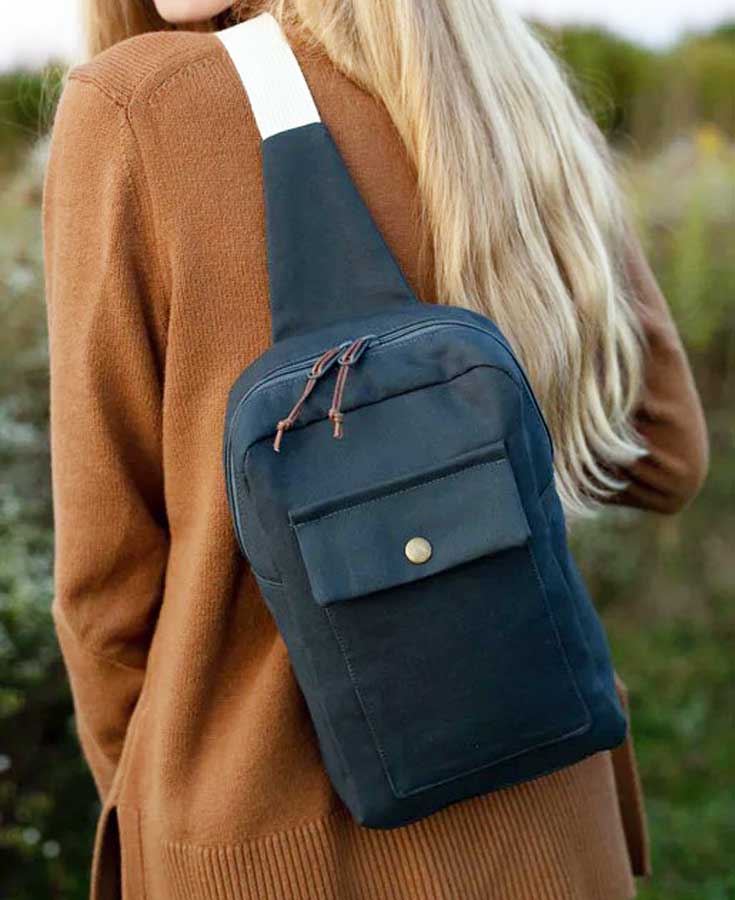
Sandhill Sling bag from Noodlehead Designs

If you’ve made bags, totes or packs, you may have had to deal with a gusset or two.

So, what’s a gusset?

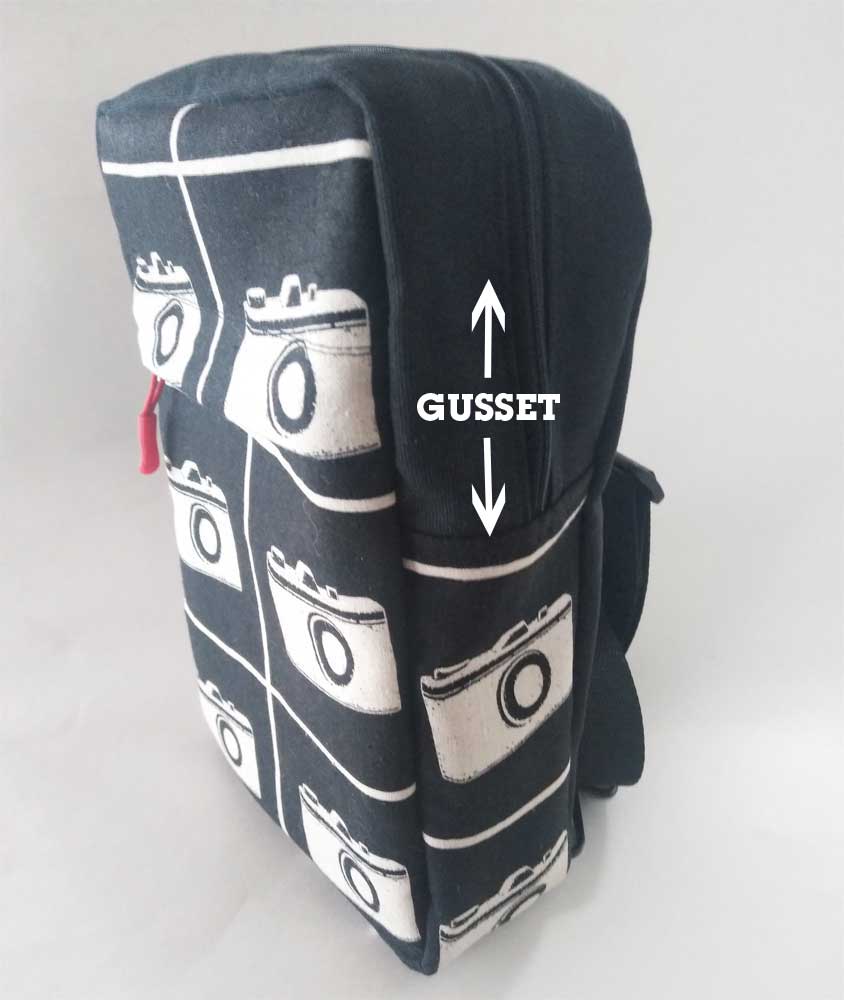
The word gusset doesn’t roll easily off the tongue and may not be something of common knowledge. But the purpose of this design detail is to add depth and more room to a project. Rather than creating a perfectly flat tote, bag or purse with just a back and front, it’s handy to have space for more items inside.

A gusset is basically a strip of fabric that goes fully or partially around a bag for this purpose. Most gussets also feature a zipper opening for access to the interior of the bag. A gusset also allows a bag to stand on its own.

Gussets on Garments: Gussets in garments are pieces of fabric inserted to add width, strength, or comfort. They’re commonly found in areas that need extra ease of movement, such as the underarms of sleeves or the crotch of pants. Sewing gussets into clothing is a different process than adding them to bags or totes.

Gussets can be the same width throughout or can be wider at the bottom tapering to narrow or non-existent by the time they get to the upper bag edge.

Adding a continuous band around a base shape can be tricky—not only are there corners or curves involved, but the gusset has to fit the piece exactly so there are no puckers or gaps, and if the bag has square corners, you don’t want any pleats at the corners.

Piece by Piece

If your bag has a zipper closing, you’ll likely have two upper gusset pieces to cut—one for each side of the zipper. If the bag is lined, there will be four upper gusset pieces—two outer fabric and two lining fabric.

While some gussets are constructed slightly differently, the pattern guidesheet should detail the process, but shown here is the general process for most bag gussets.

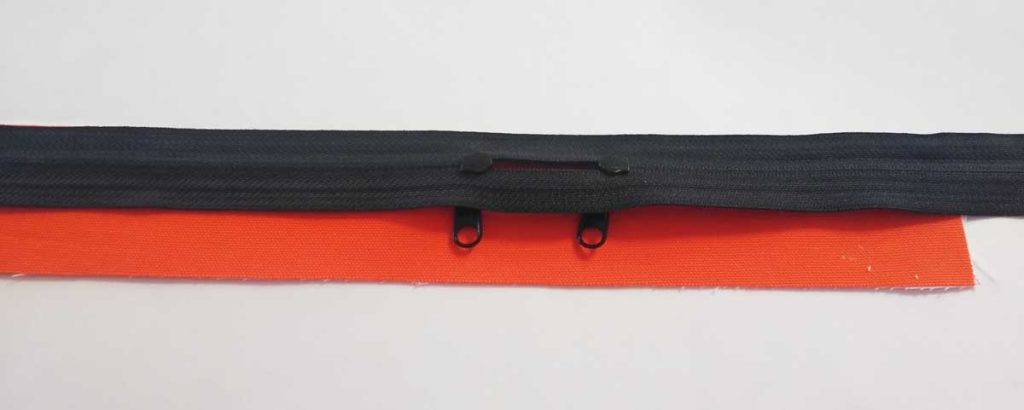
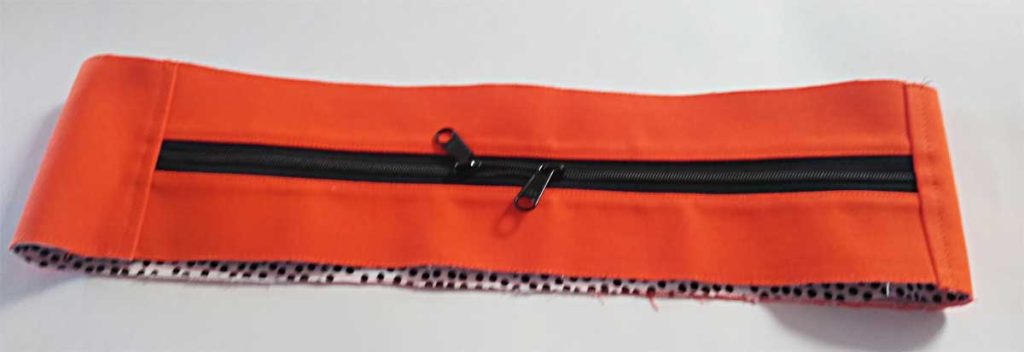
To construct a zippered upper gusset, place the zipper tape face down on one gusset with the long edges matching and baste in place close to the edge (1).

1

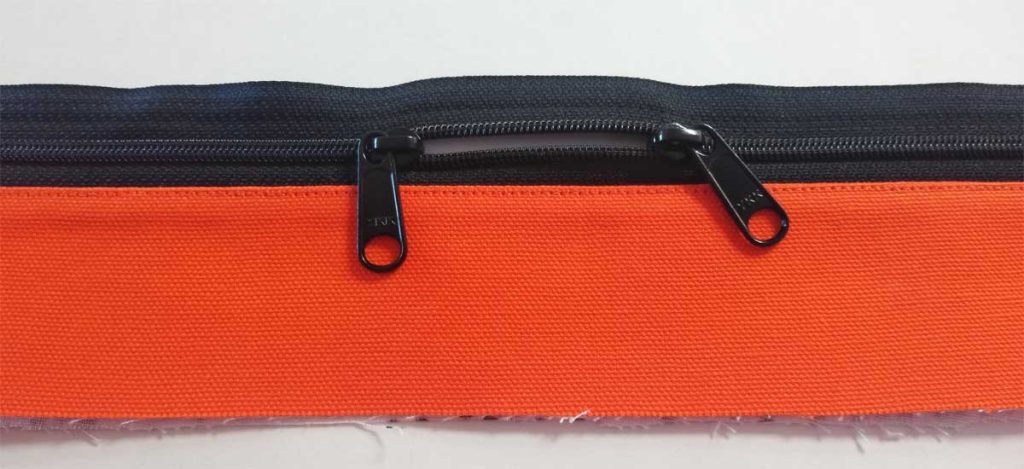
If the gusset is lined, place the lining piece right sides together with the gusset and stitch in place along the seam line. Press both gusset layers away from the zipper and topstitch (2).

2

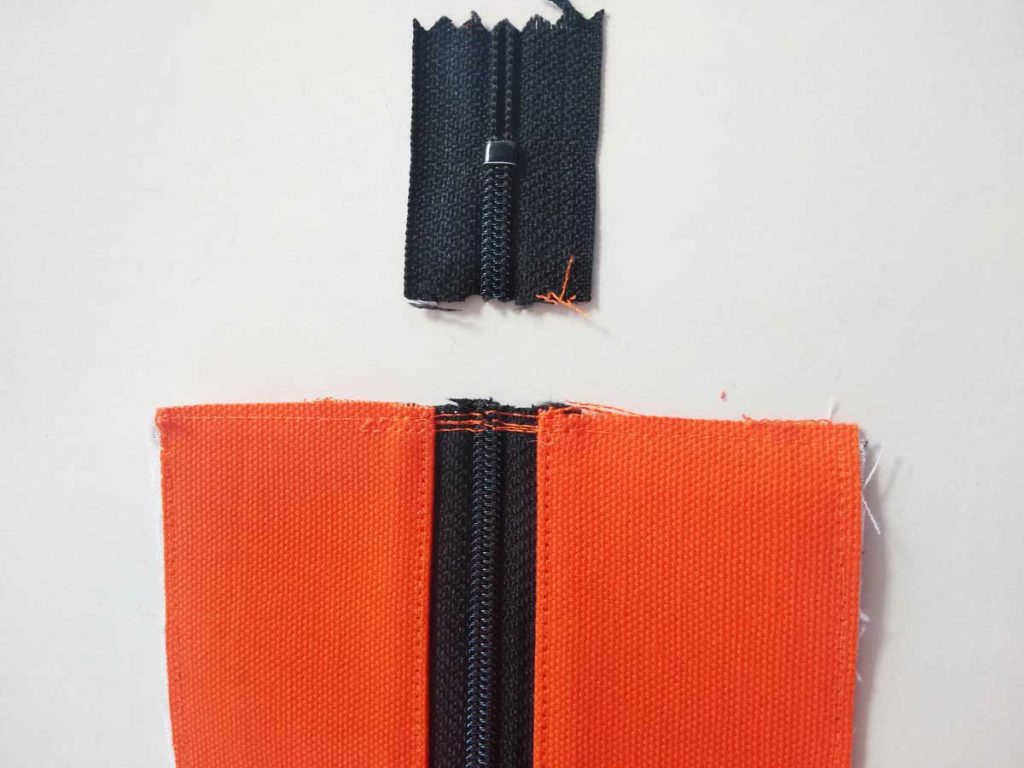
If the zipper is longer than the gusset, unzip it halfway and sew across the end several times, then trim off to match the gusset length. Repeat for the other end if needed (3).

3

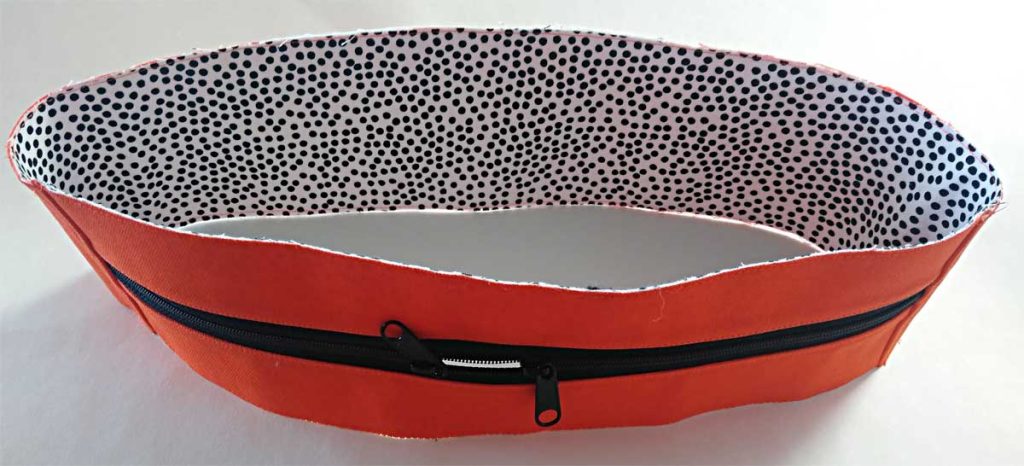
With right sides together, sew the bottom gusset to the top gusset across the gusset width. This creates a circle which should fit your bag back and front exactly. Press the seam in one direction and topstitch through all layers (4).

4

Note that if your bag is lined, the lining lower gusset will be part of the seam (5)—check instructions for your specific bag.

5

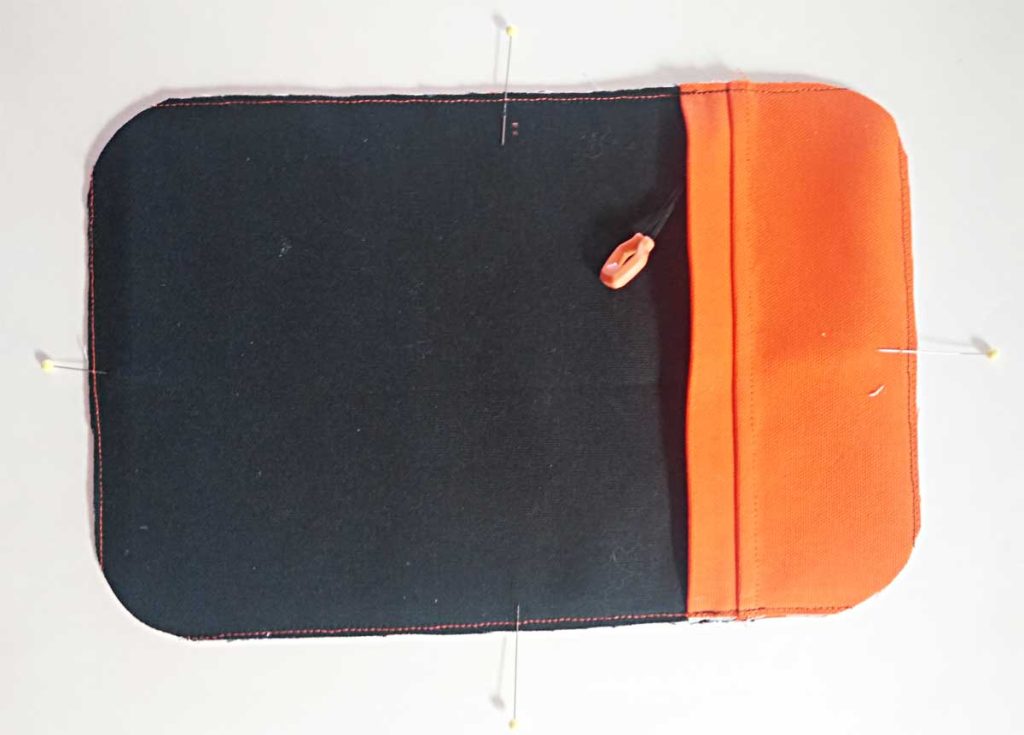
Now comes the fun part—attaching the completed gusset to the bag front and back. Pin-mark the top and bottom gusset centers, then fold those marks to match, and mark. This divides the gusset into equal quarters. Create those same sectional markings on the bag back and front (6).

6

With right sides together, match the quarter markings on the bag with the same on the gusset starting at the top center and clip the layers together (7). If the bag back has rounded corners, slash into the gusset seam allowance only and spread apart to round the corners.

7

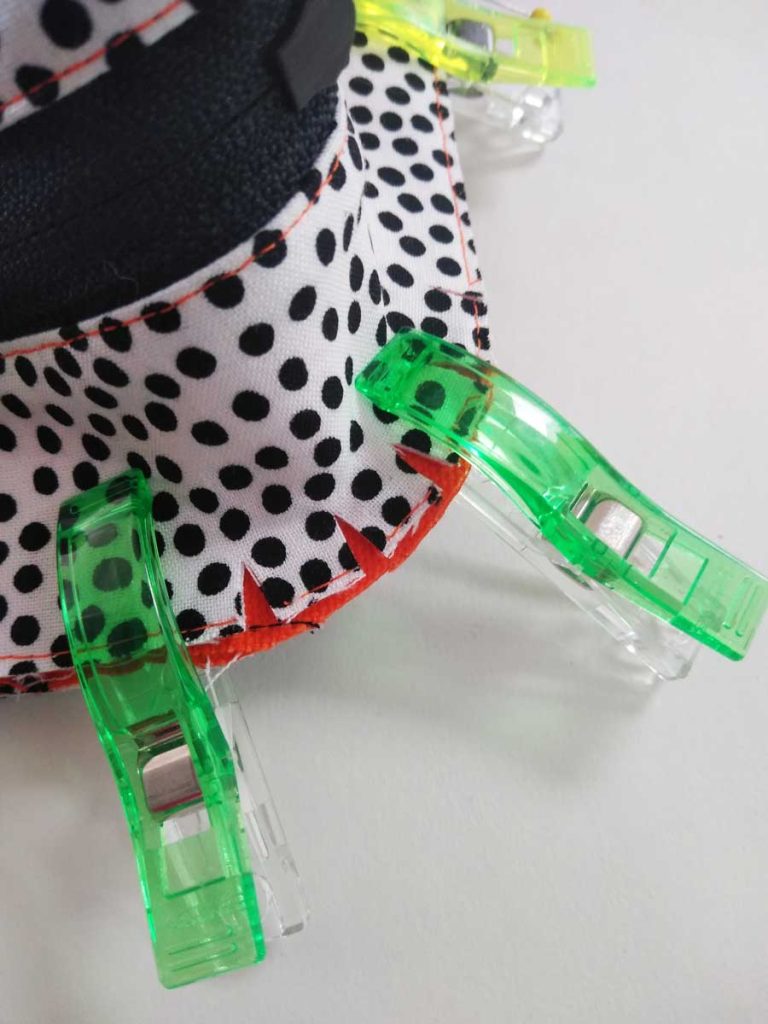
Clip all layers together (8). If the bag has square corners, slash the gusset once and spread at the corner seam. Start along one side and sew the gusset to the bag section around the perimeter, allowing the gusset notches to spread around the corners. No puckers!

8

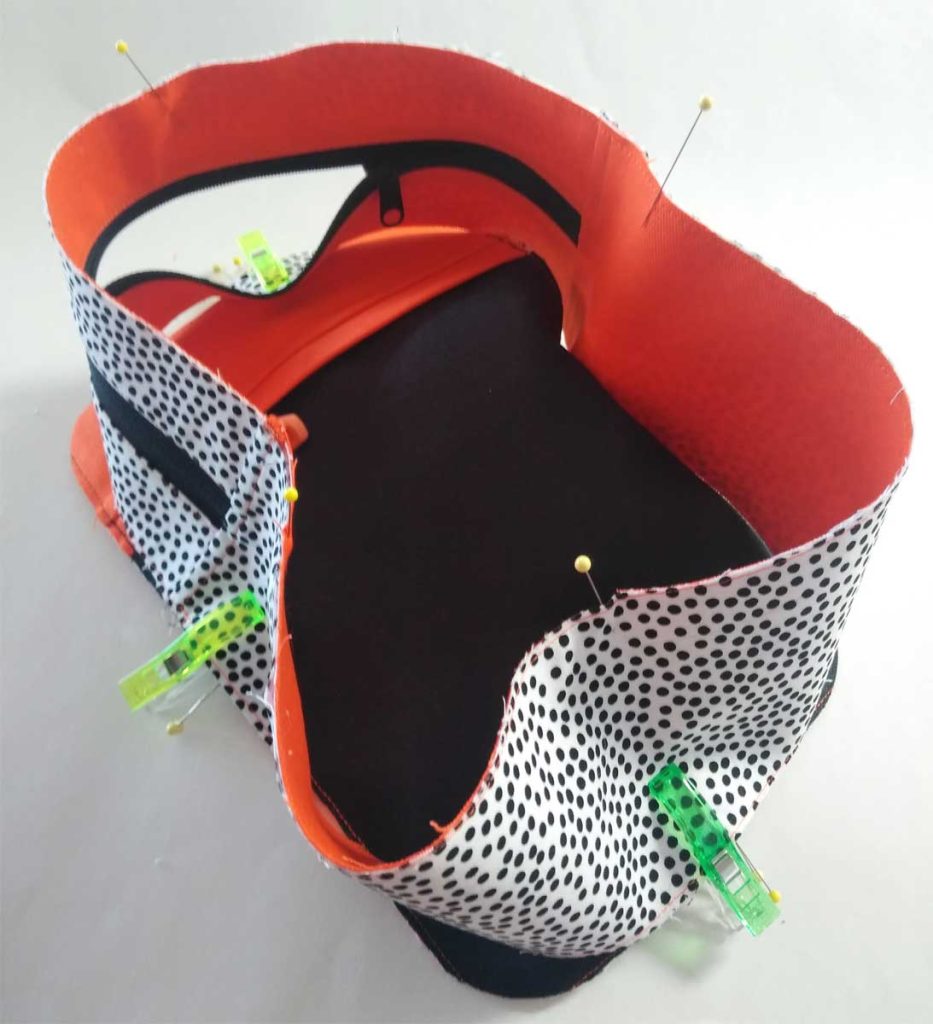
With the zipper partially open to allow for turning, repeat the process to attach the remaining gusset side to the remaining section of the bag. Yes, it’s a bit like standing on your head for this step as you’re wrestling the other side and gusset but stay the course and keep an even seam allowance. Turn the project right side out and check for any puckers or pleats. Trim the seam allowance if the pattern directs. Voila—gusset installed!

Complete the project per the pattern instructions.


~Linda Griepentrog is the owner of G Wiz Creative Services and she does writing, editing and designing for companies in the sewing, crafting and quilting industries. In addition, she escorts fabric shopping tours to Hong Kong. She lives at the Oregon Coast with her husband Keith, and three dogs, Yohnuh, Abby, and Lizzie. Contact her at gwizdesigns@aol.com.

January 17, 2025

Sewing Q&A: Faux Leather, Bias Binding, & Pretreating Fabric

Q: I want to make a coat from faux leather and wondering how to make a buttonhole in this fabric.

A: Faux leathers come in a variety of styles and textures, but generally they have some kind of knit backing to stabilize the textured vinyl front surface. If yours does not, then use small dots of textile glue inside the seamline to place a sturdy interfacing behind the buttonhole area. If you don’t interface the area, the buttonhole will never return to its original size after use.

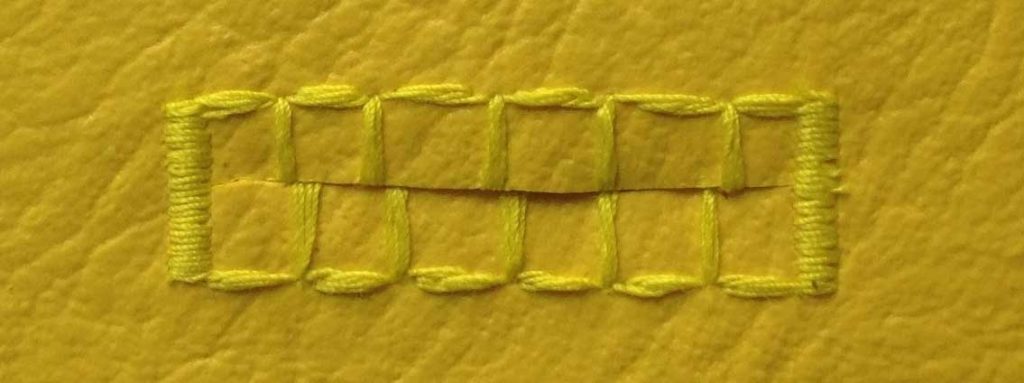
To sew a machine buttonhole in faux leather, check to see if your machine has a special buttonhole stitch for the fabric. The one shown in the photo is specific to leather-like fabrics. The stitch shown is actually sewn after the buttonhole opening is slashed so that the stitch goes over the raw edges. A sturdy bartack at each end prevents distortion.

Another type of buttonhole suited to faux leather has a straight stitch along each side of the hole location, and there’s a wider space between the stitched lines. Since faux leathers don’t ravel, the stitching just helps the buttonhole area keep its shape.

It’s a good idea not to use a traditional buttonhole on most faux leathers, as the close satin-stitched bars can perforate the fabric. So, be sure to test-stitch.

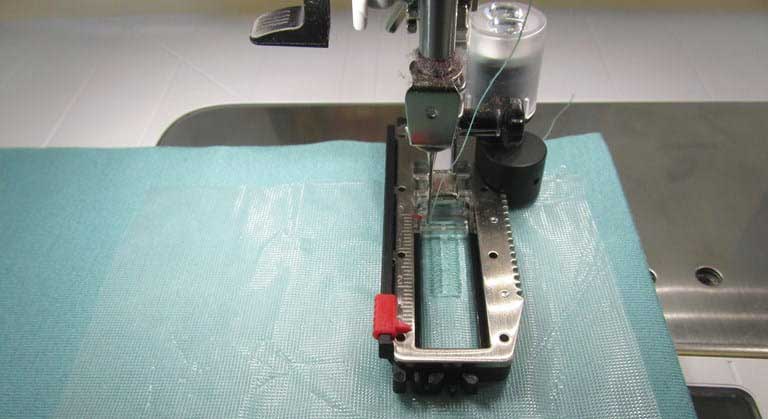
No matter what buttonhole type you choose, if the machine foot doesn’t feed evenly and sticks to the fabric surface, use a piece of water-soluble stabilizer under the foot for even feeding.

Image courtesy of Bernina

Q: I’m making an apron and the pattern calls for the binding to be cut on the bias. Since cutting on the bias takes more yardage, is it really necessary to cut it that way or can I just cut crosswise strips for the binding?

A: The answer depends on the apron itself—are parts of the bound area on a curve, like armholes or bib edges? If the answer is yes, then you will need to cut the binding on the bias so that it can shape to the curves, as straight-grain binding will not curve properly. If you try to shape straight-grain binding to a curve, you will get pull lines or puckers.

Many sewers like to cut their binding on the bias as a design feature. If the binding fabric is striped, cutting it on the bias creates a decorative diagonal patterning, as opposed to simply crosswise lines.

Note that you can piece bias binding in multiple places to use less fabric than cutting much longer strips at a 45° angle. If you match the patterning at the diagonal seam, no one will be the wiser and the seam will be almost invisible.


Q: What’s the best way to pre-treat fabric before I sew It?

A: The general rule for fabric you’re sewing, is to pre-treat it as it will be cared for once the garment or project is finished. The answer really depends on the type of fabric and what you plan to use it for.

If it’s 100% cotton fabric, there’s a chance for some shrinkage. If you’re using that fabric for a quilt, shrinkage may not be a concern, but if you’re using it for a garment, shrinking could be a definite issue. Some cotton fabrics, like flannel, can shrink significantly, causing your garment not to fit after washing. Denim should be washed and dried multiple times as the fabric often has residual shrinkage.

Follow the care instructions on the bolt end to pre-wash any cotton or cotton blend fabrics to avoid two things—shrinkage and color transfer. The latter occurs when a bright color is next to a lighter one—think red hearts on a white background. After washing, the background can become light pink, depending on how the dyes are set. If that happens, rewash with a color catcher to capture the excess dye.

For most synthetic fabrics, like polyester, there is no need to pre-treat, as shrinkage isn’t an issue. If you’re concerned about any applied finishes, pre-washing is an option.

For dry-clean-only fabrics, like wool and wool blends, it’s best to at least thoroughly steam the fabric before use to help avoid shrinkage, or to actually send it to the drycleaner before cutting out your garment and ask them to steam it.

Home décor fabrics generally do not require any pre-treating, as they often have stain-repellant finishes that can be removed by washing.


~Linda Griepentrog is the owner of G Wiz Creative Services and she does writing, editing and designing for companies in the sewing, crafting and quilting industries. In addition, she escorts fabric shopping tours to Hong Kong. She lives at the Oregon Coast with her husband Keith, and three dogs, Yohnuh, Abby, and Lizzie. Contact her at gwizdesigns@aol.com.

This field is for validation purposes and should be left unchanged.
Did you enjoy this article?
Are you an ASG member?

May 3, 2024

Sew…what? Unexpected Sewing Tools

As sewing enthusiasts, we’re always looking for the best tool for the job, but do we always need to look only at the fabric or quilt shop for the right tool? Heaven’s no…any store is fair game! Check out some of these handy tools that didn’t have sewing as their original purpose.

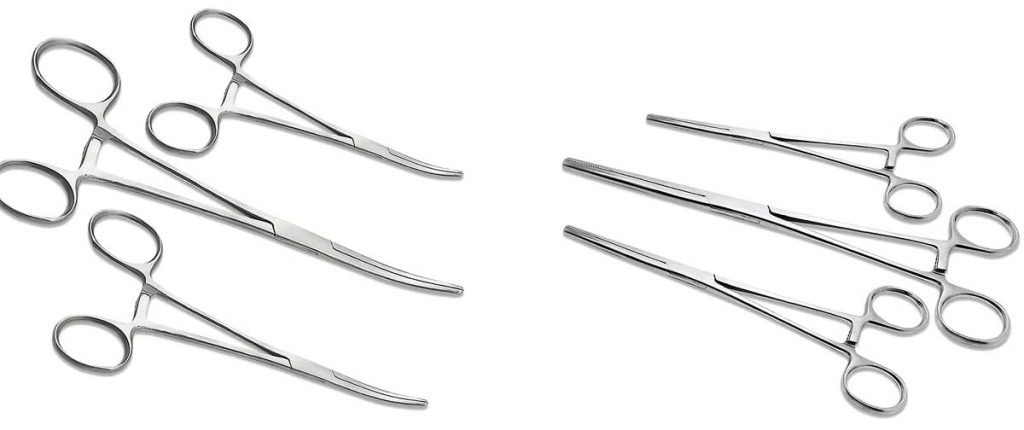
Hemostats

Medical professionals will recognize these tools from the operating room where they’re used to access small areas during surgery and clamp blood vessels together, but in the sewing room, it’s a different story. These small scissor-like tools are ideal for turning things and for stuffing tiny areas. Dollmakers swear by them for getting fiberfill into mini-fingers and toes. They’re also useful for turning bag straps and helping to create sharp points on collars. For spaghetti straps and other small tubes, long hemostats are a godsend.

This tool comes in a variety of shapes and sizes—some have curved blades, others have long and skinny straight blades, and some have rounded, blunt-nose tips.

Magnetic bowl/tray

Head to the auto supply store, big box stores like Home Depot or Lowe’s, discount tool stores like Harbor Freight, or on Amazon for this handy device. It’s designed to hold screws, bolts and other small metallic parts removed during automotive servicing. But in the sewing room, it makes an ideal holder for pins and/or needles. Depending on your machine brand, some sewing machine feet can also be corralled with one of these bowls.

The magnetized bowls come in multiple shapes and sizes, some purely metallic, others with colorful plastic borders. Some are collapsible for easier toting and storing.

One caution: Be sure whatever you want to store is made from a metal that is magnetically attracted, like steel or nickel…otherwise things can fall out of the bowl.

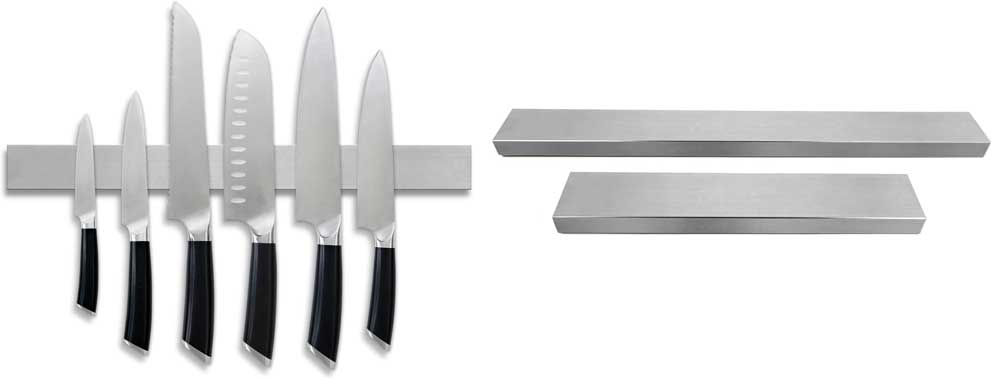
Magnetic Knife Holder

Magnetic bar

Another magnetic fav from the kitchen section! Designed to hold the knife blades along a rail, these handy devices are ideal for storing scissors and other magnetically attractive sewing tools. Just hang it on the wall in your sewing room and you’ll always know where to find your items.

Dental Floss

dental flossWe all know that flossing is good for your dental health, but the floss itself can be helpful in your sewing room as well.

Floss is ideal for making gathers in all kinds of fabric. Simply sew over a strand of it with a wide and open zigzag stitch, the pull the floss to gather the fabric to the size needed (hold one end to avoid pulling it out of the thread channel).

Waxed dental floss is also helpful for sewing on buttons, as it makes a more secure attachment, especially for metal buttons that can sometimes wreak havoc with thread.

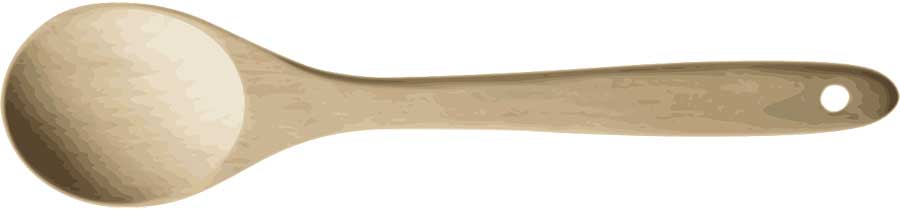
Wooden Spoon

Even if you have a large arsenal of professional pressing tools, there comes a time when something you’re trying to press may be too small to use with any of them. Enter the trusty narrow round wooden spoon handle. Whether it’s a spaghetti strap for a sundress or a shoulder strap for a tote, both need to be pressed and have the seams positioned. Once your sewn piece is turned, simply slide it over the wooden spoon handle and press as needed. Note: Be sure your spoon handle is raw wood and not coated, painted or finished with something that will come off on your fabric when subjected to the heat of the iron.

A wooden spoon handle can also be used to help turn a narrow tube as well or as a “finger-presser” for fabrics that can’t take the heat of an iron, like vinyl or laminated cottons. The bowl of the spoon can be used to press seams open at your machine without making repeated trips to the iron—just press and drag it along the opened seam.

Straws

Straws

Cut off a short bit of a straw and tape it to the front bed of your sewing machine (just in front of the foot) as a guide for feeding yarn or trim you want to couch. It helps the thread feed evenly in the needed location.

This same function can be accomplished by taping a straw segment above the presser foot and feeding the yarn or other couching material down through it and then under the foot.

Flex Straws

Flexible strawsFlex straws that bend allow for even more precise placement in awkward areas.

A straw segment can also be used in place of a bodkin to help thread elastic or a drawstring through a stitched channel. Just insert the carrier, tape the end in place and push the length through the opening. And a straw is perfect to thread through bobbins to keep them corralled.

So, next time you’re shopping, ask yourself “Is there a sewing use for that?”


~Linda Griepentrog is the owner of G Wiz Creative Services and she does writing, editing and designing for companies in the sewing, crafting and quilting industries. In addition, she escorts fabric shopping tours to Hong Kong. She lives at the Oregon Coast with her husband Keith, and three dogs, Yohnuh, Abby, and Lizzie. Contact her at gwizdesigns@aol.com.
This field is for validation purposes and should be left unchanged.
Did you enjoy this article?
Are you an ASG member?

  • 1
  • 2
  • 3
  • …
  • 11
  • Next Page »

Become a Member

Join the only national organization dedicated to Advancing Sewing as an Art and Life Skill.

Join Now button

Blog Article Categories

  • ASG Conference
  • Chapter Stories
  • Embroidery
  • Fitting
  • Learn to Sew
  • National Sewing Month
  • Products, Books, & Patterns
  • Projects
  • Quilting
  • Sewing
  • Sewing Techniques
  • Sewing Tips
  • Sewing Tours
  • Videos
  • Disclaimer
  • Privacy Policy

American Sewing Guild
National Headquarters
9660 Hillcroft, Suite 230
Houston TX 77096
713-729-3000 | 713-721-9230 Fax
www.ASG.org

ASG wordcloud - education, conference, discounts, videos, special offers, tours and more

Copyright © 1998–2026 · American Sewing Guild · All Rights Reserved