American Sewing Guild (ASG)

Visit our blog Visit the ASG Facebook page Visit ASG on Pinterest Visit ASG's YouTube channel Visit ASG on Instagram
  • Home
  • Join ASG
    • Join Online
    • Chapter Locations
    • Member Benefits
    • Member Brochure
    • Join by Mail
  • Education & Classes
  • Resources
    • Contests & Awards
    • Giving Back
    • Hall of Fame
    • Links
    • Travel and Tours
    • Measurement Chart
  • Shop
    • ASG Store
    • Chapter Products
    • Video Resources
  • Blog
  • About
    • About Us
    • Donate to ASG
    • ASG Sensitivity Statement
    • FAQ’s
    • Start a Chapter
  • Contact
  • Member Login
    • Login First!
    • Members Only
    • Leadership Only
    • Website FAQ’s
    • Logout
  •  

June 13, 2025

Wise Words and Witty Threads

Every now and then, while we’re elbow-deep in the archives digging for something entirely different (like sewing archaeologists), we stumble upon a true gem—an “oldie but goodie” that makes us stop, smile, and say, “Well this aged like a fine seam ripper.” This blast from 2010 is one such treasure: a hilarious and heartfelt presentation delivered by an ASG member at a Los Angeles chapter annual meeting. As we read it—nodding, laughing, and maybe snorting once or twice—we realized it’s still sew true today. So of course, we had to share:

Most sewers find sewing creative and fulfilling, if occasionally frustrating, and produce lovely projects. But there’s another aspect of sewing that we can explore…the very human side of sewing.

We learn early on about stitching standards and we face them every time we run up a seam. We ponder, “Move on? Or rip and re-stitch?” We aim for professionalism, but lest we be too perfectionistic and fussy, we might consider the standard told to me by a dear quilting friend whose grandmother critiqued iffy stitching quality thusly: Could you see it from a galloping horse at 30 feet? The message? Relax! It needn’t be perfect. According to my artist sister-in-law, minor flaws are the mark of human craftsmanship.

True Sewing Confessions

Chapter meetings, Neighborhood Group meetings, and sewing classes are wonderful places to meet some super ladies—accomplished, talented, friendly, and helpful women. And I am amazed at what’s shared when a session turns into a gabfest. I mean, there’s such trust and comfort level that we confess our sometimes-dumb behavior, publicly revealing our moments of distraction and mental lapses. Where else would someone confide they nearly burned the house down because they left a hot iron face down on fabric or plastic? Or volunteer that they swear at their sewing machine? Or share that they stitched an entire seam without noticing the needle wasn’t threaded or the bobbin was empty?

In addition, we also admit to things like cutting out two left sleeves and affixing iron-on interfacing to the front of the fabric. Or cutting out an entire project with the fabric facing the wrong direction so the obvious one-way theme is upside down and lament…what was I thinking?

We love classes and can sometimes feel we’re transporting most of our sewing paraphernalia to them, but we can also skid into class late and loaded with gear, and suddenly realize we’ve left not only the machine at home, but the project as well. If you’ve felt chagrined and embarrassed, you’re not alone!

Most of us over a certain age swap frustrations about the most necessary and basic visual requirement of sewing: the challenge of getting the thread through the eye of the needle. And those eyes seem to be getting smaller all the time.

Then we have the grown-up version of grade school show-and-tell, one notable use being to tout new notions discoveries. We’re excitedly sharing our latest find and then someone says, “Oh, those have been around forever!” Or “I bought one last week.” And we secretly feel crestfallen because we wanted everyone to clamor for a demo so we’d be a hero.

 The Big Three Topics

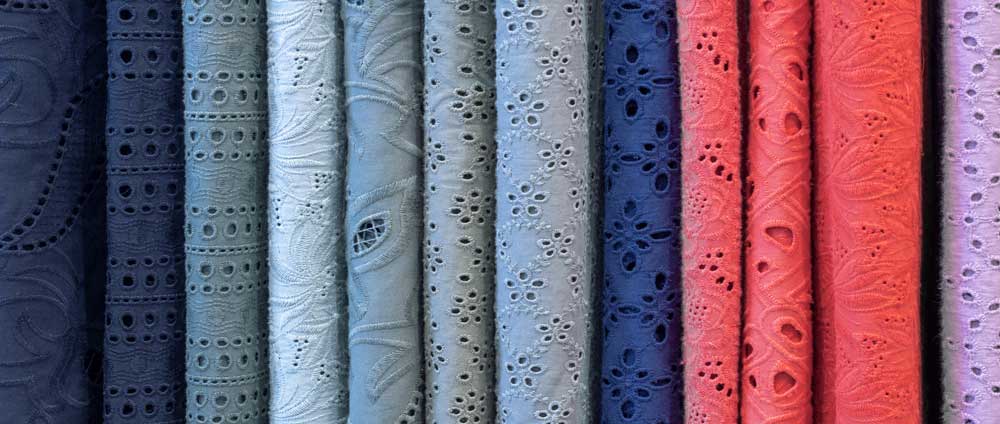
There are three topics that create a buzz among sewers. The first is fabric stashes—for which there is near-universal embarrassment and guilt about the addictive lure that keeps it growing. We develop a love affair with fabrics, dreaming up projects, inspired by the sight and feel, color and texture, print and pattern of textiles, and sales that beckon with irresistible bargains. And sometimes we just go crazy!

Woman excited with fabric

I’m sure you all have your stories. For me it was a piece of fabric so exquisite my heart did flip-flops. It’s a delicate white silk emblazoned with colorful butterflies in breathtaking detail—absolutely gorgeous—and I gasped at the price—in triple digits! But I was smitten and had to have it so I splurged and bought a quarter-yard. It’s art on fabric and I gaze at it in awe every now and then. So, if your fabric purchases are sometimes accompanied by excitement with a tinge of guilt—welcome to the club. You have lots of company.

The second topic that creates buzz is paused projects—those begun with every intention of swift completion. But if we get stuck, we set them aside to figure out how to get past the problem, and then it’s out of sight, out of mind. Or we start another project, nagged by the memory of that unfinished one. Or… sound familiar? You have lots of company.

The third topic is pattern fitting. The bane of many sewers is adjusting commercial patterns to fit our bodies, which, for many of us, do not remotely resemble the models on the pattern envelopes! We struggle with tissue patterns, fitting shells, and muslin trials, trying to mold pattern pieces to our unique curves and bulges so clothes will fit, feel comfortable, and flatter us. And all this must take place before the cut material slides under the needle, by which time—according to one ASGer—her fickle body has changed size and shape.

The Praise Factor

We sewers freely pass out compliments when we see each other’s projects. But I have a pet peeve about this process. Folks, modesty does not require that you describe all the places you struggled with. My advice to compliment recipients is, “Would you please say “Thank you” before launching into a detailed description of all the flaws you perceive? Honestly, I probably wouldn’t have noticed them and it’s very awkward when I have to defend my own compliment. So, when complimented, look pleased, acknowledge the praise, and share a feature you love about your creation. We’ll both feel good. Then you can vent about the vexations and confess the imperfections.

Our contacts with other sewers enrich our lives. We meet sewers who make clothing and create crafts, are crazy about quilting, or into embroidery, all sharing what they love and helping each other. Let’s celebrate our sewing sisterhood!


 Inspired by the late writer Erma Bombeck, former ASG member Deborah Sumner delivered this humorous look at sewing at the Los Angeles, CA chapter’s annual meeting in November, 2010.

June 6, 2025

Serger Q&A: Differential Feed, Threading, & Securing the Ends

Sergers can be especially mystifying with their multiple threads, loopers and needles. But we’re here to help with answers to some common serger questions.

My serger has a differential feed, but I don’t really understand what it does. Can you enlighten me?

Understanding a differential feed system is important to get the most out of your serging capabilities.

Serger stitch length (top) and differential feed (bottom) settings.

Fabric is fed under the serger foot by feed dogs—those little teeth under the presser foot. There are two sets of feed dogs that operate independently, depending on the differential feed settings.

Front and back feed dogs.

For example, some knit fabrics emerge wavy and stretched out after sewing a serged seam—obviously, not an ideal scenario. Adjusting the differential feed ratio can eliminate that distortion, maintaining a flat finished seam. Oppositely, adjusting the other direction can create a ruffled seam, stretching the area as it’s being overlocked.

Proper adjustment will create a flat seam.

Depending on the brand, the differential feed adjustment may be accomplished with a dial, a lever or knob and can showcase a number or simply a schematic, or both. At a setting of 1 (or N for normal), both sets of feed dogs move at the same speed. This is usually a good setting for woven fabric seaming as long as they’re not bias-cut edges. But, a 1 setting for knits can be problematic.

Adjusting the differential feed can create ruffles.

Turning to a higher number feeds more fabric into the front feed dogs and this setting can be used for gathering or easing. It can also be used to create a flatter seam in knits that tend to stretch.

Turning to a lower number feeds less fabric into the front feed dogs than the back is putting out, creating stretch. This setting can be used to create ruffled or lettuce edges.

The differential feed settings work in tandem with the stitch length indicator, so test-stitching is imperative to get a flat overcast seam without distortion if that’s the goal.


I find threading my serger very intimidating. Is there a proper way to do this?

Sergers can be much more intimidating that a conventional machine because they have multiple threads, multiple needles and the added loopers, all needed to form the stitch patterning.

It’s always best to consult your instruction manual for specific instructions, but as a general rule, thread the machine in this order: upper looper, lower looper, right needle, left needle. Some brands thread the loopers automatically, making it less likely that you need to stand on your head to accomplish the task.

Some brands of sergers also come with threading loops to make threading the upper and lower loopers easier. And, there are likely threading diagrams inside the front opening panel. With the threads shown in different colors, it’s easier to keep the threading paths in order.

If you want to avoid having to rethread the serger when you need to change colors, simply tie the new thread color on to the old color and gently pull it through the threading path. Clip the knots before rethreading the needle(s).

Be sure that all threads are engaged in the machine’s tension discs to ensure proper stitching.


What do I do at the end of a serged seam to keep it secure?

The easiest thing to do is to serge off the fabric for a few inches, then thread the serger tail into a needle threader, carry it back under the encased seam edge, then clip off the excess length.

Image courtesy of NeedleThreaders.com

Another option is to apply a seam sealant to the serged seam ends, wait for it to dry, then clip off the excess tails.

Some people prefer to tie an overhand knot with the extended serger tail.

If the seam will be crossed by another seam, there’s little worry about it unraveling, so you may need to do nothing as it will be reinforced with the crossing seam.

*Unless otherwise noted, all images courtesy of Bernina


~Linda Griepentrog is the owner of G Wiz Creative Services and she does writing, editing and designing for companies in the sewing, crafting and quilting industries. In addition, she escorts fabric shopping tours to Hong Kong. She lives at the Oregon Coast with her husband Keith, and three dogs, Yohnuh, Abby, and Lizzie. Contact her at .

May 30, 2025

Sewing Swimwear? Quality counts

There is nothing more timeless (or useful) than a high-quality, well-made swimsuit. I recently had a customer who is an avid swimmer contact me after 10 years to make her another set of swimsuits. Although I usually purge dormant patterns from customers, I still had hers and her shape had not changed much during in the 10 years. The original suits had for the most part withstood the onslaught of chlorine and salt and were just starting to show some loss of recoil in the elasticized edges. This is understandable as the elastic fibers are usually the first to go. But all things aside, 10 years says a lot about the garment. Let’s look at what it takes to make a high-quality swimsuit and then in a future article, delve into staple garments of high quality.

Two tank-style swimsuits created by Kim Larcom with Astrosports Activewear.

It’s All in the Layers

It is important to look at the layers of things to consider in making a timeless swimsuit—or event a garment for that matter. By layers, we refer to the considerations you must ponder for that garment to still be viable in terms length of time of wear and its fashion trend longevity.

Style

Tank-style swimsuit worn on the beach

The first layer we see is the style of the garment. Visually, a garment will always be in style if it suits the wearer, meaning that it accentuates the figure type. With fashion trends constantly changing, there will be short-lived styles, but a well fitted, high quality swimsuit in a style that flatters the wearer is always in style. Also, remember trends cycle. As a longtime seamstress once told me; 7 years to come in, 7 years in style, and 7 years to go out. By that time, they are back in style. If you are lucky to be around long enough, you will see this trend on repeat.

Fit

If a swimsuit fits the wearer well and is the correct style for the anthropometry (size and stature) of the wearer, the visual results will be positive. There are design details that one can use to flatter the figure as well.

  • Using gathers to add volume, or using color blocks mixed with colors to create optical illusions are great factors to keep in mind. These details applied to a well fitted tank-style swimsuit will never go out of style.
  • Within the suit base, you can eye out details of neckline shape, both front and back, shoulder strap width and placement on the shoulder, and the cut and shape of the leg style both front and back.
  • A slightly higher cut leg can have the visual of creating a longer leg, but without a well fitted seat it can cause the seat or bottom of the back of the suit slide out of place. One thing a wearer does not want to deal with is constantly fixing the back of the bottom of the suit or the straps. So, length, width, and placement all count towards a well-fitting garment. Not only will this flatter the body type but will feel comfortable and be functional as well. Less is not always best when it comes to coverage.
  • You can add a variety of support mechanisms including a shelf bra, underwires, or sewing cups right into the lining. They are not as hard as they might appear to accomplish. There are a lot of similarities with sewing lingerie and bras to sewing swimwear. Both are very close fitting with little or no ease and have small seam allowances.

Choosing Fabric and Lining

When choosing your fashion fabric, choose exquisite fabrics! The most resilient and brilliant colored spandex fabrics have an 80% nylon / 20% spandex blend. That is not to say that some polyester blends do not work, but they usually will not have the same resiliency and it will affect longevity. When looking at prints, try to look for fabrics that use the wet print method of dying the fabric as opposed to heat sublimation. When fabrics are heat sublimated, the colors fade as the garment is stretched. Try it out when you get a spandex fabric next time. Grab 5 inches and stretch it. Look at the print colors. Do they fade with stretching? If so, that will happen as the garment is worn.

Weight of fabric is also a consideration. Anything less than 5oz. per sq. yd. is too thin and will not last or have the structure needed for a suit to last. Anything higher than 7oz. per sq. yd. might be too heavy when wet so look carefully before choosing. Study your fabric, look at the direction of the print and how that will translate when laying down your pattern. At best, aim to achieve the greatest amount of stretch going around the body; while making sure it works with the print design. You do not want to have sideways designs on the print going in the vertical of the suit.

Lining

You can line the front and/or the back of the swimsuit. The lining plays an important role in a well-made garment as it allows the garment to slide onto the wearer and also protects the fashion fabric from perspiration. It also protects the textile of the fashion fabric from the wear and tear of friction. Lining fabric does have a right and wrong side so study it closely to determine top from bottom. Use a lining that has the same or very close to the stretch coefficient of the fashion fabric. I often use bold colors in the lining as well, because the garment should look as beautiful on the inside as the outside—a ‘tell’ of a high-quality garment! If you happen to be using light colored fashion fabrics such as yellows or whites, then it is best to use a color of lining that closely resembles your skin tone. It may appear that this will show through, but rest assured, it won’t.

Lined bikini

Cut the lining as you did the fashion fabric, so that the greatest amount of stretch goes around the body. Use a 4 way stretch fabric so the tension lines can be created in when the garment is worn. This, of course, presupposes that you have put thought into creating these tension lines in your planning of the design details of the suit itself. I have found after many years of doing swimwear that the pattern on the lining is 1/16th smaller than the original garment pattern. You can trim the seam allowances of the lining after you cut it out or make an additional lining pattern with these specifications. This is often done on collars in blazers to account for turn of the cloth and a better overall fit of the garment.

Strap Placement

Strap placement and size is a consideration for a functional suit. Straps that are place too far away from the neckline will constantly fall off unless you add a back horizontal support strap. The properties of spandex do help immensely with this, but you must know how to use it to its full advantage. Spandex will support with creating tension lines vertically and horizontally, but the strap must have horizontal tension created by strap width, and vertical tension created by the strap placement with respect the shoulder point and neckline. Find just the right spot so the strap stays put, combined with the best width, allowing the spandex do its work, then add elastic for added security and structure. A comfortable armhole that gives you the coverage you need will help you decide the best strap placement.

Construction of the Garment

It is best practice—but not required—to use an overlock machine to do the bulk of the construction. You can use a lockstitch, coverstitch, or zigzag stitch to do the finish work. I use a combination of these, depending on the suit. You can line both the front and the back, or just the front as previously mentioned.

Sewing the crotch: I never line only the crotch area for all the reasons discussed above about what the function of the lining plays in the overall integrity of the garment. If using both a front and back lining, stack your garments in the following order in preparation to sew the crotch:

  • Wrong side up of front fashion fabric—to right side up of back of fashion fabric—to wrong side up of back of lining—to right side up of front lining.

In essence, you have stacked the fashion fabric front and back, right sides together, and the front and back lining right sides together underneath. When you have completed sewing the crotch seam, the right side of the front lining should lie against the wrong side of the front fashion fabric, and same for back. The beauty of this is that the crotch seam is encased so the overlocked seam does not lie against the body. Ideally, you can do this for the side seams and shoulder seams too as well. My sewing order is crotch seam sewn, shoulder seams, then side seams. I do this in a chain fashion to save time, then clip the connected trail treads.

Applying the Elastic

Apply elastic to the wrong side of the swimsuit, on the lining side, with an overlock machine or zigzag stitch on your conventional machine. The stitch lengths and widths depend on size of elastic. Use a larger zigzag stitch on larger width elastics; however, a 2.5 width and 2-3 length is a good starting point. Although some use a three-step zigzag, I have found after years of experience that less-is-best when it comes to thread in the elastic as it will allow the elastic to keep its recoil and resiliency. Although I do use the three-step zigzag on lingerie

Type of Elastic

The best type of elastic for swimsuits is cotton braided elastic. It comes in a variety of lengths and has a beige or crème color to it. Knit elastic does not have the resiliency in the high-tension areas, and nylon braided is too thick. You can use latex elastic but if you so, use the no stretch techniques and make sure your patterns are commensurate with that.

Length of Elastic

Learning what NOT to do: Ready to wear now uses a smooth look to elastic. This means the elastic length is almost the same length as the opening. In order to do this, your pattern has negative ease, meaning smaller than the body size so that the garment stretches when on the body. This allows the garment to look smooth on the rack for retail, but is a lesson in what not to do on your custom garment.

Years ago, the elastic was stretched to fit the garment hole and I still use this technique today in certain areas of the suit to get the best secure fit, especially if the suit is used for exercise or competition. In a deep curve area, you stretch the elastic and it can be up to .9 % stretch factor. Measure the area to be elasticized and multiply by 0.9 — this will give you the elastic length. You can match one to one on straight lines, then stretch over curves. A perfect example of this is the armhole area. The strap has straight lines so keep the elastic one-to-one there but pull it to fit the length when going around the underarm. Don’t stretch the fabric, only the elastic. It is not hard and a technique you will acquire by practice and tenacity.

An alternative is to get machine feet or tension mechanisms to do the work for you. Personally, I find that you need various stretch techniques within one garment… and who has time to keep changing feet or attachments! If you use the stretching elastic technique, you will see the results in the garment when it’s off the body; however, remember that a swimsuit is worn on the body which is where it needs to fit well, be functional, and look good so don’t worry about the gathering effect that stretching elastic causes. Paying careful attention to this in the leg opening means a successful swimsuit. Stretch the elastic to fit over the backside of the swimsuit with less stretch in the front of the leg line. This helps the back “cup” over the derriere.

Practice with your elastic:

  • Anchor a 5” piece of elastic to a table via tape or pin it to a garment, with a tape measure underneath.
  • 5″ x .05 (5 percent stretch) =.25, so 5″+ .25 = 5.25.” Practice stretching the elastic from 5” to just under 5.25.“ Then practice stretching 5” to 9.5,” which is a 90% stretch, etc.
  • You can calculate for any stretch coefficient you want. Oftentimes, lingerie will use a 3% strech, which is a very little bit but a good technique to practice when using very little stretch.

Neckline Elastic

Neckline elastic application for both front and back will use a combination of stretching elastic to little (3%) or no stretching, depending on the style lines.

I will often time write my cutter’s “must” measurements for each swimsuit on the patterns:

  • Neckline opening, cut elastic _______
  • Armhole opening, cut elastic _______
  • Leg line opening, cut elastic ________

The Order of Things

The order for applying elastic to your swimsuit can be varied. I usually do neckline, armholes, and leg openings. Sometimes there is a back opening as in a keyhole back.  When overlocking the elastic to the opening, it is placed on the wrong side of the garment, with the elastic side up, and the right side of the garment against the feed dogs.

You can also bind elastic edges to have a contrast look to your suit. When doing that, cut off the width of elastic for the area; for example, if using ¼” elastic, trim off ¼” from that opening. Then remeasure the area, cut a strip of binding the length of the opening (or you can use the stretch coefficient plus ½’ seam allowance). Sew the binding strip in the round technique and then pin to the opening right sides together. Cut the elastic at 90% stretch length, plus ½” overlap, and pin to the opening. You will have to stretch the elastic in the appropriate areas as you are sewing both the elastic and binding to the opening and trim off the excess after topstitching (see below.)

Topstitching to the Finish

Next on the list is topstitching. Turn the elastic to the wrong side when topstitching with either a zigzag or coverstitch machine. The right side of the fabric should face up and the elastic side should face the feed dogs. You could also stitch with the right side against the feed dogs and the wrong side up if using a zigzag stitch.  If using a zigzag, zig on the elastic, then zag just at the edge or just off the edge, using the edge of the pressor foot as your guide depending on the width of elastic used. If using a coverstitch machine, keep the needles close to the outside edge of elastic so it will hold it down. Whichever way you decide to orient the fabric with respect to the feed dogs, use your left (or non-dominant) hand to hold the fabric in a perpendicular line to the line of the stitching. This will help keep tension on the spandex fabric so it is held snug to the elastic and you will not get any rippling. You may need to pull on the elastic as you go around the curves just like you did when inserting the elastic. Topstitch all the elasticized edges in any order you want. I typically do the neckline, then armholes and, finally, the legs.

If you need to do tacking of thin straps, then use a bar tack or a small-width, short-length zigzag stitch.

If you have decided to bind the elastic edges, you would need to trim off the area to be elasticized an amount equal to the width of the elastic on the garment itself. Remember you will not be turning under the elastic but rather turning the binding over the elastic and topstitching it from there. You can use a variety of methods to topstitch; zigzag, coverstitch, etc. Use your hands to pull the binding snugly over the elastic and around the wrong side of the garment by holding the edge of the binding with your non-dominant hand, and manage the topstitched area with our dominant hand. For example, I am right-handed, so I use my left hand to hold taught and slightly pull it perpendicular to the line of stitching while my right hand guides the garment. Sometimes your left hand (or non-dominant hand) will be underneath a part of the garment which is ok – you will get used to doing it with practice. Be especially careful around curves to keep the binding tight around the garment and the area being bound for a nice, smooth, topstitched finish.

Ironing It All Out

I iron my spandex when all is complete using a piece of silk or polyester organza over the garment which allows me to see the garment area to be pressed. Use steam over the elastic and allow it to recoil to its original (or mostly original) length. Finally, I always tell my customers, that to preserve the longevity of their garment, they should wash it in cold water, with clear, gentle detergent. Rinse it well, and hang the garment dry out of direct sunlight to preserve the elastic fibers.

Like any other type of garment, it will take practice to get acclimated to working with stretch garments but just think of all the suits you can make while trying. Not wearing swimsuits anymore? I am sure there are plenty of willing subjects who would be delighted to reap the benefits of your swimwear sewing musings! Long-lived and long-loved swimsuits is the end result.


 ~Kim Larcom, ASG Member (Boston Chapter), known as The Bridgewater Seamstress, is the Entrepreneur for Astrosportswear Activewear. She graduated from the Master Seamstress certificate program at the University of Rhode Island and owns her own custom activewear business.

Tagged With: diy, swimsuit, swimwear

May 23, 2025

Creative Fabric Sourcing

As some fabric stores close their doors, you might find yourself wondering, “Where can I find fabric and notions now?” The good news is, even if you live in an area without a local fabric store, there are still plenty of creative and convenient options to explore.

First, may we humbly suggest that you start with your stash? Most of us have enough “stock on hand” to last a while. In addition, many ASG groups have fabric exchanges or frequent free-cycle events where you can score fabulous finds. If you’re an ASG member, you’ll know the inside scoop. Non-members can

Independent Stores

The obvious answer is to search for other independent stores. There are many that still exist (and will welcome you with open arms) and you’ll be doing yourself — and them — a wonderful service to start shopping there. You may find though that at least some of those focus on quilting only. If you’re a garment sewer, but have a great quilting store or local sewing machine dealer in your area, ask if they might be willing to carry some other items, like notions, interfacing, etc.

Online

Online shopping is a great alternative, and there are myriad options available. For those who like to “touch and feel” before buying, search for companies that offer a swatching service. And check the company’s return policy before purchasing.

Some online fabric resources curate collections of go-together coordinates and notions, others offer personalized shopping for a small fee. Some also offer a swatched fabric club subscription.

However…

If you’re an adventurous sewer, there are a few other options to consider:

Re-use Centers

Specializing in the reuse of art materials of all sorts, there are several shops around the country that offer large selections of donated fabrics and notions. Check this site to see if there’s a re-use center near you. Not one near you? Consider starting one with sewing friends!

Thrift Stores

Thrift stores often have fabric, patterns and notions, as well as yarns and needlework supplies. In addition, check the linens section for tablecloths, runners, bedspreads and placemats that can be creatively fashioned into sewn projects.

But look beyond the conventional and peruse the clothing racks for fun garments to “harvest” their fabrics. Need some inspiration? Many of our recent Sew Sustainable webinars (open to ASG members) offer ideas for reusing various fabrics. Look for large and extra-large sizes and full skirts to maximize fabric. Be sure to inspect the garment to ensure that all the fabric is usable and there are no stains, snags, odd seams, etc. Save any fun buttons on garments for reuse as well, and zippers too if you’re willing to pick out the stitching.

Sweaters are an ideal source of knit fabric, though admittedly limited in quantity. But, you can keep the knit cuffs, collars and neckbands, in addition to utilizing the knit itself. If there’s wool in the sweatering, consider felting it to change the look and make a denser fabric. Again, check over the item before purchasing and look for stains, moth holes, etc.

Don’t bypass the tie racks if you’re looking for some fun silk piecing fabrics. Disassemble the ties, double check for any stains, and press. Adding a fusible interfacing to the wrong side will help to stabilize the bias-cut strips and make them easier to use in a new project.

Swing by the accessory department to peruse the handbags. Think about harvesting and reusing handles, closures, zippers and flaps in new ways.

Head over to the jeans department. In addition to reusing the denim fabric, there are also seams, pockets, closures and waistbands waiting for creative detailing.

Home Décor Stores

Check out the bath department of your favorite home décor store for fun beach towels, especially in the off season. If you need terrycloth for a project, this can be an economical way to get it.

Look in the drapery and curtain department—an excellent source of fabric in large expanses and few or no seams.

Blankets provide large expanses of seamless fabric—perfect for winter coats or jackets

Home Improvement Stores

“Say what now?”

Home improvement stores sell large canvas tarps ideal for dyeing, painting and otherwise embellishing, and they are way cheaper than purchasing canvas by the yard. They’re heavyweight and perfect for totes and some home décor projects like floorcloths, bins, etc. Some come with grommets already installed along finished edges, so the hem can be repurposed into your project.

Colored plastic tarps come in huge sizes and they’re ideal for tote bags and outdoor carry-alls where water resistance is needed.

Many home improvement stores also sell draperies and curtains providing large expanses of seamless fabric for sewing.

Check out the rope section for lots of cording size and color options sold by the yard or by the foot. They’re located near the clips, buckles, slides, grommets and latches that can also be incorporated into sewn projects.

So, as sad as many of us may be about store closures, we can just be more creative in the search for sewing necessities. Will we stop sewing because of it? Heavens no! As creative types, we know all about the “thrill of the hunt!”

Share Your Sources!

Tell us what sources you use for fabric and we will compile the information and present it in an upcoming artlce.

First Name(Required)
Your email will only be used if we have a question for you. Your email address will not be publicly shared.
What do you use for your fabric sources?
Tell us your favorite fabric source(s), whether it’s a retail or online fabric store, thrift store, fabric sharing event, your own stash, a swap, or any other place you source fabric. *PLEASE ENTER ONE SOURCE PER BOX. Use the “PLUS” sign on the right to add additional lines for additional sources.
Source


~Linda Griepentrog is the owner of G Wiz Creative Services and she does writing, editing and designing for companies in the sewing, crafting and quilting industries. In addition, she escorts fabric shopping tours to Hong Kong. She lives at the Oregon Coast with her husband Keith, and three dogs, Yohnuh, Abby, and Lizzie. Contact her at .

May 16, 2025

Giving Your Sewing Machine Some Love

As much as we love sewing, some tasks aren’t quite as much fun as others, but they’re no less important. One of those tasks is cleaning your sewing machine. If you allow dust, lint and thread to build up in the machine, you’re asking for trouble, so make a point to clean it on a regular basis.

How often do I need to clean my machine?

Experts advise cleaning every 10-12 hours of use, or more often if you’re using fuzzy fabrics like fleece, wool, quilt batting, etc.

What You’ll Need

In addition to the machine manual, you’ll need a few helpful tools. Look for the machine’s lint brush (or a small paintbrush), a soft cloth, pipe cleaners, Q-Tip, tweezers, a screwdriver (if needed) and perhaps treat yourself to a mini vacuum attachment. Or, if you prefer, look for disposable sewing machine cleaning brushes.

First and foremost, consult your instruction book for the care specifics of your model. Then, unplug the machine before you begin. Remove the needle and presser foot to allow easy access to the innards of the machine where the accumulations can easily go unnoticed.

Up Top

Once you’ve removed the needle and presser foot, take off the machine’s throat or needle plate. This can be done by pushing a button, lifting a lever or unscrewing it, depending on the machine brand. Doing this exposes the machine feed dogs (those little teeth that move the fabric), thread cutter (if you have one) and other movable parts. And, very likely, some packed-in lint as well.

Gently brush the lint out from under the sewing machine's throat plat

Lint comes from the fabric we sew, the thread we use and from the dust in the environment, including those loyal pets who watch us create at the machine.

Use the brush, tweezers and/or a pipe cleaner to pull out the gobs of lint throughout the entire area. Lift the feed dogs to remove lint packed underneath them. Avoid the temptation to simply blow lint out with your breath or with canned air, as both not only introduce unwanted moisture into the machine, but they can imbed the dust bunnies further into the machine’s mechanism. The use of canned air can also void some machine warranties. Gently lift it out one whisp at a time.

Don’t forget to clean the area above the presser foot, as lint often accumulates there as well and sometimes up into the light area if it’s accessible.

Fold the soft cloth and clean between the tension disks to dislodge any bits that might be hidden as a result of thread breakage while sewing.

Down Below

Remove the bobbin case (if you have one) and open the bobbin area per your instruction manual. Pay close attention to the process, as you’ll be putting it back together in reverse order. Remove lint or any errant thread bits in that entire area, including inside and outside the bobbin case.

If your machine requires oil, now is the time to do it, once lint is removed and the moving parts are visible. Carefully follow the instruction manual for where and how to lubricate and use ONLY sewing machine oil for the task.

Clearning and oiling the bobin case

Finishing up

When you’re done with the cleaning tasks, reassemble the parts and plug the machine back into the power source. If you oiled it, run it for a while without thread or bobbin to work the oil into the parts. This is a great time to put in a new needle as well.

Use a barely damp cloth to wipe down the outside of the machine to remove any visible stains. You probably didn’t mean to touch the machine after eating chocolate.

Call in the Pro

Regular machine cleaning is essential to successful sewing, but so is a yearly or bi-yearly check-up from your dealer. They can get to the internal workings that you can’t reach, and their work goes beyond cleaning. So, don’t skip it…it’s like your personal health check-up.


~Linda Griepentrog is the owner of G Wiz Creative Services and she does writing, editing and designing for companies in the sewing, crafting and quilting industries. In addition, she escorts fabric shopping tours to Hong Kong. She lives at the Oregon Coast with her husband Keith, and three dogs, Yohnuh, Abby, and Lizzie. Contact her at .

Tagged With: bobbin case, cleaning, machine cleaning, sewing machine

  • 1
  • 2
  • 3
  • …
  • 83
  • Next Page »

Become a Member

Join the only national organization dedicated to Advancing Sewing as an Art and Life Skill.

Join Now button

Blog Article Categories

  • ASG Conference
  • Chapter Stories
  • Embroidery
  • Fitting
  • Learn to Sew
  • National Sewing Month
  • Products, Books, & Patterns
  • Projects
  • Quilting
  • Sewing
  • Sewing Techniques
  • Sewing Tips
  • Sewing Tours
  • Videos
  • Disclaimer
  • Privacy Policy

American Sewing Guild
National Headquarters
9660 Hillcroft, Suite 230
Houston TX 77096
713-729-3000 | 713-721-9230 Fax
www.ASG.org

ASG wordcloud - education, conference, discounts, videos, special offers, tours and more

Copyright © 1998–2025 · American Sewing Guild · All Rights Reserved