American Sewing Guild (ASG)

Visit our blog Visit the ASG Facebook page Visit ASG on Pinterest Visit ASG's YouTube channel Visit ASG on Instagram
  • Home
  • Join ASG
    • Join Online
    • Chapter Locations
    • Member Benefits
    • Member Brochure
    • Join by Mail
  • Conference & Education
  • Resources
    • Contests & Awards
    • Giving Back
    • Hall of Fame
    • Links
    • Travel and Tours
    • Measurement Chart
  • Shop
    • ASG Store
    • Chapter Products
    • Video Resources
  • Blog
  • About
    • About Us
    • Donate to ASG
    • ASG Sensitivity Statement
    • FAQ’s
    • Start a Chapter
  • Contact
  • Member Login
    • Login First!
    • Members Only
    • Leadership Only
    • Website FAQ’s
    • Logout
  •  

March 29, 2024

Fabric Napkins: A Square Deal

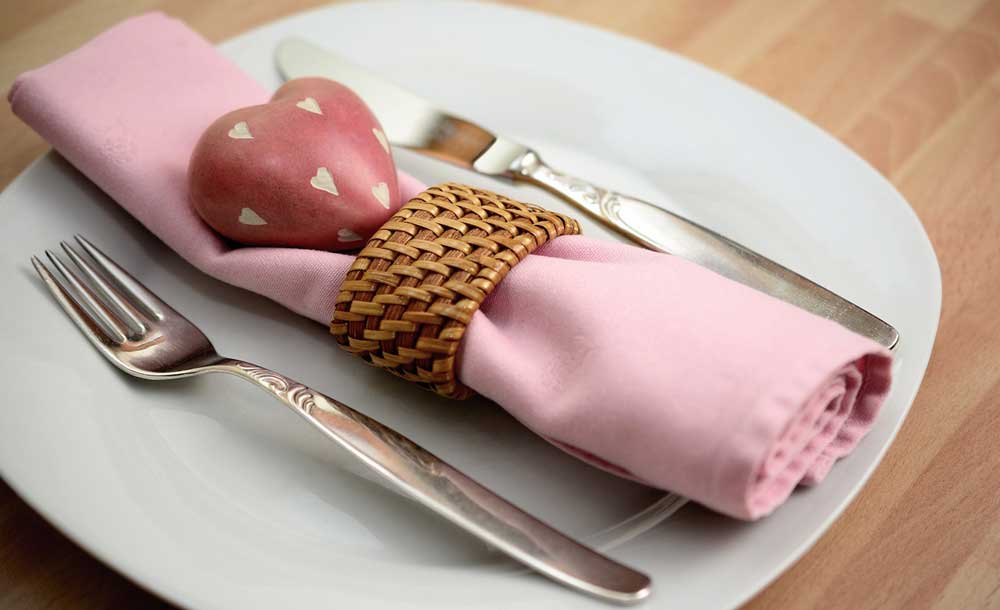
Fabric napkins are a fun way to add some style, color, or interest to your dining table, whether casual dining for the family or more formal affairs for guests. There’s a perfect fabric for all occasions, and they’re sew easy to make, even a beginner can create them. Once you start, you can’t stop!

Hand-made napkins

Napkins vary in size, depending on their use—from 12” squares for cocktail events up to 22” square for a generous dinner size. If you cut them 18” square, the economy plays in your favor as you can get four napkins from a yard of fabric.

If your fabric is loosely woven, add a bit of stability before stitching by using spray starch or starch alternative. On fancy fabrics, like lamé, use stabilizer when edge stitching.

On the Edge

SergerThe key decision for napkin-makers is choosing an edge finish. There are many options, so let us count the ways.

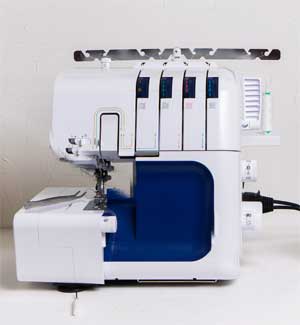
If you have a serger, you can finish the cut edges, press them to the wrong side and topstitch in place. For an even quicker finish, press up the edge and tuck in a narrow strip of fusible web and press the hem in place. This fusible method is especially appealing for children who want to help, but may not have sewing machine skills yet. Basic pressing skills are all that’s needed to finish an overlocked edge.

Or, you can set your serger on the roll-hem setting and simply sew along all four edges, leaving a densely stitched single-layer edge.

Either way, it’s quick to serge continuously—when you’re done with one side, feed in the next napkin and keep on going. The, cut them apart later. This is a timesaver if you’re making quantities of napkins for a party or a craft sale.

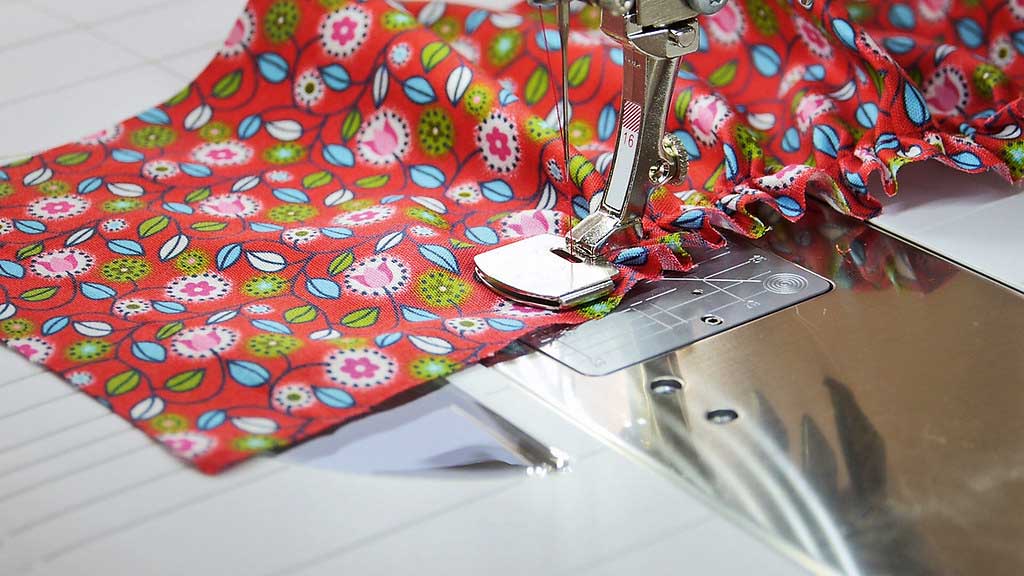
If you don’t have a serger, press under a double ¼” hem on all napkin edges and topstitch in place. For a firmer edge on lightweight fabric, fuse the hems in place using fusible web tape prior to topstitching.

Corner Capers

If you serged the napkins edges, finish the corners by applying fray protector on both the napkin front and back corners. Once the liquid has dried thoroughly, clip the threads close to the corner.

For a folded hem, stitch continuously around the napkin perimeter, backstitching at the beginning and ending stitches. Clip the threads closely.

To reduce bulk at the folded corners of heavier napkin fabrics, trim the fabric at an angle before folding up the hems.

Fringe Benefits

Napkin with fringe edges

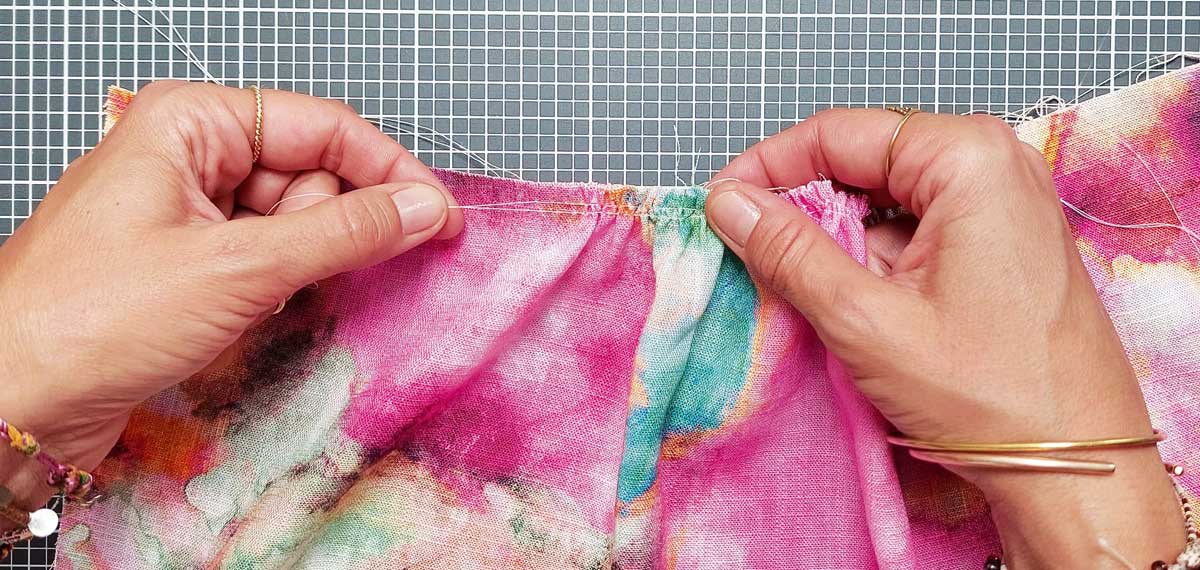
If you’re using napkin fabric with a prominent weave, like linen, mudcloth, etc., a fringed edge may be all you need for a finish. Be sure to cut the napkin squares on the fabric grain, then sew around the square the width of the fringe you want to create. Pull the fabric threads to just outside the stitching line. Trim the fringe evenly if needed.

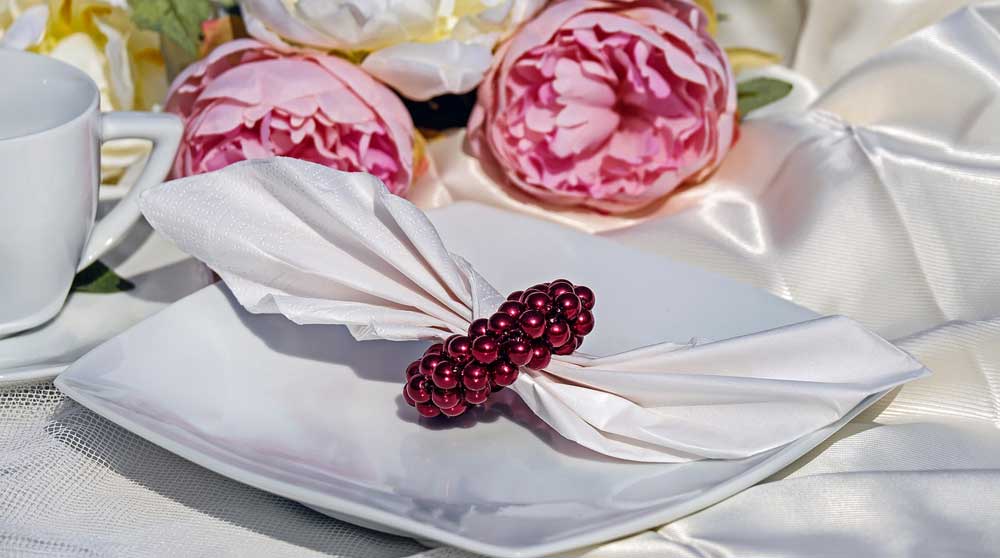
Two Sides to the Story

Single-layer napkins are fun, but if looking at the wrong side of a fabric print is offensive to you, particularly if you’re doing fancy folds, make the napkin double instead. You can use the same fabric or a contrast fabric for the opposite side.

To make a double-layer napkin, cut two squares for each napkin—one from the outer fabric and one from the contrast. Place them right sides together and sew around the edges using a ¼” seam, leaving a small opening for turning. Trim the corners to reduce bulk, and turn the napkin right sides out. Press under the seam allowance at the opening edge and hand-stitch or fuse closed. Press the seam at the edge so neither fabric shows on the opposite side, then topstitch close to the edge. This stitching is also an option for closing the opening edges.

Napkin with fancy folds

Thread Tales

You can use many kinds of thread for the visible stitching on napkins with a serger. Rayon creates a shiny edge, while a woolly option creates a dense matte edge. Metallic can be used for a bit of bling.

For more thread prominence, topstitch hemmed edges using a decorative stitch instead of a straight stitch. One caution: Be sure to reduce the fabric bulk at the corners to avoid stitch distortion.
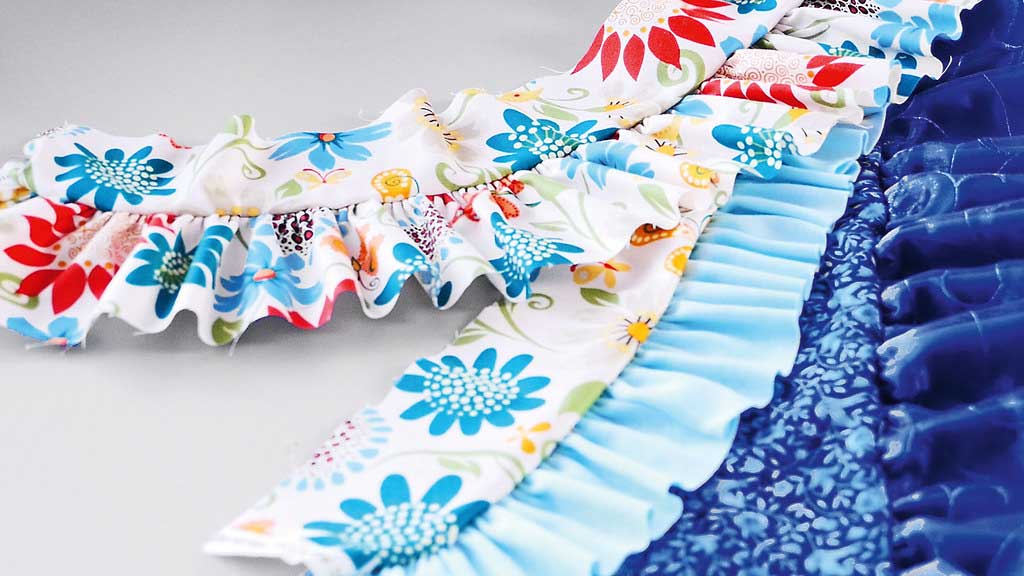
Whimsical Additions

Napkin with lace edges

No one says that napkin edges have to be plain—add some rickrack, tiny ball fringe, lace or other trims extending from the fabric edges. If your napkins are double layer, attach the trim to one side first so the header is between the layers when the napkin is finished. On single-layer versions, simply lap the finished edge over the trim header.


~Linda Griepentrog is the owner of G Wiz Creative Services and she does writing, editing and designing for companies in the sewing, crafting and quilting industries. In addition, she escorts fabric shopping tours to Hong Kong. She lives at the Oregon Coast with her husband Keith, and three dogs, Yohnuh, Abby, and Lizzie. Contact her at .

Did you enjoy this article?
Are you an ASG member?
This field is for validation purposes and should be left unchanged.

March 22, 2024

Altering Your View of Sewing: Upcycling

With ASG’s inaugural Sustainable Sewing group meeting less than a week away, this timely article will help encourage you to start thinking about sustainable sewing opportunities for your wardrobe.

Thrift store clothing rack

We often think of repurposing thrifted materials — whether it be fabric scraps, curtains, or clothing — into non-clothing items like handbags, dog beds, or home dec items. And while many of us think of thrift stores and donation centers as places to drop off that bread machine we wanted so desperately 15 years ago and no longer use, or those size 8 dresses that don’t fit any longer, a thrift or second-hand store is the perfect place to look for great clothing options that don’t need to start from scratch. When thinking about sustainable sewing, we need to change our mindset from toss to reuse, and from buy to recycle. Thrift shopping can also start in your own closet. Either way, get into your creative zone as you look at different pieces.

  • A beautiful skirt might be reclaimed from an otherwise uninteresting dress.
  • A hopelessly outdated jacket with fabulous animal-shaped buttons may be worth the $3.00 price tag. Even if you toss the jacket, those buttons will look great on your next summer dress. If you find something that fits, consider a brightly colored new lining, or even a complete restyle.
  • Turn an oversize scarf into a kimono-styled jacket or beach cover up with the addition of side seams.
  • Check out Pinterest for inspiration

Look at clothes that aren’t in your size range. Over-sized blouses can be remade into a lovely overlay for a sleeveless dress.

For those who want to learn to do alterations, items purchased for a few dollars are perfect to practice on. If you make a mistake, the cost is minimal. You can use your finished piece as a reference when you work on something more valuable.

Recognizing a Treasure

So how do you decide what will work and what won’t? First, consider the integrity of the fabric. Clothes that have started to deteriorate already simply won’t be worth your while to work with. Be sure that the clothing is clean (you are generally safe purchasing at places like consignment shops, and larger donation centers as they are careful in what they accept). When it comes to cleanliness, purchasing at yard sales can be a bit chancier, but generally garments are less expensive. However, finding a Harve Bernard wool coat for $10 is not a bargain if the wool is dry and the threads have started to pull apart. So, pass that up and go on to the next rack.

upcycling

Second, choose clothing using the same criteria you would use in buying or sewing new clothing for yourself. Is it a color you like? Is it a type of fabric that you feel comfortable in? Will it have to be dry-cleaned?

Third, carefully analyze what alterations or changes need to be made to make this work for you. Is it really worth the time to fix it? Do you have the skills to make the needed alterations? Will it require more fabric to make it work and can you find that fabric? When you’ve answered these questions to your satisfaction, then either put it back for someone else to enjoy or take it home and make it your own.

By embracing the art of thrifted fashion and sewing, you not only cultivate a more sustainable approach to style but also express your individuality through unique creations. Each stitch tells a story of transformation, turning forgotten garments into cherished wardrobe staples that reflect your personal taste and creativity. So, the next time you stroll through the aisles of a thrift store or the deep corners of your closet, envision the endless possibilities awaiting your skilled hands and creative vision.

ASG Members can join in the new Sustainable Sewing online group to share, learn, and brainstorm ideas. Not a member? Join today!

Tip: If you don’t have a use for your unwanted clothing or textiles, there are many options for recycling:

  • Resale Shops and Thrift Stores
  • Clothing Swaps
  • Online resale shops
  • For Days: The Take Back Bag
  • Trashie: The Take Back Bag
  • St. Pauly Textile, Inc.
  • Blue Jeans Go Green Denim Recycling
  • Bra Recyclers

March 15, 2024

Sewing Back to Basics: Gathering

Gathering is one of many ways that parts of a garment (or other project) can be joined together when one portion is larger than the other. Sometimes this task is accomplished with pleats or darts, but often gathering is the most used option. Think of a gathered skirt joined to a fitted bodice, or a gathered ruffle trimming a skirt or apron.

Ruffles made with a gathering foot. Photo compliments of Bernina.
Ruffles made with a gathering foot.

In addition to the obvious fullness in the above  examples, gathering can also be more subtle, like to help ease fullness into a sleeve cap, or pulling in a sleeve to fit a cuff.

Methods

There are multiple ways to gather, but the most common method uses basting stitches to pull up the fullness to fit an adjacent portion. To gather using basting stitches—those straight stitches 5-6mm long—it’s best to use multiple rows for security. Stitch a line of basting within the seam allowance, and another row ¼” away. On heavier fabrics, often a third row is added just outside the seam allowance as well. Leave a long thread tail at the end of each basting row.

Once the basting lines are in place, gently pull on the bobbin threads of all the rows at the same time. For best distribution of fullness, it’s best to pull from both ends, carefully easing in the fullness toward the middle. When you reach the requisite length for the gathered portion, tie off all the thread ends to secure the length.

Pulling up gathering threads. Photo from Bernina.
Pulling up gathering threads

Gathering lines can also be put in with hand stitching—especially helpful on more delicate fabrics where machine needle holes might show.

Zig-Zagging Away

Another option for gathering is to use a zigzag stitch and sew over a heavier thread, yarn or small cord just inside the seamline. It’s imperative that the wide, open zigzag stitch is wide enough to easily span the carrier thread, essentially making a casing for it. Note: If the zigzag accidentally catches the heavier thread, gathering won’t work, so stitch slowly and carefully to avoid catching it. If your machine has a buttonhole foot, or other accessory foot with a channel on the underside, that can be helpful to position the heavier thread down the center of the zigzagging.

Dental floss is ideal to zigzag over!

When using a zigzag stitch for gathering, be sure to stitch over the entire length where gathers are needed. Then, gently pull on the encased cord or thread, holding the opposite end securely so that it doesn’t pull out. When you achieve the desired fullness, tie off the threads at both ends to secure.

Zig-zag over heavy thread.

When you have the garment section gathered to size, it’s time to join it to the adjacent portion. It’s best to match center points and even quarter points for even gather distribution. Note that you can slide gathers along the thread lines to ensure they are evenly distributed along the length of the area. Pin in place, then stitch along the seamline. For the best look, don’t let gathers form deep pleats or folds along the stitching line, and keep them perpendicular to the cut edge.

Once the gathered section is joined to the adjacent portion, remove any basting stitches that show on the right side.

Gathered skirt

How many gathers do you need?

Commercial patterns have figured that amount for you, but if you’re venturing off on your own, consider these.

  • The minimum ratio of the ungathered size to the finished size is 1.5:1. This produces light gathering on medium-weight fabrics.
  • More common is a 2:1 ratio.
  • On very lightweight fabrics, you can even go up to 4:1.

Differing ratios are used on different types of garments—for example a tutu may have a 4:1 ratio, while a simple gathered skirt ratio might be 2:1. If you have a 30” waist and you want a flowing gathered skirt, the skirt section would measure 60” before gathering.

Gathering foot
Gathering foot

Other options for gathering include a gathering foot or ruffler. Check with your dealer to see if these accessories are available for your machine. Also, you can gather using a serger.

Several photos in this article are courtesy of Bernina.


~Linda Griepentrog is the owner of G Wiz Creative Services and she does writing, editing and designing for companies in the sewing, crafting and quilting industries. In addition, she escorts fabric shopping tours to Hong Kong. She lives at the Oregon Coast with her husband Keith, and three dogs, Yohnuh, Abby, and Lizzie. Contact her at .

Did you enjoy this article?
Are you an ASG member?
This field is for validation purposes and should be left unchanged.

March 8, 2024

See Before You Sew

Red dressSelecting the ideal fabric for a garment tailored to your preferences and body type is a frustration that even the most experienced seamstresses encounter at least once, if not multiple times, in their sewing journey. Many of us also inadvertently create additional hurdles for ourselves when aiming for the absolute perfect garment. In our pursuit of ideal pattern-fabric combinations, we often overlook a fundamental aspect — understanding the intricacies of both the pattern and the fabric we have at hand.

The key lies in learning to see before you sew. This involves a comprehensive examination of the pattern, fabric, and how they align with your own preferences and body type. Developing this visual acuity forms the basis of a deeper understanding. Here’s a step-by-step guide to consider:

See the Pattern

Begin by thoroughly examining the pattern instructions and recommendations, but don’t limit yourself to the suggested fabrics. With all of the different fibers and fabrics available, it is easy to be confused about what each fabric actually is. Instead, focus on the visual cues provided by photographs or illustrations. Consider the garment’s silhouette – whether it hugs the body’s contours or has a more relaxed fit. Observe the lines within the garment, paying attention to how they depict folds in the fabric as it drapes over the body. Are they gently curved, or jagged and broken? Curved lines suggest a soft fabric, like silk, while angular lines generally indicate a crisper material, such as the cotton used in men’s dress shirts.

Consider seamlines as well. The more seams there are to control fabric over the body, the less drape the intended fabric has. Garments with fewer seams or dart shaping often pair well with drapey fabrics, providing movement and flow over the body. The major exceptions to this rule are six- and eight-gore skirts with drape and flare, as well as eveningwear. Examine the overall silhouette of the garment, noting whether it follows the natural curves of the body or stands independently.

Hemlines, too, offer valuable insights. Take cues from ready-to-wear manufacturers who meticulously test fabric and pattern combinations – their choices can provide valuable guidance.

See the Fabric

Understanding the characteristics of your chosen fabric is crucial. Choose a variety of fabrics from your stash in different weights, in knits and wovens, then conduct simple tests with them, including the corner test for drape, the fist test for transparency, the stretch test for flexibility, the grab test for weight, and the crumple test for wrinkle resistance. These tests, when applied to different fabrics, help you discern their unique qualities and applications.

Corner Test: The corner test, which tests drape, is the easiest test of all. Pick up the fabric by one corner, and let it drop. Look at the drape of the fabric. Does it fall in a wide triangle or a narrow line? Are the folds soft and rounded or sharp and crisp? Does each side hang differently? Unless your fabric is a perfect square, they probably wilt because one side will have the weight of the yardage pulling it down. Note your observations.

Fabric feel

Fist Test: With the fist test, bring your fist up through the center of your fabric and let the fabric hang from it. Can you see the shape of your hand clearly through the fabric? Can you count the valleys between your fingers? Some fabrics will fall into every nook and cranny, while others will skim over the area, merely hinting at what is beneath.

StretchStretch Test: Try stretching the fabric on each grain: straight, cross, and bias. This will help you understand how much give is built into the fabric. A fabric with no stretch on straight or cross grain but a great deal on bias will need careful handling during cutting and sewing.

Grab Test: The grab test helps determine the bulk or weight of a fabric, which is essential to fit. Begin with your lightweight fabrics and move to progressively heavier fabrics. Start at a corner. Using your fingers, try to grab as much of the fabric into your fist as possible. With a very lightweight fabric, you may get in a whole yard; with a heavy fabric, perhaps only a small square.

Crumple Test: Hold the bunched fabric in your fist, and squeeze, counting to five. Let go, and notice whether the wrinkles stay in place. This will help you determine how to use a fabric-do you really want “sitting wrinkles” in your new pants?

See Your Body

Finally, consider your own body and personal style. A fabric may be well-suited for a pattern but not necessarily for your body type or personal style. Use a full-length mirror and drape the fabric over your body, visualizing how it interacts with your unique features. Use your hands to mold it into a simulation of the style you intend. If it is a jacket, drape the right length over your shoulder from the back, letting the rest fall behind. Skirts can use the length or the width. Fold the fabric to get the right length on you. Play with the fabric. Wrap it around you. Your attitude towards that fabric when you see it on your body will help you determine how to use it in a way that makes you feel great about yourself. This step is more effective than using a dress form, as it enables you to see yourself in the fabric, lumps, bumps, and all. Sewers know, the fabric will sing to you, shout at you, and whisper what it wants to be.

Fabric-Pattern Partnership

Corner Test

Through this holistic approach, you’ll develop a natural eye for fabric-pattern partnerships. Some initially chosen fabrics may not work, but this process often sparks new ideas for their use. As you become more adept at understanding the interplay of fabric and form, experimenting with interfacing, underlining, or embellishment will become second nature. Remember, like any skill, the ability to truly see and understand will improve with practice. Soon enough, you’ll feel more confident and successful in exploring a diverse range of fabric choices for your sewing projects. This hands-on approach ensures that your final garment not only aligns with your stylistic preferences but also enhances your body’s natural silhouette for a personalized and flattering fit.


Did you enjoy this article?
Are you an ASG member?
This field is for validation purposes and should be left unchanged.

March 6, 2024

2024 Conference Fashion Show Entry

Fashion by the Bay

Dive into a colorful tapestry of creativity as you join other ASG members on the grand stage at this year’s Conference. Whether you’re into everyday chic, athleisure comfort, vintage vibes, upcycled treasures, ethnic flair, lounge wear, or special occasion wear, the spotlight is yours. Let your imagination run wild because there’s no limit to the magic you can create. Garments, quilts, accessories, cosplay, or fiber arts — all projects are welcome. Show us everything you’ve got and let your creativity soar! No previous experience necessary.

Rules for entries:

  • Open to ASG members, 2024 Instructors at the ASG Conference, and 2024 Conference Vendors
  • Limit of two (2) items. Use one submission form for each item submitted.
  • Please include a photo or drawing of the item. Fabric swatches are not required, but you may include a separate photo of the fabric if desired.
  • Include a written commentary of no more than 75 words for each submission.
  • Deadline for submissions is June 15, 2024.

If you prefer, you may complete a paper form to mail in.


  • « Previous Page
  • 1
  • …
  • 10
  • 11
  • 12
  • 13
  • 14
  • …
  • 82
  • Next Page »

Become a Member

Join the only national organization dedicated to Advancing Sewing as an Art and Life Skill.

Join Now button

Blog Article Categories

  • ASG Conference
  • Chapter Stories
  • Embroidery
  • Fitting
  • Learn to Sew
  • National Sewing Month
  • Products, Books, & Patterns
  • Projects
  • Quilting
  • Sewing
  • Sewing Techniques
  • Sewing Tips
  • Sewing Tours
  • Videos
  • Disclaimer
  • Privacy Policy

American Sewing Guild
National Headquarters
9660 Hillcroft, Suite 230
Houston TX 77096
713-729-3000 | 713-721-9230 Fax
www.ASG.org

ASG wordcloud - education, conference, discounts, videos, special offers, tours and more

Copyright © 1998–2025 · American Sewing Guild · All Rights Reserved