American Sewing Guild (ASG)

Visit our blog Visit the ASG Facebook page Visit ASG on Pinterest Visit ASG's YouTube channel Visit ASG on Instagram
  • Home
  • Join ASG
    • Join Online
    • Chapter Locations
    • Member Benefits
    • Member Brochure
    • Join by Mail
  • Conference & Education
  • Resources
    • Contests & Awards
    • Giving Back
    • Hall of Fame
    • Links
    • Travel and Tours
    • Measurement Chart
  • Shop
    • ASG Store
    • Chapter Products
    • Video Resources
  • Blog
  • About
    • About Us
    • Donate to ASG
    • ASG Sensitivity Statement
    • FAQ’s
    • Start a Chapter
  • Contact
  • Member Login
    • Login First!
    • Members Only
    • Leadership Only
    • Website FAQ’s
    • Logout
  •  

February 2, 2024

Zippers with ZIP!

Zippers don’t have to be under flaps—they can be showcased on the outside of a project and embellished as well.

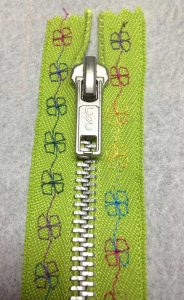
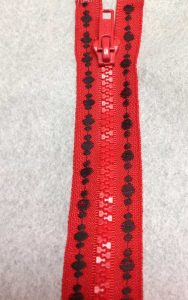
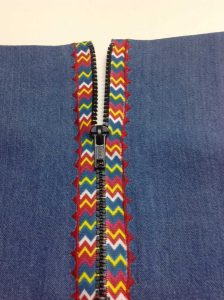
Four decorated zippers

It’s All About the Stitches

You know all those stitches in the machine that you admire, but may not use often? Many of those are perfect to highlight an exposed zipper. Just pick one that’s to your liking and adjust the width to be less than ½” so you don’t run into the zipper teeth.

Choose a narrow presser foot that can ride along the zipper tape, but still allow for the width of your stitch. Adjust the needle position and stitch width to finesse the placement. Most zipper feet will allow you to sew a motif stitch with a narrow width, as opposed to just straight stitch. Key to this effort is testing by turning the handwheel manually throughout the entire stitch sequence to be sure the needle doesn’t hit the foot (or the zipper teeth) during any portion of the motif sewing. Once you’ve determined that, you’re ready to stitch on the zipper tape.

Any type of thread can be used for embellishing zippers—choose a metallic thread to accent metal zipper teeth, a bold color for prominence, or even a variegated thread for interest.

Green zipper with flowers

Sport-weight zippers have wider tapes than all-purpose zippers, making them ideal for using decorative stitching since there’s more room for embellishing. Some will allow for multiple rows of stitches, depending on the stitch width used.

There are actually two ways you can embellish a zipper tape—one is stitching only on the zipper tape itself, and the second is to stitch on the tape as you’re applying it to the garment or other project.

If you want to embellish the tape prior to applying the zipper, some machines find it challenging to grab the narrow tape and feed it evenly under the foot. To resolve that dilemma, adhere the zipper to a removable embroidery stabilizer to support the narrow tape. Water-soluble or tear-away stabilizers work well, as does a removable adhesive version. You can pin the zipper to the stabilizer or use temporary spray adhesive if you’re stabilizer doesn’t have adhering properties itself.

Red zipper with black stitching

Once the zipper is adhered to a larger backing, simply stitch up the center of the tape, stop your stitching, and slide the zipper pull out of the way as needed for access. Then continue stitching.

Black zipper with gold stitching

When your embellishing is complete, remove the stabilizer following the manufacturer’s instructions.

Attaching the Zipper

To attach the exposed zipper, fold under the placket opening edges, pin the zipper in place keeping the finished edge away from the teeth so the zipper can function, and topstitch the zipper tape outer edge in place using matching thread and straight stitching.

If you prefer to do the decorative stitching directly onto the zipper/garment layers, it’s easiest to apply it flat, prior to cutting the placket opening. Using water-soluble basting tape, adhere the zipper in place over the marked opening and decoratively stitch along the zipper tape edges. The lower zipper tape edges can be turned under if desired prior to stitching. After stitching is complete, carefully slice open the garment placket layer down the zipper center and fold back the edges. Stitch again with straight stitching to hold the edges in place if desired, or use a narrow strip of fusible web for that purpose. A knit fabric underlayer can simply be trimmed close to the zipper teeth so the zipper can actually function without the fabric getting caught in the teeth.

Colorful zipper


~Linda Griepentrog is the owner of G Wiz Creative Services and she does writing, editing and designing for companies in the sewing, crafting and quilting industries. In addition, she escorts fabric shopping tours to Hong Kong. She lives at the Oregon Coast with her husband Keith, and three dogs, Yohnuh, Abby, and Lizzie. Contact her at .

Did you enjoy this article?
Are you an ASG member?
This field is for validation purposes and should be left unchanged.

January 26, 2024

Sublime Felt!

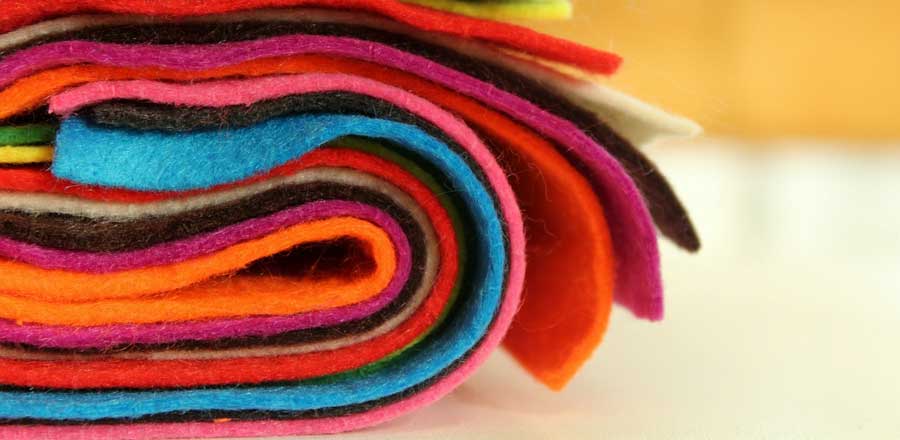
Felt is more than just a material for holiday decorations; it possesses a variety of properties that make it a versatile medium for diverse projects. Its nonwoven nature means it doesn’t ravel and provides durability and insulating qualities. It also comes in a broad range of colors, thicknesses, and textures. Such characteristics render felt ideal for creating unique dimensional clothing items like scarves, hats, purses, and slippers. Moreover, felt serves as a fantastic material for crafting dolls, enhancing its project possibilities.

Felt

The History of Felt

Felt is the world’s oldest textile and predates the spinning of yarn or the weaving of threads into fabric. No one is sure how felt was discovered, but some believe that nomadic tribes in central Asia and Turkey noticed the matting of sheep’s wool and began to use this matted wool for the soles of shoes. The constant pressure from walking caused the wool to mat further, creating a rough form of felt. It has a soft and dense texture and is known for its ability to insulate and provide warmth.

Felt can be made from any natural fiber. When the fibers are exposed to a combination of water, heat, and pressure, they entangle to form felt. Feltmaking kits are available to create your own felt at home. Homemade felt has a looser texture than commercial felt but is also very versatile. Felt can also be created from synthetic fibers.

One-of-a-Kind Felt Fabric

Felt allows you to express your creativity in new ways. Using your sewing machine, you can create new types of fabrics by cutting, stacking, and stitching felt to incorporate the variety of colors and thicknesses. Because of its beautiful, smooth, warm finish, the queen of all felt is 100% wool felt. But blends of wool and rayon also offer options to make dimensional fabric. Felt can be washed and dried to produce interesting textured effects. Once you have the texture you want, you can continue to enhance it by adding embellishments of beads, buttons, trims, fabric paint, and other items—the list is limited only by your imagination.

Felt Dolls

Felt dollDolls are easy to make and felt brings a natural warmth, depth, and variety of color that is perfect for doll skin. It takes fabric paint and inks beautifully, resulting in subtle textures and shadows just like porcelain. Making a doll with 100% wool felt is a satisfying experience because the felt is easy to stuff and will give you a smooth finish with no lumps or bumps.

Cut-Play Felt

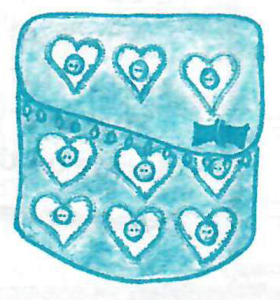
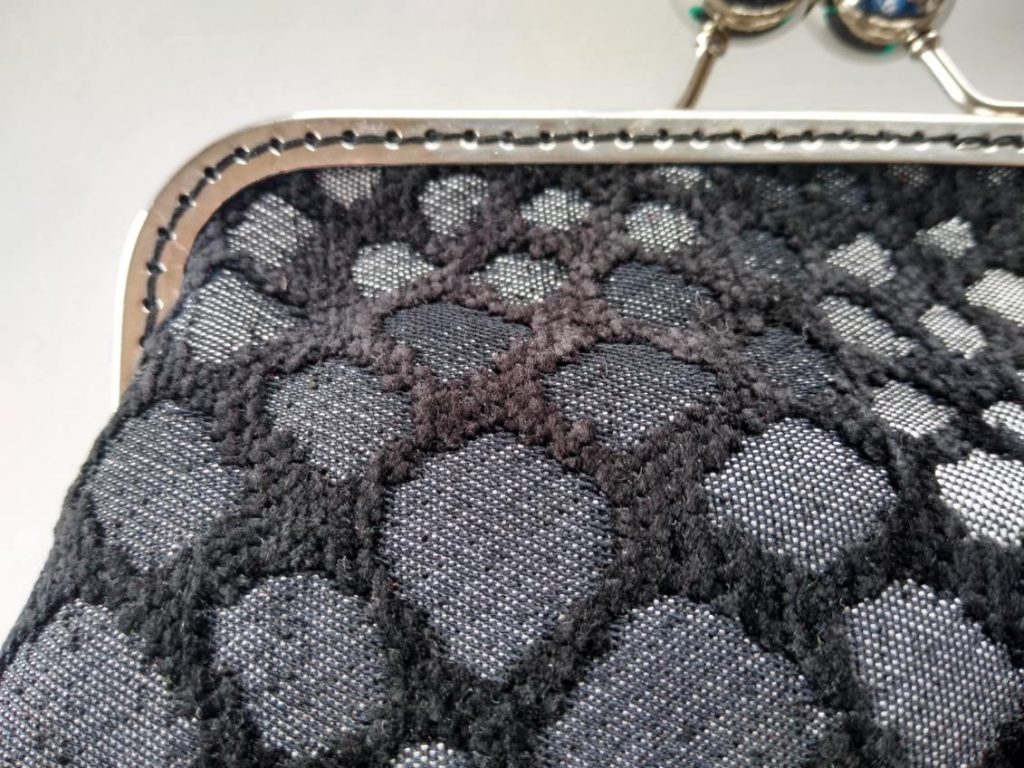
To make cut-play felt (also called reverse appliqué), stitch two layers of felt together and cut away shapes to add texture and interest. A simple purse is a great first project for this technique.

Felt purseBecause the felt may shrink up to 15%, make sure to allow for this, especially if you are making clothing. Use 100% wool felt for the base fabric and an 80% wool/20% rayon blend felt for the top fabric.

Cut the two fabrics slightly larger than the desired finished purse and baste them together along the outside edges. Create a template for the desired decorative motif then, using the template, trace the shapes onto the top layer of felt. Stitch along the traced lines, using a stitch length of 20 stitches-per-inch. Carefully cut away the inside of the shape close to the stitching to reveal the under layer of felt. Once all of the shapes are cut out, toss the fabric into a hot wash cycle (no soap) and then a hot dryer. After removing from the dryer, you will find that the top felt has developed soft, crinkly edges that form a pleasing look. Now it is time to embellish with buttons in the center of each motif. To construct the purse, fold and sew the sides to together. To finish, line the pouch and add the closure of your choice.

Visit this website for a tutorial on reverse appliqué with felt.


Did you enjoy this article?
Are you an ASG member?
This field is for validation purposes and should be left unchanged.

Tagged With: cut-play felt, felt

January 19, 2024

Q&A: Piping, Seam Allowances, PomPoms

How do I?

Sewers can frequently say these three simple words to other sewers, and it’s often at an ASG meeting, get together, or workshop. Most times the answer is simple and readily shared by perhaps a more experienced sewer. We’ve received some of those questions, and we’ve got some answers.


HOW DO I…make piping so that the stitching doesn’t show when I insert it?

Making piping

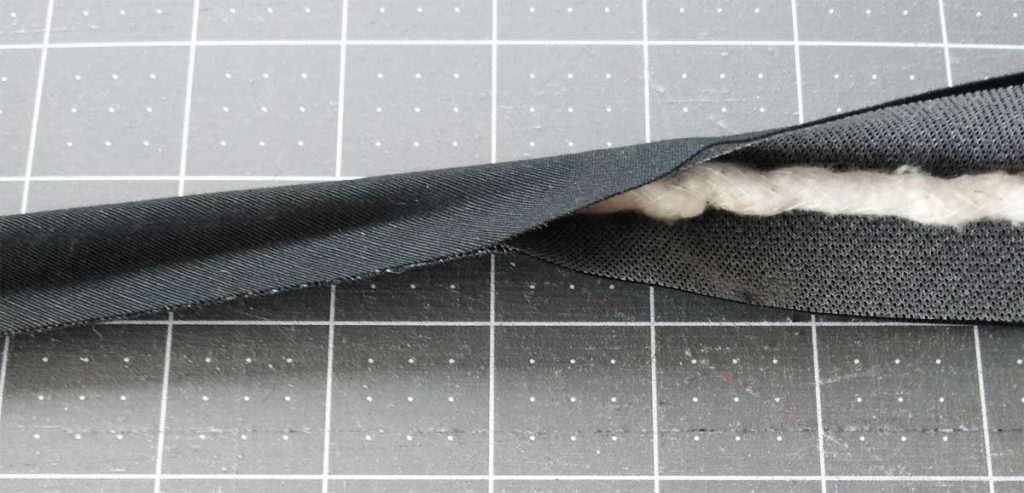
The easiest way to solve this dilemma is to not stitch it when you’re covering it! Measure the circumference of your piping filler cord and add 1 ¼” for seam allowances. Cut your piping covering fabric to that width by the amount of length needed, plus an extra inch or two. This fabric can be cut on the straight grain or bias, depending on where the piping will go and the desired finished look. If it goes around any curves, cut the covering fabric on the bias.

Cut a strip of fusible web the same size as the covering fabric, noting that it may be necessary to abut the ends to get the length needed.

Place the fusible web on the wrong side of the fabric strip and wrap it around the filler cord. Using the tip of your iron, press the long raw edges of the piping covering together, snugging the fabric up to the cord. During insertion, use your zipper foot and adjust the needle position so it’s as close to the cord as possible for perfect piping.


HOW DO I…finish the seam allowances of an unlined jacket made from a ravelly fabric like silk suiting?

Hong Kong finish

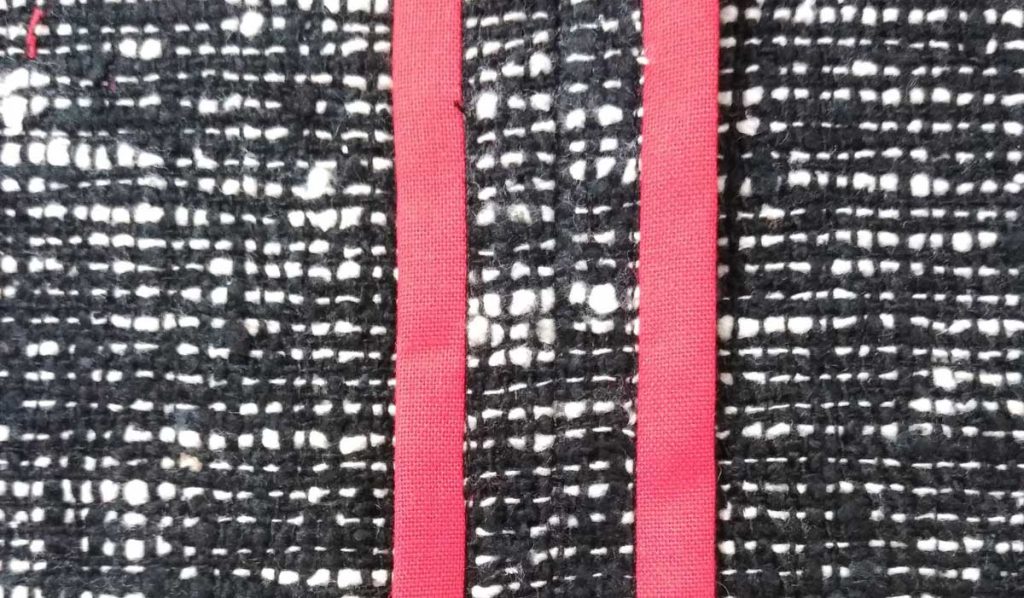
One of the easiest and nicest looking methods of taming a ravelly suiting is called a Hong Kong finish. It’s easy to do and makes the inside of your jacket look stunning.

Begin by choosing a binding fabric—it can be a color match to your garment, or a stark contrast if you prefer; it can be solid or print, depending on how much pizazz you want on the inside. Lining fabric works well for this technique as it’s lightweight, but you can also use lightweight cotton.

Cut bias binding strips 1” wide (1 ¼”-1 ½” for bulky garment fabrics). This allows you to bind both straight and curved seams without puckers. Piece the strips together with diagonal seams to get the length needed and press those joining seams open.

Press the seam allowances of the jacket open (except armholes). On armholes, press the seam allowances in one direction and bind the two edges together. Pin the binding to a single layer of the seam allowance, matching the raw edges. Sew with a ¼” seam allowance being careful not to stretch the binding. Press the binding away from the seam, and fold it snugly over the seam allowance edge, then pin in place. Stitch in the ditch of the seam to secure the binding underside. Press, then trim off any excess binding width on the wrong side, leaving about 1/8” beyond the stitching.

Quick Tip: For even faster binding, use fusible thread in the bobbin for the initial stitching line, then fold the binding strip over the seam allowance edge and press to hold it in place.

This technique can also be used on facing, pocket and hem edges for a beautiful inside finish. And it can be used on reversible garments as well—instead of stitching in the ditch of just the single-layer seam allowance, stitch through the entire garment to flatten the seam. One side will show topstitching and the other side will show the finished seam allowances.

Learn more about the Hong Kong seam finish in the article, “Tailoring Tricks Part 3: Hong Kong Seam Finish”


HOW DO I…make a pompom for a fleece hat?

Pompoms

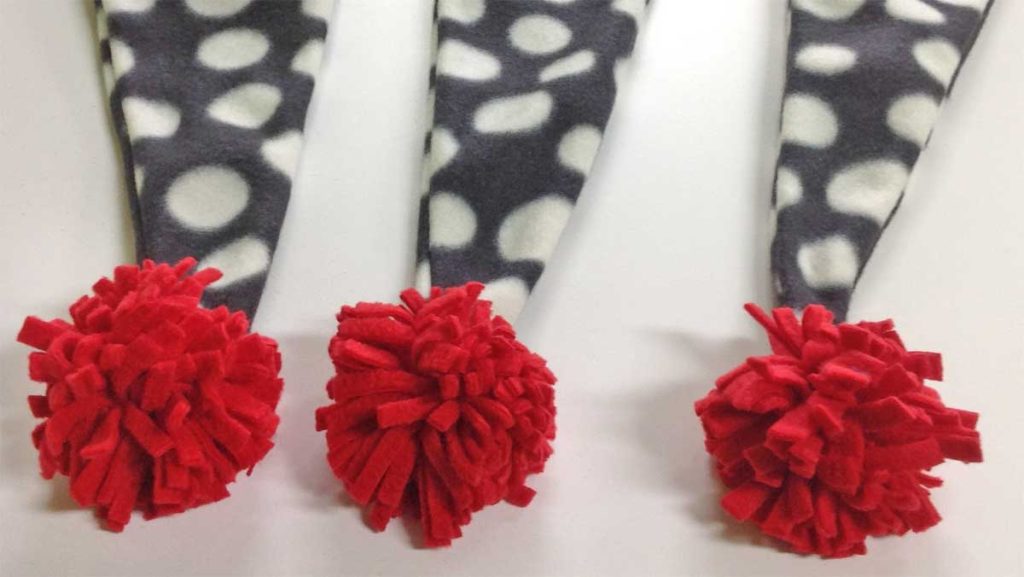
Fleece makes great pompoms because it doesn’t fray, so all you have to do is cut. Decide on the finished size of your pompom and cut 30 fleece strips ¼” wide by the length you determined. Cut an extra ¼” strip about 8” long. So, for a 4” pompom, you’ll need thirty 4” x ¼” strips and one ¼” x 8” strip.

Stack up the like-size strips directly on top of each other and use the longer strip to tightly tie the center of the stack together; knot securely. Fluff up the pompom and use the longer strip end to attach the pom to the hat—either in the seam as you’re constructing it or threaded into a tapestry needle and attached after construction.

If desired, clip the ends of the pompom strands at an angle.


~Linda Griepentrog is the owner of G Wiz Creative Services and she does writing, editing and designing for companies in the sewing, crafting and quilting industries. In addition, she escorts fabric shopping tours to Hong Kong. She lives at the Oregon Coast with her husband Keith, and three dogs, Yohnuh, Abby, and Lizzie. Contact her at .

Tagged With: hong kong finish, piping, pompoms, tips

January 12, 2024

Jacket Tailoring: The Chest Shield

Tailored women's jacketThere are some techniques used in tailoring that are rarely found in the pattern instructions. One of those is a chest piece, or chest shield.

The chest shield is a layer — or, sometimes, multiple layers — that provide stability, body, and reinforcement to the upper front of a jacket. Every woman, even if large-busted, has a little crease or hollow next to the armhole in the chest area that can cause vertical wrinkles or folds in the upper chest of a jacket or coat. To remedy this, we put in a chest shield. The shield enhances the overall fit and appearance, and gives structure, support, and shape to the chest area. It also contributes to a more flattering and tailored look, creating a smooth and well-defined silhouette.

Although chest shields are common in men’s jackets and couture tailored garments, they are rarely seen in women’s ready-to-wear. Chest shields can be made from quality canvas, silk organza, batting, muslin, Pellon Fleece, or Thermolam. If more structure is needed, they can be multi-layered and any combination of the above.

TIP: Do not use fusible fleece as this is a high stress area on the garment and it will not stay fused.

The chest shield is cut according to the jacket pattern to assure it matches the shape and size of the front panels but can be customized to your own body shape and preferences to ensure a personalized fit.

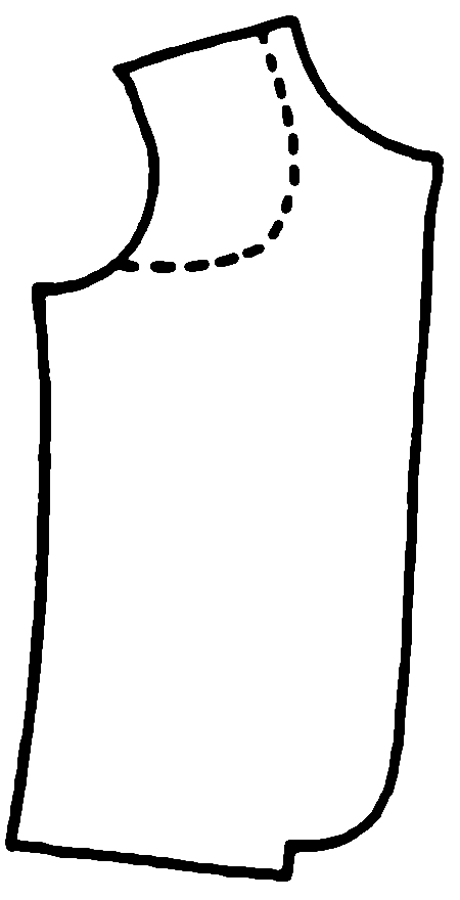
Use your jacket or coat front to make a pattern by drawing a curved line from about two-thirds down the armhole up to the shoulder. Do not go into the roll line (Figure 1). Cut a chest piece for each front.
Figure 1

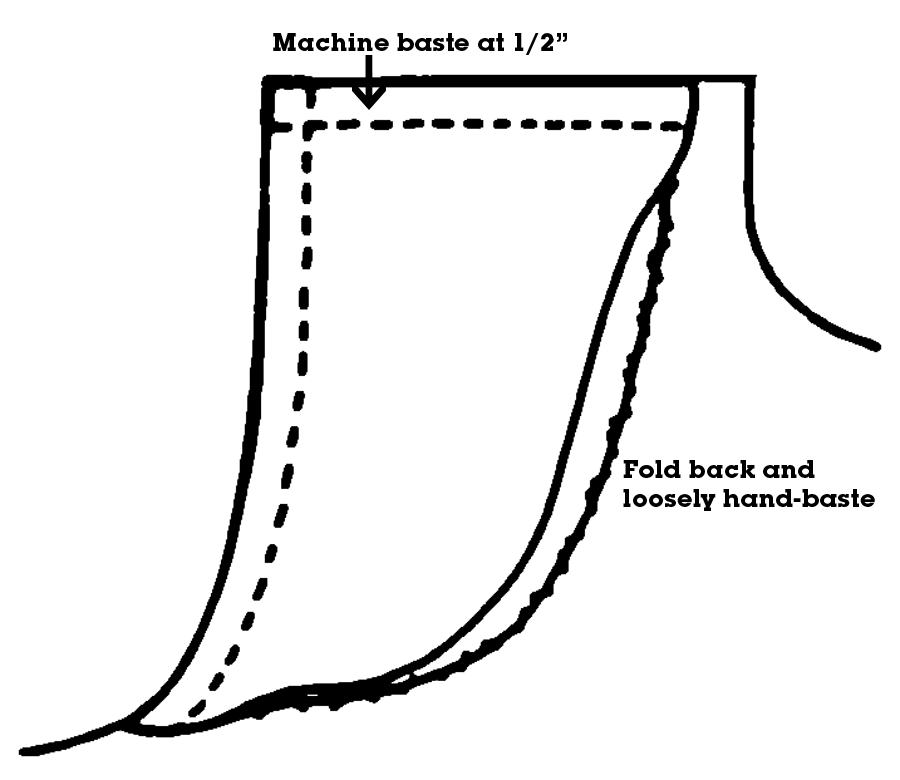
After you have applied interfacing to the jacket fronts, pin the chest pieces along the shoulder and armhole seams and baste them in place. Fold the curved edge back about 1/2″ and tack the chest piece to the jacket with a very loose running stitch, checking to be sure it does not show on the right side of the garment (Figure 2).

Figure 2

Sew the chest piece right into the shoulder and armhole seams during construction and trim the excess seam allowance from the chest pieces to reduce bulk. If your garment will be lined, the chest piece will go between the outer fabric and the inner lining.

Press the chest area over a ham and allow the garment to cool and dry in that position. The ham simulates the curves of the body and will help to shape the garment to your figure.


Did you enjoy this article?
Are you an ASG member?
This field is for validation purposes and should be left unchanged.

January 5, 2024

I’ve Been Framed!

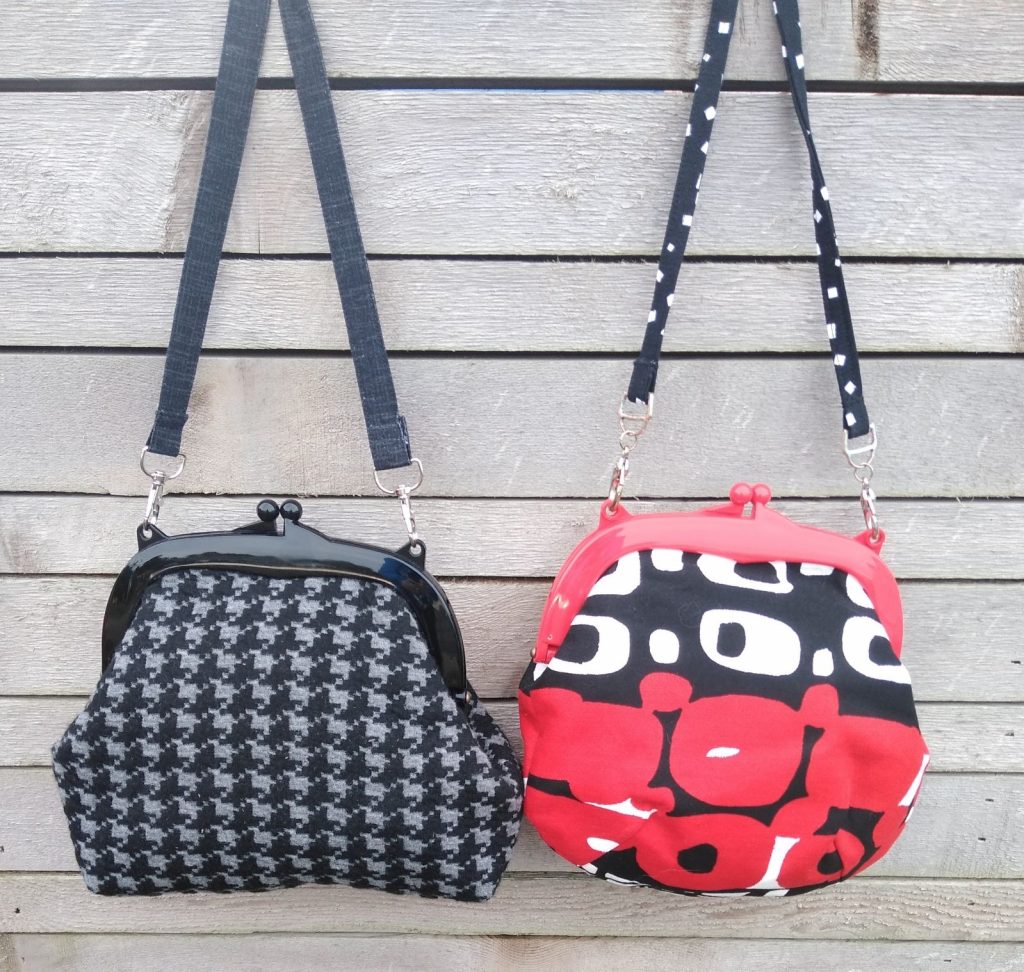
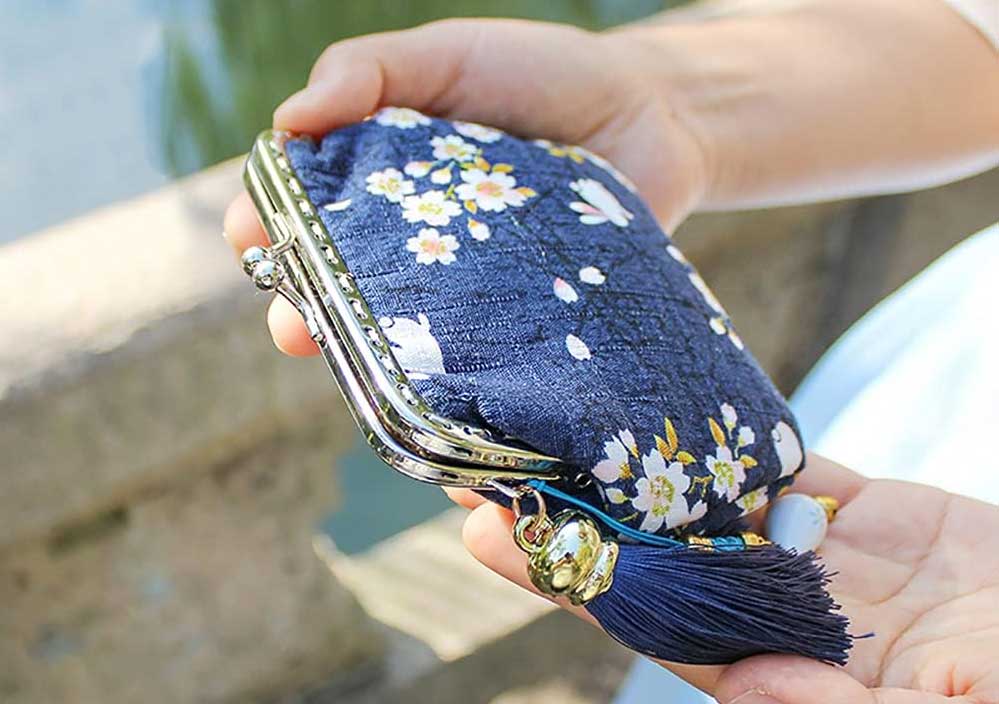
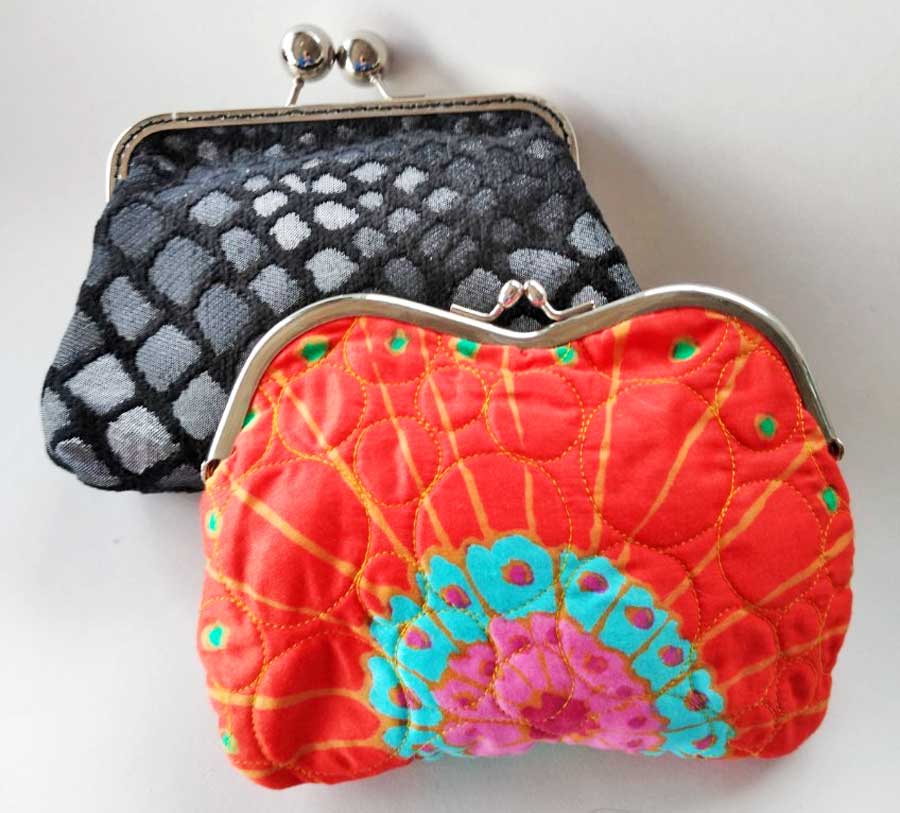
Two hand-made bagsAs sewing enthusiasts, most of us make a lot of bags in our lifetime—from totes to backpacks and beyond. Most may be soft or lightly structured, but few are actually shaped by frames. So, let’s take a look at some accent frames and how to use them.

Types of Frames

Frames provide the external structure for a bag and allow it to support the weight of its contents. Some provide for shoulder strapping and others simply frame a clutch.

Available in many shapes and sizes kiss-lock frames get their name from the interlocking knobs or other shapes that provide the closure for the bag. These frames come in plastic, wood or metal and they can be curved, squared or otherwise shaped at the upper edge.

Frames come in many sizes, from tiny coin-purse versions to larger luggage-style options.

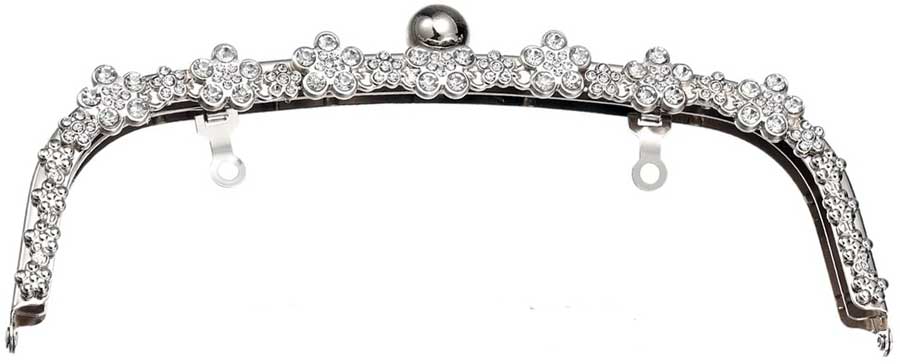
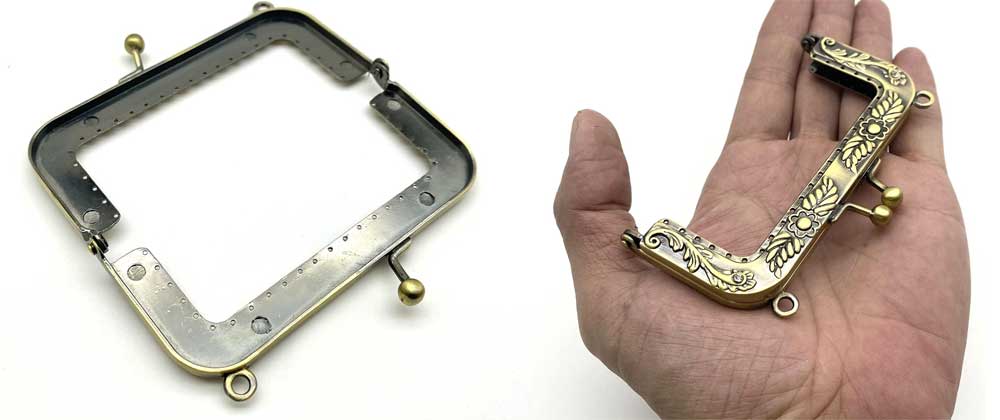
There are simple metal frames, shiny or matte, or they can be more elaborate with filagree work or bedecked with jewels. Some frames have small loops to attach straps or chains, others have hinged loops that fit down into the bag so it can also be used as a clutch. Some metal frames have novelty shaped handles built in for closure in lieu of kiss locking closures.

Bejeweled purse frame with fold-down chain holders from Amazon.


When shopping from any of our Amazon links, we may earn a small commission — at no additional cost to you — if you make a purchase.

All purse frames have a channel between the outer and inner frame portions. This is where the top edge of the finished bag body slides in and is secured.

Attachment Styles

Sew-on frames are perhaps the most common type of frame and they come with small holes along the channel opening for hand stitching the bag to the frame. You can attach the bag body using a running stitch, backstitch or a decorative hand embroidery stitch, and you can even add beads to help hide the stitches if you prefer.

Sew-on purse frame from Amazon.

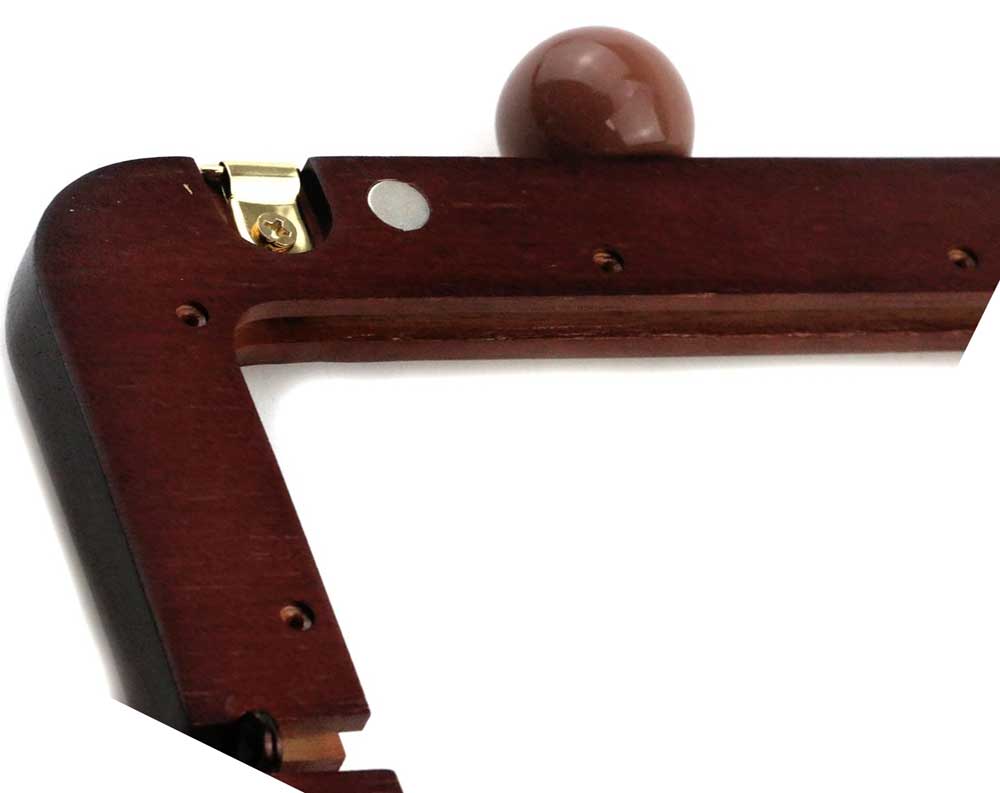
Screw-on frames attach the bag body with tiny screws on the frame inside, invisible from the outside. The bag body simply slides into the channels and is held in place when the screws are tightened. Glue can be added for additional hold prior to insertion.

Screw-on wooden frame available on Amazon.

Glue-on frames rely totally on adhesive to hold the bag body in place. Depending on the fabric your bag is made of, the channel may be wider than the fabric thicknesses, so you can insert a small cord to fill the gap. Be sure to follow the manufacturer’s instructions for type of glue and application, as errant glue can damage a frame. With this type of frame, it’s important to be sure both sides of the upper bag edges are glued securely to both the frame front and back for maximum strength.

Glue-on frame available on Amazon.

Crimp-on frames must be clamped once the bag body upper edges are positioned, as that’s what holds the fabric in place. Purse crimpers or flat-jaw pliers are required for a secure squeeze and some kind of protection is needed between the tool and the metal frame to avoid damage—a fleece scrap works fine to avoid scratches. Some frames have inside teeth for better gripping, and other manufacturers recommend adding glue before crimping.

How to Attach Frames

2 bagsMost purse frames come with a pattern for the bag body, so follow the manufacturer’s instructions to make the bag body. This process will create a finished upper edge, ready to mount to the frame.

  1. First, find the center of the frame and the bag body upper edge. Mark it with tape or a thread.
  2. Detail view of sew-on frame
    Detail view of sew-on frame.

    Open the frame hinges as far as possible to expose the channel where the bag upper edge will go. For most frames, you’ll want to run a very thin line of glue in the channel. Begin inserting the bag body matching the center points. Use a small screwdriver, stiletto or skewer to push the upper edge all the way into the channel. Continue from the center outward in the same manner until you reach the hinge area of the frame and clamp in place, protecting the metal frame with fabric scraps. Repeat for the second half of the same side. For some bags, the frame is shorter than the bag edge, so push in a few gathers evenly spaced. If the channel seems to have extra room, add in a string or tiny cord to fill the gap and glue in place.

  3. Wait for the first half of the bag frame to dry completely, then repeat the process for the second half.
  4. If you’re working with a clamp-on or screw-on frame, continue with that process. For a sew-on version, stitch through the frame holes.

~Linda Griepentrog is the owner of G Wiz Creative Services and she does writing, editing and designing for companies in the sewing, crafting and quilting industries. In addition, she escorts fabric shopping tours to Hong Kong. She lives at the Oregon Coast with her husband Keith, and three dogs, Yohnuh, Abby, and Lizzie. Contact her at .

Did you enjoy this article?
Are you an ASG member?
This field is for validation purposes and should be left unchanged.

  • « Previous Page
  • 1
  • …
  • 12
  • 13
  • 14
  • 15
  • 16
  • …
  • 82
  • Next Page »

Become a Member

Join the only national organization dedicated to Advancing Sewing as an Art and Life Skill.

Join Now button

Blog Article Categories

  • ASG Conference
  • Chapter Stories
  • Embroidery
  • Fitting
  • Learn to Sew
  • National Sewing Month
  • Products, Books, & Patterns
  • Projects
  • Quilting
  • Sewing
  • Sewing Techniques
  • Sewing Tips
  • Sewing Tours
  • Videos
  • Disclaimer
  • Privacy Policy

American Sewing Guild
National Headquarters
9660 Hillcroft, Suite 230
Houston TX 77096
713-729-3000 | 713-721-9230 Fax
www.ASG.org

ASG wordcloud - education, conference, discounts, videos, special offers, tours and more

Copyright © 1998–2025 · American Sewing Guild · All Rights Reserved