American Sewing Guild (ASG)

Visit our blog Visit the ASG Facebook page Visit ASG on Pinterest Visit ASG's YouTube channel Visit ASG on Instagram
  • Home
  • Join ASG
    • Join Online
    • Chapter Locations
    • Member Benefits
    • Member Brochure
    • Join by Mail
  • Conference & Education
  • Resources
    • Contests & Awards
    • Giving Back
    • Hall of Fame
    • Links
    • Travel and Tours
    • Measurement Chart
  • Shop
    • ASG Store
    • Chapter Products
    • Video Resources
  • Blog
  • About
    • About Us
    • Donate to ASG
    • ASG Sensitivity Statement
    • FAQ’s
    • Start a Chapter
  • Contact
  • Member Login
    • Login First!
    • Members Only
    • Leadership Only
    • Website FAQ’s
    • Logout
  •  

March 28, 2025

What’s the (Sewing) Word?

Whether you’re new to sewing or a seasoned veteran with myriad skills, chances are good that you like to continue learning about your favorite hobby and knowing the vocab is essential.

While there are glossaries of common sewing terms, we wondered about the not-so-common words that might be good to know. Take a look at some sewing/fashion related terminology you might find interesting (and also helpful for a sewing “Jeopardy” category).

Armscye

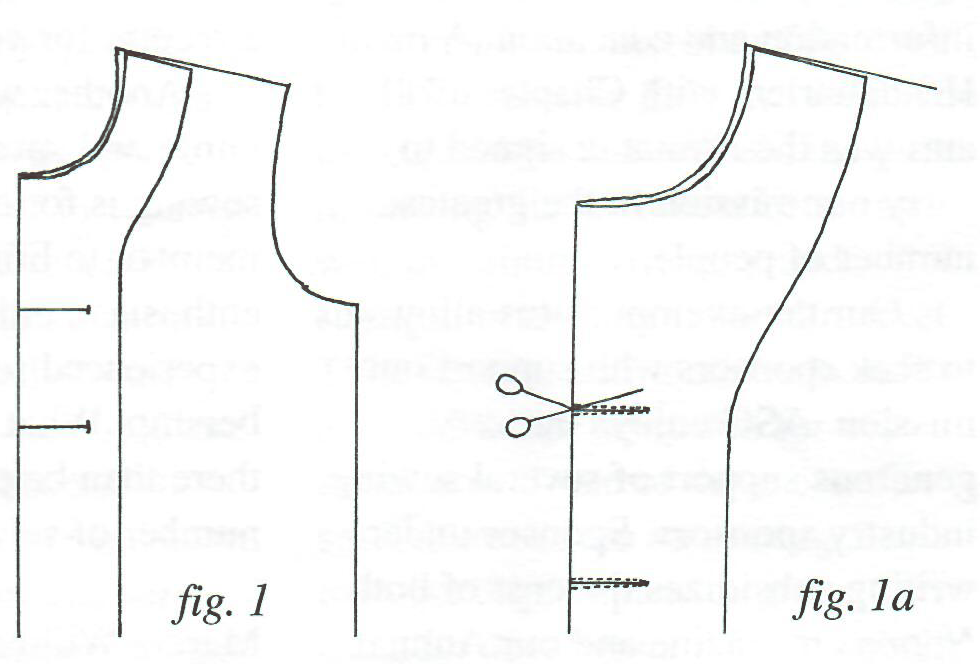
An obscure word for the armhole of a garment where the sleeve is attached. Historically, the Scottish word scye referred to a sleeve hole. The length of the armscye is the circumference at the cut edge and the armscye width is the space between the front and back at the mid-point after the side seam is sewn.

Banger

An alternative name for a clapper (see below).

Bight

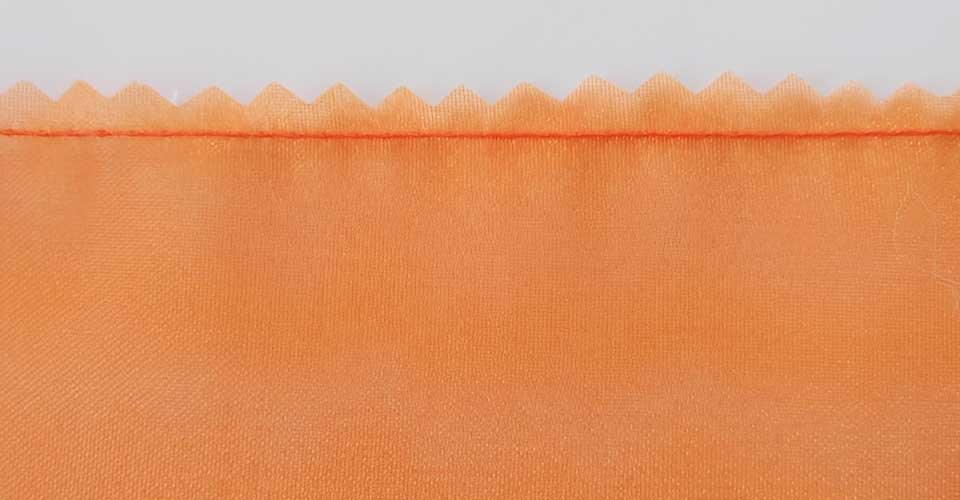
This term refers to the width of a zigzag stitch.

Bumble Bunching

A mess of threads on the bobbin side of a stitched seam when the thread has come out of the upper tension, or the upper tension is too loose to produce a balanced stitch. Sometimes called “bird’s nest”.

Clapper

Available at your local retailer or on <a href="https://amzn.to/3DS68HJ">Amazon</a> (affiliate link)

A heavy wooden block used for flattening seams. Some come with a handle on top, others have an indentation along the sides for holding. The wood is porous and absorbs steam when held in place immediately after pressing a seam. This tool is used both in tailoring and quilting to reduce bulk.

Feed Dogs

The tiny teeth below the sewing machine presser foot that move the fabric evenly while sewing. The movement of the feed dogs is controlled by the stitch length indicator. Feed dogs can move both forward and backward.

Frogging

Ripping out a seam. This funny term could be derived from the action call “rip-it” which sounds like a frog when repeated.

Godet

A triangular piece of fabric inserted into a garment to add fullness, like in a skirt. The godet can be rounded or pointed at the top.

Gore

A section of a skirt that’s wider at the hem than at the waist. A skirt can have multiple gores depending on the desired fullness in relation to the waist size.

Gusset

A square, triangular or rectangular piece of fabric inserted into a garment area where there might be stress, such as under a cut-on sleeve.

Header

A cardboard placed at the top of a fabric sample to showcase it for display. Furniture stores place their upholstery fabrics on hanging headers for easy selection.

The term also refers to the top portion of draperies that is reinforced for hanging hooks or grommets.

Richelieu

Richelieu (image courtesy of Bernina

A type of cutwork forming free-floating bars with no fabric behind them. The bars are heavily stitched with a zigzag to add stability despite the openwork nature of the design.

Ruching

A trim made by pleating or gathering both sides of a lightweight or sheer fabric. The ruffled strip is then inserted into or overlayed onto a portion of the garment, like the center of a sleeve, or covering a bodice.

Sloper

A basic garment pattern, without seam allowances, that is used to draft other types of garments. The sloper is derived from body measurements; ease and design details need to be added in the drafting process.

Stay Button

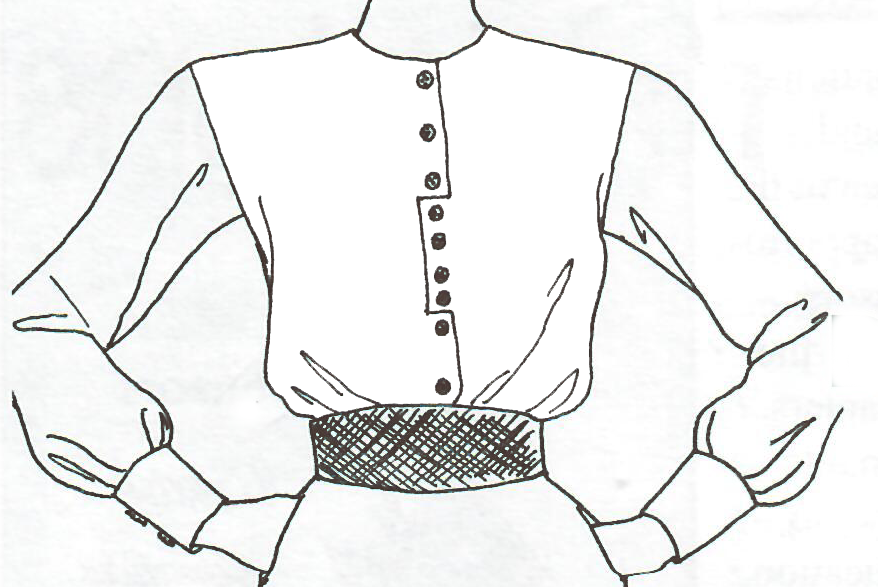
A small button sewn behind another button for added stability in an area of stress. Often used behind large decorative buttons (like on a coat) to help keep the garment closure from distorting.

Surplice

An overlapping bodice neckline that forms a V when the right is lapped over the left.

Tabard

An open-sided overgarment where the sides may have buttons or ties to hold them in place. It’s a common design for an apron or other protective garment, as well as it is often used as a canvas for wearable art embellishment.

Trapunto

A type of quilting where the design outline is sewn and then the section is stuffed from the back for added depth.

Image courtesy of Bernina


~Linda Griepentrog is the owner of G Wiz Creative Services and she does writing, editing and designing for companies in the sewing, crafting and quilting industries. In addition, she escorts fabric shopping tours to Hong Kong. She lives at the Oregon Coast with her husband Keith, and three dogs, Yohnuh, Abby, and Lizzie. Contact her at .

March 21, 2025

Mastering Waterproof Fabrics

Working with waterproof fabrics can feel intimidating, especially if you’re new to sewing or had a rocky start with them. Maybe you’ve tried stitching a raincoat or backpack, only to find yourself battling slippery surfaces, sticky presser feet, and mysterious leaks. Don’t worry—you’re not alone! Waterproof fabrics do have their quirks, but with the right techniques and tools, you can absolutely tame them. Whether you’re crafting outdoor gear, making outdoor cushions, creating rain jackets, or designing durable bags, these tips will help you succeed.

What is the Difference Between Waterproof, Water-Repellant, and Water-Resistant?

Waterproof fabric does not allow water to penetrate the fabric. These fabrics would keep you dry if you are caught in a downpour; however, these aren’t entirely impermeable. Waterproof fabric is composed of various materials, including synthetic fibers like polyester and nylon and natural fibers like cotton and wool. 

Water-repellent fabrics are treated with a water-repellent coating that causes water to bead up and roll off, preventing water from penetrating the fabric. They will keep you dry in a mild rainshower, but won’t offer much protection in a heavy rainstorm. However, they are also often less expensive and more breathable than waterproof or water-resistant materials. 

Water-resistant fabrics offer the least amount of water protection—they will repel water to some extent, but will not prevent it from penetrating the fabric. Water-resistant fabrics are often used for outdoor garments like jackets and trousers. They will shield you from light rain and splashes but won’t keep you dry in heavy rainstorms or if you are immersed.

Preparing to Sew

Fabric

While many fabrics do not require pre-washing, it’s usually recommended to pre-wash waterproof fabric. In addition to helping to remove residual chemicals, pre-washings will pre-shrink the natural fibers (such as cotton or linen) that tend to shrink when washed. Wash in cold water with a gentle soap on a gentle cycle. No bleach or other chemicals should be used. Air dry after rinsing.

Know Your Fabric Types

Here are a few common waterproof fabrics and how they behave:

FABRICFEATURESCHALLENGES
Ripstop NylonLightweight, tear-resistant, water-repellentSlippery, prone to fraying
PUL (Polyurethane Laminate)Soft, stretchy, waterproof, washableSticky when sewing, heat-sensitive
OilclothSturdy, water-resistant, wipe-clean surfaceSticky, stiff, can crack over time
VinylDurable, waterproof, wipeableSticky, thick, hard to maneuver
Laminated CottonFlexible, water-resistant, washable
Less durable than PUL, can wrinkle

Interfacing

If your pattern requires interfacing, you will need to test the best option. Some water-resistant materials may not adhere well to fusible interfacing, plus the heat could damage the fabric. Sew-in interfacing may be your best option.

Cutting and Sewing

Forget Using Pins

One of the first lessons when working with waterproof fabrics? Avoid pins like the plague. Pins leave permanent holes that compromise the waterproof quality of your project. Once that hole is there, water can sneak through.

Here’s what to do instead:

  • Use Pattern Weights for Cutting: Skip pinning your pattern pieces. Instead, use weights—whether commercial or home-made— to keep your fabric in place while cutting.

  • Sewing Clips Are Your Best Friend: When assembling your pieces, opt for sewing clips instead of pins. They hold your layers together securely without puncturing the fabric.

  • Try a Water-Soluble Basting Tape: If your fabric is slippery or hard to control, a water-soluble basting tape will temporarily stick the layers together, preventing shifting as you sew. And it washes out when you’re done.

Marking

It’s best to use chalk or washable pens for marking as other methods might damage the fabric.

Choose the Right Needle

Waterproof fabrics, like coated nylon, vinyl, or laminated cotton, can be tough on your needles—and each stitch creates a tiny hole. To minimize damage:

  • Use a Microtex Needle: These needles have a very sharp, fine point, perfect for piercing tightly woven or coated fabrics without causing unnecessary damage. Choose sizes 70/10 or 80/12 for lightweight waterproof materials like rain coats or windbreakers. Choose a 90/14 or 100/16 for heavier fabrics such as that used in outdoor gear or tents.

  • Universal Needles Can Work (in a Pinch): If you don’t have a Microtex needle on hand, a sharp universal needle can work for many projects. Just be prepared to change your needle frequently. A sharp needle designed for heavy-duty fabrics is preferable. Note that waterproof materials can dull your needle faster than regular fabrics.

Thread

A high-quality polyester or nylon thread designed for heavy-duty or outdoor use should be used. These threads are water-resistant, UV-resistant rays, and can absorb the abrasion for these uses.

Mind Your Presser Foot

Your presser foot can make or break the sewing process, especially with waterproof or coated fabrics.

Non-Stick Zigzag Teflon Sewing Machine Presser Foot
Non-Stick Zigzag Teflon Sewing Machine Presser Foot (available on Amazon or your favorite retailer)

  • Walking Foot: For slippery, shifting fabrics like ripstop nylon or oilcloth, a walking foot is invaluable. It feeds both the top and bottom layers through the machine evenly, preventing puckering or stretching and reducing slipping.

  • Teflon (Non-Stick) Foot: If you’re sewing sticky fabrics like vinyl or polyurethane-coated materials, a Teflon foot helps the material glide under the presser foot smoothly. They’re affordable and make a noticeable difference.

  • No Teflon Foot? Try This Hack: If you’re in a hurry and don’t have a Teflon foot, place a layer of parchment paper or tissue paper on the top of the fabric (between the fabric and the foot). Sew through the paper as normal, then tear it away once you’re finished. It’s an old-school trick that works surprisingly well!

Adjust Your Stitch Length

Remember that every drop of the needle in the fabric makes a hole—and too many holes can compromise your fabric’s water resistance. To minimize this:

  • Lengthen Your Stitch: Use a longer stitch length, ideally between 3.0mm and 3.5mm. This reduces the number of perforations and prevents puckering.
  • Test, Test, Test: Try your stitch length on a scrap piece of your fabric before committing to the actual project. Some fabrics behave differently, and you’ll want to see how yours reacts.

Finishing

Skip the Iron (Most of the Time)

Waterproof fabrics and heat don’t always mix. Some materials can melt or warp when exposed to high temperatures.

  • Avoid Direct Heat: As a rule of thumb, don’t iron waterproof fabrics unless you know they can tolerate it. Many coated fabrics will melt or get damaged with heat.

  • Use Finger-Pressing or a Seam Roller: Instead of ironing seams open, press them firmly with your fingers or use a seam roller. You can also topstitch seams to help them lay flat, if needed

The Final Steps for True Waterproofing

When planning for closures, consider waterproof zippers which often have sealing mechanisms to keep out moisture.

Also, no matter how careful you are, there will be needle holes that will allow moisture in. For truly waterproof seams, seam sealing is a must.

  • Seam Sealing Tape: This special tape covers the inside of your seams and is activated by heat (yep, this is the exception to the no-iron rule). Follow the tape manufacturer’s instructions carefully:

    • Use a low-temp setting.
    • Place a pressing cloth between the iron and tape.
    • Turn the steam off.
    • Always test on a scrap piece first!
  • Liquid Seam Sealant: For smaller projects or awkward seams, a liquid seam sealant (often sold in outdoor supply stores) can be painted or squeezed along the seams. It dries clear and flexible.

That said, sealing seams isn’t always necessary. If your finished item won’t be submerged, you may decide it’s not worth the extra step.


March 14, 2025

DIY Wired Ribbon, Serger Style

Do you use your serger only for finishing seam allowance edges? If so, let us enlighten you about another use for this wonderful machine—to make decorative edges using wire or fishing line! What, you say?

You may have purchased wire-edge ribbon at the store to use for floral or other decorative effects, but with the serger you can make your own with fabric of your choosing. Simply cut long lengths of fabric into strips the width you need, plus ½” for seam trimming. Piece the strips together if needed to get the total length needed for your project.

Wired ribbon from Amazon (affiliate link)

Select a very thin florist or beading wire and, if it’s available for your serger, a cording/beading foot. This foot has a designated channel/guide to help direct the wire for encasing with serger stitches. If you don’t have that foot, the standard foot can work, but it will take a bit more effort to guide the insertion.

Bernina Cording Foot

Use a medium-width, medium- to short-length stitch setting to encase the wire, depending on how much you want it to show (or not). A rolled hem setting will totally cover the wire if that’s the preferred look. Test-stitching will determine the proper length and width setting.

Position the wire under the presser foot so that the serger stitch covers it—about ¼” in from the right side cut edge. Do not try to guide it exactly along the fabric edge, as you will slip off. It’s better to let the serger knife trim the edge next to the wire as you sew to make a neater and cleaner looking edge. For ribbon-making, be sure not to stretch the fabric edge as you sew or you’ll create ruffles.

At the end of your ribbon length, repeat the wire encasement on the opposite length. Clip the wire ends close to the stitching and secure with a seam sealant.

To make the fabric ribbon stiffer, spray with starch or starch alternative. Shape the wire to form the bow or whatever shape is needed for your project.

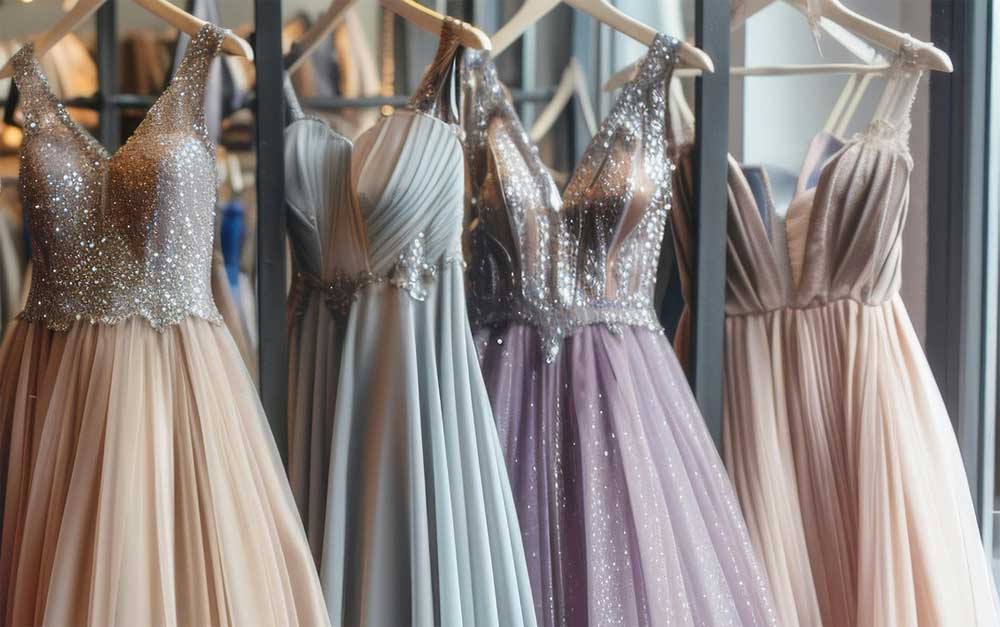
You’ll often find a similar edge on fabric, especially on wedding and evening wear, only the edge finish encases fishing line instead of wire. The edge can be flat or ruffled.

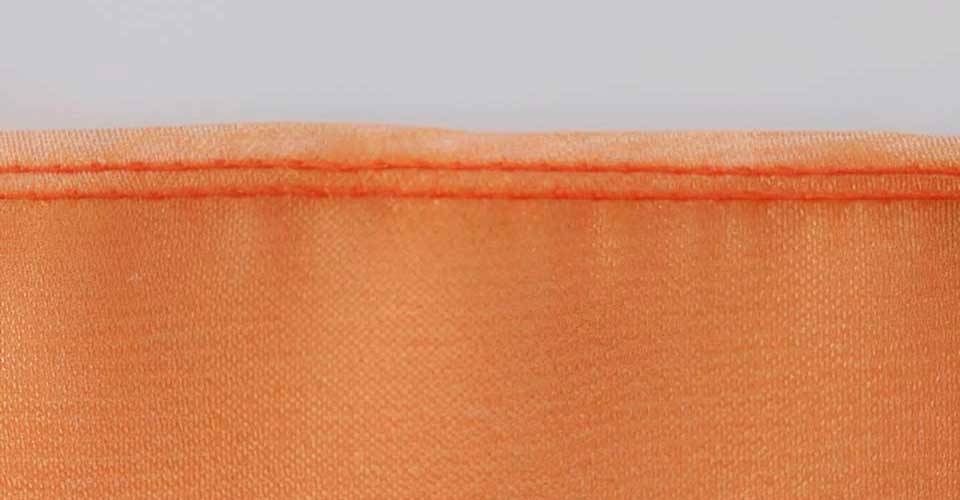
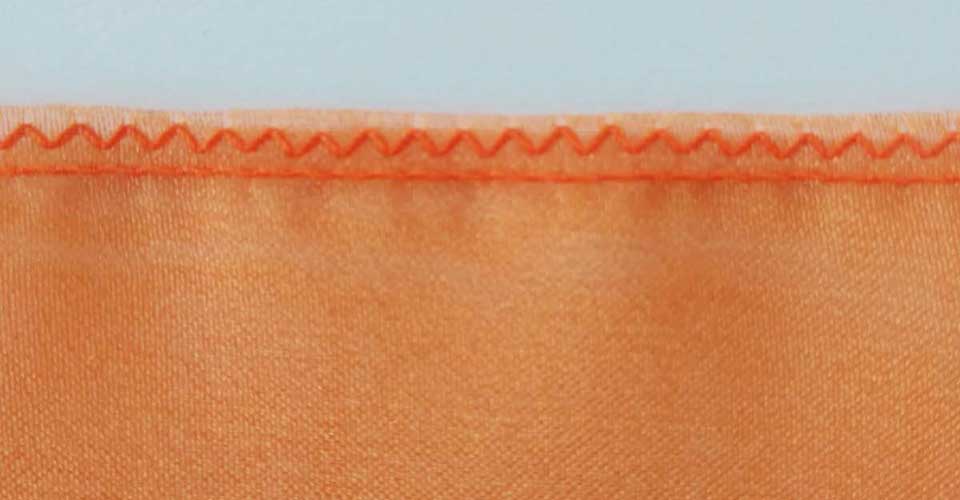
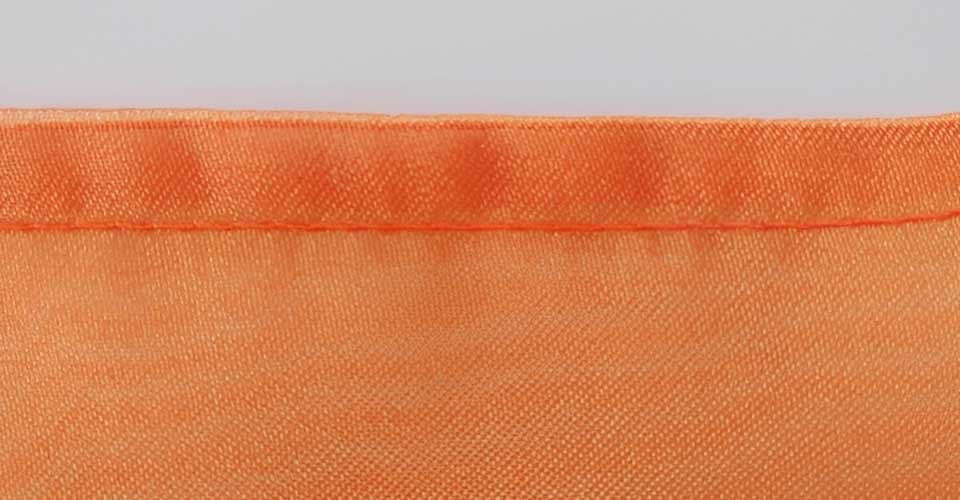
To make an edge finish on a fabric, like net, tulle or lightweight sheer, follow those same processes but use lightweight monofilament fishing line (10-15 lb.) instead of wire. For heavier fabrics, like satin or taffeta, or when serge-finishing two layers together, a 25-lb. fishing line weight works well.

Leave a 4”-5” fishing line tail at the beginning of your serging. If you want a flat edge, be careful not to stretch the fabric as you sew, but if you want undulating ruffles, sometimes called lettuce edging, stretch the fabric as you serge. For a prominent looking edge, use a rolled hem setting; for a lighter looking edge, use a medium stitch length and width.

When you’re serging fishing line into a hem and wondering what to do when you come to the end of the circle, the answer is easy—just keep stitching after you cut off the finishing end of the line. As you continue stitching over the previously stitched area, both the finishing end and the beginning end will be encased. Then, clip off any additional length.

Another Way

If you don’t have a serger, you can create wired or fishing line edges on your conventional machine. Choose a cording or buttonhole foot with a guide slot for the filler and follow the same instructions as above. Stitch inside the fabric cut edge about ¼” rather than trying to go over the fabric edge, then carefully trim the excess close to the stitching once you’re done sewing.


~Linda Griepentrog is the owner of G Wiz Creative Services and she does writing, editing and designing for companies in the sewing, crafting and quilting industries. In addition, she escorts fabric shopping tours to Hong Kong. She lives at the Oregon Coast with her husband Keith, and three dogs, Yohnuh, Abby, and Lizzie. Contact her at .


March 7, 2025

Online Fabric Shopping

Resources and Practical Suggestions

Once upon a time, sewers (the word sewist was not yet in usage) who wanted to create a new garment or other sewn item would get in the car and drive to their nearby fabric store. I have been sewing long enough to remember fabric shopping in a robust fabric section in a popular department store.

While some may be fortunate to still have brick and mortar stores near them, sometimes the only option is to buy fabric online. The most obvious drawback to online fabric shopping is the inability to touch the fabric. Other problems are differences in color in real life compared to what it looks like on your computer monitor, as well as shipping costs and waiting for fabric to arrive. So what’s the modern day sewist to do?

Just like any business, the most important criteria for choosing a store is reputation. Look for stores that are mentioned often by sewists on Instagram or by those you know personally.

PatternReview.com is an unbiased gathering of opinions from sewists on many sewing topics. You’ll probably find reviews of any online store you are interested in ordering from.

Another important feature of the best online shops is the description and pictures of the fabric. Many give advice on the weight, opacity and suitability. The best pictures show the fabric draped in some way, not just a flat photo.

Many online stores will send swatches, either free or for a small cost, if you can manage to be patient or you’re not in a big hurry. This is especially important when ordering expensive fabric or a large amount. For example, you can earn Swatch Points at Mood Fabrics from previous purchases.

Finally, your own experience will inform your opinions. It’s probably best to order small when trying out a new store to test the accuracy of their descriptions and photos. Once you are happy with the quality of the product, you can feel confident in ordering more. No doubt, you will have some disappointments – the fabric may not work for what you had planned because of weight, color or suitability. This is a good opportunity to think creatively to see if it might work for another project.

With a little patience and curiosity, shopping for fabric online can be like walking into a vast and exciting store where nearly anything is available!

Resources

  • Article from Core Fabrics about GSM weight and how this number can help make informed decisions when ordering online
  • Article from Love Notions (a digital pattern company) about online fabric stores, with recommendations
  • List of Online Apparel Fabric and Trim Sources
  • Online Fabric and Notions Sources – sign up to view the list at Tomkat Stitchery

Stores listing GSM or ounces in their descriptions:

  • Blackbird Fabrics
  • Blue Moon Fabrics
  • Fabric.com (affiliate link)
  • Fabric Wholesale Direct
  • Gorgeous Fabrics (also has videos showing how a fabric moves and drapes)
  • Hobby Fabric Store
  • Mood Fabrics (can buy swatches and earn swatches with purchases)
  • Stone Mountain Fabrics
  • Surge Fabric Shop (they have Cupro double knit)
  • Tessuti
  • The Fabric Store Online

Stores with good descriptions:

  • Fabric Mart Fabrics
  • Fashion Fabrics Club (GSM for denim is listed)
  • Finch Fabrics
  • Mendel-Goldberg Fabrics
  • Metro Textiles NYC
  • Minerva (GSM for denim is listed)

The retailers mentioned are independently owned and operated. We provide recommendations for informational purposes only and do not endorse or take responsibility for the products, services, or policies of these businesses. Please contact the retailer directly for any questions or concerns.


~Cecelia Harris, Pikes Peak Chapter, ASG

February 28, 2025

Denim Delight: Jean Jacket

Who doesn’t love denim—whether it’s well-worn and oh-so-comfy jeans, or a great blue jean jacket? Denim ebbs and flows in the fashion world but continues to be a classic wardrobe staple for year-round wear. There’s something wonderful about denim jackets specifically that make it easy to just throw it on and know it’s good to go almost anywhere.

Sustainability

Denim is a sturdy fabric and can often outlast the wearer. Originally worn by wranglers and cowboys in the wild West, today’s denim jackets are mainstream for everyone from kids to seniors. You can craft your own jacket or head to a local thrift store to find one that’s already gently broken in already, pre-shrunk, and ready for you to add your creative touches.

Enhancement Ideas

Some jackets are well worn and may show it, so creativity is limitless in either showcasing or camouflaging any flaws. If a little mending is needed to stabilize a worn spot, add a piece of fusible interfacing to the underside to hold loose threads in place, then use a contrasting 12-weight thread to sew some big stitches across the area. This is not only decorative but also holds the worn area in place and keeps it from getting any larger.

Patching denim

Holes and tears in denim jackets are all the rage, but if that look isn’t to your liking, add a bold fabric under the opening, use a contrasting 12-weight thread to outline the hole with big stitches. Frayed edges are up to you—like them or trim them—depending on your taste.

Purposeful fabric patches can add a hint of color to the bluest of blues. One option is a simple calico rectangle on the back yoke:

Or you may fancy a vintage fabric square on a sleeve:

Or an orphaned quilt block on the jacket back:

Patches can be put on invisibly with tiny hand stitches, machine sewn, or accented with hand stitching in matching or contrasting thread colors.

Adorning Your Jacket

Beautify the front of any denim jacket by adding color to the button/rivet or buttonhole area. Small bits of a variety of colored fabrics make a perfect accent. Even more so, if you add some bold hand stitching. Running stitches, cross stitches or random stitch rows are perfect embellishments to hold the little patches in place, though you also probably want to needle-turn the edges to finish.

These front patches can wrap around the band edge as well or simply end at the fold.

Photos courtesy of Jane Foster Design | Fabric shown is Roses-dark-base Fabric by Jane Foster

Step-by-Step

If you need to dress up a denim jacket, consider adding a bold fashion print to some areas. The existing seaming in a denim jacket defines individual sections, perfect for fabric additions.

Sewing teacher Jane Foster from Walnut Creek not only embellished her jacket with fabric she designed herself, but she actually cut the fabric to fit the garment back, undercollar, flaps and cuffs.

  • To do this, lay the jacket flat on a piece of paper large enough to fit the area you want to cover, then poke pins straight through along the edges of the designated area. The pins will leave holes in the paper once you remove the garment. Roughly connect the pin holes, add a ½” seam allowance all around, then cut out the paper pattern. Use the pattern to cut the fashion fabric.
  • If you want to center a motif on a section, fussy-cut the piece with the proper design placement.
  • Pin the fabric in place on the garment right side so that it lies perfectly flat, then needle-turn the edges under and stitch in place.
  • Another option is to add fusible web behind the fabric accent section and fuse it to the jacket. You can leave the edges raw (and fused) or leave a ¼” turn-under along the edges, then hand-stitch in place.

For another dressy idea, follow Jane’s student Nanette Saabcrowell’s idea and use a beautiful scarf on the back of a white jacket denim.

So, whether you choose blue, black, white or a colored denim jacket, the sky’s the limit for embellishing potential. Just put your creative mojo in gear and make a plan.


~Linda Griepentrog is the owner of G Wiz Creative Services and she does writing, editing and designing for companies in the sewing, crafting and quilting industries. In addition, she escorts fabric shopping tours to Hong Kong. She lives at the Oregon Coast with her husband Keith, and three dogs, Yohnuh, Abby, and Lizzie. Contact her at .

  • « Previous Page
  • 1
  • 2
  • 3
  • 4
  • …
  • 82
  • Next Page »

Become a Member

Join the only national organization dedicated to Advancing Sewing as an Art and Life Skill.

Join Now button

Blog Article Categories

  • ASG Conference
  • Chapter Stories
  • Embroidery
  • Fitting
  • Learn to Sew
  • National Sewing Month
  • Products, Books, & Patterns
  • Projects
  • Quilting
  • Sewing
  • Sewing Techniques
  • Sewing Tips
  • Sewing Tours
  • Videos
  • Disclaimer
  • Privacy Policy

American Sewing Guild
National Headquarters
9660 Hillcroft, Suite 230
Houston TX 77096
713-729-3000 | 713-721-9230 Fax
www.ASG.org

ASG wordcloud - education, conference, discounts, videos, special offers, tours and more

Copyright © 1998–2025 · American Sewing Guild · All Rights Reserved