American Sewing Guild (ASG)

Visit our blog Visit the ASG Facebook page Visit ASG on Pinterest Visit ASG's YouTube channel Visit ASG on Instagram
  • Home
  • Join ASG
    • Join Online
    • Chapter Locations
    • Member Benefits
    • Member Brochure
    • Join by Mail
  • Conference & Education
  • Resources
    • Contests & Awards
    • Giving Back
    • Hall of Fame
    • Links
    • Travel and Tours
    • Measurement Chart
  • Shop
    • ASG Store
    • Chapter Products
    • Video Resources
  • Blog
  • About
    • About Us
    • Donate to ASG
    • ASG Sensitivity Statement
    • FAQ’s
    • Start a Chapter
  • Contact
  • Member Login
    • Login First!
    • Members Only
    • Leadership Only
    • Website FAQ’s
    • Logout
  •  

December 13, 2024

Sew Soft: Tips for Sewing with Velvet

With the holidays approaching, you may want to make something special to wear to a dressy get-together, and velvet or velveteen could be the answer to your quest for something wonderful. Never sewn with these beautiful pile fabrics before? The helpful hints in today’s blog article will guide you down the path to success.

Velvet

Fit to be Tried

Since both velvet and velveteen can be expensive, it’s a good idea to use a pattern that you know fits you. If in doubt, make a muslin first to check for any needed alterations and adjust the pattern accordingly.

What’s the scoop?

The terms velvet and velveteen are often used interchangeably, but they’re not the same. Both have pile—fibers that stick up from the backing surface—but other fabrics also fall into the pile fabric category.

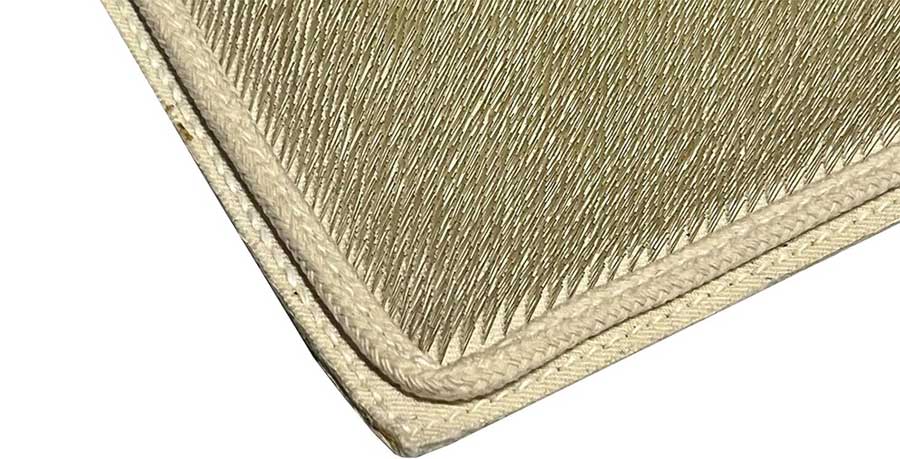
Velvet is soft, drapey and has an elegant sheen resulting from its high pile. It can be smooth or have a variety of textured surfaces. Velveteen is stiffer with a shorter, dense matte-finish pile. Velvet can be made from silk, rayon or other synthetic fibers, while velveteen is most often made from cotton. Both fabrics have a woven backing.

Sewing with Pile Fabrics

  • Whether you’re sewing with velvet or velveteen, the sewing and cutting principles are similar—and perhaps different from other fabrics you’ve sewn as they require extra care. Choose a pattern with simple lines and not too many seams. The fewer seams a garment has, the easier it will be to create. Set-in sleeves can be a challenge, so opt for raglan or cut-on for easier sewing. Avoid buttonhole if at all possible, and opt for closures like buttons and loops.
  • Pile fabrics have nap, meaning that all pattern pieces have to be cut in a single direction to avoid color shading, so be sure to follow that layout on the guide sheet.
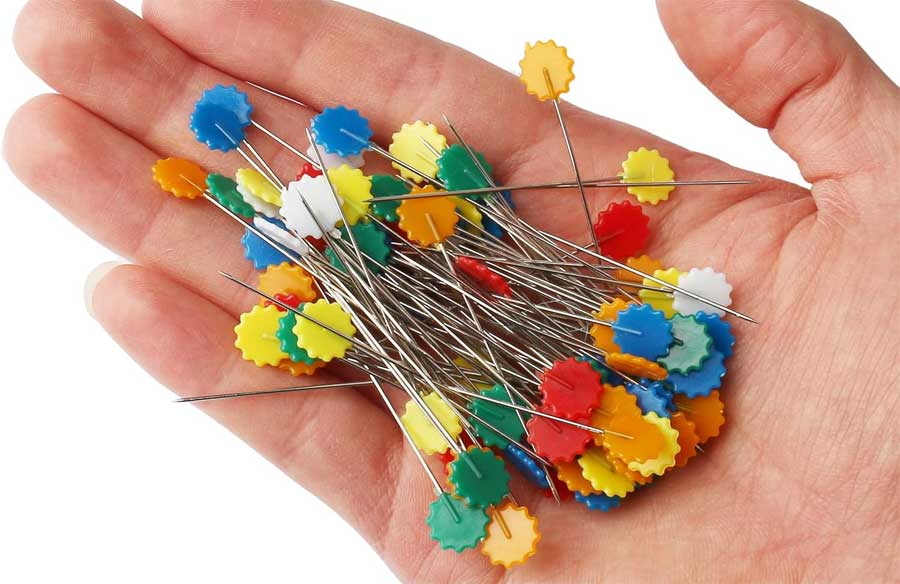
  • Pin marks can be permanent on pile fabrics, so pin only within the seam allowances. Another option for an even better hold is pattern weights. With a raised fabric surface, it’s easy for pieces to shift. Cutting pieces single layer with the pile side down is a sure-fire way to more accurate cutting than trying to cut two layers of shifting fabric at once.
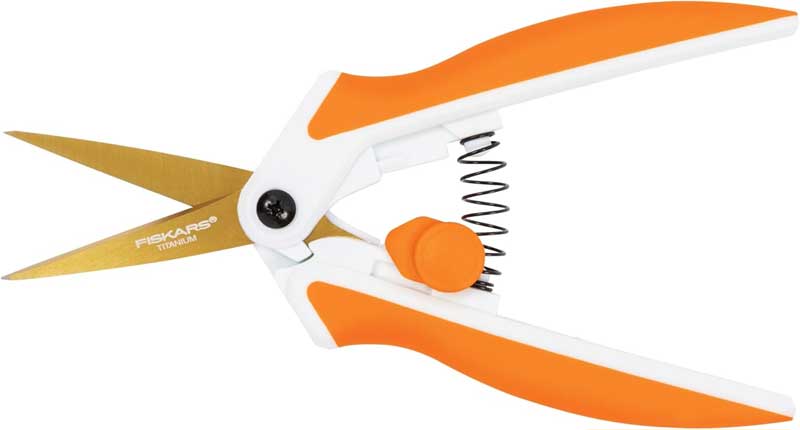
  • Cutting velvet creates a mess, as the pile fibers are being cut through as well as the fabric backing. So, clean up frequently—not only your scissor blades, but the cutting surface too.
  • Markings can be transferred with chalk or an air-removable fabric marker to the wrong side of the fabric. Avoid using a tracing wheel as it will permanently damage the fabric surface. For accuracy, choose tailor tacks for marking interior details like darts or pleats.
  • Choose a sharp-tip needle, in a weight compatible with the fabric.
  • Always opt for sew-in interfacings, as velvet and velveteen cannot tolerate fusible products.

Foot Notes

Because velvet and velveteen have pile, it’s difficult to keep pieces in place while stitching. Use a walking foot if you have one, but test-stitch first to be sure the foot doesn’t leave track marks along your seam. If it does, layer tissue paper top and bottom spanning the seam allowance.

Walking Foot available on Amazon. (affiliate link)

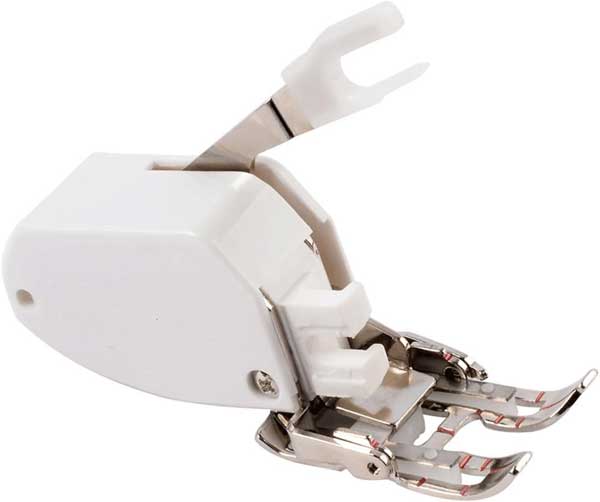
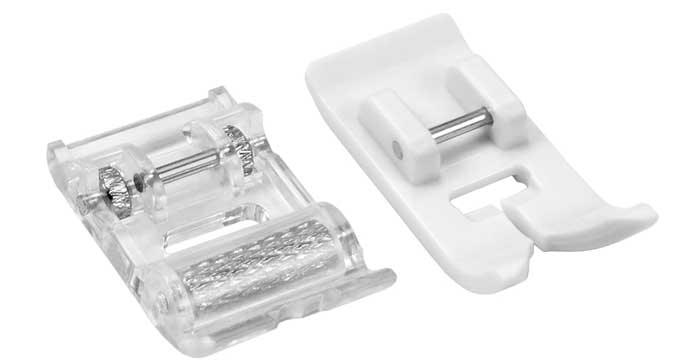
Other options for presser feet include a roller foot or a non-stick foot for seaming. Both can help reduce slipping while stitching. Hand-basting is another option to use prior to machine stitching.

Roller foot and Non-stick presser foot available on Amazon. (affiliate link).

Fear not, velvet and velveteen will inevitably “creep” as you sew, but test-stitch some scrap samples to devise a plan to mitigate that process and produce a pucker-free seam. You may find that you need to adjust your thread tension or the presser foot pressure to create a smooth seam.

On most velvets, no seam allowance finish is needed as it only adds bulk. If you have a ravelly velvet, use pinking shears on the seam allowance edges to minimize the fraying, or a three-thread serged edge.

Press Carefully

Press very carefully, if at all, as iron marks cannot be removed from velvet, but rather leave permanent imprints. If you feel compelled to press pile fabrics, lay them face down on a padded ironing surface covered with a thick terrycloth towel, a face-up piece of velvet, or a needle board, a tool specifically designed for this purpose.

Needle board from Amazon. (affiliate link)

Hover the iron over the seamline, but do not allow it to touch the velvety surface or the seam allowance edges. The latter can easily imprint onto the right side of the project.

Steam can be your friend if you insist on pressing velvet but watch the temperature on synthetic fibers and only hover the iron to create the steam in the area needed.


~Linda Griepentrog is the owner of G Wiz Creative Services and she does writing, editing and designing for companies in the sewing, crafting and quilting industries. In addition, she escorts fabric shopping tours to Hong Kong. She lives at the Oregon Coast with her husband Keith, and three dogs, Yohnuh, Abby, and Lizzie. Contact her at .

December 6, 2024

Letter Perfect Gifts

Many sewing machines have built-in alphabets, and some have multiple style and font options. We’re not necessarily talking about high-end embroidery machines, but mid-line machines without the embroidery function.

Little socks are perfect for gift cards or dog bones

Check your instruction manual for options on your machine and you’ll be able to personalize some holiday gifts with thread.

While we can’t tell you exactly how the alphabet stitching works on your machine model, we can discuss some commonalities and helpful hints.

Make a Plan

Most machines with alphabets offer multiple fonts (lettering styles), and upper and lowercase lettering options.

It’s possible to program in the words you want to write and to combine them with spaces and punctuation symbols, depending on your machine’s options. On many machines, you can also program in a knot or lockstitch and the beginning and ending of the word or phrase you’re stitching out, so there’s no worry about threads pulling out.

Photo courtesy of Bernina

You may also be able to change the size of the font so your words or phrases can be taller or shorter, and perhaps change the spacing between the letters as well. This adjustment may or may not be available on your machine, as some stitch alphabets in only a single size.

Repeat the Thought

Many machines will allow you to program in a word and after the stitching is complete, the machine will stop sewing, displaying a single word or phrase only. Or, the machine can keep on stitching the same word repeatedly until you manually stop it. If you opt for the latter, you can create an allover patterning with multiple rows of words.

Add-ins

Some machines will allow you to combine lettering with decorative stitches or repeats of decorative stitches. For example, you could stitch out Happy Holidays and add snowflakes to the beginning and end of the phrase.

For motifs that aren’t symmetrical, use the mirror-image function to switch them up either side to side or front to back when you add them to your words.

Memories

As you play with the alphabet options in your particular machine, remember that there’s likely a memory where you can save the patterning that you created, so you don’t have to reinvent it. Check your machine manual for information on how to save your stitch patterns in the memory, and also how many memories you have available.

Jump Stitches

Photo courtesy of Bernina

Most machines transition from one stitched letter to the next with what’s called a “jump stitch”. This is a visible link to the next letter in the sequence. This connector can be a single stitch, or multiple stitches, depending on the spacing and orientation of the next letter. While some machines can cut all the jump stitches for you, others don’t have that capability and you’ll need to manually trim the jumps with small, sharp pointed scissors or snips to neaten the look.

These thread snips (Amazon affiliate link) are ideal for cutting jump stitches.

Depending on the contrast between your background fabric and the stitching thread color and your personal tolerance, you may opt to simply leave the jump stitches in place instead of trimming them.

Behind it All

Before you stitch out words and phrases, it’s a good idea to stabilize your fabric just as you might for any decorative stitching. The stabilizer helps keep the fabric flat and eliminate any puckering with the build-up of thread.

If you’re using sturdy felt, a lightweight stabilizer will suffice, but for lighter or loose weave fabrics, consider a fusible stabilizer than can stay in place.

Software Options

If your machine has embroidery options, it’s possible to program your lettering and/or decorative stitches together in your embroidery software program. This allows you to stitch out an entire pre-determined shape in a single hooping. Embroidery software offers more options than what’s likely built into the machine.

Embroidery Designs

Note that some embroidery design companies also make digitized designs that contain words and letters, sometimes in a shaped motif. This lets you simply purchase the ready-made design and avoid the programming or digitizing adventure yourself.

So, explore your lettering options and create something fabulous for the holidays!


~Linda Griepentrog is the owner of G Wiz Creative Services and she does writing, editing and designing for companies in the sewing, crafting and quilting industries. In addition, she escorts fabric shopping tours to Hong Kong. She lives at the Oregon Coast with her husband Keith, and three dogs, Yohnuh, Abby, and Lizzie. Contact her at .

November 22, 2024

Salvaging Sweaters

Whether you’re a thrift store junkie or just cleaning out your closet, sweaters can be a fun and creative source of fabric for new projects.

Image courtesy of Bernina

When thrift shopping for sweaters, look for the larger sizes so you’ll have more “fabric” to work with. If you plan to felt the sweater, small moth holes, pilled areas or small stains are OK, as they won’t be noticeable after the felting process. Look for sweaters with large, ribbed areas, like cowl collars, as the ribbing areas provide a coordinating trim readymade for your project. If the sweater is wool, its character can be changed dramatically through felting. But, for non-wool sweaters, it’s open season for transforming the chunky rib knits into something fun.

To Felt or Not to Felt

Sweaters made from at least 80% wool can be felted by machine washing in hot water and drying with hot temperatures. Use detergent and add some tennis balls for additional agitation, then wash the sweaters on the longest and hottest cycle available. The sweater will look shrunken and distorted after the washing process, but you can do it again if you want more shrinkage. Then, pop the sweaters into a hot dryer until thoroughly dry.

The resulting fabric is dense and stable as the fibers shrink together for stability, and it doesn’t fray. Depending on the amount of felting, the sweatering fabric may no longer have any stretch, so it can be used like any woven fabric or felt.

If your project requires stretch to fit, such as a hat, felting is not recommended; instead use the sweater as-is to take advantage of the knit’s stretch.

Sweater Attributes

Depending on what you’re making, the sweater sleeves can be used as-is, just cut them away at the armhole seaming. Sleeves are ideal for making stuffed toy snakes like the one shown.

Sweater snake


On larger sizes, the sleeves can be cut down to make a child’s hat with the cuffs becoming the lower edge rib finish. They can also be used to make knit leggings or arm wamers, depending on the size. Sweater scraps can be used to make pet sweaters.

Hat and arm warmers made from sweaters


Sturdy ribbing can also be used as the top edge on a tote but be sure to stabilize the wrong side to avoid stretching.

Working with Sweatering

If your project requires stability and you’re using a non-felted sweater, there’s an easy fix for that. Cut the project pieces from a woven iron-on interfacing and fuse them to the wrong side of the fabric before cutting. That will keep the sweatering in shape and prevent stretching. Then use the interfacing edge as your cutting line.

When the project is sewn, the interfacing is caught in the seam allowances to keep the piece stable. A colorful lining can hide the interfacing.

For projects that require stretch, use a serged seam or a regular seam sewn with a narrow zigzag to keep stitches from popping. A universal needle works just fine on most sweater knits.

Never throw away sweater scraps, as they can be used for piecing or appliqués. If the scraps are felted, there’s no worrying about finishing the edges and you can simply make lapped or butted seams for pieced projects since there’s no fraying. They’re also great for trims on other sweaters.

Image courtesy of Bernina.

Merging Sweaters

If creativity is on your mind, consider “merging” parts from multiple sweaters into one. Just be sure to stabilize the seams with stitching before cutting apart the bits and pieces and resewing them as you wish.

One note: Harvesting sweaters can be addictive, so beware!


~Linda Griepentrog is the owner of G Wiz Creative Services and she does writing, editing and designing for companies in the sewing, crafting and quilting industries. In addition, she escorts fabric shopping tours to Hong Kong. She lives at the Oregon Coast with her husband Keith, and three dogs, Yohnuh, Abby, and Lizzie. Contact her at .

November 15, 2024

Couching

Couching is the method of embroidery used to attach a thread or group of threads to fabric when they are too thick, too highly textured or too fragile to be stitched through the fabric. A second thread, normally finer, is used to stitch over the couched thread, thus anchoring it to the fabric. The name comes from the French word coucher, meaning to lay down. In couching, a design is created by hand or machine stitching over threads, cords, or yarns that have been arranged on the surface of a material. With the availability of more embellishments such as sequins, beads, pearls, and ribbons, and additional feet available for your machine, couching takes on a new dimension.

Couching materials

The market is overflowing with wonderful threads designed for the upper and lower loopers on sergers, yet are still heavy enough to use in the sewing machine needle. These metallic threads, braids, ombres and ribbons, pearl rayons and cottons, and other decorative yarns are perfect for couching. Other threads and yarns intended for hand embroidery, needlepoint, knitting, and related crafts can also transfer to couching. They glide through a couching foot, maintaining their position and making couching by machine a simple, quick process for creating an ornament or trim. Start by choosing your couching thread or threads, and then choose a needle thread.

Plan Your Layers

Each type of couching thread and ribbon could have multiple options for couching. To begin, apply the widest, flattest layers first, in colors that need to be subtle in the project. As layers progress, add the more bulky layers like edgestitched ribbon, beads, and sequin yardage.

¼” Satin Ribbon

When a centered stitching is desired on ¼” ribbon, use the open two embroidery foot, making accuracy a breeze. More open decorative stitches, staggered satin stitches, the honeycomb stitch, or double needle feather stitches produce a beautiful texture. Experiment with the stitch length and width for different effects. Be careful with the stitch width when using the double needle. The wider the distance between the needles, the narrower the width must be to prevent the needle from breaking. The double needle button on most new machines allows the machine to stitch up to a certain width. Be sure to push the button.

Ribbon Thread and 1/8” Ribbon

Ribbon thread or floss and 1/8” satin ribbon are suitable for couching in a variety of ways. Use the braiding foot to center the ribbon by the needle. Set the decorative stitch width to allow the needle to go over the edge of the ribbon and not beyond. Consider the daisy, ladder, or feather stitch for these narrow ribbons or any stitch with open spaces for the ribbon to show. Combinations of stitches are another alternative using memory.

Serger Threads

Heavier threads for the serger loopers are easy to couch single or twisted width with other colors. The tendency is to match colors so well that they are not visible once stitched. Add a contrast in color visibility. Use thread colors you would never buy in fabric. Thread is only a small portion of the garment.

The Proper Stitch

Most instructions suggest using a zigzag stitch to hold twisted threads in position. However, it tends to mat the beautiful threads down. My preference is the multi-step zigzag stitch. Alter the stitch width to the width of the twisted threads. Lengthen the stitch to about 1.5 or 2. By using variegated thread that do not match, the needle thread is barely visible and it doesn’t draw attention to itself but does add sparkle to the couching thread.

Occasionally I work with braids or ribbons that are so tightly woven, it’s difficult for the needle to penetrate using the multi-step zigzag stitch. In this case, use a clear monofilament thread in the needle and a zigzag stitch.  Be sure the needle swings over these couching threads rather than piercing them to avoid pulls.

Choose the foot with the hole closest to the size of the couching threads to maintain proper alignment. A too-large hole will cause the couching threads to move around too much, missing stitches. A too-small hole will catch on the couching threads, causing the fabric to gather. Some feet have an adjustable screw to alter the size of the hole.

Using a Multi-hole Cording Foot

Cording feet with tiny holes through which three to nine heavier threads may pass allow many combinations of types and colors of thread. The different holes align the threads perfectly, resulting in the illusion of ribbon.

A subtle variegated design is achieved with slightly different shades of a color or a bolder appearance with sharper, brighter colors. The possibilities are endless because a great variety of colors is available in specialty threads.

Ordinarily, all holes in the foot are threaded at once. Just because there are a number of holes in a foot does not mean all holes must be used at the same time. Creativity happens when rules are broken. Sometimes, only the outer holes are used with a decorative stitch set to the maximum width.

Other times, odd holes are used, allowing space between the lanes of couching threads. Incorporate a variety of uses from the same foot into the same project. Every row stitches can be a different application.

Tips:

  • Always test needle thread and couching thread combinations as they sometimes change colors after they are stitched.
  • Whenever possible, begin and end on the cut edge of the garment.
  • Couching may cause the base fabric to shrink slightly. Cut out the garment 1” larger before beginning to stitch.
  • Use the foot that makes the task easier.
  • When threading is difficult, use a floss threader to thread the foot.
  • Effective couching uses threads of high contrast colors and texture. The spools of thread laying side-by-side may look awful together. Twist several threads together before making a final choice because, sometimes, what looks ugly on the spool becomes wonderful in small amounts.
  • Have several full bobbins handy. Decorative stitches use more thread than straight stitches.
  • To hide a skipped stitch, overlap another row of couching. Note that it’s not necessary to relocate the needle into the stitch pattern.


~from the book, Creating Texture with Textiles by Linda McGehee (reprinted with permission), available from Ghee’s.

ASG members receive a discount with a code available from the Members Only area.


Linda McGehee from Ghee’s brings 50 years of rich and varied sewing expertise, spanning everything from garment creation and handbags to piecing, heirloom sewing, and surface manipulation. She skillfully blends multiple techniques into samplers showcasing her broad skill set. A seasoned demonstrator and lecturer, Linda has shared her knowledge worldwide through her books and patterns. Highly sought after at trade shows, machine conventions, consumer events, guilds, shops, and on television, Linda’s teaching style is engaging, fun, and detailed.

November 8, 2024

Sew Comfortably: Adaptive Sewing Tools

Some things, like fine wine and artisanal cheeses, seem to get better with age. But not everything follows suit—as we age, some sewing tasks can become more difficult. Savvy manufacturers have designed some tools specifically to help those with ongoing needs and challenges.

Seam Guide

If you find stitching lines easing toward wobbly, get help from a magnetic seam guide that simply snaps into place on the machine’s throatplate. Abut your seam edges for perfectly placed stitching lines. Look for one with both curved and straight edges for versatility.

Available at your favorite retailer or on Amazon. (affiliate link).

Threading Needles

Perhaps one of the most challenging tasks as we age is threading needles—whether hand or machine. But, there’s help for that as well with a variety of types of needle threaders. Choose a sturdy wire looped device to fit easily through the eye of your hand needle or check out a table-top model.

Photo courtesy of NeedleThreaders.com.

Many modern sewing machines come with built-in needle threaders, so put pride aside and use it to effortlessly pull that strand through the eye. Or check out a slotted “Quick Threading” needle to avoid the threading process all together—just pull the thread into the slot by feel.

Slotted needle. Photo courtesy of Euronotions.


Make it Big

For help with threading manually or with a threader, invest in a magnifier that easily attaches to the machine front and has a flexible neck for positioning where you need the magnification.

Available at your favorite retailer or on Amazon. (affiliate link).

If you prefer not to use a threader, you can put a white card behind the eye of the needle for better visibility as you’re guiding the strand through the eye.

Lighting

Need a little extra light on your machine’s sewing surface? Check out a line of LED lights you can easily add for more lumens. Or invest in a task light for your sewing table—perhaps a clip-on to allow for moving it around easily to shed light where you need it.

Available at your favorite retailer or on Amazon. (affiliate link).

Measuring

Measuring can be tricky if things look a bit blurry, so look for a tape measure with darker markings or tactile markings that are slightly raised.

Available at your favorite retailer or on Amazon. (affiliate link).


Needle Guard

Consider adding a needle guard onto the presser foot area if low vision is an issue, as it will keep you from stitching up your fingers as you guide the fabric.

Available at your favorite retailer or on Amazon. (affiliate link).

Seam Ripper

It’s inevitable that sometimes things don’t go as planned, so helpful to have a seam ripper nearby. Two available features for extra help include large handled rippers for better grip for anyone who has arthritis or joint issues, and you can get a seam ripper with a light and a magnifier attached for better visibility.

Available at your favorite retailer or on Amazon. (affiliate link).


Available at your favorite retailer or on Amazon. (affiliate link).


Cutting

Comfortable cutting can be an issue, so look for ergonomically designed tools that help take the strain off joints. Cushioned handled scissors and those with spring-loaded blades are ideal to make cutting easier as they don’t have small finger holes. Rotary cutters with special shaping can also help make cutting more comfortable.

Available at your favorite retailer or on Amazon. (affiliate link).

Pins

Choose sewing pins with large, easy-grip heads for better handling.

Available at your favorite retailer or on Amazon. (affiliate link).

Final Thoughs

If memory is an issue, look for an iron that shuts itself off after a certain amount of time, just in case you forget to unplug it.

And, if tools sometimes seem to disappear, consider putting them around your neck—either individually or on a chatelaine, so you always know where to find them.

So, no matter what your sewing challenge is, there’s likely a solution to help resolve it.


~Linda Griepentrog is the owner of G Wiz Creative Services and she does writing, editing and designing for companies in the sewing, crafting and quilting industries. In addition, she escorts fabric shopping tours to Hong Kong. She lives at the Oregon Coast with her husband Keith, and three dogs, Yohnuh, Abby, and Lizzie. Contact her at .

  • « Previous Page
  • 1
  • …
  • 3
  • 4
  • 5
  • 6
  • 7
  • …
  • 82
  • Next Page »

Become a Member

Join the only national organization dedicated to Advancing Sewing as an Art and Life Skill.

Join Now button

Blog Article Categories

  • ASG Conference
  • Chapter Stories
  • Embroidery
  • Fitting
  • Learn to Sew
  • National Sewing Month
  • Products, Books, & Patterns
  • Projects
  • Quilting
  • Sewing
  • Sewing Techniques
  • Sewing Tips
  • Sewing Tours
  • Videos
  • Disclaimer
  • Privacy Policy

American Sewing Guild
National Headquarters
9660 Hillcroft, Suite 230
Houston TX 77096
713-729-3000 | 713-721-9230 Fax
www.ASG.org

ASG wordcloud - education, conference, discounts, videos, special offers, tours and more

Copyright © 1998–2025 · American Sewing Guild · All Rights Reserved