American Sewing Guild (ASG)

Visit our blog Visit the ASG Facebook page Visit ASG on Pinterest Visit ASG's YouTube channel Visit ASG on Instagram
  • Home
  • Join ASG
    • Join Online
    • Chapter Locations
    • Member Benefits
    • Member Brochure
    • Join by Mail
  • Conference & Education
  • Resources
    • Contests & Awards
    • Giving Back
    • Hall of Fame
    • Links
    • Travel and Tours
    • Measurement Chart
  • Shop
    • ASG Store
    • Chapter Products
    • Video Resources
  • Blog
  • About
    • About Us
    • Donate to ASG
    • ASG Sensitivity Statement
    • FAQ’s
    • Start a Chapter
  • Contact
  • Member Login
    • Login First!
    • Members Only
    • Leadership Only
    • Website FAQ’s
    • Logout
  •  

February 21, 2020

Adding Ease to Your Garment

Grainline Studios “Morris” Blazer

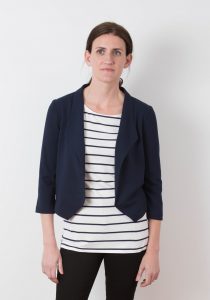
A few years ago, I adapted my knit Grainline Studio Morris blazer pattern so I could make it with some luscious silk matka. I knew I had to adjust the pattern since my fabric of choice had absolutely no stretch in it. I decided to take a tried-and-true (TNT) pattern designed for a woven fabric and “frankenpattern” the knit blazer into a woven blazer. I took some of the pattern pieces from the Archer Buttonup pattern (also designed by Grainline) and came up with new cutting lines for the Morris. I used the Archer upper back, arm scythe, and upper sleeve to redraft the blazer pattern and was just sure I had made all the pattern adjustments to shift from a zero-ease design that works with the stretch of a knit to a design that would work with a non-stretch woven. I finished the blazer and couldn’t wait to put it on only to discover it was a bit too tight across the upper back. I hadn’t added enough EASE! I know I am not the only person who has experienced this.

Can We Put Your Mind at Ease?
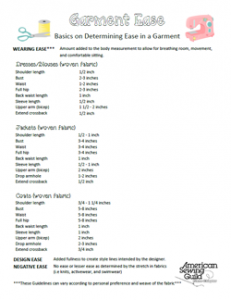
We’d like to put your mind at ease with some information and a free garment ease template created by members of the Plano, TX chapter that shows the minimum amount of ease you’ll need to add in your garment for a comfortable fit. Identifying the correct amount to include is vital to avoid an outcome like the one in my blazer story.  We hope this ease cheat-sheet helps you!

What is ease?

In its simplest form, ease is the additional room in a garment in excess of the actual body measurement. There is much more to ease than this simple definition though — there is wearing ease, design ease and negative ease. Each of these impacts the finished measurement of a garment in different ways.

  • Wearing ease provides ease of movement. It is the difference between the actual body measurement and the finished garment measurement. The template will help you understand this kind of ease. It gives you guidelines that will help you be sure you have at least enough room in your garment for comfortable movement as you wear it.
  • Design ease provides the style. It is also referred to as style ease or fashion ease. It is additional ease added beyond what is needed for movement to create specific styles ranging from close fitting to very loose-fitting garments. It also comes into play when the design of the garment includes things like pleats, gathers, or tucks.
  • Negative ease is associated with fabrics that stretch (such as knits or woven fabrics with lycra added) or are cut on the bias, producing a certain degree of stretch. In this case, the finished garment measures the same as the actual body measurements, or more often, even smaller. The degree of stretch produced in each fabric plays a big role in how much negative ease a garment will need for good fit. Negative ease is used in garments like activewear and swimwear.

How do I calculate the right amount of wearing ease?

When choosing the size you will make in a pattern, look not only at the body measurements, but also the finished garment measurements. Many patterns will include this information for at least the 3 primary measurements – bust, waist and hips. If your pattern does not include this information on the pattern, you can calculate it yourself by simply measuring the pattern pieces in those locations and removing the amount included for seam allowances. Compare the finished garment size to your personal body measurements to be sure you will have a comfortable fit before you start cutting.

More about Negative Ease
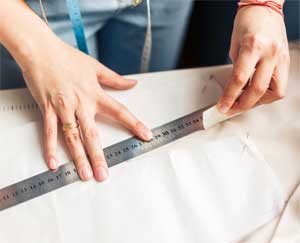
As already stated, negative ease simply means that your finished garment measurements will be the same or smaller than your actual body measurements. When sewing with knits or stretch woven fabrics, the same accommodation for wearing ease is not required since the fabric will stretch as the body moves. Just because your finished garment is smaller than your actual body measurement doesn’t mean you won’t be able to get it over your head. The more negative ease you incorporate just means you will get a more fitted look in the final garment. In most cases, you will probably target no more than 1”-3” negative ease in your design. More than that and you may wander into that “Incredible Hulk” look that has people wondering if you will burst through the seams at any moment.

Of course, the percentage of stretch in your fabric choice and whether it has 2-way or multi-directional stretch play a huge role in determining the right amount of negative ease. The higher the percentage of stretch built into the fabric you have chosen for your project, the higher the percentage of negative ease you are likely to need in your pattern.

There are lots of “rules” out there for how to calculate the right amount of negative ease for a given fabric, but here is a good starting point:

  • Cut a 6”x3” piece of fabric.
  • Stretch the fabric to its comfortable maximum length.
  • Calculate the percentage of stretch
    • Addition stretch length/original length = percentage of stretch
    • Examples:
      • If the 6” piece stretches to 9”, the fabric has 50% stretch.
      • If the 6” piece stretches to 7”, the fabric has 15% stretch
    • For a comfortable fit, try starting with the same amount of negative ease at the percentage of stretch in your fabric, up to but not exceeding that 1”-3” guideline mentioned earlier.
    • Thinner fabrics do best with less negative ease to avoid a see-through effect. Thicker fabrics can handle more negative ease and give a more acceptable form-fitting look.

Remember, these are starting point rules and you will develop your own that best fit your own personal taste and adapt with each fabric you choose to work with.

Don’t forget Design Ease

With all this talk about negative ease, let’s not leave this discussion without going back to the concept of design ease. Even with stretch fabrics, design ease has a role to play. It is perfectly acceptable to decide to add design ease into a garment made with a very stretchy fabric. It will take your garment from form-fitting to soft, graceful drape and still have a beautiful look. You are the designer and you are in charge!

Now it’s you turn!

We hope this gets you started on your journey of understanding ease and fit. This is a topic often discussed in ASG monthly group meetings around the country. Many groups focus on this kind of topic frequently and would love to meet you. Talk to someone in your local chapter to find out what is happening there. ASG loves to walk alongside fellow sewing friends in their sewing journey!


~Debby Bowles and Sheryl Belson, ASG Plano Chapter

Tagged With: Fashion, fitting, sewing

February 23, 2019

The French Jacket Experience

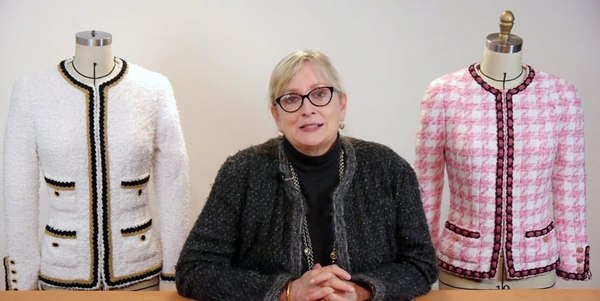
The allure of the classic French jacket – its mystique has captivated for years.

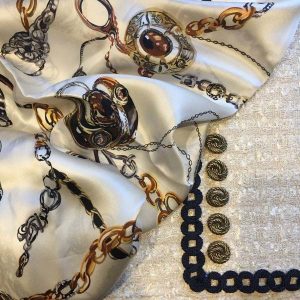
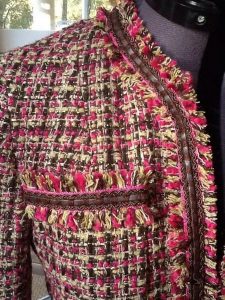
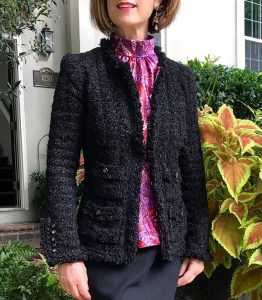
French JacketLong before rediscovering garment sewing several years ago, I admired this garment for its timeless elegance on the outside, never understanding that the magic on the inside is the real story. Quilting lofty bouclé to silk lining with rows of stitches that are all but invisible from the outside produces a sumptuous quality double-layer that hugs the body almost like a sweater and feels like heaven to wear.

While creating this garment is a lengthy process with a great deal of hand sewing, (many have estimated it to take anywhere from 70 to over 100 hours), none of the steps are particularly difficult. Many find the slow and steady pace to be relaxing and contemplative, thoroughly enjoying the rhythmic repetition, the time-honored techniques and the effort of perfecting one stitch after another.

If one were ever to splurge on materials and trims, this is the time!

French JacketGiven the amount of labor invested, only the best will do. Quality bouclé can be sourced at many online retailers – some of the more popular are:

  • Linton Direct UK
  • Elliott Berman
  • Mendel Goldberg
  • B&J
  • Emma One Sock

You’ll still be thousands of dollars ahead in the end. Did you know that the price of an off-the-rack Chanel original averages around $5,000 and the made-to-measure haute couture version begins at upwards of $15,000 to $20,000?

French JacketFor anyone interested in trying these techniques for the first time, Blueprint’s class (formerly Craftsy) “The Iconic Tweed Jacket” by Lorna Knight offers great value and an approachable starting point. I was thrilled with the success achieved on my first jacket and came away with the confidence to move to the next level.

For a full-on couture experience, Susan Khalje’s class, in-person or on-line, is thought by many to be the gold standard. True haute couture methods are employed throughout and her three-piece sleeve with vent allows for prominent placement of featured trim and fancy buttons, both authentic hallmarks of Chanel.

French Jacket

It starts with a muslin

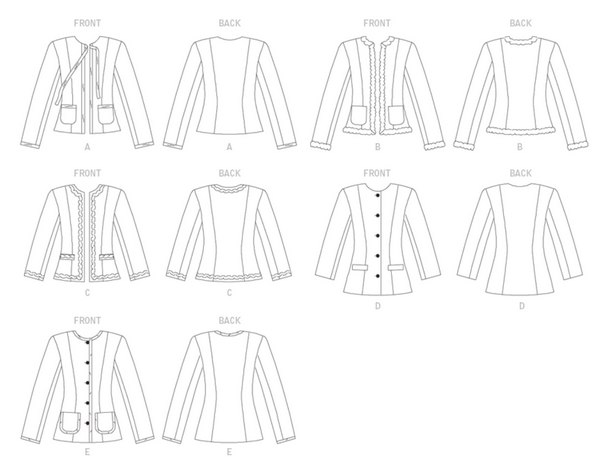
French JacketA perfectly fitted muslin (or toile) is your best friend when beginning this project. Vogue 7975 is the pattern many use since its shoulder princess seams permit the best opportunity for bust adjustments.

French JacketTime for Adjustments

French JacketOnce necessary adjustments have been made and the muslin fit perfected, it is cut apart on the seam lines and used as the jacket’s actual pattern. For optimum accuracy, each piece is thread traced along the seam lines on a single layer of fabric. Measured seam allowances are not used in couture sewing; large rough borders are cut around each piece and the thread traced lines are matched throughout construction.

Machine Quilting the Sections

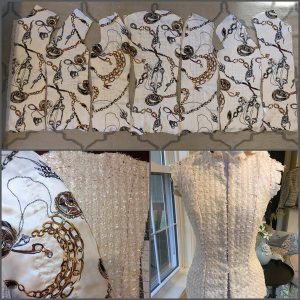
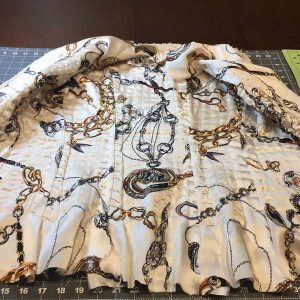
French JacketEach bouclé section is then machine quilted to silk charmeuse lining and the bouclé layer is sewn by machine while keeping the lining edges free to be hand fell-stitched together on the inside. Next, each lining seam is carefully pinned and hand fell stitched closed.

The control one has by hand stitching is truly unmatched. Before falling in love with couture sewing, I would have avoided hand stitching at all costs but I now find myself including some on nearly everything I sew. Collars, cuffs, facings and basting of any sort; they all benefit greatly from the accuracy of hand stitching.

On to the Sleeves

Once the “vest” has been completed, the sleeves are similarly assembled then attached to the jacket entirely by hand. Front hook and eye closures are added and the jacket’s trim is hand applied before fell-stitching the outer edges of the lining closed.

French Jacket French Jacket French Jacket French Jacket French Jacket

Pockets

The desired number of pockets and their placement is determined and they are constructed and trimmed in the same manner as the jacket. Each is backed with hand stitched silk lining and matching trim is applied.

French Jacket French Jacket French Jacket

Buttons

Finally, decorative buttons are added to the sleeve vents and pockets and the iconic chain is stitched along the inner hemline. The chain is said to counterbalance the weight of heavy buttons and prevent the jacket from slipping forward on the shoulders but, primarily, it adds that special touch of luxury on the inside!

frjack-21-sm frjack-22-sm frjack-23-sm


Not just for Suits

French JacketWhile I’ve made a matching skirt for all but one of my six French jackets, they are most often worn with jeans, proving there is a place in every wardrobe for this classic you will be proud to say you’ve created yourself. No one will believe you’ve made it!


~ Post by Julie Starr – Julie is the co-author of the Tunic Bible with Sarah Gunn. Both will be teaching at the 2019 ASG Conference in Boston.

Tagged With: Chanel, Fashion, sewing

June 14, 2017

Radial Grading

Radial Grading, also known as Radial Projection, was a method used by pattern companies many years ago and I’ve often wondered why it’s not used any longer — it certainly would save a lot of paper and printing butt does require a little more effort on the part of the user. During the first part of the last century and before, magazines were printed with fashion illustrations and included were tiny little pattern templates of the pattern pieces needed for the garment all on a page or two. The fashion illustrated on the page was sewn from the pattern drafted from those tiny templates — clever, isn’t it! Honestly, once learned, the method can be used for any pattern and for any size as long as the pattern template is accurately drafted and printed.

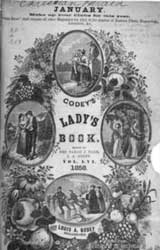
This method is not new. The “Lady’s Godey” magazines used illustrated fashion “plates” and often included the patterns to make the garments. The University of Vermont has an extensive collection of Lady’s Godey books; they have scanned excerpts of patterns and illustrations. Some full editions may also be found online in the Hathi Trust Collection.

Costume makers use this method. It just requires using the template (small scale pattern) of a pattern piece and a ratio method to draft a pattern to full scale, as seen in this video.

Costuming Books

There are many costuming books available with pattern templates (check Dover Publications).

  • Fashions & Costumes from Godey’s Lady’s Book is an example
  • Scale Rulers and Charts: Not only can patterns be graded up, but they can be graded down using this method, as demonstrated by Don McCunn

Using this method is all about “ratios,” but it’s not that hard or complicated. Just use the ratio of the pattern to the person as illustrated in the videos and go to it!

How would this come in handy? Well, if you create a sloper for yourself, you can radial grade it down to a quarter or half scale pattern. Because it is a “personal” sloper, you already know it fits. It is sometimes easier to design in quarter or half scale either by flat pattern or draping on a half or quarter scale form. Once a newly design pattern in quarter or half scale is finalized, then all you’d have to do is radial grade the final pattern up and you’d have an actual full-size pattern in your size — how wonderful is that! Now, it won’t be “perfect.”  There will still be some alterations depending upon the accuracy of your drafting, radial grading, and also the fabric used for the garment — there is always tweaking and editing as we know. You’ll be able to determine alterations while making a mock-up of the garment.

There are companies that have taken this method of pattern making and made companies. For instance: The Sunburst Pattern System,The Dot Pattern System, and Lutterloh — hot here in the U.S. in the 1980’s — they called it the”Golden Rule” system of pattern making.

Can you begin to see how beneficial this type of pattern making would be? Mr. McCunn has a downloadable and printable PDF of  “scale” rulers used in his video at the bottom of the page—print them and try this method.

I think this might be a fun Neighborhood Group project for an ASG chapter, don’t you?

Sew ‘til next time…enjoy the journey of sewing!

~Ramona

Tagged With: costume making, Dot Pattern System, pattern drafting, pattern grading, radial grading, scale rulers, sewing, Sunburst Pattern System

Become a Member

Join the only national organization dedicated to Advancing Sewing as an Art and Life Skill.

Join Now button

Blog Article Categories

  • ASG Conference
  • Chapter Stories
  • Embroidery
  • Fitting
  • Learn to Sew
  • National Sewing Month
  • Products, Books, & Patterns
  • Projects
  • Quilting
  • Sewing
  • Sewing Techniques
  • Sewing Tips
  • Sewing Tours
  • Videos
  • Disclaimer
  • Privacy Policy

American Sewing Guild
National Headquarters
9660 Hillcroft, Suite 230
Houston TX 77096
713-729-3000 | 713-721-9230 Fax
www.ASG.org

ASG wordcloud - education, conference, discounts, videos, special offers, tours and more

Copyright © 1998–2025 · American Sewing Guild · All Rights Reserved