American Sewing Guild (ASG)

Visit our blog Visit the ASG Facebook page Visit ASG on Pinterest Visit ASG's YouTube channel Visit ASG on Instagram
  • Home
  • Join ASG
    • Join Online
    • Chapter Locations
    • Member Benefits
    • Member Brochure
    • Join by Mail
  • Education & Classes
  • Resources
    • Contests & Awards
    • Giving Back
    • Hall of Fame
    • Links
    • Travel and Tours
    • Measurement Chart
  • Shop
    • ASG Store
    • Chapter Products
    • Video Resources
  • Blog
  • About
    • About Us
    • Donate to ASG
    • ASG Sensitivity Statement
    • FAQ’s
    • Start a Chapter
  • Contact
  • Member Login
    • Login First!
    • Members Only
    • Leadership Only
    • Website FAQ’s
    • Logout
  •  

April 26, 2024

Sewing Tips from Japanese Tailoring

Japanese Tailoring: What is it?

Japanese tailoring represents a distinctive approach to construction methods within Japan’s ready-to-wear clothing sector. This method seamlessly blends the intricate craftsmanship of traditional tailoring with the efficiency and accessibility of modern techniques, resulting in impeccably crafted garments.

Seamstress sewing

These are a few of the characteristics found in Japanese tailoring techniques:

  • Fusible interfacing is used as a substitute for hair canvas.
  • Instead of hand-stitched tape along the roll line, fusible stabilizing tape is used.
  • Garment shaping is achieved through pressing rather than pad stitching.
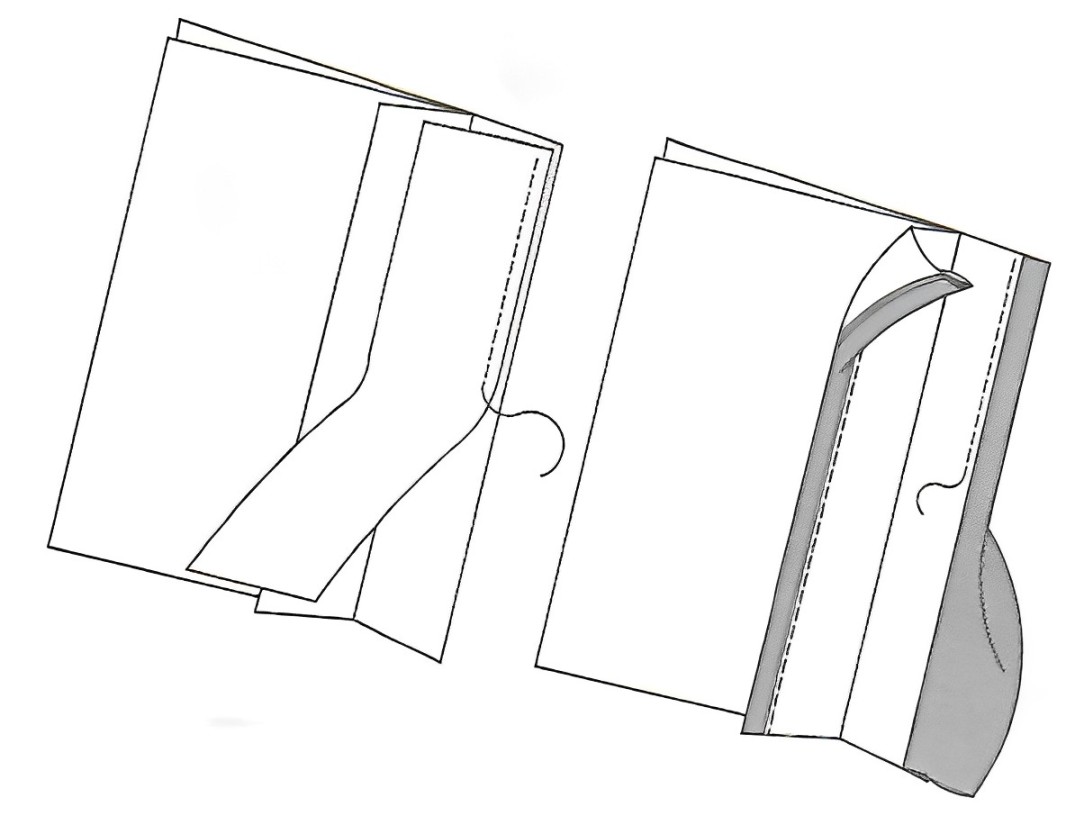
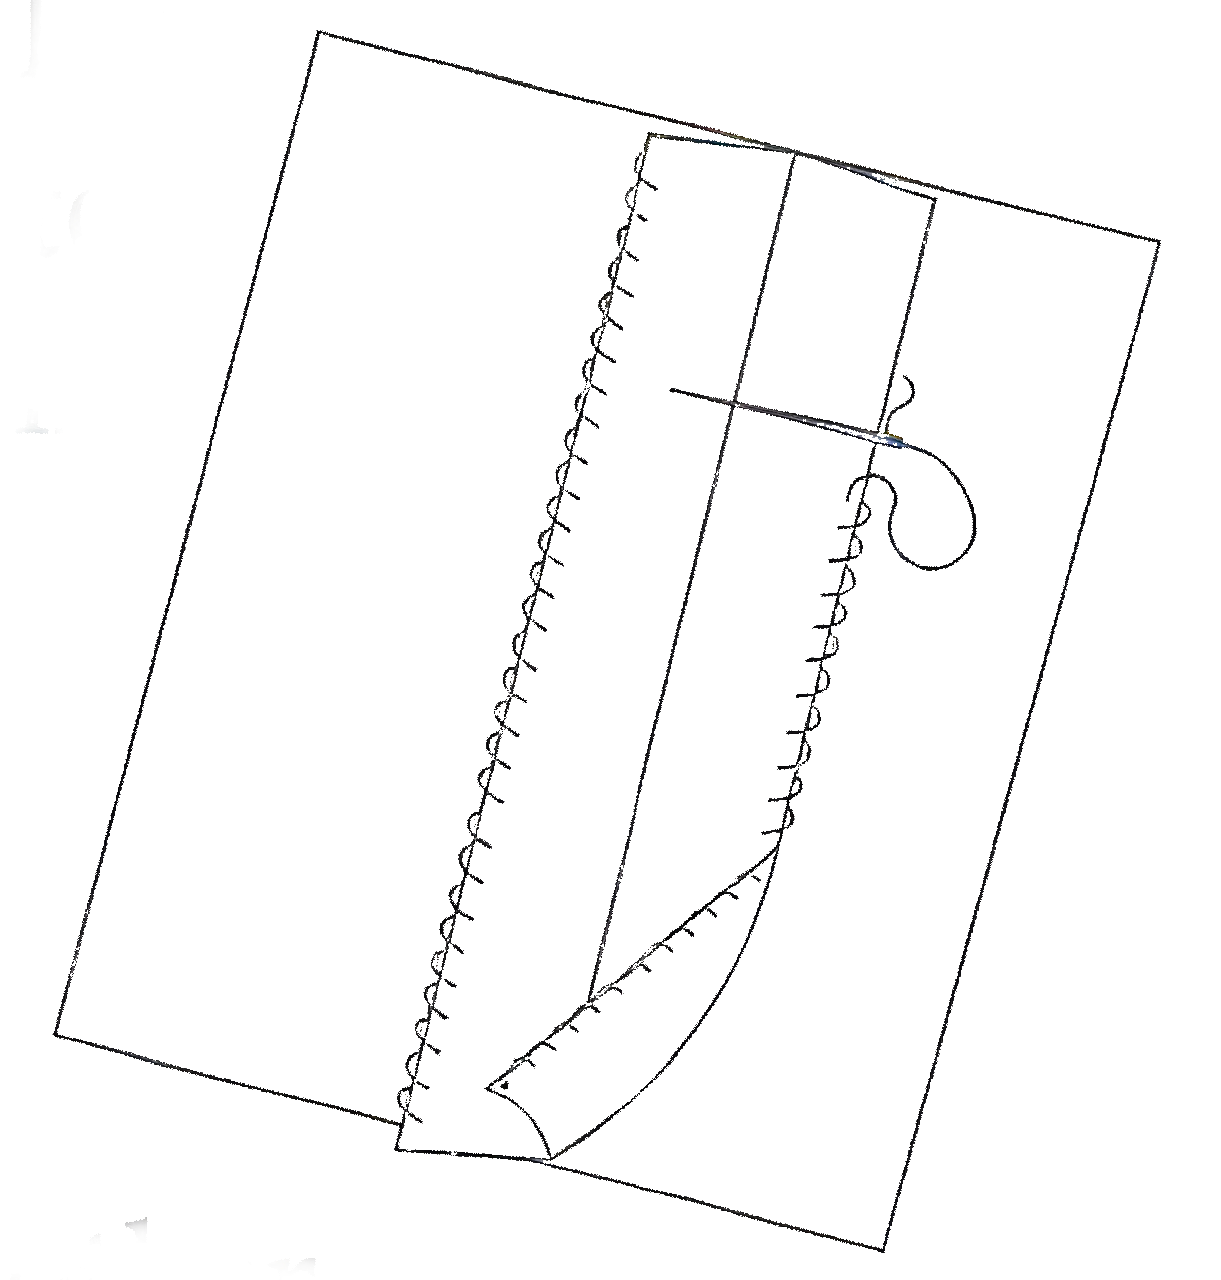
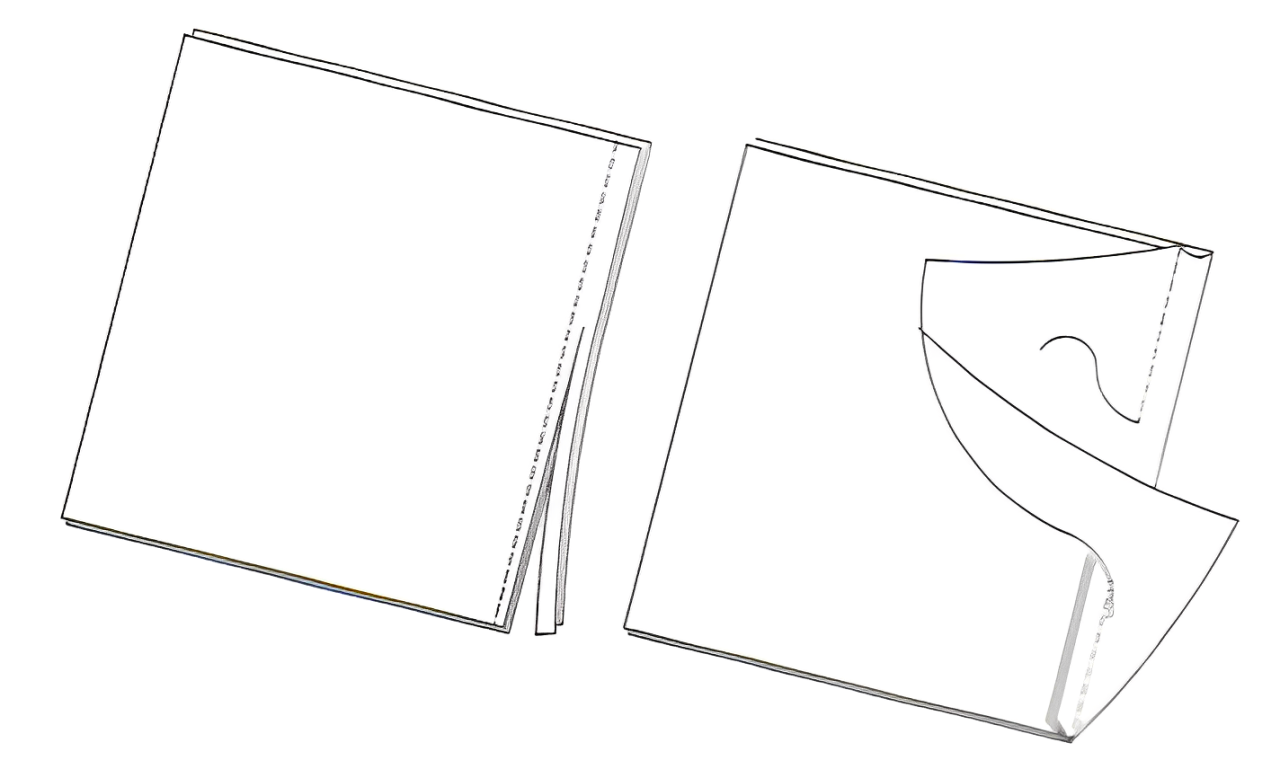
  • The seam allowances at the edges of the collar, neck, and facings are adjusted on the pattern to save time, improve accuracy, and ensure concealed seams on the front-facing side of the garment.
  • Bulk is eliminated in the notch area where the collar joins the garment.
  • Collar and lapel corners are symmetrically turned under.
  • Seams reverse direction at breakpoints, resulting in flat, sharp edges on collars and facings.
  • Welt pocket ends are mitered to remove bulk and conceal seams.
  • Sleeve vents provide an opportunity for the sleeve to be lengthened or shortened if needed.
  • Additional ease is incorporated into the lining.
  • Hand stitching is minimized.

Sewing Tips from Judy

  • Understand the pattern before you sew, so that easing and stretching can be done appropriately.
  • Check seam allowances — 5/8″ isn’t always the best standard. A nar­rower seam is better if grading is needed; a wider seam gives room for fitting.
  • When tracing patterns, dry iron the pattern paper. Paper can shrink with a steam iron!
  • Extend the grain lines the full length of the pattern.
  • Make a fitting shell, especially if making the pattern for the first time. It tests the fit and the style.
  • Check the seams and make sure they match. Always check on the stitching lines, not the cutting lines.
  • Add notches on long seams instead of using lots of pins.
  • Check princess lines-make notch­es on the front working from the bottom up and the top down above and below where the dart fullness is, then compare the notch dis­tances and make sure they match.
  • On armscyes, it is helpful to know how much sleeve ease exists before it is set in. More than 1 1/2″ is too much. If there is too much ease, fold out the excess in the sleeve cap.
  • On a two-piece sleeve, be sure there is ease to accommodate the elbow.

Unshin

Interested in learning more about Japanese-style sewing? Watch this video to learn about unshin, a Japanese hand-sewing technique:


~ Judy Barlup, formerly of Unique Techniques, is a master of Japanese Tailoring and was a frequent teacher at ASG events. Although Judy is no longer teaching, her tips and techniques are timeless.

April 12, 2024

Add a Little Bling: Iron-on Designs

Whether you’re planning to bling out a ready-made T-shirt or denim jacket, or you’re planning to embellish a garment you’re constructing, iron-ons can help you become an artist.

Iron-on for denim

Iron-on designs are available with small, single motifs, or more elaborate large designs, depending on your preference. Pre-made designs are temporarily affixed to a paper or plastic sheet, which acts like a pressing cloth during adhesion and is then removed once the design is fixed in place.

Look for a variety of types of embellishments, from crystals and pearls to rhinestones, nail heads, studs and sequins.

In addition, individual adhesive-backed design components can be purchased if you want to create your own motif. Items like rhinestones, crystals, etc. are usually sold in bags by size expressed in millimeters.

A hard and protected work surface, like a glass or ceramic cutting board is ideal for applying iron-ons, whether a full design or individual bits.

One-by-one

If you’re applying individual components, a hot tool applicator is ideal as the wand shaped tool holds the item in place while it melts the adhesive on the back of the jewel. Most hot tools come with multiple tips so you can choose which one fits your embellishments the best.

Hotfix applicator
Hotfix Rhinestone Applicator 7-in-1 Tool Kit from Amazon.

Unless you’re randomly scattering jewels, it’s a good idea to draw your design on the fabric (with a removal marker) before you start placing the components.

When using a hot tool, be sure your fabric can withstand the heat needed for the application process without melting or distorting. Test-affix an extra jewel or two onto a scrap, or a hidden area of the garment (like a hem) to get a feel for the process.

Depending on the brand of hot tool you’re using, most tips allow you to actually pick up the individual embellishment with the tool and set it onto the fabric base, then release. Some tools (and jewels) require holding the tool in place for a designated number of seconds to be sure the backing adhesive melts into place. Follow the instructions in detail, as holding a hot tool in place too long can result in the backing adhesive seeping out from under the gemstone or melting the fabric below.

Apply all the embellishments needed to complete the planned design. If you have different sizes of jewels, switch out the hot tool tips to accommodate the sizes.

Design Wise

Using pre-made iron-on designs is easier for most people, rather than applying jewels individually, especially if you’re covering a large area.

Bee Kind Iron-on
Bee Kind Sparkly Crystals Iron-on from Amazon>.

Instructions for applying motifs will vary by brand, so be sure to read the directions for your particular motifs. But, the general process is to position the motif on the right side of your garment/fabric, with the protective sheet uppermost. Press in place with a dry iron, then turn the design over (wrong side up) and press again to be sure the adhesive has melted into the fabric base. The motif instructions will tell you how long to press. Remove the protective sheet, following the product instructions—some brands remove the sheet while the design is still warm, others recommend waiting until the design is cool.

If there are any individual components that didn’t adhere for some reason, re-fuse them separately following the same process. Occasionally, when you’re trying to apply a motif to a large area with seams within (think denim jacket with flat-felled seams), the added thickness of the seams can wreak havoc with the adhesion. To resolve this, just carefully re-fuse the components in the thicker area, or add some fabric glue to help hold the gems in place.

When and where?

Iron ons

You can apply iron-ons to either a finished garment or to one in progress. If you’re working with the latter, you can draw your pattern shape onto the fabric and working within the lines prior to cutting, or cut out the garment first, then apply the embellishment. Just remember to keep the gems inside the seam lines as you don’t want to hit them during construction.


~Linda Griepentrog is the owner of G Wiz Creative Services and she does writing, editing and designing for companies in the sewing, crafting and quilting industries. In addition, she escorts fabric shopping tours to Hong Kong. She lives at the Oregon Coast with her husband Keith, and three dogs, Yohnuh, Abby, and Lizzie. Contact her at .

Did you enjoy this article?
Are you an ASG member?
This field is for validation purposes and should be left unchanged.

April 5, 2024

Seam Finishes

We often don’t think about seam finishes when constructing a new garment. A standard straight-stitched seam may be your go-to technique, you may zig-zag the seam and trim close to the stitching, or you might use your serger to provide a clean and easy finish. While any of these methods are efficient and give a clean, ready-to-wear look, sometimes you are looking for a more custom-made finish. There are some wonderful alternatives that are not only effective but can actually become a design element of your garment.

Hong Kong Seam Finish

A Hong Kong seam finish is a method used to neatly encase the raw edges of a seam, providing both a decorative and durable finish. It’s commonly used in garments where the inside of the garment is visible, such as unlined jackets, dresses, or blouses.

There are no images in this gallery.

  1. Begin by sewing your garment pieces together with a regular seam allowance. Use the seam allowance specified in your pattern or the one you’ve chosen if you’re drafting your own design.
  2. Cut (and seam together, if needed) 1”-1 ½” wide bias strips of lightweight, matching fabric or for a colorful effect, use a contrasting fabric. The strips should be long enough for the total length needed for all seam edges to be finished, plus a little extra for overlap. If the fabric needs a little more body, gently press it with some spray starch or starch alternative but be careful not to stretch the bias as it will narrow.
  3. Press the seam allowance open with an iron. This will make it easier to attach the binding evenly.
  4. With right sides together, place the strip along the single garment seam allowance or edge, matching the raw edges. Sew with a scant ¼” seam.  (image 2 of 3 above)
  5. Press the seam allowances toward the bias strip.
  6. Wrap the seam allowance edge snugly with the strip and pin in place.
  7. To finish, stitch in the ditch of the seam, catching the fold-over strip portion on the underside in the stitching.
  8. If needed, trim the fold-over portion of the strip evenly next to the stitching.
  9. Repeat for all seam allowances that need finishing.
  10. Give your finished seams a final press with the iron to set the stitches and ensure a neat appearance.

Seam finishesThat’s it! Your seams are now neatly finished with the Hong Kong seam method, providing both durability and a polished look to the inside of your garment.

Hand Overcasting

If you’ve ever constructed a garment from sequined or metallic fabric, you will be familiar with the countless broken needles and will have experienced the massive raveling. By the time you’re ready for seam finishes, you’re looking for an alternative to running this fabric through a sewing machine again. Hand overcasting the seam allowance is a great choice. While time consuming, the saving grace is that these garments tend to have simple lines with few seams to finish. Waxed thread makes this job easier. Simply whipstitch all the seam allowances that will be exposed. If the fabric is not too bulky, you may be able to turn under a small bit before you overcast-all the better. This is more than likely the seam finish your grandmother would have chosen and the one that is often used in today’s haute couture houses.

Enclosed Seams

An enclosed seam refers to a stitching technique where the raw edges of the fabric are completely encased within the seam allowance, leaving a neat and clean finish on both the inside and outside of the garment. This method adds durability and a professional look to the project, preventing fraying and ensuring a polished appearance. Enclosed seams are commonly used in garments that require a high level of precision and neatness, such as tailored clothing or garments made from delicate fabrics like chiffon or silk.

To create enclosed seams, the garment is constructed using a method that eliminates exposed seam allowances. One option is the flat-felled seam. This seam is often found in jeans that have topstitching on the outside. Some try and mimic this by serging the seam allowances together, pressing them to one side, and then topstitching. This is not quite the same as a traditional flat-felled seam, although it still looks great from the right side of the fabric.

  1. In order for the seam allowance to be enclosed, seam the fabric with wrong sides together.
  2. Trim one seam allowance to 1/8″.
  3. Wrap the remaining seam allowance around the trimmed allowance and tuck it under.
  4. Now topstitch along the fold through the seam allowance and the main fabric.

Flat-felled seams are very strong and work well where there is a lot of wear and tear, like with jeans.

French Seam

Sewing a French seam involves a two-step process to enclose the raw edges of fabric neatly within the seam allowance. This finish is a good choice for fine and extra fine fabrics and works especially well on sheers where the seam finish would be visible from the right side, or on lingerie or very ravel-ly fabrics as no raw edge is left exposed.

  1. With wrong sides together, stitch the two layers with a 1/4″ seam.
  2. Press flat to set the stitches.
  3. Now turn the fabric right sides together and press the seam flat.
  4. Seam at 1/4″ for a total of a 1/2″ seam.
  5. With the right sides of the fabric folded together and the raw edges encased within the seam, stitch again with a 1/4″ seam. This will give you a total of a 1/2″ seam allowance.
  6. Alternatively, if your original seam allowance is 5/8″, stitch the first seam at 1/4″ and the second seam at 3/8″.

Your finished project will have a clean, durable seam with no raw edges visible on either side, making it ideal for lightweight and sheer fabrics as well as garments that require a polished finish.


Did you enjoy this article?
Are you an ASG member?
This field is for validation purposes and should be left unchanged.

March 29, 2024

Fabric Napkins: A Square Deal

Fabric napkins are a fun way to add some style, color, or interest to your dining table, whether casual dining for the family or more formal affairs for guests. There’s a perfect fabric for all occasions, and they’re sew easy to make, even a beginner can create them. Once you start, you can’t stop!

Hand-made napkins

Napkins vary in size, depending on their use—from 12” squares for cocktail events up to 22” square for a generous dinner size. If you cut them 18” square, the economy plays in your favor as you can get four napkins from a yard of fabric.

If your fabric is loosely woven, add a bit of stability before stitching by using spray starch or starch alternative. On fancy fabrics, like lamé, use stabilizer when edge stitching.

On the Edge

Serger
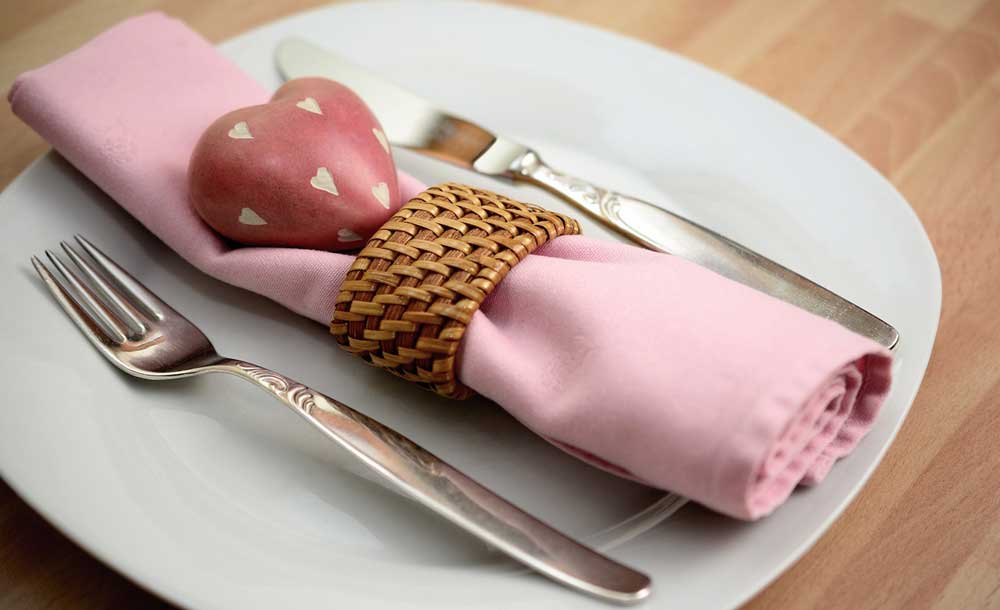
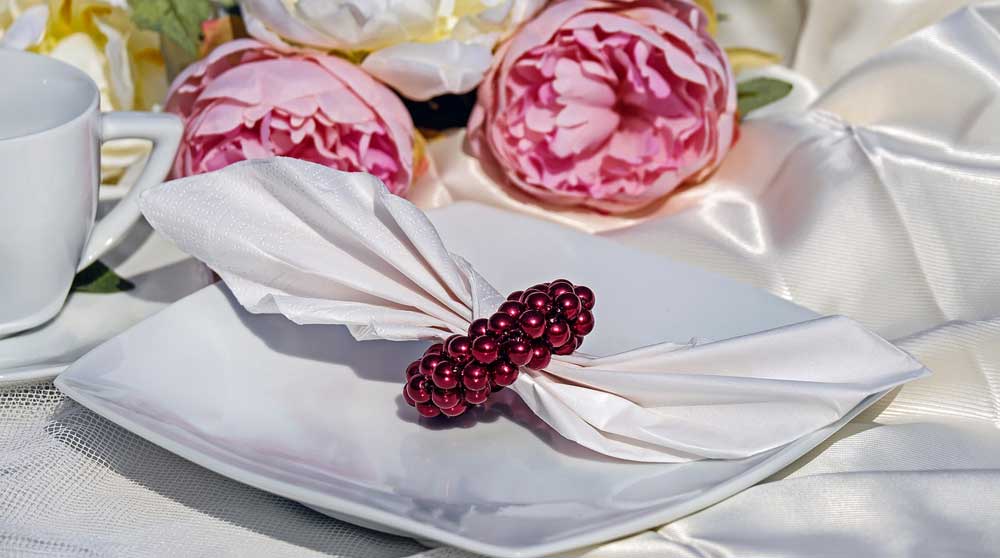
The key decision for napkin-makers is choosing an edge finish. There are many options, so let us count the ways.

If you have a serger, you can finish the cut edges, press them to the wrong side and topstitch in place. For an even quicker finish, press up the edge and tuck in a narrow strip of fusible web and press the hem in place. This fusible method is especially appealing for children who want to help, but may not have sewing machine skills yet. Basic pressing skills are all that’s needed to finish an overlocked edge.

Or, you can set your serger on the roll-hem setting and simply sew along all four edges, leaving a densely stitched single-layer edge.

Either way, it’s quick to serge continuously—when you’re done with one side, feed in the next napkin and keep on going. The, cut them apart later. This is a timesaver if you’re making quantities of napkins for a party or a craft sale.

If you don’t have a serger, press under a double ¼” hem on all napkin edges and topstitch in place. For a firmer edge on lightweight fabric, fuse the hems in place using fusible web tape prior to topstitching.

Corner Capers

If you serged the napkins edges, finish the corners by applying fray protector on both the napkin front and back corners. Once the liquid has dried thoroughly, clip the threads close to the corner.

For a folded hem, stitch continuously around the napkin perimeter, backstitching at the beginning and ending stitches. Clip the threads closely.

To reduce bulk at the folded corners of heavier napkin fabrics, trim the fabric at an angle before folding up the hems.

Fringe Benefits

Napkin with fringe edges

If you’re using napkin fabric with a prominent weave, like linen, mudcloth, etc., a fringed edge may be all you need for a finish. Be sure to cut the napkin squares on the fabric grain, then sew around the square the width of the fringe you want to create. Pull the fabric threads to just outside the stitching line. Trim the fringe evenly if needed.

Two Sides to the Story

Single-layer napkins are fun, but if looking at the wrong side of a fabric print is offensive to you, particularly if you’re doing fancy folds, make the napkin double instead. You can use the same fabric or a contrast fabric for the opposite side.

To make a double-layer napkin, cut two squares for each napkin—one from the outer fabric and one from the contrast. Place them right sides together and sew around the edges using a ¼” seam, leaving a small opening for turning. Trim the corners to reduce bulk, and turn the napkin right sides out. Press under the seam allowance at the opening edge and hand-stitch or fuse closed. Press the seam at the edge so neither fabric shows on the opposite side, then topstitch close to the edge. This stitching is also an option for closing the opening edges.

Napkin with fancy folds

Thread Tales

You can use many kinds of thread for the visible stitching on napkins with a serger. Rayon creates a shiny edge, while a woolly option creates a dense matte edge. Metallic can be used for a bit of bling.

For more thread prominence, topstitch hemmed edges using a decorative stitch instead of a straight stitch. One caution: Be sure to reduce the fabric bulk at the corners to avoid stitch distortion.

Whimsical Additions

Napkin with lace edges

No one says that napkin edges have to be plain—add some rickrack, tiny ball fringe, lace or other trims extending from the fabric edges. If your napkins are double layer, attach the trim to one side first so the header is between the layers when the napkin is finished. On single-layer versions, simply lap the finished edge over the trim header.


~Linda Griepentrog is the owner of G Wiz Creative Services and she does writing, editing and designing for companies in the sewing, crafting and quilting industries. In addition, she escorts fabric shopping tours to Hong Kong. She lives at the Oregon Coast with her husband Keith, and three dogs, Yohnuh, Abby, and Lizzie. Contact her at .

Did you enjoy this article?
Are you an ASG member?
This field is for validation purposes and should be left unchanged.

March 22, 2024

Altering Your View of Sewing: Upcycling

With ASG’s inaugural Sustainable Sewing group meeting less than a week away, this timely article will help encourage you to start thinking about sustainable sewing opportunities for your wardrobe.

Thrift store clothing rack

We often think of repurposing thrifted materials — whether it be fabric scraps, curtains, or clothing — into non-clothing items like handbags, dog beds, or home dec items. And while many of us think of thrift stores and donation centers as places to drop off that bread machine we wanted so desperately 15 years ago and no longer use, or those size 8 dresses that don’t fit any longer, a thrift or second-hand store is the perfect place to look for great clothing options that don’t need to start from scratch. When thinking about sustainable sewing, we need to change our mindset from toss to reuse, and from buy to recycle. Thrift shopping can also start in your own closet. Either way, get into your creative zone as you look at different pieces.

  • A beautiful skirt might be reclaimed from an otherwise uninteresting dress.
  • A hopelessly outdated jacket with fabulous animal-shaped buttons may be worth the $3.00 price tag. Even if you toss the jacket, those buttons will look great on your next summer dress. If you find something that fits, consider a brightly colored new lining, or even a complete restyle.
  • Turn an oversize scarf into a kimono-styled jacket or beach cover up with the addition of side seams.
  • Check out Pinterest for inspiration

Look at clothes that aren’t in your size range. Over-sized blouses can be remade into a lovely overlay for a sleeveless dress.

For those who want to learn to do alterations, items purchased for a few dollars are perfect to practice on. If you make a mistake, the cost is minimal. You can use your finished piece as a reference when you work on something more valuable.

Recognizing a Treasure

So how do you decide what will work and what won’t? First, consider the integrity of the fabric. Clothes that have started to deteriorate already simply won’t be worth your while to work with. Be sure that the clothing is clean (you are generally safe purchasing at places like consignment shops, and larger donation centers as they are careful in what they accept). When it comes to cleanliness, purchasing at yard sales can be a bit chancier, but generally garments are less expensive. However, finding a Harve Bernard wool coat for $10 is not a bargain if the wool is dry and the threads have started to pull apart. So, pass that up and go on to the next rack.

upcycling

Second, choose clothing using the same criteria you would use in buying or sewing new clothing for yourself. Is it a color you like? Is it a type of fabric that you feel comfortable in? Will it have to be dry-cleaned?

Third, carefully analyze what alterations or changes need to be made to make this work for you. Is it really worth the time to fix it? Do you have the skills to make the needed alterations? Will it require more fabric to make it work and can you find that fabric? When you’ve answered these questions to your satisfaction, then either put it back for someone else to enjoy or take it home and make it your own.

By embracing the art of thrifted fashion and sewing, you not only cultivate a more sustainable approach to style but also express your individuality through unique creations. Each stitch tells a story of transformation, turning forgotten garments into cherished wardrobe staples that reflect your personal taste and creativity. So, the next time you stroll through the aisles of a thrift store or the deep corners of your closet, envision the endless possibilities awaiting your skilled hands and creative vision.

ASG Members can join in the new Sustainable Sewing online group to share, learn, and brainstorm ideas. Not a member? Join today!

Tip: If you don’t have a use for your unwanted clothing or textiles, there are many options for recycling:

  • Resale Shops and Thrift Stores
  • Clothing Swaps
  • Online resale shops
  • For Days: The Take Back Bag
  • Trashie: The Take Back Bag
  • St. Pauly Textile, Inc.
  • Blue Jeans Go Green Denim Recycling
  • Bra Recyclers
  • « Previous Page
  • 1
  • …
  • 11
  • 12
  • 13
  • 14
  • 15
  • …
  • 64
  • Next Page »

Become a Member

Join the only national organization dedicated to Advancing Sewing as an Art and Life Skill.

Join Now button

Blog Article Categories

  • ASG Conference
  • Chapter Stories
  • Embroidery
  • Fitting
  • Learn to Sew
  • National Sewing Month
  • Products, Books, & Patterns
  • Projects
  • Quilting
  • Sewing
  • Sewing Techniques
  • Sewing Tips
  • Sewing Tours
  • Videos
  • Disclaimer
  • Privacy Policy

American Sewing Guild
National Headquarters
9660 Hillcroft, Suite 230
Houston TX 77096
713-729-3000 | 713-721-9230 Fax
www.ASG.org

ASG wordcloud - education, conference, discounts, videos, special offers, tours and more

Copyright © 1998–2025 · American Sewing Guild · All Rights Reserved