American Sewing Guild (ASG)

Visit our blog Visit the ASG Facebook page Visit ASG on Pinterest Visit ASG's YouTube channel Visit ASG on Instagram
  • Home
  • Join ASG
    • Join Online
    • Chapter Locations
    • Member Benefits
    • Member Brochure
    • Join by Mail
  • Conference & Education
  • Resources
    • Contests & Awards
    • Giving Back
    • Hall of Fame
    • Links
    • Travel and Tours
    • Measurement Chart
  • Shop
    • ASG Store
    • Chapter Products
    • Video Resources
  • Blog
  • About
    • About Us
    • Donate to ASG
    • ASG Sensitivity Statement
    • FAQ’s
    • Start a Chapter
  • Contact
  • Member Login
    • Login First!
    • Members Only
    • Leadership Only
    • Website FAQ’s
    • Logout
  •  

August 11, 2023

Basting Methods for Plaids

Plaid vestWhen selecting a basting method for plaids, consider the complexity of the plaid, the texture of the fabric, and the garment design, as well as your sewing skills. Here are a few basting methods that can help you achieve precise plaid matching:

First Step

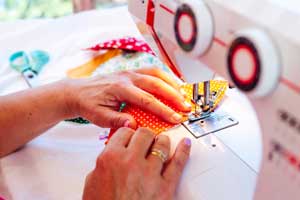
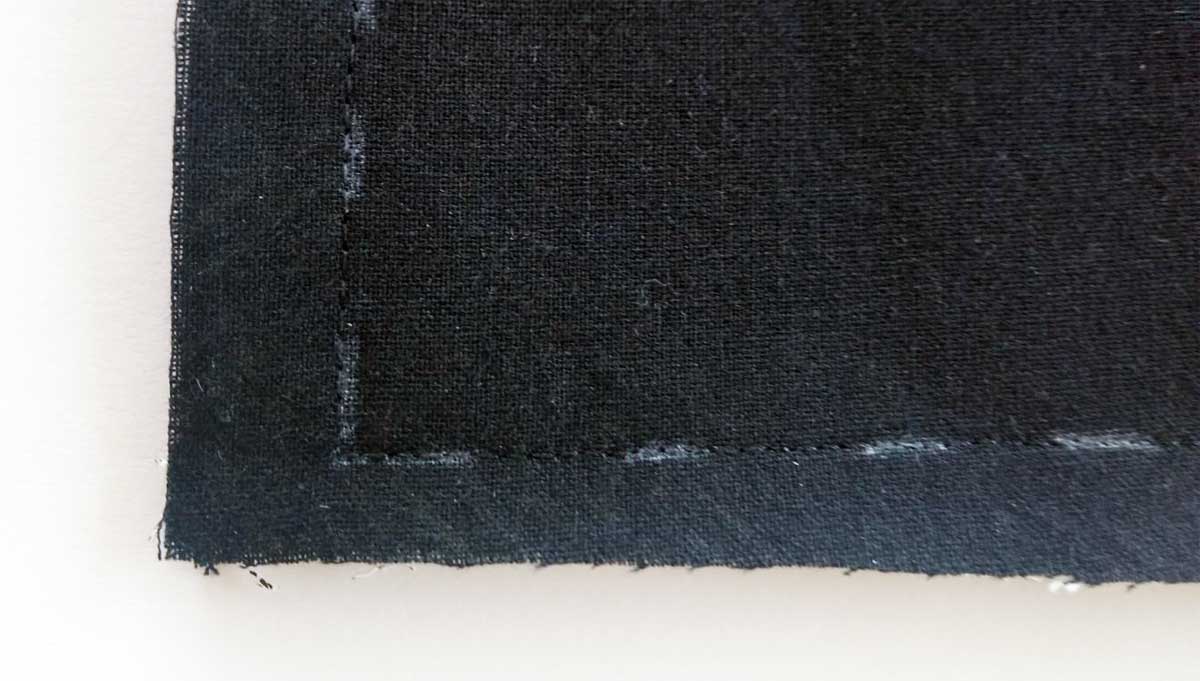
For best results, baste with the right sides up. It’s also helpful to stay stitch the edges of your fabric pieces. This helps maintain the shape of your pieces while you work on matching the plaids.

Glue Sticks and Tapes

Glue sticks and water-soluble double-stick tape are easy basting techniques that could work well on some fabrics where, for example, needle punctures would not be appropriate. Position the glue or tape just inside the seam line on the right side of the unpressed section. Align the plaid bars and press the layers together. Let the glue dry before stitching.

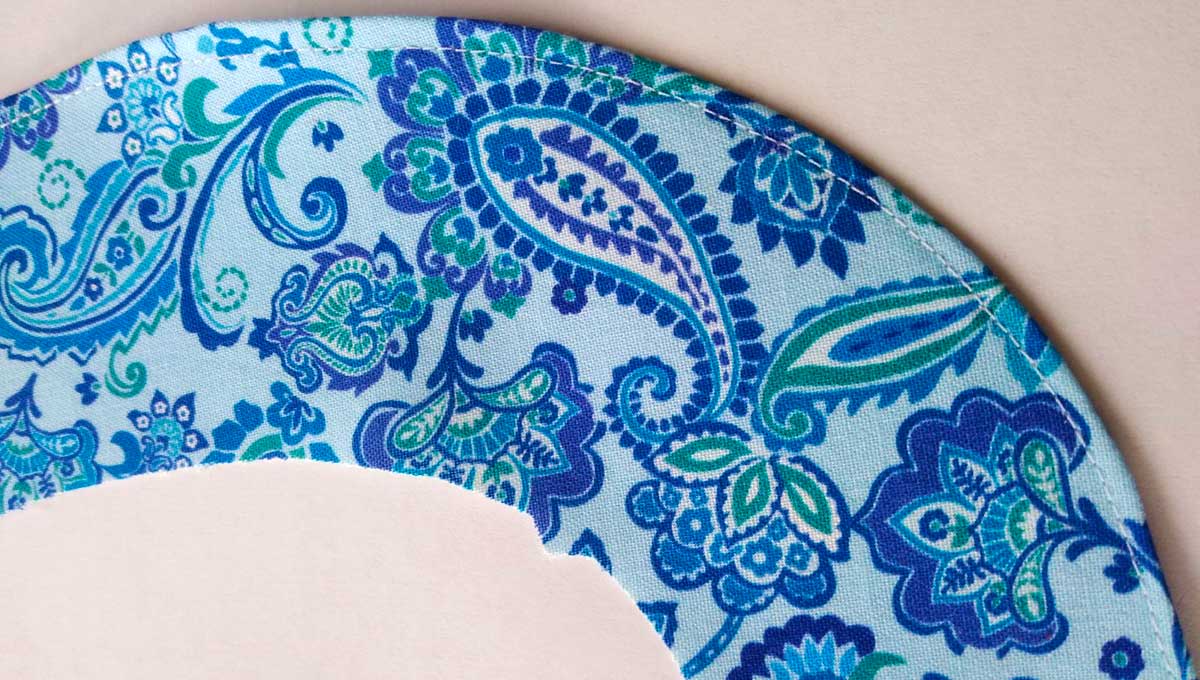
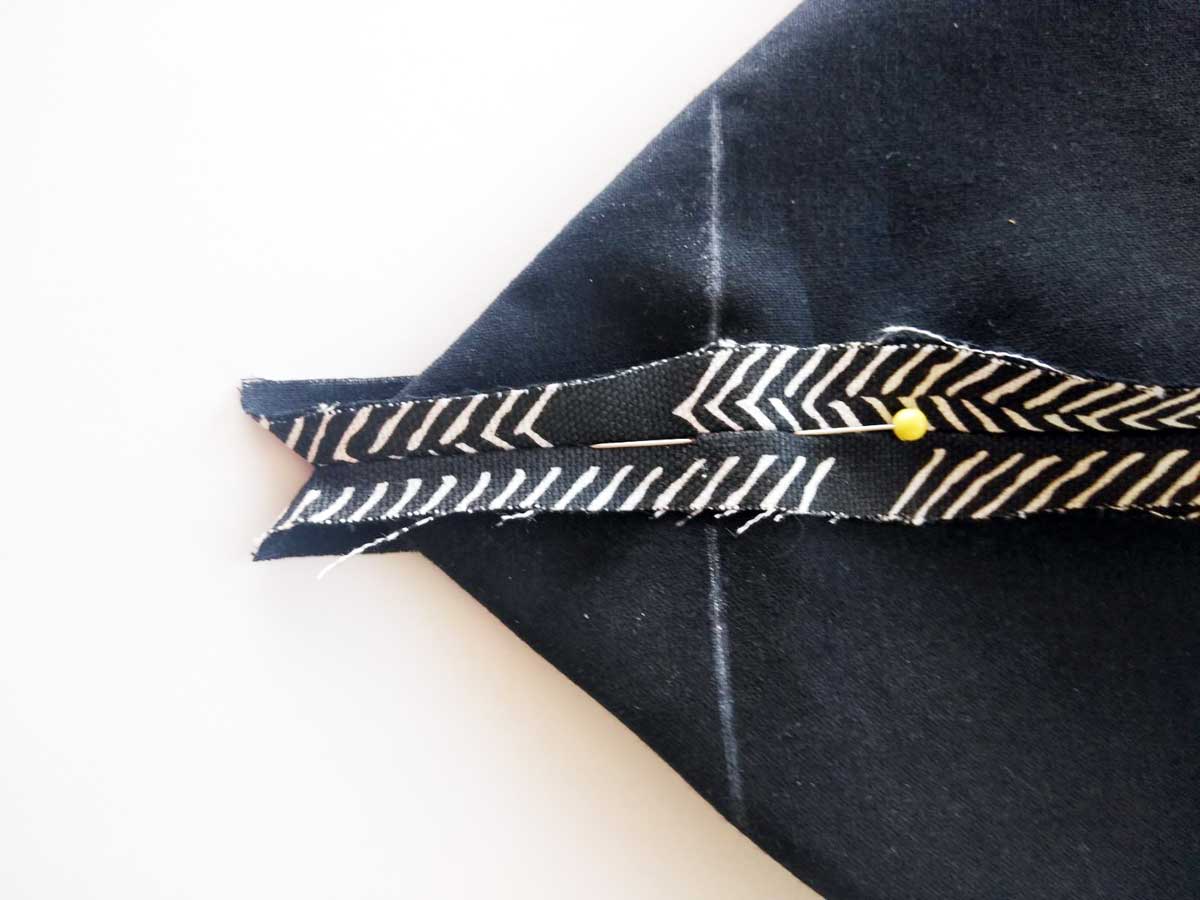
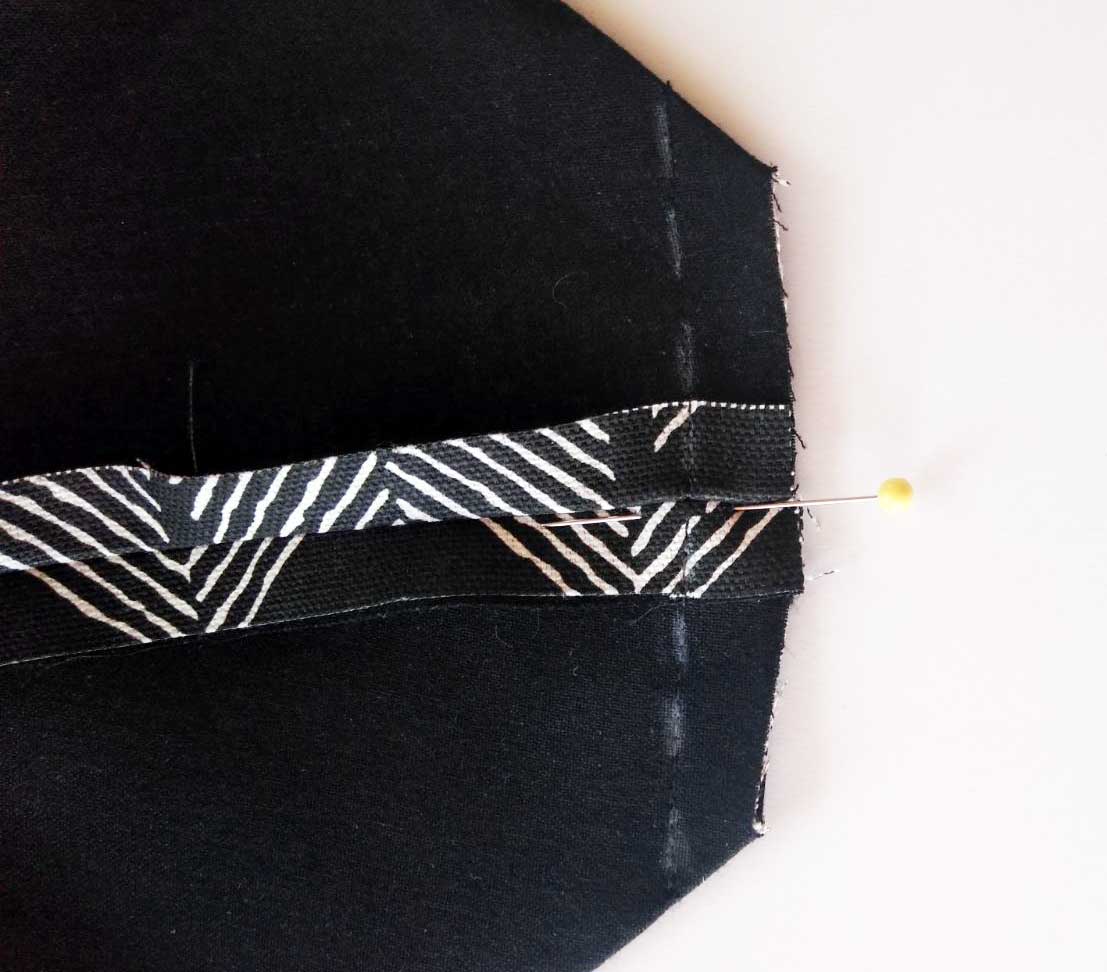
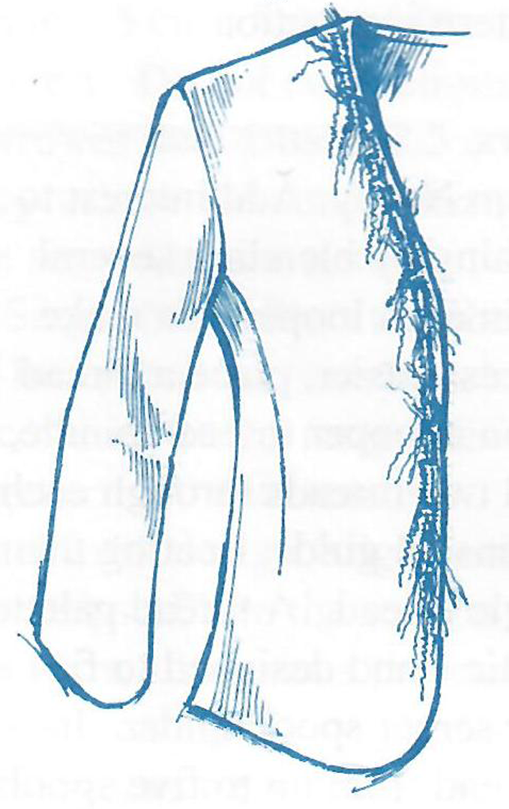
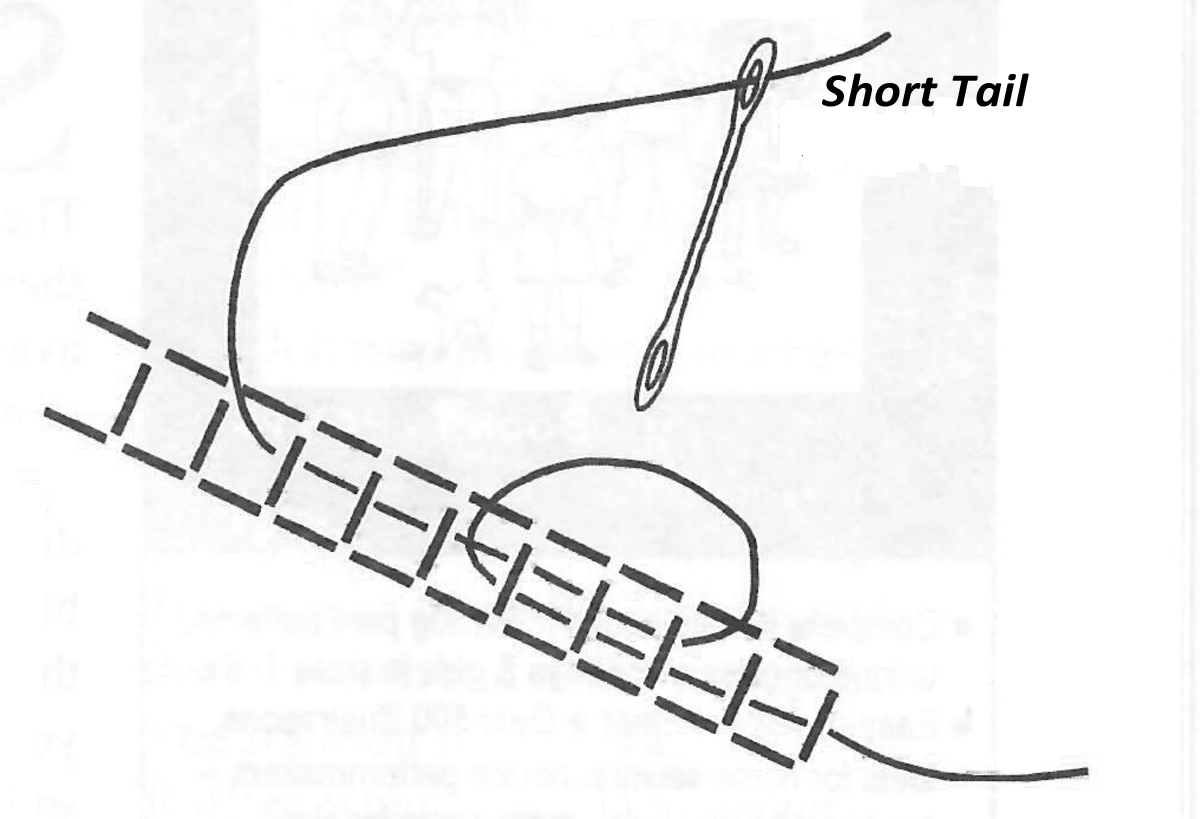
Another easy basting method is to use drafting tape. Match the color bars and tape the sections together. Then, right sides together, stitch from the wrong side on the seam line. (Figure 1).

Basting plaids
Figure 1

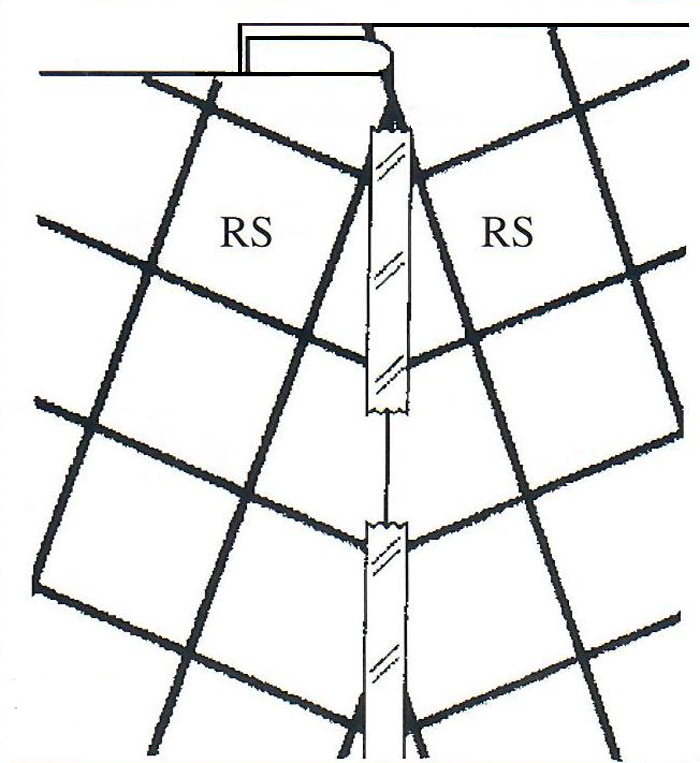
Tip: Before using drafting tape, test to be sure the tape won’t mar the fabric or pull off the nap.
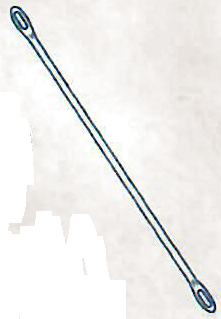
Hand Basting

For difficult seams, hand-baste. With right sides up, align and pin the sections together. Then use a short slip stitch or fell stitch to baste. Use a contrasting thread color that’s easily visible against the plaid pattern.

  • The fell stitch tends to hold the fabric a little more securely; however, on the wrong side, the stitches are slanted and if you aren’t using a water-soluble thread in the bobbin, they are more difficult to remove.
  • If using the slip stitch, consider adding a safety by turning the garment over and putting in a second row of basting from the wrong side so that there are no spaces in between the stitches.
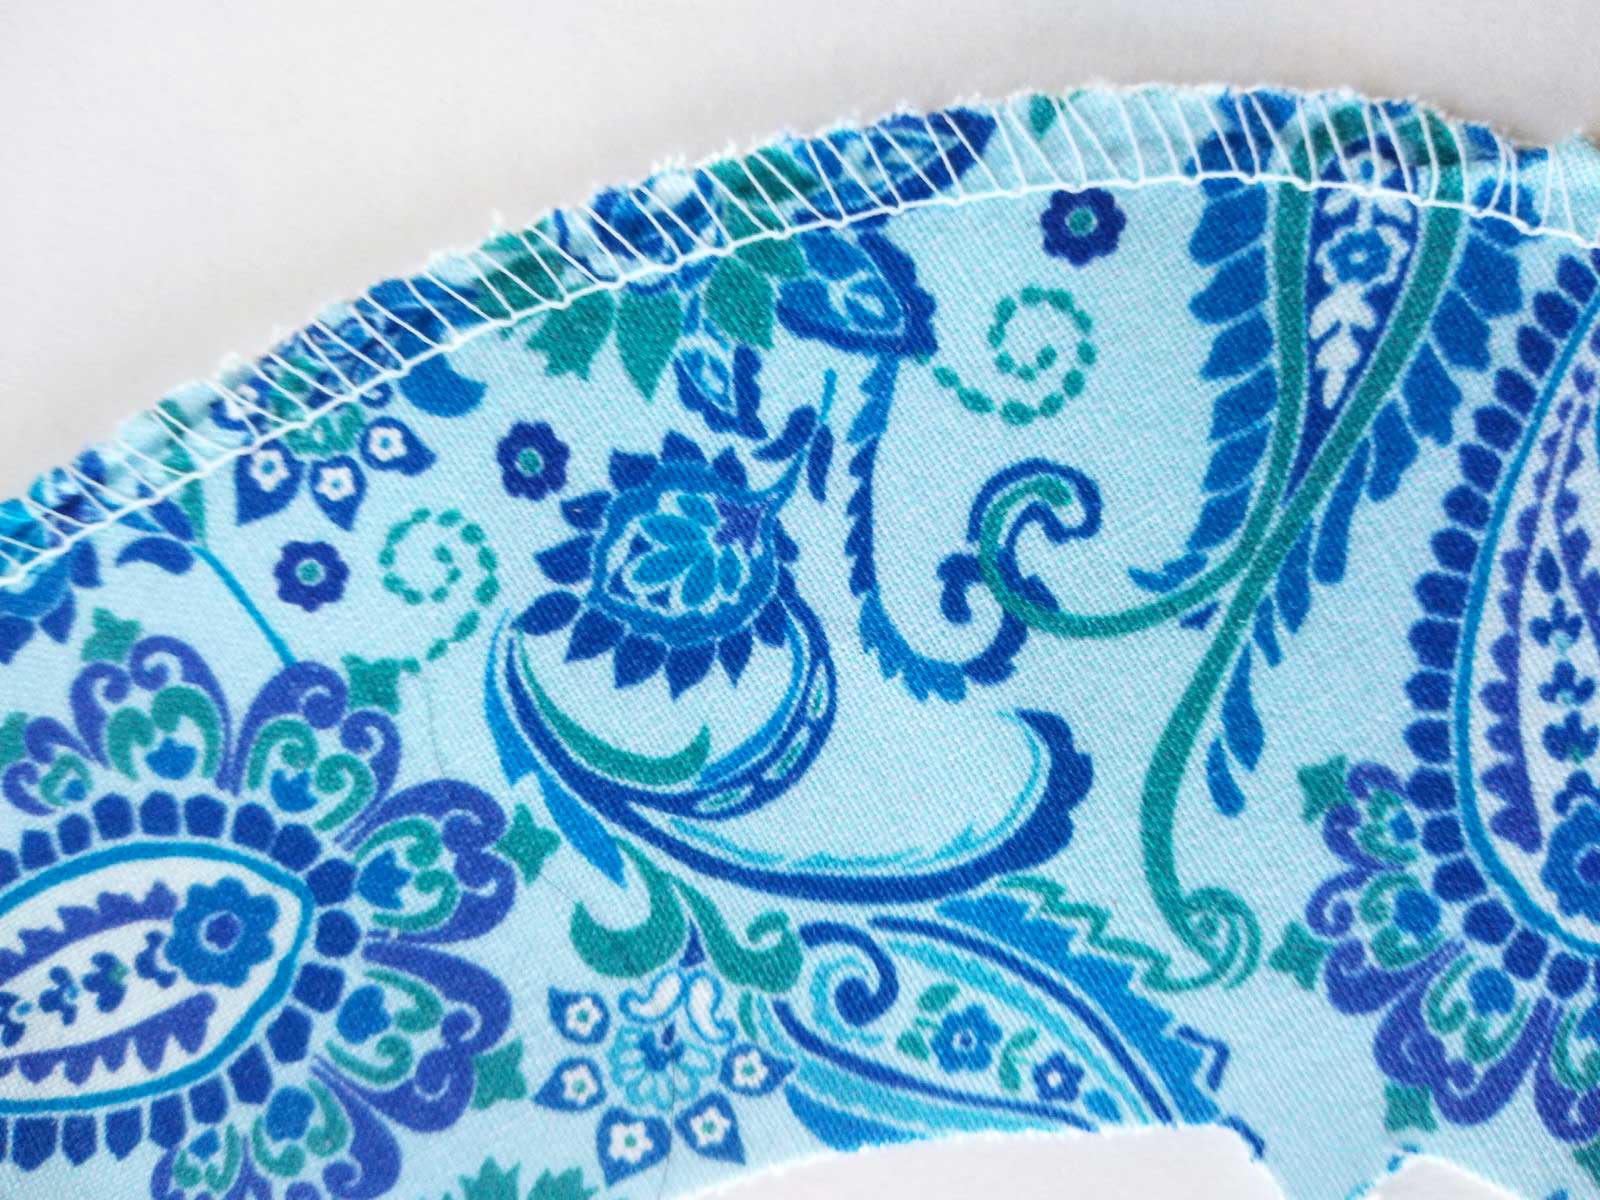
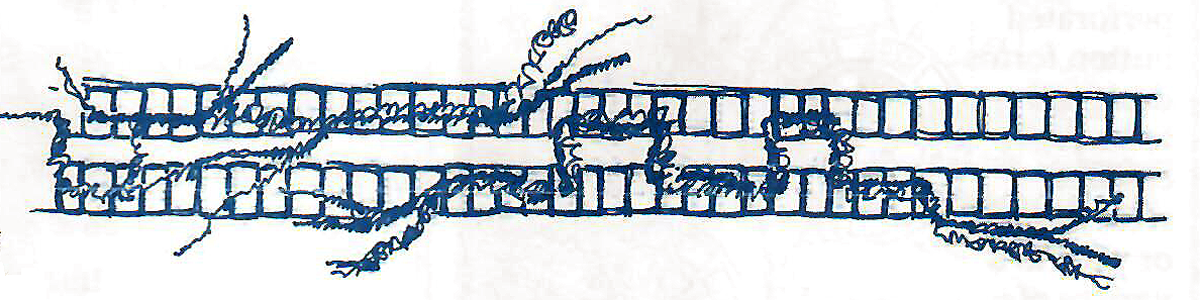
Machine Basting

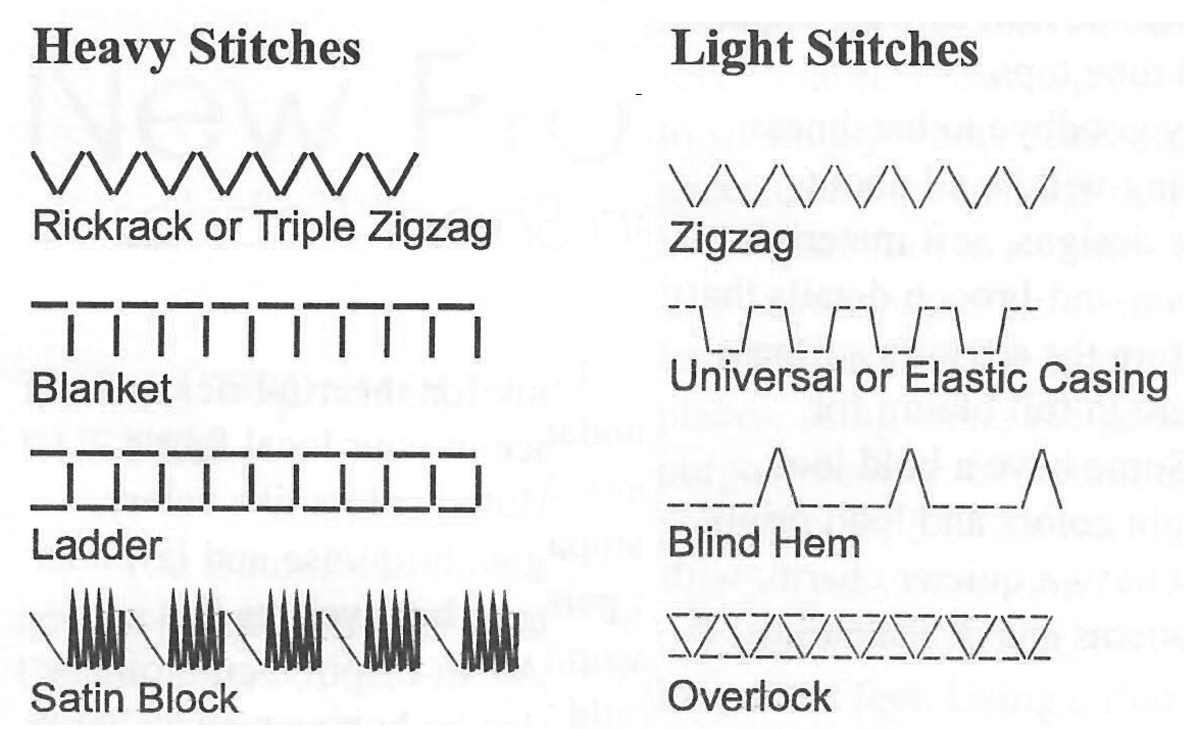
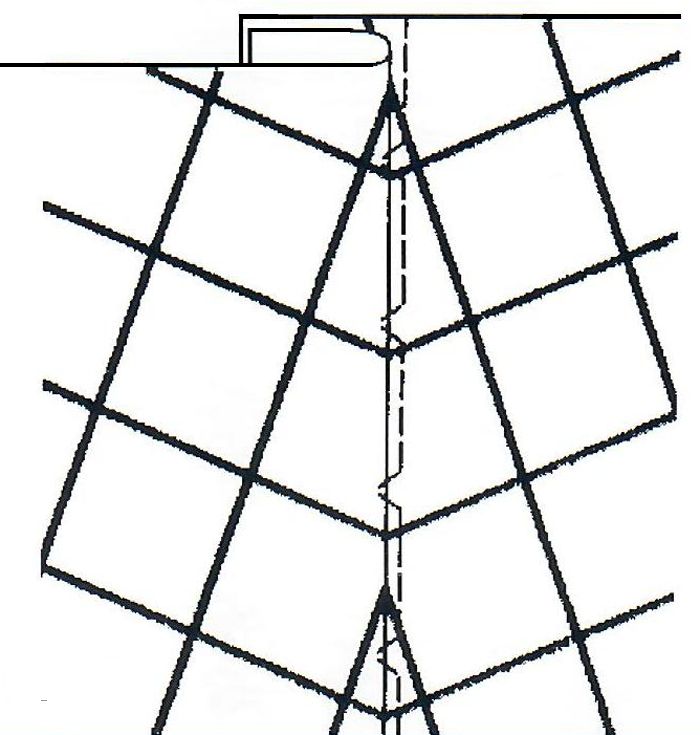
Machine basting works well on fabric that won’t be damaged by extra needle holes. With right sides up, align the color bars and pin the sections together. Set the machine for a blind hemming stitch (Width: 2″, Length: 2.5″) and a loose tension, then stitch next to the fold line. Only the zig-zag stitch will catch the fold line (Figure 2). Consider using water-soluble basting thread in the bobbin, but remember that this thread could dissolve in hot, moist hands or when wound on to a bobbin at high speed. In this method, it could help to use a contrasting thread color that’s easily visible against the plaid pattern.

Matching plaids
Figure 2

Pin Basting

Pin the plaid pattern pieces together along the plaid lines, making sure the lines match up perfectly. Place the pins parallel to the plaid lines and about an inch apart, then place the pins in both vertically and horizontally to keep the pattern pieces aligned.

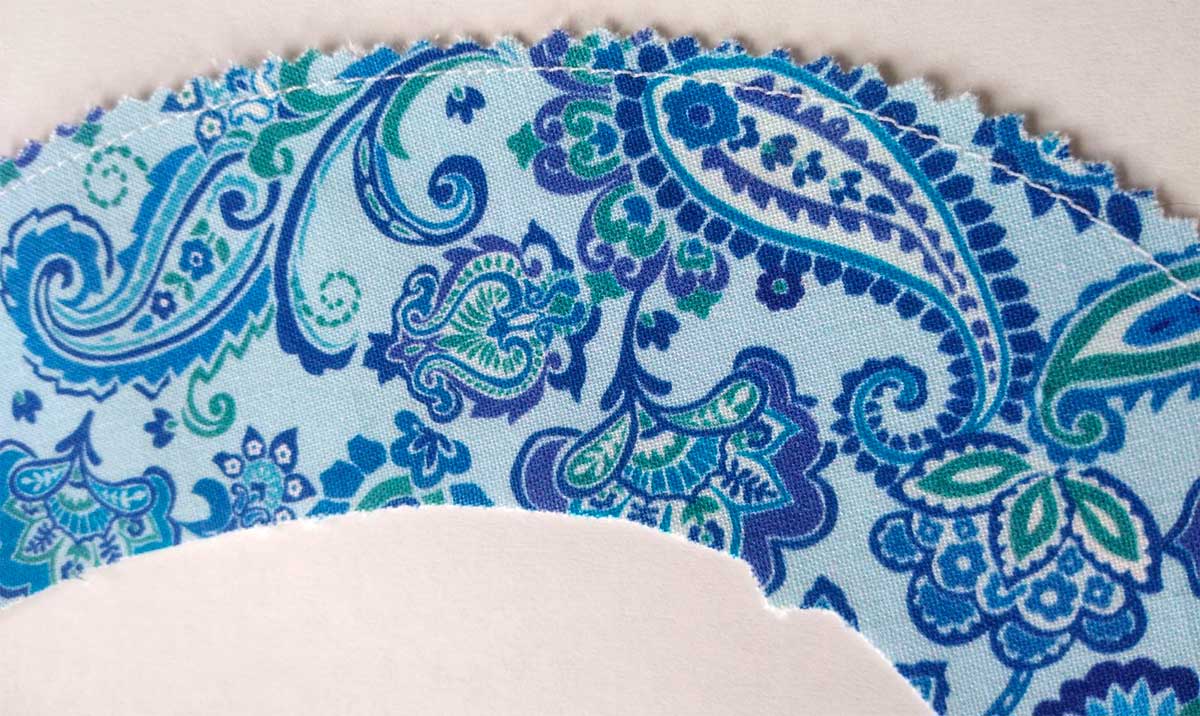
Clipping and Notching

When you have intersecting seams, clipping into the seam allowances or notching them can help align the plaid lines more accurately. Make small diagonal snips (clips) or triangular notches along the seam allowances, being careful not to cut into the stitching line.

Plaid jacket and dress on children


~Partial contribution from an ASG article by Claire Shaeffer

Did you enjoy this article?
Are you an ASG member?
This field is for validation purposes and should be left unchanged.

August 4, 2023

Facing Facts

Woman sewingFacings are a great way to finish edges—whether it’s down the front of a garment, around the neckline, or on armholes. By definition, a facing is simply a narrow fabric piece cut to the shape of the opening to encase the garment raw edges. However, you don’t normally leave the edge of a facing without any finishing as the fabric can fray and wear.

  1. For any finishing method except the last one listed below, attach interfacing as required to the facing piece(s) and sew any joining facing seams first—like shoulder or underarm.
  2. Press the seam allowances open. If the fabric is bulky, trim the seam allowances to ¼”.
  3. Once the facing is complete, then finish the edges.

So how do you finish facing edges? Let us count the ways…

Serging

Serged edge finish
Serged edge finish

If you have a serger, it’s ideal for finishing facing edges. Easy and quick—just serge around the outer edge of the facing. The serger threads encase the raw edges of the fabric and leave a flat smooth perimeter.

Hemming

Narrow hem finish
Narrow hem finish

You can hem the outer edges of facings if you don’t have a serger. Simply press under the perimeter edge ¼” and stitch close to the fold. This creates a finished edge, but on some fabrics, it can add unnecessary bulk. Depending on the grain on the facing edge, turning under and stitching a hem can also cause distortion and rippling. On some fabrics, that extra layer of turned-under fabric can also create a ridge on the garment outside when pressing.

Stitch and Pink

Stitch and pink the edges
Stitched and pinked finish

Adding a line of stitching around the facing perimeter, followed by the trimming with pinking shears creates a neat looking, flat-finish edge suitable for many fabrics. It’s ideal for knits and closely woven fabrics.

Binding

Bias tape finish
Bias tape finish

The outer facing edge can be bound, either with bias tape or with a bias strip of a lightweight fabric. If using bias tape, place the larger side under the facing and use a narrow zigzag to secure the edges.

On bulky fabrics, a narrow single-layer binding is made using fabric that’s lighter in weight than the garment fabric itself to avoid additional bulk—something like silk organza or lining fabric is ideal.

To finish a facing with a narrow fabric binding, cut enough 1”-wide bias strips to go around the facing outer edges plus 1” for each. Piece the bias strips together if needed and press seams open. Align one strip long raw edge with the facing edge and sew around the facing perimeter using a scant ¼” seam allowance. Flip the binding to the underside, press and stitch in the ditch of the seam to hold the underside in place. Trim any excess binding width close to the stitching.

Narrow single-layer binding finish

Sometimes facing edges (and seams) in unlined garments are bound in a contrast color for added interest.

Interfacing

Interfacing finish
Interfacing finish

Many faced opening patterns call for interfacing to help the armhole, neckline or front opening keep its shape during wearing and construction. The interfacing also serves to help stabilize areas for further design details like buttons/buttonholes, toggles, etc.

Rather than adding interfacing as a separate construction step, you can use it to finish the facing edge. The interfacing can be fusible or sew-in depending on your fabric and the desired amount of stabilization needed.

To finish facings this way, cut the facing pieces out of both fabric and interfacing. Sew the seams (shoulder, underarm, etc.) as needed, separately in both the fabric and interfacing. Trim the seam allowances to ¼” in the interfacing layer. Finger-press the seams open if using fusible interfacing; otherwise press open with an iron. Place the matching fabric and interfacing layers right sides together and sew around the perimeter using a scant ¼” seam.

Turn the interfacing to the facing underside and press along the outer edge using the tip of the iron. If you’re using fusible interfacing, this process will fuse the edges together. Turn the facing interfacing side out and press. Again, for fusible interfacing, this will secure the interfacing to the fabric layer. For non-fusible interfacing, match the inner facing edges and baste around the opening.

Once the facing edges are finished, apply the facing according to the pattern instructions.

Raw edges? Is there ever a time when facing edges can be left raw? The answer is yes—if they’re hidden by an attached lining, there’s no need to finish the edges. Some sewers leave facing edges unfinished if the fabric is knit, as the edges won’t ravel. But, serging a knit facing edge, or even just pinking it, gives a nicer looking finish.


~Linda Griepentrog is the owner of G Wiz Creative Services and she does writing, editing and designing for companies in the sewing, crafting and quilting industries. In addition, she escorts fabric shopping tours to Hong Kong. She lives at the Oregon Coast with her husband Keith, and three dogs, Yohnuh, Abby, and Lizzie. Contact her at .

Did you enjoy this article?
Are you an ASG member?
This field is for validation purposes and should be left unchanged.

July 28, 2023

Working with Petersham Ribbon

Petersham Ribbon
Petersham Ribbon on Amazon.

Petersham ribbon, also known as Petersham grosgrain, Petersham facing, or simply Petersham, is a versatile and pliable type of ribbon known for its ability to shape around curves and maintain a smooth appearance.

Petersham is often used in millinery to create hat bands or hat trimmings, especially for wide-brimmed hats because it provides structure and allows the ribbon to curve along the shape of the hat seamlessly. It’s also used in garment construction, particularly in waistbands, belt loops, and as a stabilizing ribbon in corsets and bodices. Its flexibility and ability to take shape make it an excellent choice for these purposes. Petersham ribbon is equally popular in various crafting projects, including embellishing accessories, gift wrapping, and creating decorative elements in home decor.

Known for its unique characteristics and versatility, Petersham ribbon is thick, stiff, and flexible and is typically made from cotton, viscose, a cotton/rayon or acetate blend, or even from acetate or 100% rayon. Some variations may even use silk. It has a slightly ribbed texture and a flexible, pliable nature, which makes it popular for creating decorative accents and embellishments. The ribbed texture is achieved through a weaving technique that creates horizontal ribs across the ribbon’s surface.

Where did the name come from? It depends on who you ask! One version is that Petersham was named after the 18th century English lord Viscount Petersham who invented an overcoat and breeches made of a special heavy woollen cloth with a round nap surface. The second version is that the original Petersham was manufactured by a company called Panda in the town of Petersham.

Petersham is often compared to grosgrain ribbon due to their similar appearance, but they have distinct differences:

  • Petersham has a scalloped edge. Grosgrain has a straight edge.
  • Petersham is usually softer and more pliable, making it easier to work with when shaping it around curves.
  • Petersham has a crisp feel and can become stiffer when exposed to moisture or heat.

One of the additional features of Petersham is its ability to shape and mold around curves and corners without puckering or gathering. It is woven so that once steamed, it will take on and support the curve of the piece it’s being applied to. This property makes it ideal for hatbands, belts, and other applications where the ribbon needs to maintain a smooth and even appearance when wrapped around irregular shapes. When used for hatbands, Petersham ribbon helps create a structured, tailored look.

Another notable characteristic of Petersham ribbon is its soft, draping quality. It has a more fluid and supple feel compared to standard grosgrain ribbon, which tends to be stiffer. This flexibility allows for a greater range of uses, including garment trims, bows, sashes, and waistbands. It can also be used for crafts like gift wrapping, hair accessories, and DIY projects.

Petersham ribbon comes in a variety of widths, colors, and patterns, offering endless possibilities for creative expression. It can be found in solid colors, as well as prints, stripes, and other designs. The edges of Petersham ribbon are usually cut with a hot knife or treated to prevent fraying.

Tips for working with Petersham

  1. Cutting: Petersham ribbon has a scalloped edge and an identical front and back, so you don’t have to worry about which side is facing up when cutting. Use sharp fabric scissors to cut the ribbon to your desired length. Remember to cut on the diagonal to avoid fraying.
  2. Shaping: The key feature of Petersham ribbon is its flexibility and ability to take shape. To shape the ribbon around curves or bends, use steam from an iron or a steamer. Hold the ribbon over the steam for a few seconds, and while it’s still warm and pliable, gently shape it to the desired curve. You can use pins to hold the shape in place until it cools and retains the shape.
  3. Attaching: Petersham ribbon is typically sewn onto fabric or hats. When sewing, it’s best to use a needle and thread that matches the color of the ribbon. Since Petersham ribbon is slightly thicker than regular ribbon, you might need a larger needle, or a needle designed for heavy fabrics. Sew along the edge of the ribbon, using small and discreet stitches.
  4. Hat Bands: To use Petersham ribbon as a hat band, measure the circumference of the hat’s crown and cut the ribbon accordingly, leaving some extra length for overlap. Shape the ribbon to match the curve of the hat’s crown using steam. Sew the ends together to form a loop, and then sew the loop onto the inside of the hat’s crown.
  5. Waistbands and Garment Trims: Petersham ribbon can be used as a waistband in skirts or trousers. Measure your waist and cut the ribbon to the desired length. Shape the ribbon to fit your waist using steam, and then sew it in place. You can also use Petersham ribbon as decorative trims on garments, especially around the neckline or sleeve edges.
  6. Crafts and Embellishments: For craft projects, you can use Petersham ribbon to embellish accessories like headbands, bags, or shoes. It can also be used in home decor projects to add a decorative touch to pillows, lampshades, and more.

Remember that practice makes perfect, so don’t be discouraged if it takes a few tries to get the shaping and sewing just right. Once you become comfortable with working with Petersham ribbon, you’ll find it to be a versatile and elegant addition to your creations.


Did you enjoy this article?
Are you an ASG member?
This field is for validation purposes and should be left unchanged.

July 21, 2023

Bottoms Up: Bags and Totes

Making bags and totes is a ton of fun and making them look professionally finished is easy as pie. Bags have not only height and width, but many also have depth, giving you room to put things inside. But, to get that depth, you need to create some shaping in the lower portion of the bag.

Photo courtesy of Sew4Home.com | Project Instructions

Some bags have corners, others have separately sewn bottom sections called gussets, while still other bags are shaped with darts. But no matter which you choose, those details are what give your bag some depth. Other bags, like clutches, pouches and fold-over versions may not have any depth, so with a flat construction what you can put inside is limited.

There are several ways to make professional looking corners on bags, so let’s take a look at the process. Remember, the same shaping is done both to the outer bag and to the bag lining.

Boxed Corners

Boxed corners allow a bag to have a flat bottom so it can stand up on its own, and they can be made wide or narrow, depending on the bag shape desired.

Tote with boxed corners

The easiest way to make boxed corners is to stitch the side and bottom seams of the bag together, then fold the side seam directly on top of the bottom seam and pin, matching the seams exactly. If the bag doesn’t have a center bottom seam, mark the center before construction.

Figure 1

With the seams aligned, measure up the seam allowance half of the desired bag depth and mark a line. Using a right angle, mark a line across the corner exactly perpendicular to the seam and sew across it. Trim the seam allowance to ¼”.

*The boxed corner structure can also be positioned on the outside of the bag and be held in place with buttons or rivets. To do this, simply sew the side and bottom seams of a bag, turn it right side out and gently poke out the corners to get a sharp point. Fold the corner into a triangle and match the point to the outer bag side seam; shape to form the boxed corner. Anchor the triangle fold in place with sewn-on buttons or follow the manufacturer’s instructions to add rivets to hold the point in place.

Riveted corners on a bag
Rivets keep this outside boxed corner in place. Photo courtesy of Sew4Home.com

Some bag patterns come with a cut-out corner making boxing corners almost foolproof. The square cut from the bag lower corners is half the depth of the bag. Similar to the first cornering method, sew the side and bag bottom seams, then fold them directly on top of each other and sew across the cut edges.


Darted Corners

For softer, less structured bags, think about finishing the bottom of the bag with darts, instead of the sharp corners of the previous methods. The bag pattern may come with darts indicated already, or you can add them yourself by drawing a narrow triangle at the center of each bag corner, making the point at a 45° angle to the bag center. Fold the outer bag right sides together and sew the dart along the seamline, tapering to nothing at the inside point. {photo 5} Press the front and back corner darts in opposite directions to reduce the bulk of the fabric fold inside. On very bulky fabrics, trim the dart fold seam allowances to ¼” after sewing the darts and press them open to flatten. Align the dart lines when sewing the bag back to the front.

Simplicity 9563
Simplicity 9563

Gussets

Gussets are pieces added to the bag for shaping. They can be a long strip that goes from the upper edge of the bag around the bottom to the other upper edge, or sometimes gussets extend to create handles.

McCall’s 8307
McCall’s 8307

Some gussets fit only on the bottom of a bag, creating a totally flat base, while others fit up the side of a bag, creating a deeper bag, more like a luggage tote. Still other gussets go around the entire bag, coupled with a zipper closure to create even depth all around. {label: Studio Kat Flight Bag}

Studio Kat Flight Bag

~Linda Griepentrog is the owner of G Wiz Creative Services and she does writing, editing and designing for companies in the sewing, crafting and quilting industries. In addition, she escorts fabric shopping tours to Hong Kong. She lives at the Oregon Coast with her husband Keith, and three dogs, Yohnuh, Abby, and Lizzie. Contact her at .

Did you enjoy this article?
Are you an ASG member?
This field is for validation purposes and should be left unchanged.

July 14, 2023

Stitch ‘N Weave

Stitch ‘n weave embellishment techniques refer to a variety of decorative techniques that involve combining stitching and weaving methods to create unique textures, intricate patterns, or unusual designs on fabric.  Decorative yarns, threads, cords or ribbons are woven through pre-sewn machine stitching, twisting, turning, looping or knotting if desired. 

Figure 1
Figure 1

Stitch ‘n weave could include couching, laid work, raised embroidery, Brazilian embroidery, and lastly, thread weaving, which is the focus of this article. The process typically involves stitching or embroidering onto a base fabric and then weaving additional threads or fibers through the stitches to create added dimension and texture, resulting in visually stunning designs. This combination of stitching and weaving allows for the creation of intricate patterns, raised surfaces, and interesting visual effects and are often used in textile arts, embroidery, and surface embellishment.

The machine’s stitched patterns can be abstract, specific design shapes, or used for borders (Figure 1). It can be done using various weaving techniques, such as over-under weaving or wrapping threads around existing stitches. Unlike couching, the yarns can be exchanged for new colors and textures next season by gently pulling out the original yarns and weaving in new ones. These patterns of multiple-stitched rows can also be a tone-on-tone design element without the weaving. Add the thread weaving at a later time and your friends and colleagues will think you have a new garment!


Use this embellishing technique on both ready-to-wear and made-to-wear garments.

Stitching Choices

Suitable machine stitches for this technique have a wide stitch width (3mm or wider) without an intermediate stitch, as they swing across the stitch width. To showcase the weaving, stitch with machine embroidery thread that matches or blends with the fabric background. To add a bit of sparkle, use metallic thread. Heavy stitches like the rickrack or triple zigzag, blanket, ladder and satin block stitches will be more visible than those with less stitch repetition. Light stitches include the standard zigzag, universal or elastic casing stitch, blind hem, and some overlock or overedge stitches (Figure 2).

Figure 2
Figure 2

Weaving Materials

Use any decorative yarns, threads, cords or ribbons that can be woven under the machine’s crosswise stitches. If they can be threaded through a double-eye needle, they probably can be used to weave. There are several companies that package 5-10 yard assortments of yarns in a particular color grouping — these cards have plenty of yarn for an average project. If the yarns are slim, twist and weave two together. Add ribbon or other cords to the blend for texture or to give a color punch.

Weaving Notions

Double eye needle
Figure 3

Use a double-eye needle for the weaving process (Figure 3). The flat, blunt end makes the needle easy to feed under the stitches, especially those with repeating stitch patterns. Any yarns, ribbons or cords that can be threaded through a double-eye needle can be used for stitch ‘n weave.

Other notions include:

  • Water or air soluble marking pen to mark the basic design stitching lines on the fabric
  • Sealant to keep the cut ends of the thread or yarn from fraying
  • Tear-away stabilizer to place under the design area when stitching

Stitch ‘N Weave Basics

Always check your stitch and yarn combination for compatibility before starting the actual project. And make sure to test drive using your weaving materials with various stitches on your project fabric.

Stitching

Draw the design lines on the fabric right side with the marking pen. Then place tear-away stabilizer underneath the design area.

Stitch with machine embroidery thread in the needle and all-purpose or bobbin thread in the bobbin. If the project’s underside will not be concealed by a facing, use matching thread in the bobbin for a neater look.

After stitching, secure the thread ends. The tear-away stabilizer can be removed before or after the weaving is completed.

Weaving:

Thread one end of the double-eye needle with yarn and weave the unthreaded end over-and-under the long stitches. Use one or more yarns — whatever will feed under the threads.

Work with strands approximately 18″ in length or shorter and keep one end of the single strand close to the threaded needle eye. Or, for a border, stripe, or as a trim on a garment edge, use short pieces of yarn with the same length tails and weave them between two stitched rows, cutting the yarns to remove the needle (Figure 4).

Weaving
Figure 4

To secure the strands when beginning to weave, loop the ends over one or more of the machine stitches, similar to a backstitch (Figure 5). Weave short spans, pulling the strand(s) through looping or knotting as desired.

Figure 5
Figure 5

Backstitch near the end of the weaving to secure the finishing end. The finishing ends of the yarns can be woven into the design and hidden, or they can be left free for a fringe effect.

Use a seam sealant to prevent the ends from fraying or to keep chenille-like yarns from losing their fluff.


~This is an edited and updated article containing some content originally written by Sallie J Russell and inspired by her book, Dynamic Dimensional Designs (printed with permission). 

Did you enjoy this article?
Are you an ASG member?
This field is for validation purposes and should be left unchanged.

  • « Previous Page
  • 1
  • …
  • 16
  • 17
  • 18
  • 19
  • 20
  • …
  • 62
  • Next Page »

Become a Member

Join the only national organization dedicated to Advancing Sewing as an Art and Life Skill.

Join Now button

Blog Article Categories

  • ASG Conference
  • Chapter Stories
  • Embroidery
  • Fitting
  • Learn to Sew
  • National Sewing Month
  • Products, Books, & Patterns
  • Projects
  • Quilting
  • Sewing
  • Sewing Techniques
  • Sewing Tips
  • Sewing Tours
  • Videos
  • Disclaimer
  • Privacy Policy

American Sewing Guild
National Headquarters
9660 Hillcroft, Suite 230
Houston TX 77096
713-729-3000 | 713-721-9230 Fax
www.ASG.org

ASG wordcloud - education, conference, discounts, videos, special offers, tours and more

Copyright © 1998–2025 · American Sewing Guild · All Rights Reserved