American Sewing Guild (ASG)

Visit our blog Visit the ASG Facebook page Visit ASG on Pinterest Visit ASG's YouTube channel Visit ASG on Instagram
  • Home
  • Join ASG
    • Join Online
    • Chapter Locations
    • Member Benefits
    • Member Brochure
    • Join by Mail
  • Conference & Education
  • Resources
    • Contests & Awards
    • Giving Back
    • Hall of Fame
    • Links
    • Travel and Tours
    • Measurement Chart
  • Shop
    • ASG Store
    • Chapter Products
    • Video Resources
  • Blog
  • About
    • About Us
    • Donate to ASG
    • ASG Sensitivity Statement
    • FAQ’s
    • Start a Chapter
  • Contact
  • Member Login
    • Login First!
    • Members Only
    • Leadership Only
    • Website FAQ’s
    • Logout
  •  

January 17, 2025

Sewing Q&A: Faux Leather, Bias Binding, & Pretreating Fabric

Q: I want to make a coat from faux leather and wondering how to make a buttonhole in this fabric.

A: Faux leathers come in a variety of styles and textures, but generally they have some kind of knit backing to stabilize the textured vinyl front surface. If yours does not, then use small dots of textile glue inside the seamline to place a sturdy interfacing behind the buttonhole area. If you don’t interface the area, the buttonhole will never return to its original size after use.

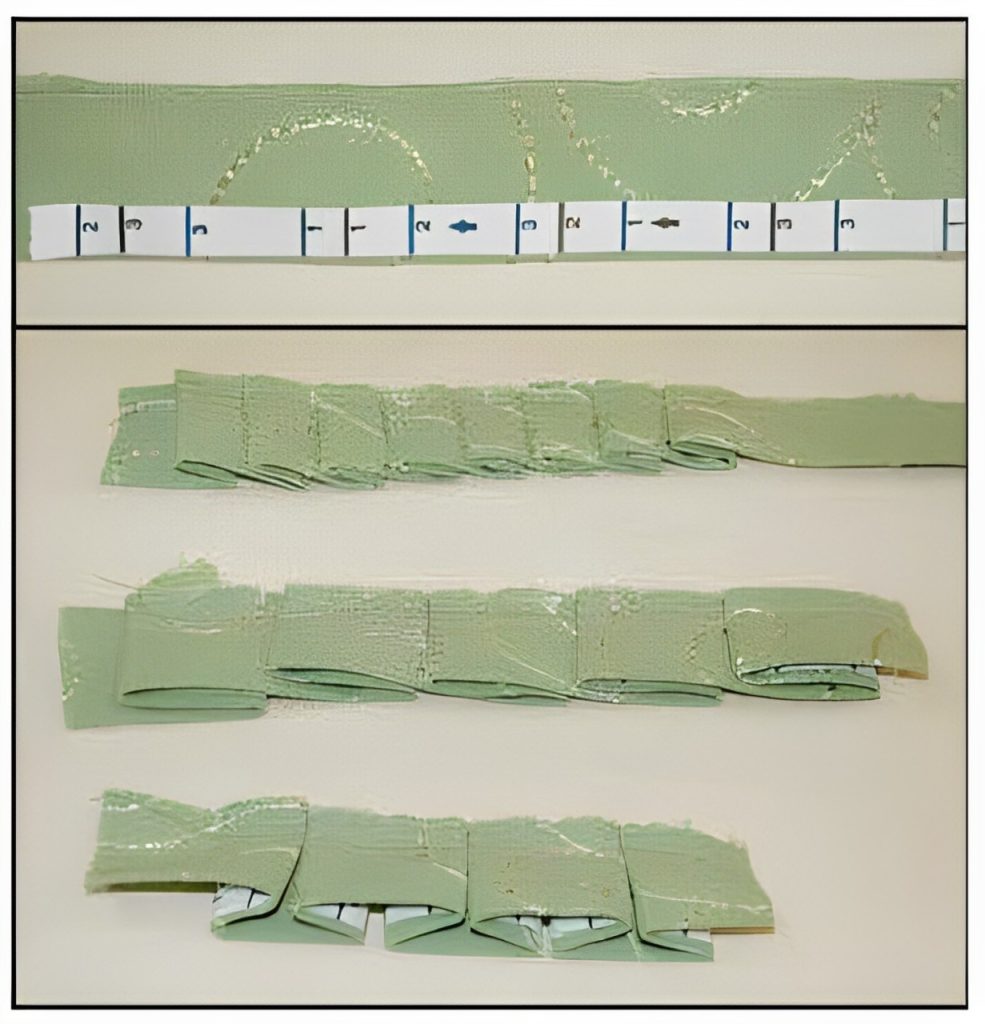
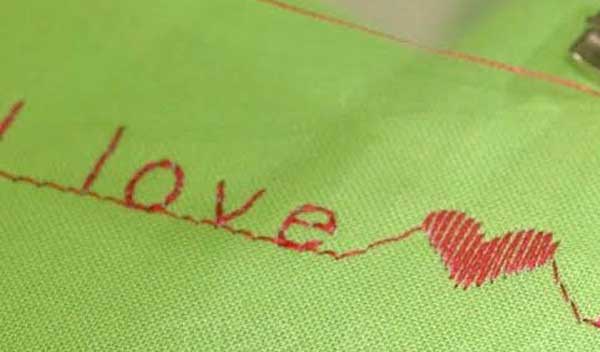
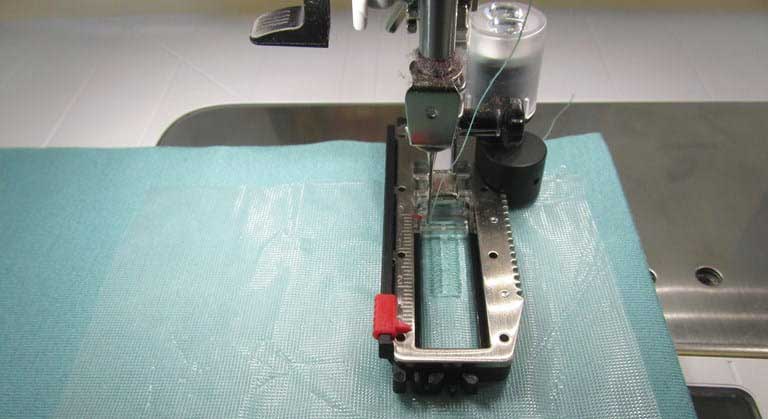
To sew a machine buttonhole in faux leather, check to see if your machine has a special buttonhole stitch for the fabric. The one shown in the photo is specific to leather-like fabrics. The stitch shown is actually sewn after the buttonhole opening is slashed so that the stitch goes over the raw edges. A sturdy bartack at each end prevents distortion.

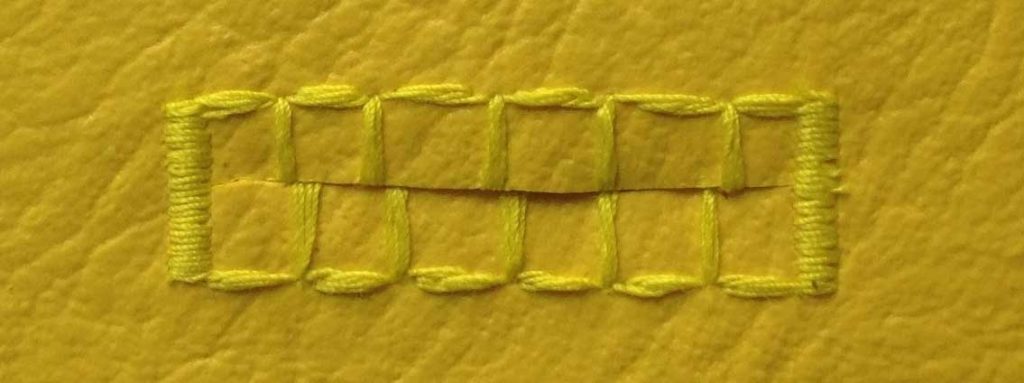
Another type of buttonhole suited to faux leather has a straight stitch along each side of the hole location, and there’s a wider space between the stitched lines. Since faux leathers don’t ravel, the stitching just helps the buttonhole area keep its shape.

It’s a good idea not to use a traditional buttonhole on most faux leathers, as the close satin-stitched bars can perforate the fabric. So, be sure to test-stitch.

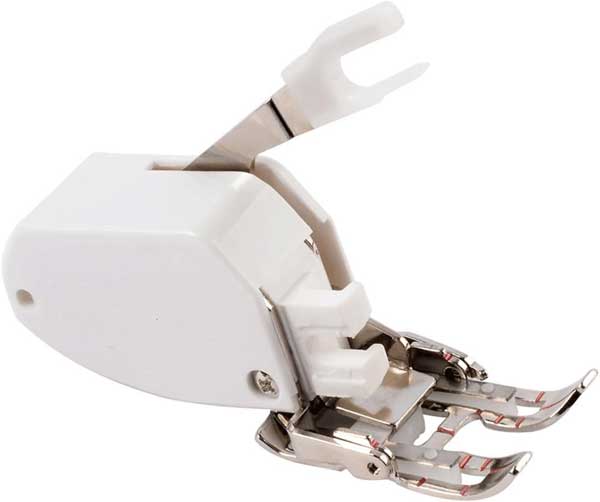
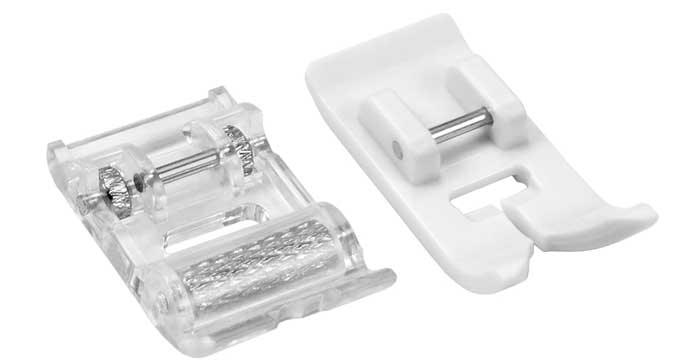
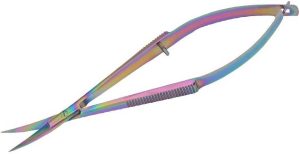
No matter what buttonhole type you choose, if the machine foot doesn’t feed evenly and sticks to the fabric surface, use a piece of water-soluble stabilizer under the foot for even feeding.

Image courtesy of Bernina

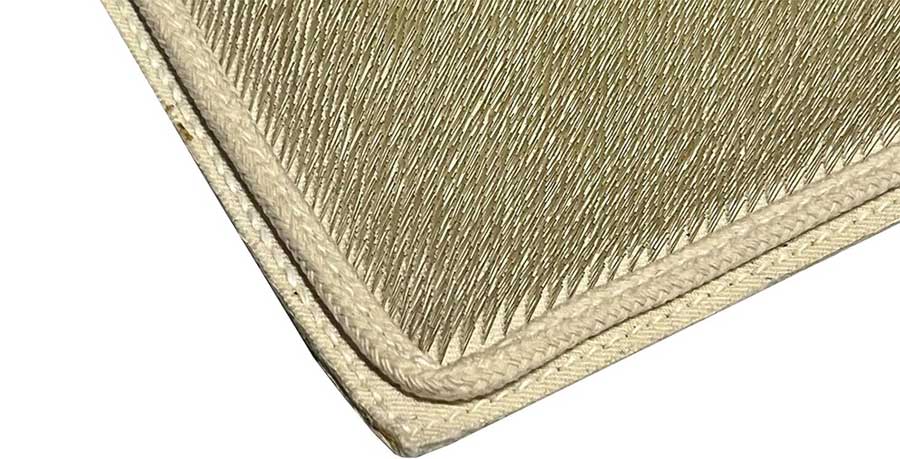
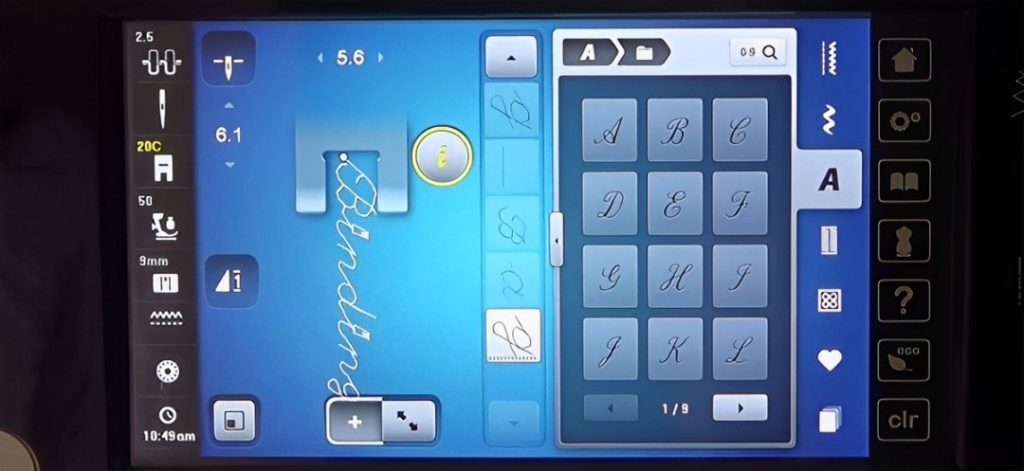
Q: I’m making an apron and the pattern calls for the binding to be cut on the bias. Since cutting on the bias takes more yardage, is it really necessary to cut it that way or can I just cut crosswise strips for the binding?

A: The answer depends on the apron itself—are parts of the bound area on a curve, like armholes or bib edges? If the answer is yes, then you will need to cut the binding on the bias so that it can shape to the curves, as straight-grain binding will not curve properly. If you try to shape straight-grain binding to a curve, you will get pull lines or puckers.

Many sewers like to cut their binding on the bias as a design feature. If the binding fabric is striped, cutting it on the bias creates a decorative diagonal patterning, as opposed to simply crosswise lines.

Note that you can piece bias binding in multiple places to use less fabric than cutting much longer strips at a 45° angle. If you match the patterning at the diagonal seam, no one will be the wiser and the seam will be almost invisible.


Q: What’s the best way to pre-treat fabric before I sew It?

A: The general rule for fabric you’re sewing, is to pre-treat it as it will be cared for once the garment or project is finished. The answer really depends on the type of fabric and what you plan to use it for.

If it’s 100% cotton fabric, there’s a chance for some shrinkage. If you’re using that fabric for a quilt, shrinkage may not be a concern, but if you’re using it for a garment, shrinking could be a definite issue. Some cotton fabrics, like flannel, can shrink significantly, causing your garment not to fit after washing. Denim should be washed and dried multiple times as the fabric often has residual shrinkage.

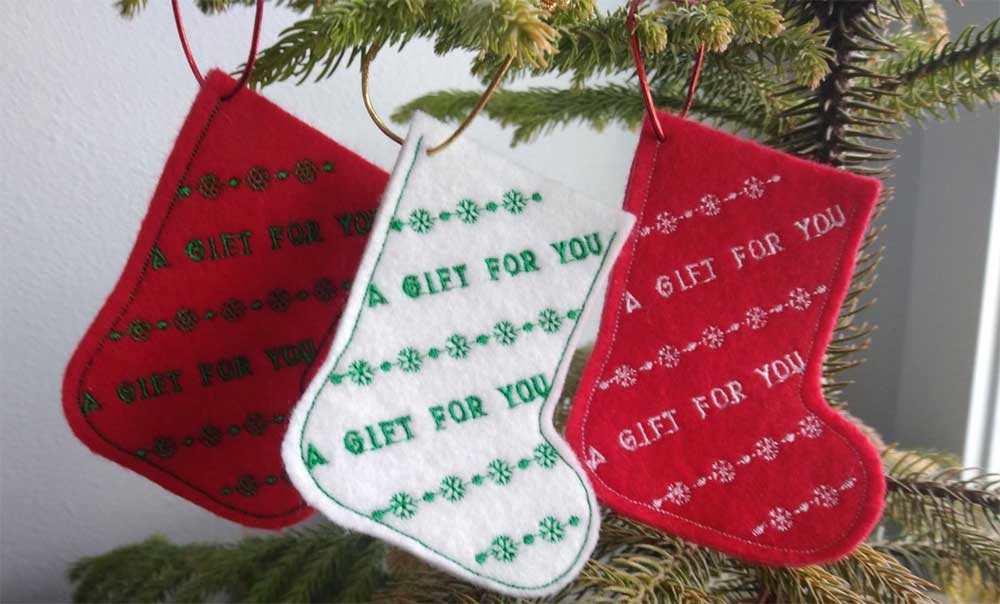
Follow the care instructions on the bolt end to pre-wash any cotton or cotton blend fabrics to avoid two things—shrinkage and color transfer. The latter occurs when a bright color is next to a lighter one—think red hearts on a white background. After washing, the background can become light pink, depending on how the dyes are set. If that happens, rewash with a color catcher to capture the excess dye.

For most synthetic fabrics, like polyester, there is no need to pre-treat, as shrinkage isn’t an issue. If you’re concerned about any applied finishes, pre-washing is an option.

For dry-clean-only fabrics, like wool and wool blends, it’s best to at least thoroughly steam the fabric before use to help avoid shrinkage, or to actually send it to the drycleaner before cutting out your garment and ask them to steam it.

Home décor fabrics generally do not require any pre-treating, as they often have stain-repellant finishes that can be removed by washing.


~Linda Griepentrog is the owner of G Wiz Creative Services and she does writing, editing and designing for companies in the sewing, crafting and quilting industries. In addition, she escorts fabric shopping tours to Hong Kong. She lives at the Oregon Coast with her husband Keith, and three dogs, Yohnuh, Abby, and Lizzie. Contact her at .

Did you enjoy this article?
Are you an ASG member?
This field is for validation purposes and should be left unchanged.

January 10, 2025

DIY Patch Jean Jacket

Give New Life to an Old Classic: Upcycling a Jean Jacket
Transforming a well-loved jean jacket into a one-of-a-kind patched masterpiece is a fun and eco-friendly way to refresh your wardrobe. Whether you’re looking to express your creativity, extend the life of a beloved garment, or reduce textile waste, this upcycling project is the perfect blend of fashion and sustainability. Let’s create something truly unique!

Inspired by this modified jean jacket from a high-end boutique, I set out to make a knock-off for myself. Here’s the original jacket I spotted at a conference:

My favorite resale store yielded most of the components — a basic jean jacket and a grouping of lightweight and semi-sheer print scarves.

The accent fabrics in the original were randomly assorted. Always keeping versatility in mind, I curated a more intentional set of prints that make the finished jacket an easy coordinate with dark jeans and black or brown skirt and pants in my wardrobe.

Working one section at a time, I rough-cut a segment of accent fabric an inch or so larger on all sides. I secured the print, right side down against the inside of the garment, pinning to the flat-felled seam or topstitched edge at about 1” intervals. From the right side, I then stitched through all the layers, following the original stitching and matching its color. The excess accent fabric was trimmed away with pinking shears, leaving a ¼” seam allowance.

The accent panel along the front band area was handled differently to avoid a visible seam allowance when the jacket is worn open. I securely hand stitched a finished edge of the brown/tan zebra print scarf to the straight edge of the band before attaching the remaining edges with topstitching.

On the side front panels, the welt pockets were cut away from the inside of the jacket before attaching the accent fabric.

The back panel was wider than any others, so I added 3 parallel rows of topstitching through both fabrics at center back to simulate the look of a seam and add stability in the finished garment.

A few denim panels were left unembellished to retain the visual integrity of the jean jacket and emphasize the flattering vertical design lines. It was relatively easy – if somewhat tedious – process. Except for the sleeves, that is.

Topstitching an accent fabric in place down that long tube just wasn’t an option. Opening one seam in the 2-piece sleeve, leaving the armhole seam and cuff area attached, allowed for easier access. An accent print was pinned securely to all edges of the wider panel, then top-stitched to the armhole seam, the placket, and the cuff edge. Re-joining the open seam completed the process.

The final step was simply to carefully trim away the denim layer in each embellished panel leaving the print exposed. I chose to pink those cut edges to minimize the fraying, compared to the more rustic look in the inspiration garment.

Even in such a creative project, my Classic style personality comes through in the color-coordinated accent prints, the symmetrical placement and the areas of original denim toning down the visual busy-ness. How might you adapt this project to your personal style aesthetic?


~Nancy Nix-Rice is an image and wardrobe consultant who specializes in helping sewists make optimal wardrobe choices. You can subscribe to her newsletter at https://bit.ly/3SRtPoq

January 3, 2025

A Trio of Edge Finishes (preview)

Many home dec techniques cross over into garment sewing. Here is the professional way to create three edge finishes that will enhance all your sewing endeavors.

Technique: Pleated Trim

Machine foot: general-purpose foot or open toe appliqué foot.

Other requirements: Pleat Tape; bias strip of fabric (folded lengthwise in half) or grosgrain or double-faced satin ribbon—total length should be three times the length of the finished trim.

The full article is in the Members area of the website. CLICK HERE to read the full article. Not a member? Join online!

December 13, 2024

Sew Soft: Tips for Sewing with Velvet

With the holidays approaching, you may want to make something special to wear to a dressy get-together, and velvet or velveteen could be the answer to your quest for something wonderful. Never sewn with these beautiful pile fabrics before? The helpful hints in today’s blog article will guide you down the path to success.

Velvet

Fit to be Tried

Since both velvet and velveteen can be expensive, it’s a good idea to use a pattern that you know fits you. If in doubt, make a muslin first to check for any needed alterations and adjust the pattern accordingly.

What’s the scoop?

The terms velvet and velveteen are often used interchangeably, but they’re not the same. Both have pile—fibers that stick up from the backing surface—but other fabrics also fall into the pile fabric category.

Velvet is soft, drapey and has an elegant sheen resulting from its high pile. It can be smooth or have a variety of textured surfaces. Velveteen is stiffer with a shorter, dense matte-finish pile. Velvet can be made from silk, rayon or other synthetic fibers, while velveteen is most often made from cotton. Both fabrics have a woven backing.

Sewing with Pile Fabrics

  • Whether you’re sewing with velvet or velveteen, the sewing and cutting principles are similar—and perhaps different from other fabrics you’ve sewn as they require extra care. Choose a pattern with simple lines and not too many seams. The fewer seams a garment has, the easier it will be to create. Set-in sleeves can be a challenge, so opt for raglan or cut-on for easier sewing. Avoid buttonhole if at all possible, and opt for closures like buttons and loops.
  • Pile fabrics have nap, meaning that all pattern pieces have to be cut in a single direction to avoid color shading, so be sure to follow that layout on the guide sheet.
  • Pin marks can be permanent on pile fabrics, so pin only within the seam allowances. Another option for an even better hold is pattern weights. With a raised fabric surface, it’s easy for pieces to shift. Cutting pieces single layer with the pile side down is a sure-fire way to more accurate cutting than trying to cut two layers of shifting fabric at once.
  • Cutting velvet creates a mess, as the pile fibers are being cut through as well as the fabric backing. So, clean up frequently—not only your scissor blades, but the cutting surface too.
  • Markings can be transferred with chalk or an air-removable fabric marker to the wrong side of the fabric. Avoid using a tracing wheel as it will permanently damage the fabric surface. For accuracy, choose tailor tacks for marking interior details like darts or pleats.
  • Choose a sharp-tip needle, in a weight compatible with the fabric.
  • Always opt for sew-in interfacings, as velvet and velveteen cannot tolerate fusible products.

Foot Notes

Because velvet and velveteen have pile, it’s difficult to keep pieces in place while stitching. Use a walking foot if you have one, but test-stitch first to be sure the foot doesn’t leave track marks along your seam. If it does, layer tissue paper top and bottom spanning the seam allowance.

Walking Foot available on Amazon. (affiliate link)

Other options for presser feet include a roller foot or a non-stick foot for seaming. Both can help reduce slipping while stitching. Hand-basting is another option to use prior to machine stitching.

Roller foot and Non-stick presser foot available on Amazon. (affiliate link).

Fear not, velvet and velveteen will inevitably “creep” as you sew, but test-stitch some scrap samples to devise a plan to mitigate that process and produce a pucker-free seam. You may find that you need to adjust your thread tension or the presser foot pressure to create a smooth seam.

On most velvets, no seam allowance finish is needed as it only adds bulk. If you have a ravelly velvet, use pinking shears on the seam allowance edges to minimize the fraying, or a three-thread serged edge.

Press Carefully

Press very carefully, if at all, as iron marks cannot be removed from velvet, but rather leave permanent imprints. If you feel compelled to press pile fabrics, lay them face down on a padded ironing surface covered with a thick terrycloth towel, a face-up piece of velvet, or a needle board, a tool specifically designed for this purpose.

Needle board from Amazon. (affiliate link)

Hover the iron over the seamline, but do not allow it to touch the velvety surface or the seam allowance edges. The latter can easily imprint onto the right side of the project.

Steam can be your friend if you insist on pressing velvet but watch the temperature on synthetic fibers and only hover the iron to create the steam in the area needed.


~Linda Griepentrog is the owner of G Wiz Creative Services and she does writing, editing and designing for companies in the sewing, crafting and quilting industries. In addition, she escorts fabric shopping tours to Hong Kong. She lives at the Oregon Coast with her husband Keith, and three dogs, Yohnuh, Abby, and Lizzie. Contact her at .

December 6, 2024

Letter Perfect Gifts

Many sewing machines have built-in alphabets, and some have multiple style and font options. We’re not necessarily talking about high-end embroidery machines, but mid-line machines without the embroidery function.

Little socks are perfect for gift cards or dog bones

Check your instruction manual for options on your machine and you’ll be able to personalize some holiday gifts with thread.

While we can’t tell you exactly how the alphabet stitching works on your machine model, we can discuss some commonalities and helpful hints.

Make a Plan

Most machines with alphabets offer multiple fonts (lettering styles), and upper and lowercase lettering options.

It’s possible to program in the words you want to write and to combine them with spaces and punctuation symbols, depending on your machine’s options. On many machines, you can also program in a knot or lockstitch and the beginning and ending of the word or phrase you’re stitching out, so there’s no worry about threads pulling out.

Photo courtesy of Bernina

You may also be able to change the size of the font so your words or phrases can be taller or shorter, and perhaps change the spacing between the letters as well. This adjustment may or may not be available on your machine, as some stitch alphabets in only a single size.

Repeat the Thought

Many machines will allow you to program in a word and after the stitching is complete, the machine will stop sewing, displaying a single word or phrase only. Or, the machine can keep on stitching the same word repeatedly until you manually stop it. If you opt for the latter, you can create an allover patterning with multiple rows of words.

Add-ins

Some machines will allow you to combine lettering with decorative stitches or repeats of decorative stitches. For example, you could stitch out Happy Holidays and add snowflakes to the beginning and end of the phrase.

For motifs that aren’t symmetrical, use the mirror-image function to switch them up either side to side or front to back when you add them to your words.

Memories

As you play with the alphabet options in your particular machine, remember that there’s likely a memory where you can save the patterning that you created, so you don’t have to reinvent it. Check your machine manual for information on how to save your stitch patterns in the memory, and also how many memories you have available.

Jump Stitches

Photo courtesy of Bernina

Most machines transition from one stitched letter to the next with what’s called a “jump stitch”. This is a visible link to the next letter in the sequence. This connector can be a single stitch, or multiple stitches, depending on the spacing and orientation of the next letter. While some machines can cut all the jump stitches for you, others don’t have that capability and you’ll need to manually trim the jumps with small, sharp pointed scissors or snips to neaten the look.

These thread snips (Amazon affiliate link) are ideal for cutting jump stitches.

Depending on the contrast between your background fabric and the stitching thread color and your personal tolerance, you may opt to simply leave the jump stitches in place instead of trimming them.

Behind it All

Before you stitch out words and phrases, it’s a good idea to stabilize your fabric just as you might for any decorative stitching. The stabilizer helps keep the fabric flat and eliminate any puckering with the build-up of thread.

If you’re using sturdy felt, a lightweight stabilizer will suffice, but for lighter or loose weave fabrics, consider a fusible stabilizer than can stay in place.

Software Options

If your machine has embroidery options, it’s possible to program your lettering and/or decorative stitches together in your embroidery software program. This allows you to stitch out an entire pre-determined shape in a single hooping. Embroidery software offers more options than what’s likely built into the machine.

Embroidery Designs

Note that some embroidery design companies also make digitized designs that contain words and letters, sometimes in a shaped motif. This lets you simply purchase the ready-made design and avoid the programming or digitizing adventure yourself.

So, explore your lettering options and create something fabulous for the holidays!


~Linda Griepentrog is the owner of G Wiz Creative Services and she does writing, editing and designing for companies in the sewing, crafting and quilting industries. In addition, she escorts fabric shopping tours to Hong Kong. She lives at the Oregon Coast with her husband Keith, and three dogs, Yohnuh, Abby, and Lizzie. Contact her at .

  • « Previous Page
  • 1
  • 2
  • 3
  • 4
  • 5
  • 6
  • …
  • 62
  • Next Page »

Become a Member

Join the only national organization dedicated to Advancing Sewing as an Art and Life Skill.

Join Now button

Blog Article Categories

  • ASG Conference
  • Chapter Stories
  • Embroidery
  • Fitting
  • Learn to Sew
  • National Sewing Month
  • Products, Books, & Patterns
  • Projects
  • Quilting
  • Sewing
  • Sewing Techniques
  • Sewing Tips
  • Sewing Tours
  • Videos
  • Disclaimer
  • Privacy Policy

American Sewing Guild
National Headquarters
9660 Hillcroft, Suite 230
Houston TX 77096
713-729-3000 | 713-721-9230 Fax
www.ASG.org

ASG wordcloud - education, conference, discounts, videos, special offers, tours and more

Copyright © 1998–2025 · American Sewing Guild · All Rights Reserved