Give New Life to an Old Classic: Upcycling a Jean Jacket
Transforming a well-loved jean jacket into a one-of-a-kind patched masterpiece is a fun and eco-friendly way to refresh your wardrobe. Whether you’re looking to express your creativity, extend the life of a beloved garment, or reduce textile waste, this upcycling project is the perfect blend of fashion and sustainability. Let’s create something truly unique!
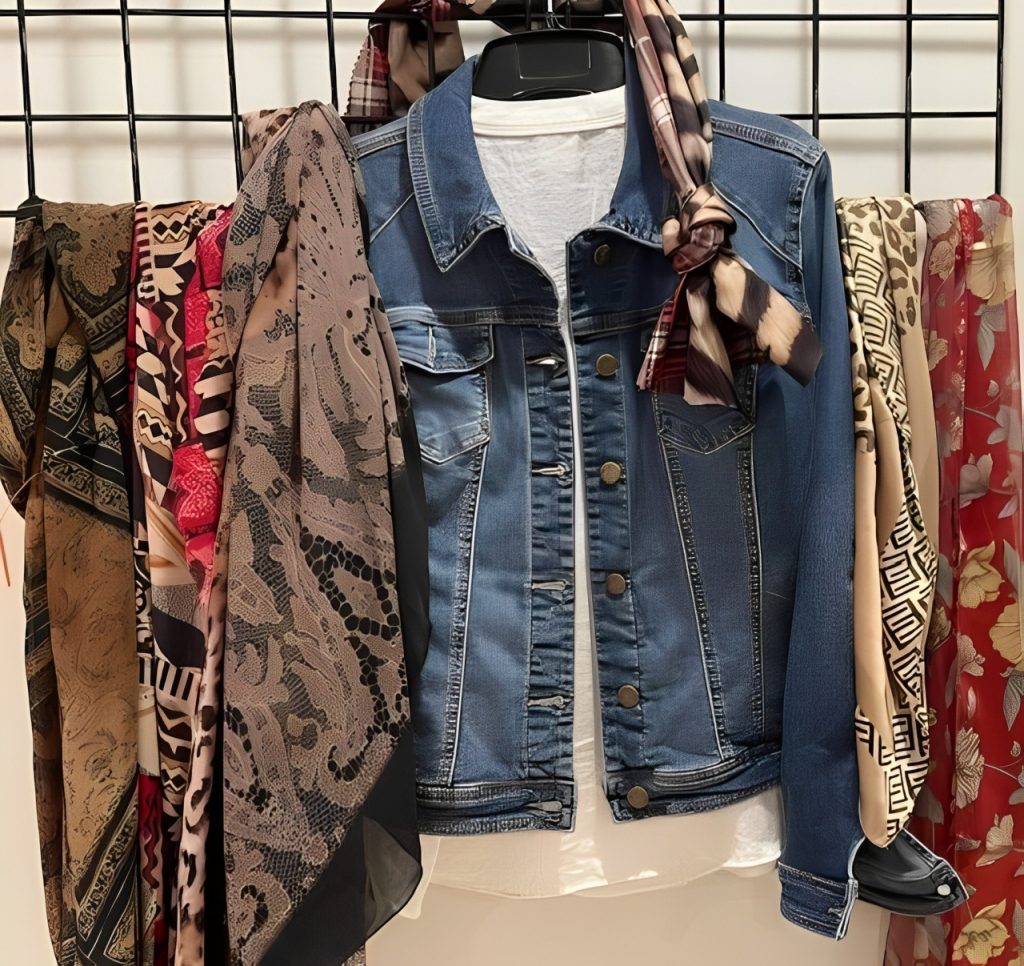
Inspired by this modified jean jacket from a high-end boutique, I set out to make a knock-off for myself. Here’s the original jacket I spotted at a conference:
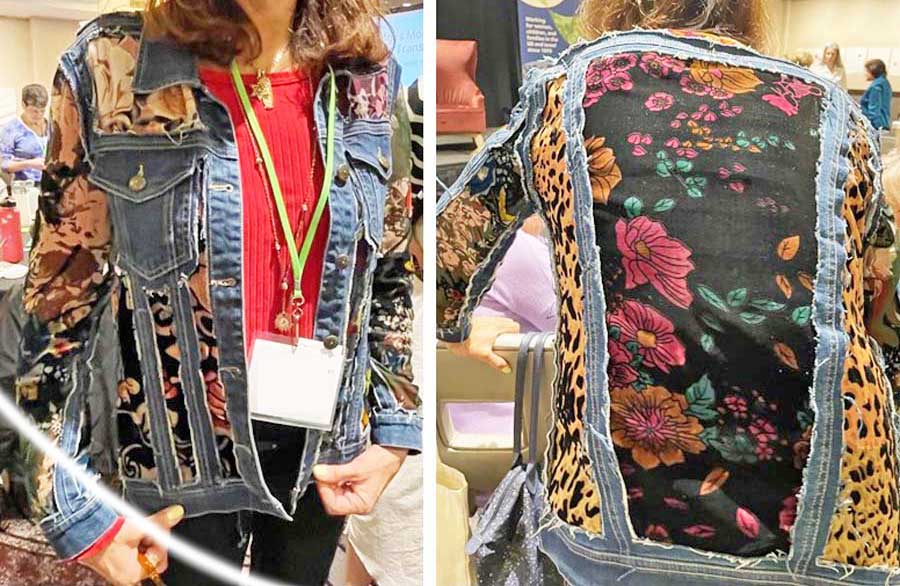
My favorite resale store yielded most of the components — a basic jean jacket and a grouping of lightweight and semi-sheer print scarves.
The accent fabrics in the original were randomly assorted. Always keeping versatility in mind, I curated a more intentional set of prints that make the finished jacket an easy coordinate with dark jeans and black or brown skirt and pants in my wardrobe.
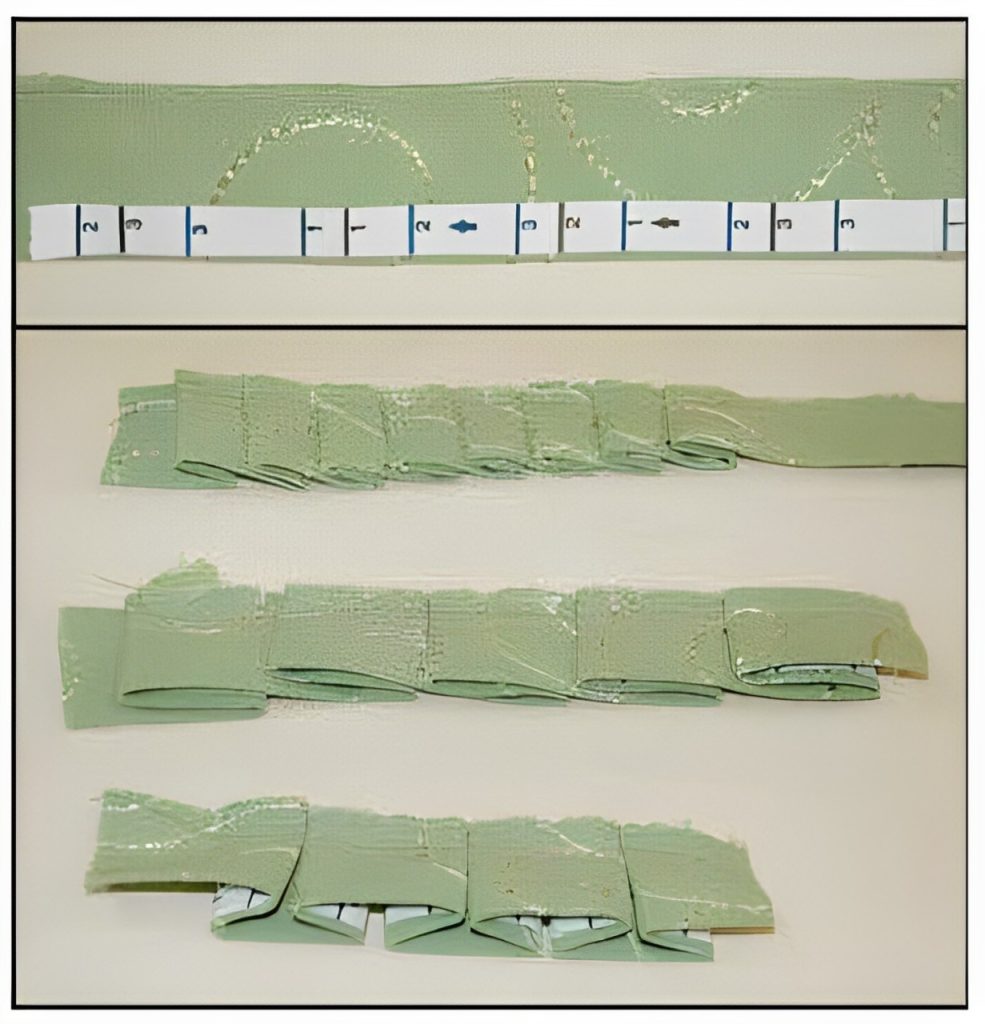
Working one section at a time, I rough-cut a segment of accent fabric an inch or so larger on all sides. I secured the print, right side down against the inside of the garment, pinning to the flat-felled seam or topstitched edge at about 1” intervals. From the right side, I then stitched through all the layers, following the original stitching and matching its color. The excess accent fabric was trimmed away with pinking shears, leaving a ¼” seam allowance.
The accent panel along the front band area was handled differently to avoid a visible seam allowance when the jacket is worn open. I securely hand stitched a finished edge of the brown/tan zebra print scarf to the straight edge of the band before attaching the remaining edges with topstitching.
On the side front panels, the welt pockets were cut away from the inside of the jacket before attaching the accent fabric.
The back panel was wider than any others, so I added 3 parallel rows of topstitching through both fabrics at center back to simulate the look of a seam and add stability in the finished garment.
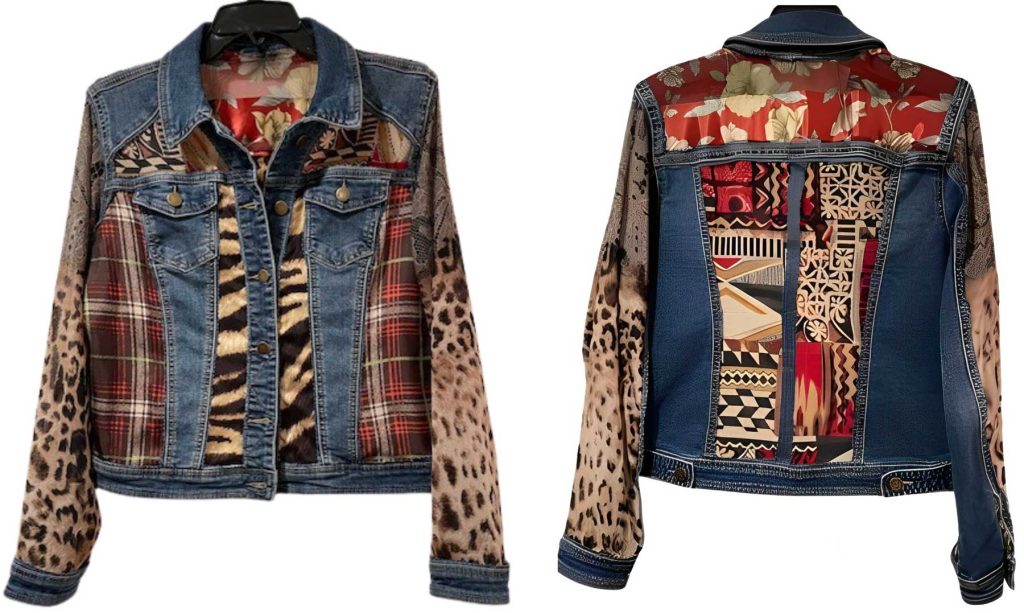
A few denim panels were left unembellished to retain the visual integrity of the jean jacket and emphasize the flattering vertical design lines. It was relatively easy – if somewhat tedious – process. Except for the sleeves, that is.
Topstitching an accent fabric in place down that long tube just wasn’t an option. Opening one seam in the 2-piece sleeve, leaving the armhole seam and cuff area attached, allowed for easier access. An accent print was pinned securely to all edges of the wider panel, then top-stitched to the armhole seam, the placket, and the cuff edge. Re-joining the open seam completed the process.
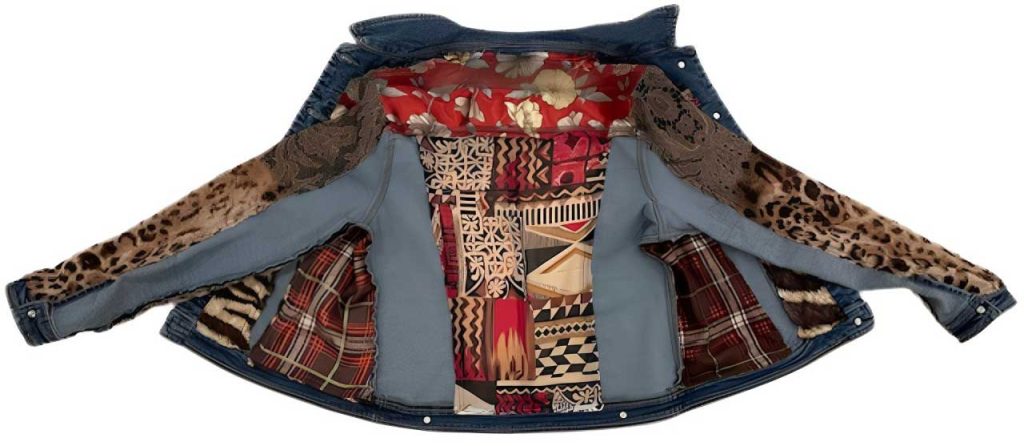
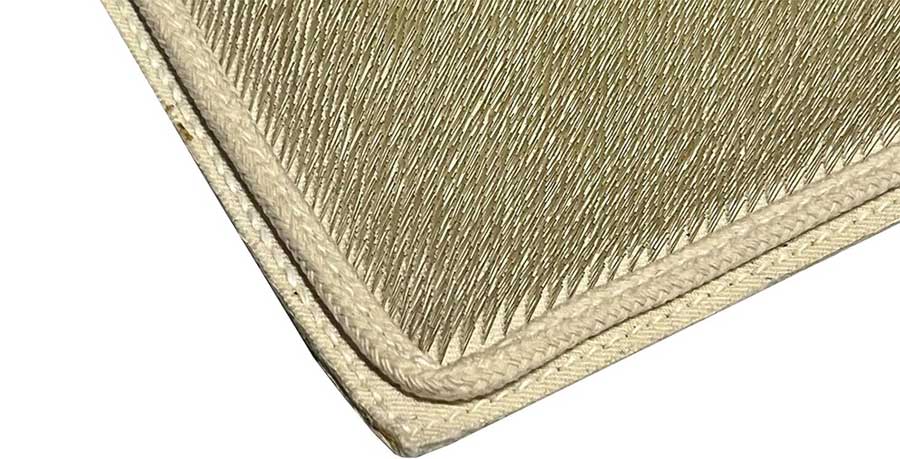
The final step was simply to carefully trim away the denim layer in each embellished panel leaving the print exposed. I chose to pink those cut edges to minimize the fraying, compared to the more rustic look in the inspiration garment.
Even in such a creative project, my Classic style personality comes through in the color-coordinated accent prints, the symmetrical placement and the areas of original denim toning down the visual busy-ness. How might you adapt this project to your personal style aesthetic?
~Nancy Nix-Rice is an image and wardrobe consultant who specializes in helping sewists make optimal wardrobe choices. You can subscribe to her newsletter at https://bit.ly/3SRtPoq