


 The traditional fly zipper you see on a commercially made pair of jeans or slacks works well in a manufacturing environment because special machines can make them very quickly, even though it is not necessarily the best technique or finished product. A mock fly is a great option for home sewers and is a good compromise that gives the same look but is much more practical. This method is a very deep-set version of a lapped zipper that requires little extra preparation to be successful.
Getting Started
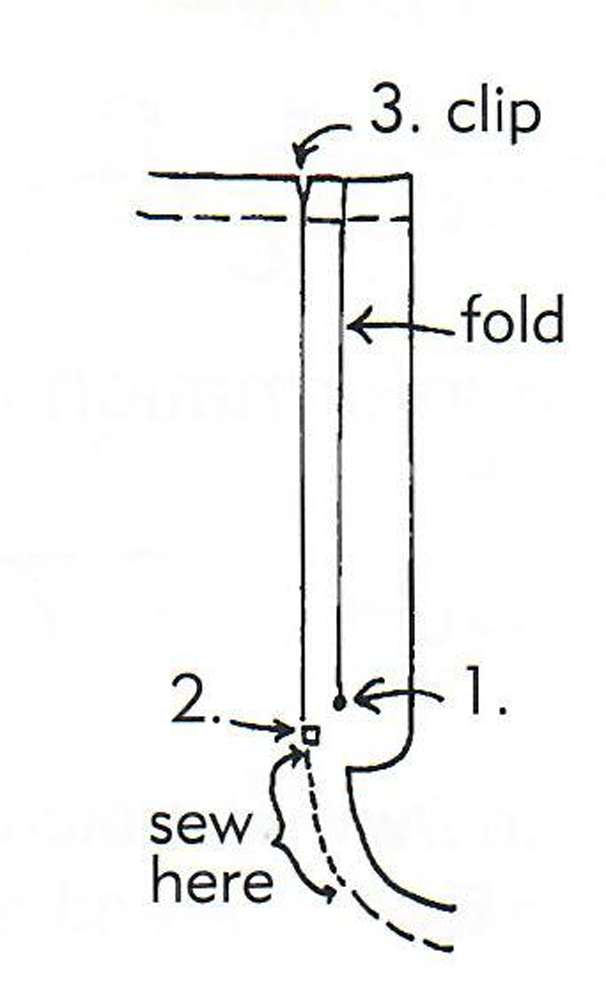
1. Make the following marks on the fabric section. (See Figure 1)
- Make a dot at the Bottom of the zipper. (#1 on diagram)
- Make a dot at the Beginning of Stitching. (#2 on diagram)
- Make a clip at the top of the Center Front line. (#3 on diagram)
2. Stitch from the bottom opening dot (#2 on diagram) down 2 1/2″ towards the inseam using very small stitches. Do not sew the entire seam!
Underflap
3. Decide which will be the underflap of the zipper.
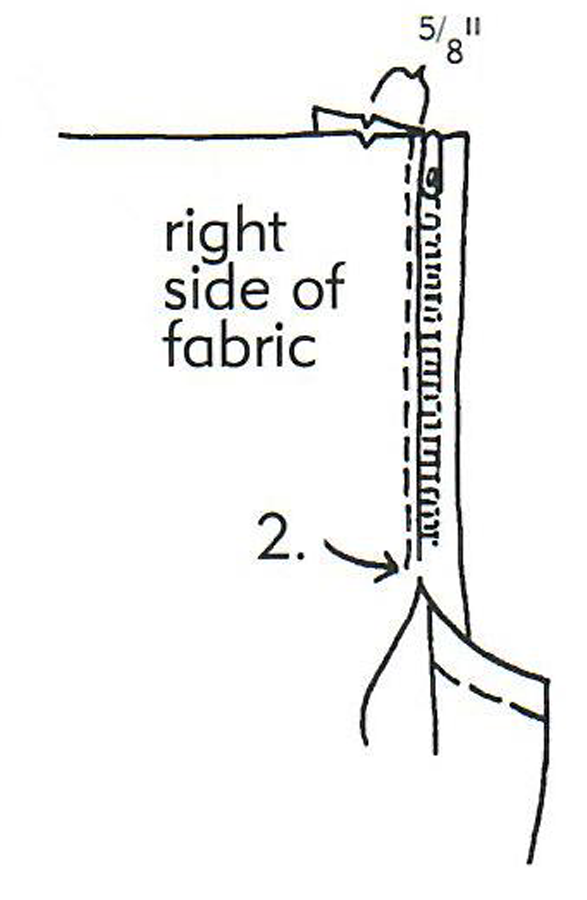
4. Fold the underflap wrong sides together from the seam allowance to 5/8″ from the clip at the top of the Center Front line. This should make the underflap fold evenly.
5. Apply glue stick to underside of the folded flap and attach to zipper as close to the teeth as possible.
6. Sew fabric to zipper as close to the teeth as possible.
Overflap
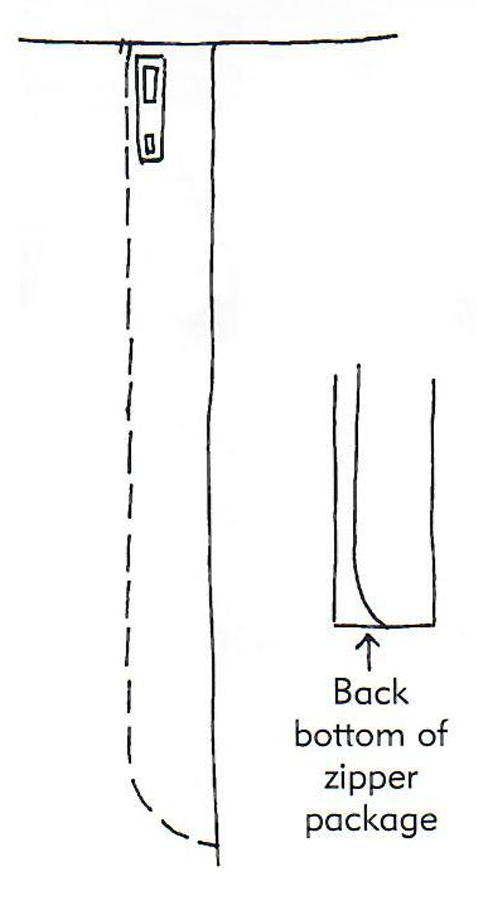
7. Fold other flap under from center clip to bottom of opening. (Figure 3)
8. Match clips and pin folded edges flat to front.
9. Use a glue stick to apply glue stick to the loose top of the zipper and apply the top to the overflap, making the top parallel to the zipper.

10. Lay garment flat, feel for edge of zipper. Using the zipper package as a straight edge, mark stitching line, stopping 3″ from the end with removable pen, pencil, or chalk (Figure 4).
11. Using the bottom curve of the zipper package as a template, finish drawing the stitching line, ending at the bottom of the opening.
12. Beginning at the top, sew over the drawn line for 2″ and stop.
Fabric Manipulation for Zippers
Practice manipulating the fabric while sewing to prevent wrinkles on the overlap section as shown in Figure 5.
As the foot slides on the fabric, it presses on one side of the needle only. This exerts an uneven push and shoves fabric on the foot side faster than the other, thus creating the diagonal wrinkles that often happen along the overlap piece.
Preventing this problem requires handling. Note that this hold will seem awkward at first, but with a little practice you will love the results.
- After the zipper is in place, begin sewing from the top down and continue about 2″. Stop sewing and with your hands flat on the surface of the fabric, push the side that the foot rests on toward the back about 1″.
- Wrinkles will form on the surface, but will equalize with the force of the foot.
- Sew forward about 3″ allowing your hands to move evenly with the fabric.
- Stop, readjust your hands in the same way for the next section, and repeat this process until you reach the end of the zipper.
- Turn at an angle and sew to the seam.
- Reduce the stitch length to 0 and make 3 or 4 stitches.
- After removing from the machine, pull both threads to the back, then pull apart to cinch knot.
~Gale Grigg Hazen, edited from an article that appeared in a previous issue of Notions
