


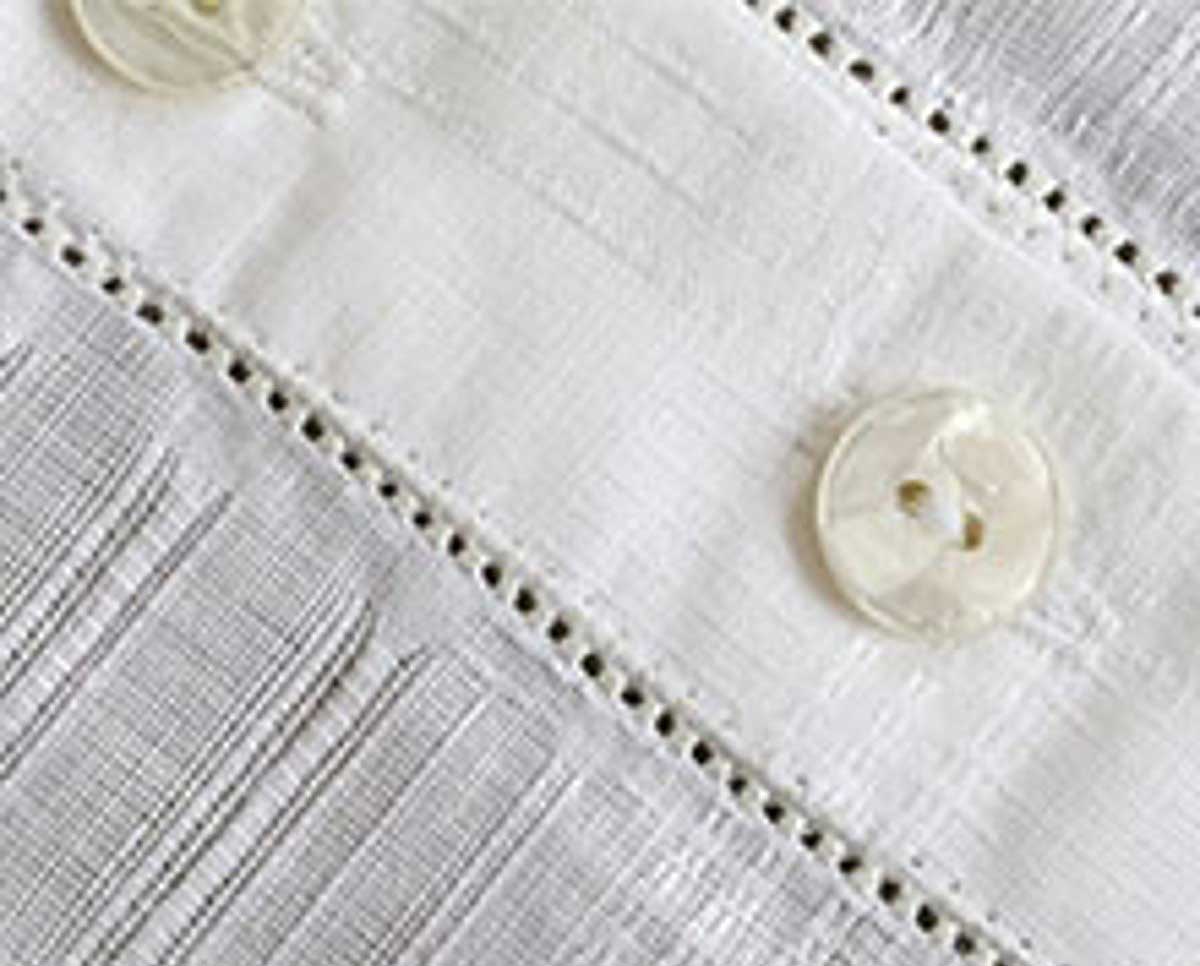
Hemstitching is actually a very old technique that was done by tediously drawing threads and embellishing with hand stitches, but in today’s world it’s easy to do by machine.
What you need
The secret to hemstitching is the perfect combo of fabric, specialty needle, thread, stabilizer and stitches.
Linen and linen blends are ideal as a fabric base, but you can also use batiste and voile. The latter two are often found in heirloom pieces where this technique is especially appropriate. The secret is that you need a natural-fiber fabric that isn’t too tightly woven. Knit fabric does not work with this technique.
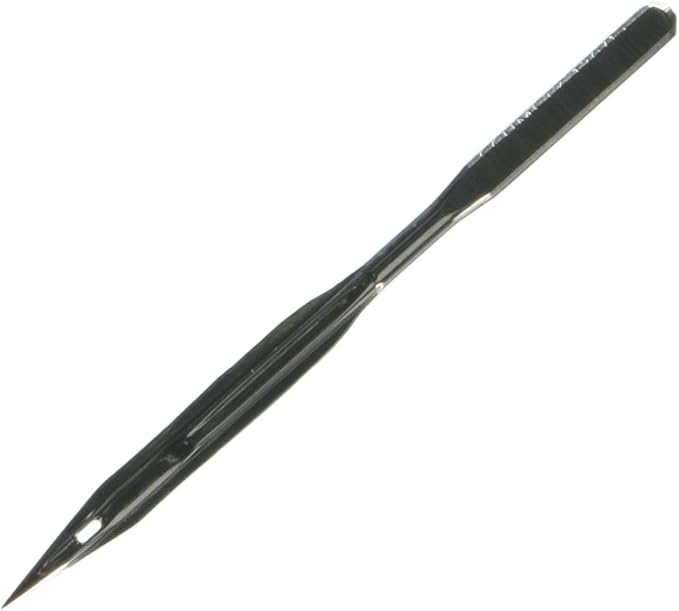
A wing needle is paramount—often called a hemstitch needle, it has protrusions on each side of the needle shaft so that it makes holes in the fabric by spreading the fibers. These specialty needles are available in sizes 16-19 (100/120).
Choose a lightweight thread, either in a matching or contrasting color, depending on the desired finished look. Size 60-80 threads work well as they don’t fill in the hole created by the needle wings and leave a clean opening. Use a matching color bobbin thread.
Stabilizer is imperative to make this technique work. Liquid or spray stabilizer works best and can be supplemented with another water-soluble stabilizer and/or starch if needed. It’s important that the fabric is very stiff for optimal stitching results.
Obviously, you want to use a presser foot with a wide opening for greater visibility and room for the wing needle swing—either a clear zigzag foot or a metal open-toe foot is ideal. Some machines have limitations to the available stitch width when using a wing needle, so double check your instruction book. If your machine has dual feed, activate that function as well for even fabric feeding.
CAUTION: When using a wing needle, don’t use your machine’s needle threader or thread cutting functions, as they can be damaged by the “wings”.
Which stitch?
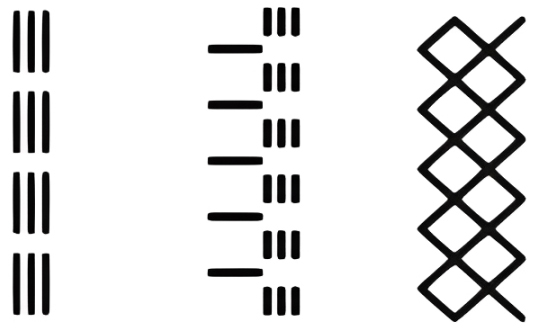
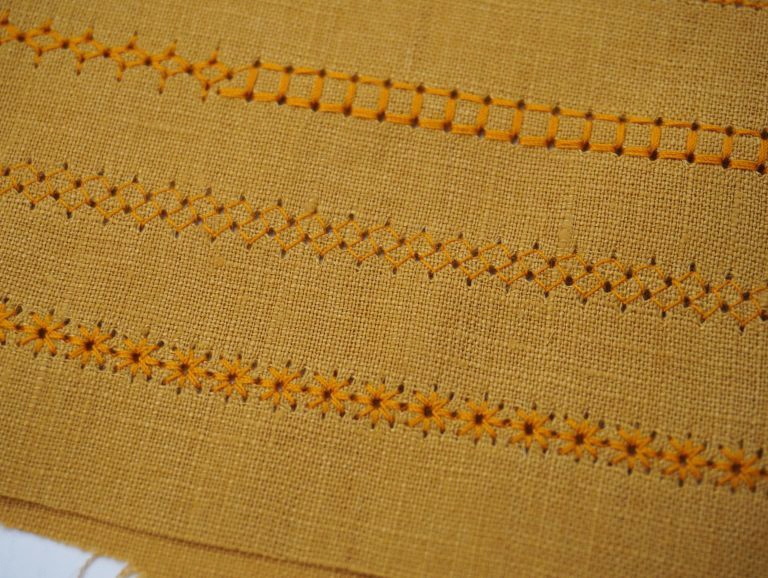
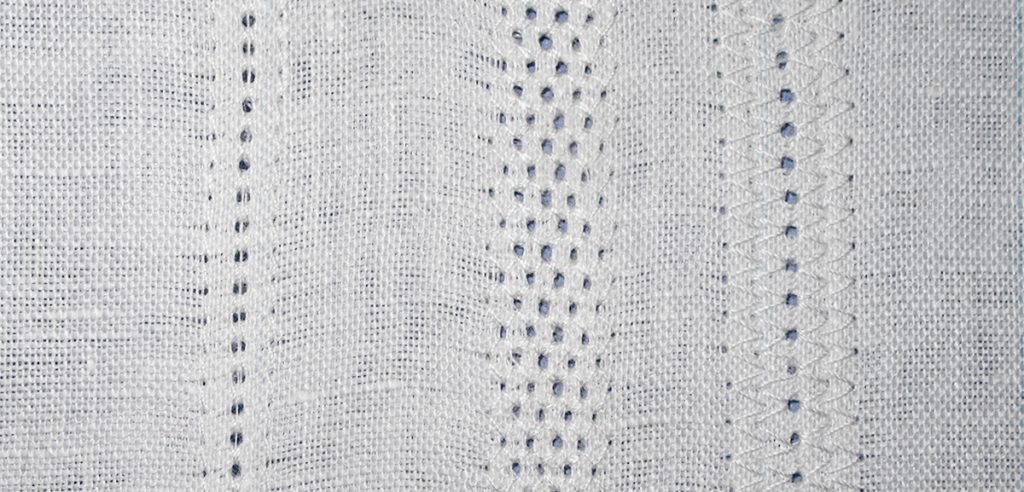
The secret to choosing a stitch is that the needle needs to go into the same hole in the fabric multiple times, so choose a stitch that goes forward and backward, and/or side to side. Some machines have specially labeled stitches for hemstitching, sometimes under an heirloom sewing menu. Straight triple stitch, blanket stitches, star stitches and honeycomb stitches all work well, but play with other stitches to check results.
Ready, set, stitch
Mark the area of the fabric where you want to stitch using a removable marker. If it’s a hem area, press under the hem first then plan to stitch just inside the upper hem edge. Another option for marking it to actually pull a thread but be sure your fabric/project is on grain if you choose this option.
Test-stitch on scraps of stiffened fabric to check stitch length and width prior to sewing your actual project. Just as a double-check for the width setting, hand turn the handwheel to be sure the wing needle clears the foot you’ve chosen. Make any adjustments needed, including length, width and tension, to get the look you want.
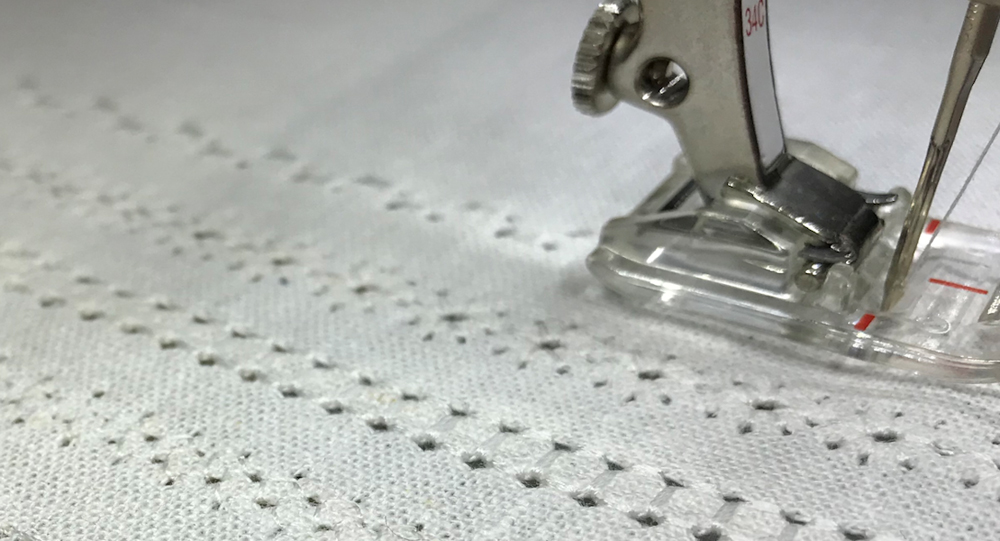
Stitch along the marked line and sew slowly, remembering that the machine is going backward and forward/side to side, to form each stitch and the needle needs to penetrate the same hole multiple times to make a prominent opening. Don’t push or pull the fabric.
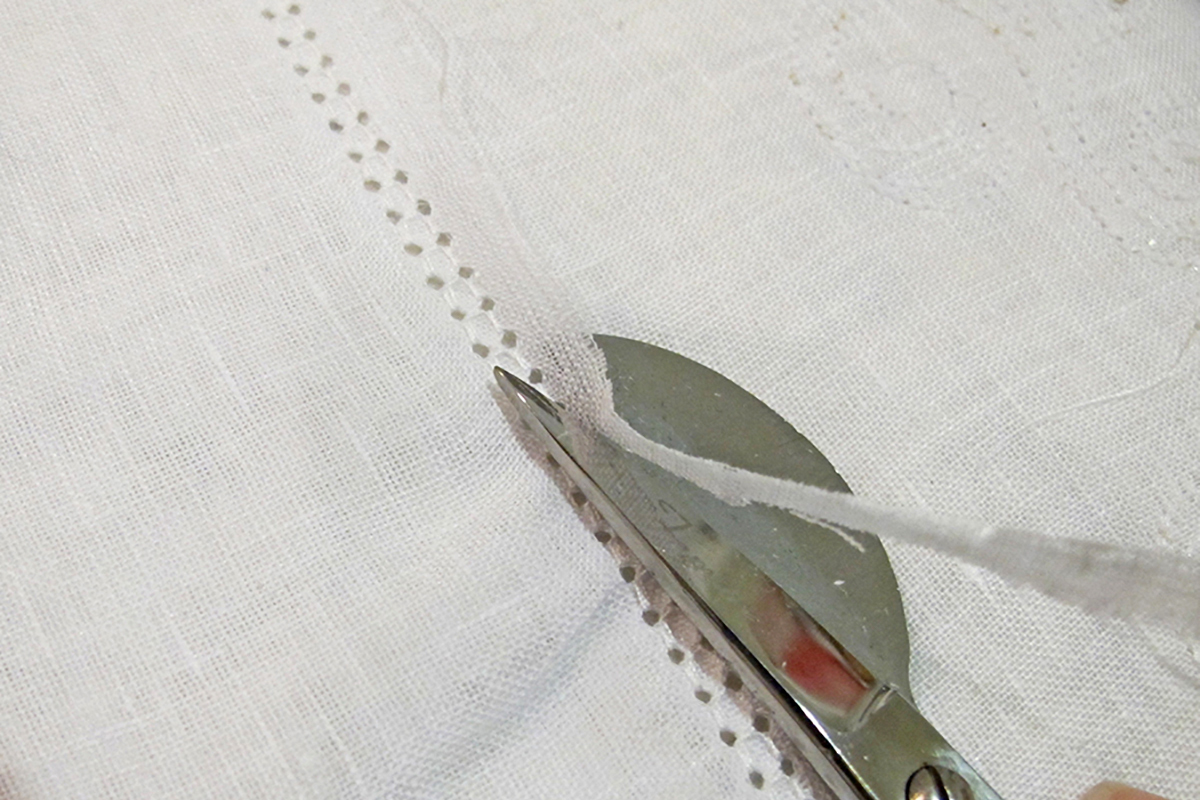
Depending on what you’re hemstitching, you might want to create an allover design on fabric to be used for a yoke, cuff, collar, placket or hem band on an heirloom garment. Or, you may be actually hemming a napkin or garment. If it’s the latter, trim the excess hem allowance width once your embellishing efforts are complete.
If your stitching line ends don’t go into a seam allowance, bring the top thread to the underside and tie off to finish and secure the stitches.
The last step is to remove the stiffener/stabilizer from the fabric, following the manufacturer’s instructions. When the fabric is dry, press the stitched area from the wrong side of the fabric to set the hole openings. This leaves a clear design area. If needed, apply light starch to smooth the finish.
~Linda Griepentrog is the owner of G Wiz Creative Services and she does writing, editing and designing for companies in the sewing, crafting and quilting industries. In addition, she escorts fabric shopping tours to Hong Kong. She lives at the Oregon Coast with her husband Keith, and three dogs, Yohnuh, Abby, and Lizzie. Contact her at gwizdesigns@aol.com.
