


Working with waterproof fabrics can feel intimidating, especially if you’re new to sewing or had a rocky start with them. Maybe you’ve tried stitching a raincoat or backpack, only to find yourself battling slippery surfaces, sticky presser feet, and mysterious leaks. Don’t worry—you’re not alone! Waterproof fabrics do have their quirks, but with the right techniques and tools, you can absolutely tame them. Whether you’re crafting outdoor gear, making outdoor cushions, creating rain jackets, or designing durable bags, these tips will help you succeed.
What is the Difference Between Waterproof, Water-Repellant, and Water-Resistant?
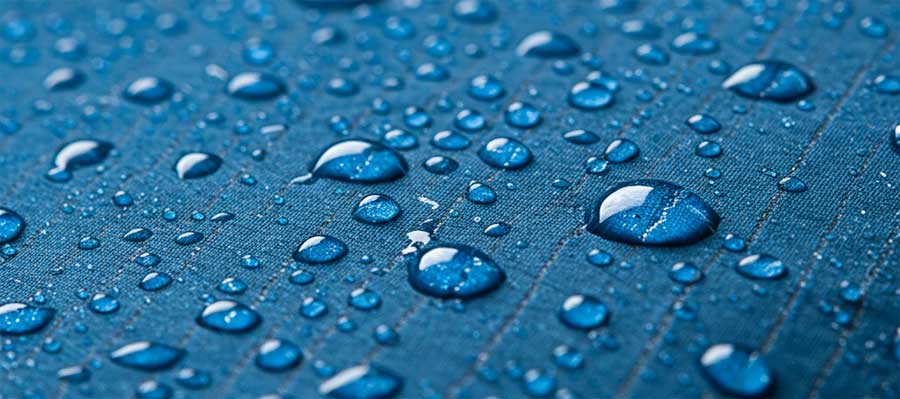
Waterproof fabric does not allow water to penetrate the fabric. These fabrics would keep you dry if you are caught in a downpour; however, these aren’t entirely impermeable. Waterproof fabric is composed of various materials, including synthetic fibers like polyester and nylon and natural fibers like cotton and wool.
Water-repellent fabrics are treated with a water-repellent coating that causes water to bead up and roll off, preventing water from penetrating the fabric. They will keep you dry in a mild rainshower, but won’t offer much protection in a heavy rainstorm. However, they are also often less expensive and more breathable than waterproof or water-resistant materials.
Water-resistant fabrics offer the least amount of water protection—they will repel water to some extent, but will not prevent it from penetrating the fabric. Water-resistant fabrics are often used for outdoor garments like jackets and trousers. They will shield you from light rain and splashes but won’t keep you dry in heavy rainstorms or if you are immersed.
Preparing to Sew
Fabric
While many fabrics do not require pre-washing, it’s usually recommended to pre-wash waterproof fabric. In addition to helping to remove residual chemicals, pre-washings will pre-shrink the natural fibers (such as cotton or linen) that tend to shrink when washed. Wash in cold water with a gentle soap on a gentle cycle. No bleach or other chemicals should be used. Air dry after rinsing.
Know Your Fabric Types
Here are a few common waterproof fabrics and how they behave:
| FABRIC | FEATURES | CHALLENGES |
| Ripstop Nylon | Lightweight, tear-resistant, water-repellent | Slippery, prone to fraying |
| PUL (Polyurethane Laminate) | Soft, stretchy, waterproof, washable | Sticky when sewing, heat-sensitive |
| Oilcloth | Sturdy, water-resistant, wipe-clean surface | Sticky, stiff, can crack over time |
| Vinyl | Durable, waterproof, wipeable | Sticky, thick, hard to maneuver |
| Laminated Cotton | Flexible, water-resistant, washable | Less durable than PUL, can wrinkle |
Interfacing
If your pattern requires interfacing, you will need to test the best option. Some water-resistant materials may not adhere well to fusible interfacing, plus the heat could damage the fabric. Sew-in interfacing may be your best option.
Cutting and Sewing
Forget Using Pins

One of the first lessons when working with waterproof fabrics? Avoid pins like the plague. Pins leave permanent holes that compromise the waterproof quality of your project. Once that hole is there, water can sneak through.
Here’s what to do instead:
Use Pattern Weights for Cutting: Skip pinning your pattern pieces. Instead, use weights—whether commercial or home-made— to keep your fabric in place while cutting.
Sewing Clips Are Your Best Friend: When assembling your pieces, opt for sewing clips instead of pins. They hold your layers together securely without puncturing the fabric.
Try a Water-Soluble Basting Tape: If your fabric is slippery or hard to control, a water-soluble basting tape will temporarily stick the layers together, preventing shifting as you sew. And it washes out when you’re done.
Marking
It’s best to use chalk or washable pens for marking as other methods might damage the fabric.
Choose the Right Needle
Waterproof fabrics, like coated nylon, vinyl, or laminated cotton, can be tough on your needles—and each stitch creates a tiny hole. To minimize damage:
Use a Microtex Needle: These needles have a very sharp, fine point, perfect for piercing tightly woven or coated fabrics without causing unnecessary damage. Choose sizes 70/10 or 80/12 for lightweight waterproof materials like rain coats or windbreakers. Choose a 90/14 or 100/16 for heavier fabrics such as that used in outdoor gear or tents.
Universal Needles Can Work (in a Pinch): If you don’t have a Microtex needle on hand, a sharp universal needle can work for many projects. Just be prepared to change your needle frequently. A sharp needle designed for heavy-duty fabrics is preferable. Note that waterproof materials can dull your needle faster than regular fabrics.
Thread
A high-quality polyester or nylon thread designed for heavy-duty or outdoor use should be used. These threads are water-resistant, UV-resistant rays, and can absorb the abrasion for these uses.
Mind Your Presser Foot
Your presser foot can make or break the sewing process, especially with waterproof or coated fabrics.

Walking Foot: For slippery, shifting fabrics like ripstop nylon or oilcloth, a walking foot is invaluable. It feeds both the top and bottom layers through the machine evenly, preventing puckering or stretching and reducing slipping.
Teflon (Non-Stick) Foot: If you’re sewing sticky fabrics like vinyl or polyurethane-coated materials, a Teflon foot helps the material glide under the presser foot smoothly. They’re affordable and make a noticeable difference.
No Teflon Foot? Try This Hack: If you’re in a hurry and don’t have a Teflon foot, place a layer of parchment paper or tissue paper on the top of the fabric (between the fabric and the foot). Sew through the paper as normal, then tear it away once you’re finished. It’s an old-school trick that works surprisingly well!
Adjust Your Stitch Length
Remember that every drop of the needle in the fabric makes a hole—and too many holes can compromise your fabric’s water resistance. To minimize this:
- Lengthen Your Stitch: Use a longer stitch length, ideally between 3.0mm and 3.5mm. This reduces the number of perforations and prevents puckering.
Test, Test, Test: Try your stitch length on a scrap piece of your fabric before committing to the actual project. Some fabrics behave differently, and you’ll want to see how yours reacts.
Finishing
Skip the Iron (Most of the Time)
Waterproof fabrics and heat don’t always mix. Some materials can melt or warp when exposed to high temperatures.
Avoid Direct Heat: As a rule of thumb, don’t iron waterproof fabrics unless you know they can tolerate it. Many coated fabrics will melt or get damaged with heat.
Use Finger-Pressing or a Seam Roller: Instead of ironing seams open, press them firmly with your fingers or use a seam roller. You can also topstitch seams to help them lay flat, if needed
The Final Steps for True Waterproofing
When planning for closures, consider waterproof zippers which often have sealing mechanisms to keep out moisture.
Also, no matter how careful you are, there will be needle holes that will allow moisture in. For truly waterproof seams, seam sealing is a must.
Seam Sealing Tape: This special tape covers the inside of your seams and is activated by heat (yep, this is the exception to the no-iron rule). Follow the tape manufacturer’s instructions carefully:
- Use a low-temp setting.
- Place a pressing cloth between the iron and tape.
- Turn the steam off.
- Always test on a scrap piece first!
Liquid Seam Sealant: For smaller projects or awkward seams, a liquid seam sealant (often sold in outdoor supply stores) can be painted or squeezed along the seams. It dries clear and flexible.
That said, sealing seams isn’t always necessary. If your finished item won’t be submerged, you may decide it’s not worth the extra step.
