


We receive numerous sewing queries and many require relative short answers, so check out our Q&A for some timesaving tips.
Q: My granddaughter’s jeans keep looking too short for her as she grows taller. Is there a quick way to add length instead of just cutting them off for shorts?
A: Absolutely—when kids grow taller rather than wider, there’s no need to ditch the pants quite yet. Add a ruffle to the lower edge and tie it in with an embroidered motif. Open up the inseam for easy access for embroidering the motif, then measure the leg circumference to figure the ruffle amount needed. Each ruffle piece should be about 2 ½ to 3 times the width of the jeans leg circumference. Cut the piece twice the desired finished length, plus seam allowances.
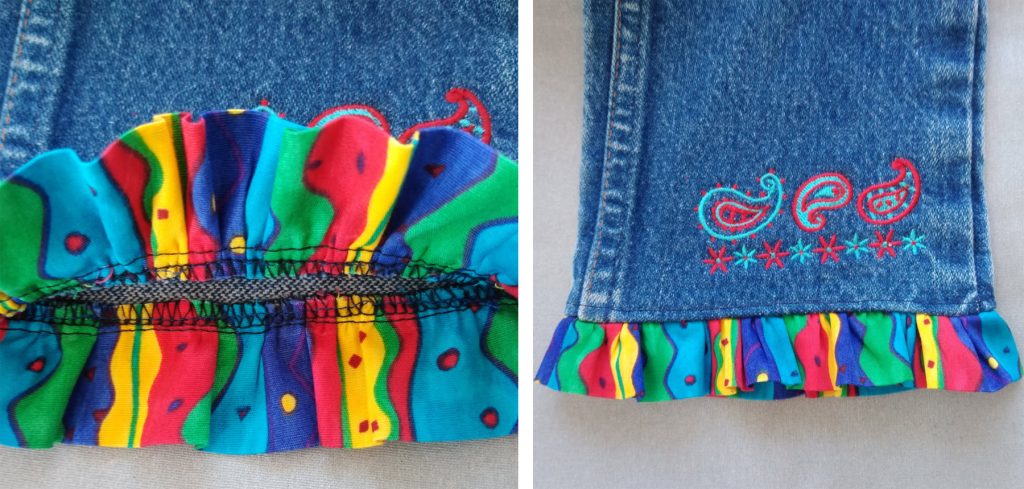
After embroidering, stitch up the inside leg seam to form a circle and trim off the bulky jeans hem. Sew the ruffle short ends together to form a circle. Fold the ruffle strip in half wrong sides together and press. Quarter-mark the leg opening and the ruffle raw edges. Sew a gathering thread around the ruffle raw edges and pull up to match the leg circumference. Matching the quarter-points, pin the ruffle to the jeans leg right side, pulling up the gathering thread to match the leg width. Stitch the ruffle in place, then serge or zigzag the raw edges together. Topstitch, if desired. Repeat for the second leg. This adds a few more months of growth room to the jeans!
Q: I’m scared to put in grommets. Any advice?
A: Grommets can be scary since they’re usually inserted when your project is otherwise completed, so one slip-up can potentially ruin the entire thing. But, never fear, you can do it!

Grommet insertion processes can vary slightly by brand, but here are some general hints:
- Be sure the area where the grommets are placed is reinforced with added interfacing, batting or multiple fabric layers (like a facing) to strengthen it. Your pattern should give you guidance on the best option.
- Carefully mark the center of each grommet location, trace the template and cut the appropriate size hole. Be careful not to cut the hole too large!
- Note that grommets have both a male and female portion and you need one of each for every grommet opening.
- Use the appropriate tool or pliers to apply your particular grommet brand. Test on a scrap of fabric with the same number of layers prior to starting on your project.
Q: I love the look of invisible zippers, but I never seem to get the stitching close enough to the coils to make it truly invisible. Can you help?
A: Invisible zippers create a professional looking garment when they’re installed properly. The key is to stitch as close to the coils as possible using a specialty presser foot. This foot is can be an accessory for your machine, or some are sold by the zipper manufacturer, and it “rolls out” the zipper coil so you can stitch close to it without catching the teeth. The teeth travel in a groove under the presser foot, and in conjunction with adjusting the needle position, you should be able to stitch close enough to hide the zipper teeth. On lightweight invisible zippers, it helps to hold the coils in their rolled out position as they feed into the foot groove. If you’re not comfortable with your fingers that close to the needle, use an awl for that process to keep them in place for stitching.
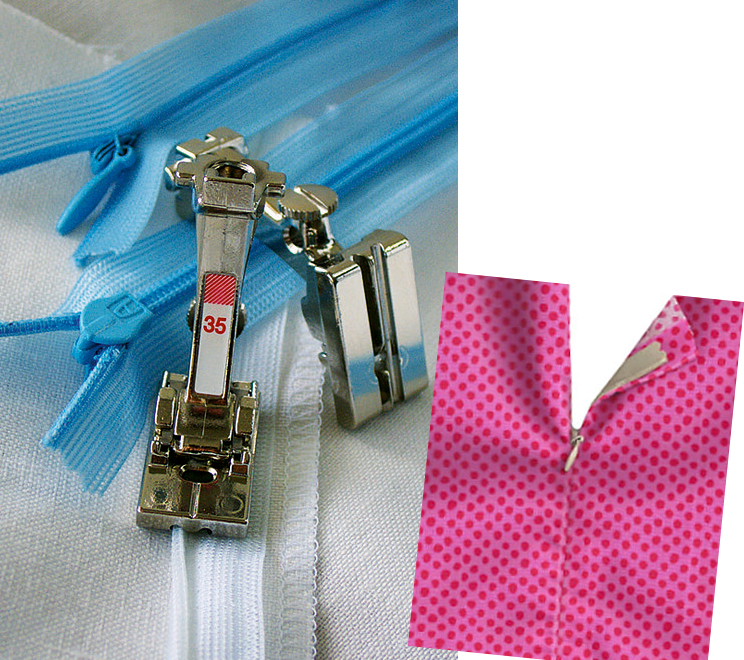
If you don’t have a special foot for installation, use your regular zipper foot and adjust the needle position to be right next to the coils, then manually roll out the coils and stitch along the base of the coils.
If your zipper pull doesn’t quite blend with the fabric, think about using nail polish to match it up.
~Linda Griepentrog is the owner of G Wiz Creative Services and she does writing, editing and designing for companies in the sewing, crafting and quilting industries. In addition, she escorts fabric shopping tours to Hong Kong. She lives at the Oregon Coast with her husband Keith, and three dogs, Yohnuh, Abby, and Lizzie. Contact her at gwizdesigns@aol.com.
