


Sergers can be especially mystifying with their multiple threads, loopers and needles. But we’re here to help with answers to some common serger questions.
My serger has a differential feed, but I don’t really understand what it does. Can you enlighten me?
Understanding a differential feed system is important to get the most out of your serging capabilities.
Fabric is fed under the serger foot by feed dogs—those little teeth under the presser foot. There are two sets of feed dogs that operate independently, depending on the differential feed settings.
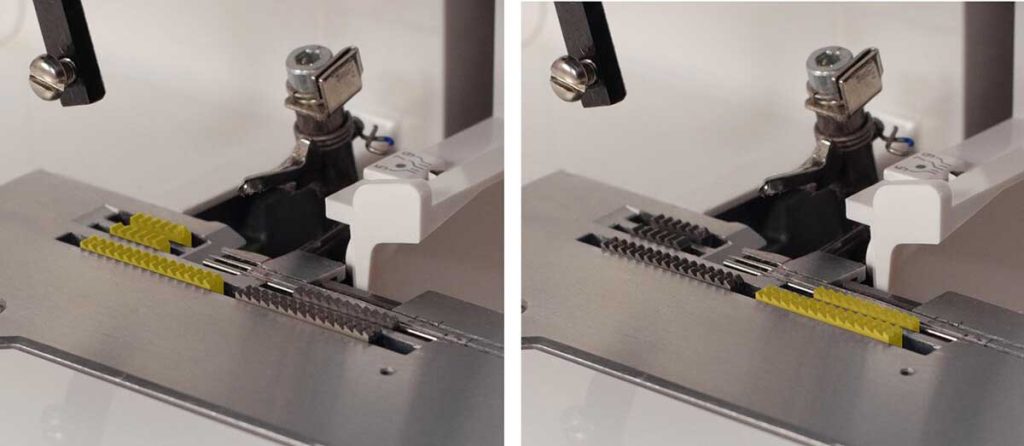
For example, some knit fabrics emerge wavy and stretched out after sewing a serged seam—obviously, not an ideal scenario. Adjusting the differential feed ratio can eliminate that distortion, maintaining a flat finished seam. Oppositely, adjusting the other direction can create a ruffled seam, stretching the area as it’s being overlocked.

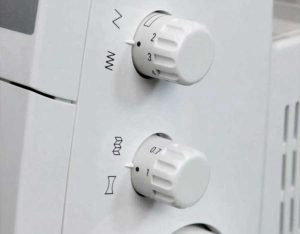
Depending on the brand, the differential feed adjustment may be accomplished with a dial, a lever or knob and can showcase a number or simply a schematic, or both. At a setting of 1 (or N for normal), both sets of feed dogs move at the same speed. This is usually a good setting for woven fabric seaming as long as they’re not bias-cut edges. But, a 1 setting for knits can be problematic.

Turning to a higher number feeds more fabric into the front feed dogs and this setting can be used for gathering or easing. It can also be used to create a flatter seam in knits that tend to stretch.
Turning to a lower number feeds less fabric into the front feed dogs than the back is putting out, creating stretch. This setting can be used to create ruffled or lettuce edges.
The differential feed settings work in tandem with the stitch length indicator, so test-stitching is imperative to get a flat overcast seam without distortion if that’s the goal.
I find threading my serger very intimidating. Is there a proper way to do this?
Sergers can be much more intimidating that a conventional machine because they have multiple threads, multiple needles and the added loopers, all needed to form the stitch patterning.

It’s always best to consult your instruction manual for specific instructions, but as a general rule, thread the machine in this order: upper looper, lower looper, right needle, left needle. Some brands thread the loopers automatically, making it less likely that you need to stand on your head to accomplish the task.
Some brands of sergers also come with threading loops to make threading the upper and lower loopers easier. And, there are likely threading diagrams inside the front opening panel. With the threads shown in different colors, it’s easier to keep the threading paths in order.
If you want to avoid having to rethread the serger when you need to change colors, simply tie the new thread color on to the old color and gently pull it through the threading path. Clip the knots before rethreading the needle(s).
Be sure that all threads are engaged in the machine’s tension discs to ensure proper stitching.
What do I do at the end of a serged seam to keep it secure?
The easiest thing to do is to serge off the fabric for a few inches, then thread the serger tail into a needle threader, carry it back under the encased seam edge, then clip off the excess length.

Another option is to apply a seam sealant to the serged seam ends, wait for it to dry, then clip off the excess tails.
Some people prefer to tie an overhand knot with the extended serger tail.
If the seam will be crossed by another seam, there’s little worry about it unraveling, so you may need to do nothing as it will be reinforced with the crossing seam.
*Unless otherwise noted, all images courtesy of Bernina
~Linda Griepentrog is the owner of G Wiz Creative Services and she does writing, editing and designing for companies in the sewing, crafting and quilting industries. In addition, she escorts fabric shopping tours to Hong Kong. She lives at the Oregon Coast with her husband Keith, and three dogs, Yohnuh, Abby, and Lizzie. Contact her at gwizdesigns@aol.com.
