


A sleeve placket is that nifty little opening at the bottom of a sleeve, skillfully stitched to let your hand slip through with ease. Typically, you’ll spot it on shirts or blouses, and it’s usually topped off with a neat cuff. Beyond its practicality, the placket can also be a real style statement. Ever thought of mixing things up with contrasting fabric for the cuff and placket?

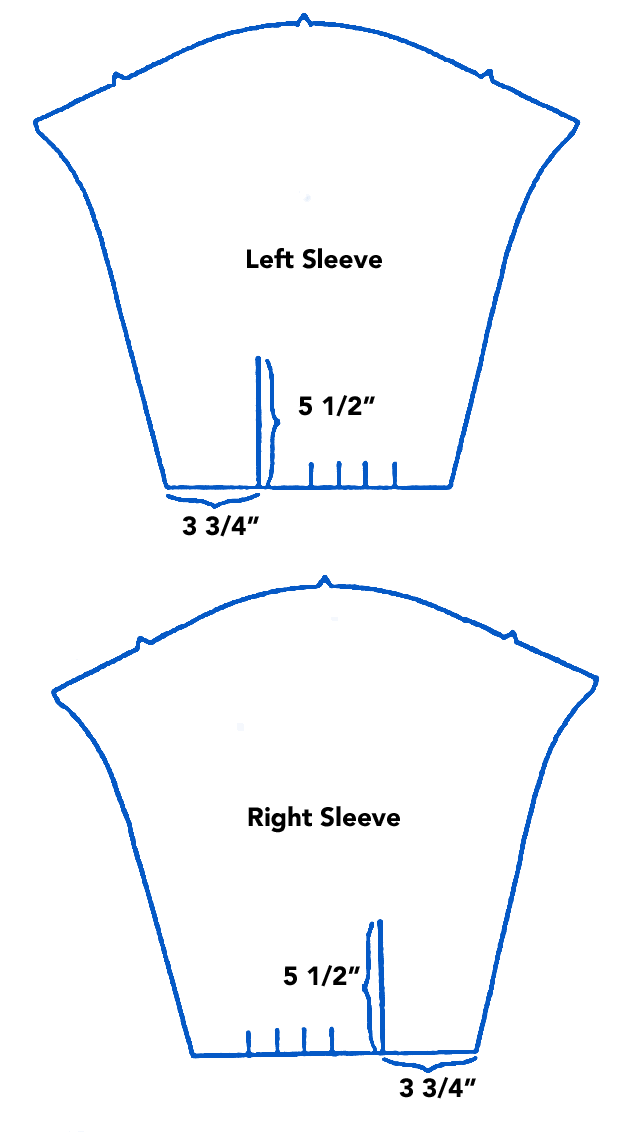
1: When making the placket, remember that the slash is on the sleeve back. Begin by marking the slash lines on sleeves. At the lower edge of own sleeve, measure 3 3/4” (9.5 cm) from one side edge, opposite the pleat markings. At the point, draw a slash line 5 1/2 (14 cm) long. Repeat this procedure with the second sleeve, measuring from opposite edge. This will give you a right and a left sleeve. (Figure 1)
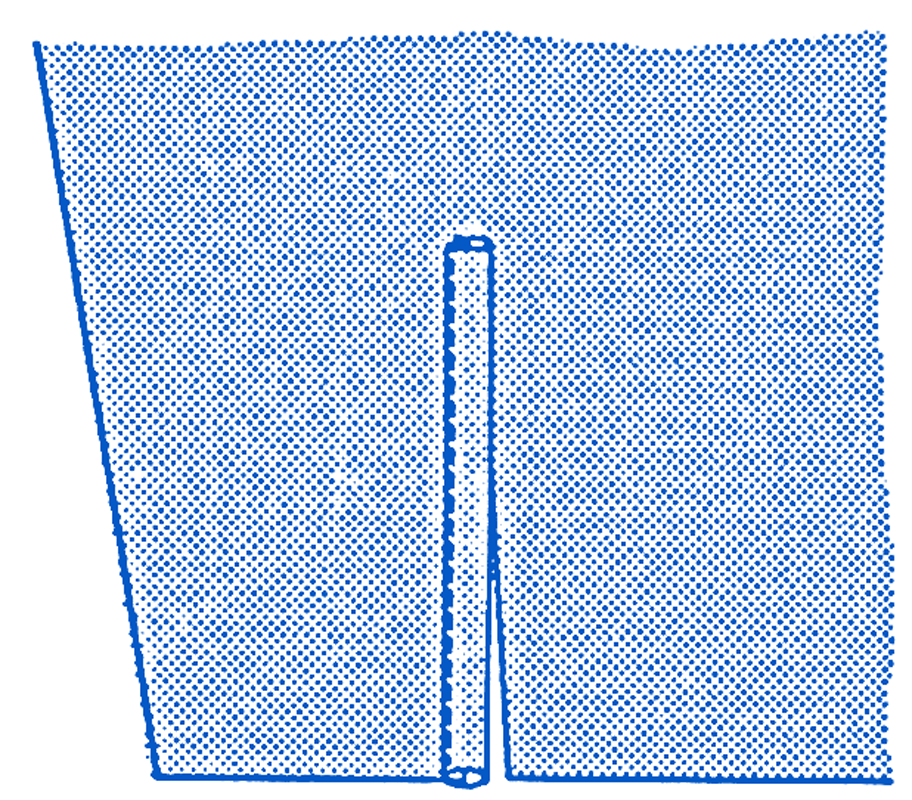
2: Cut each sleeve on the slash line. Then cut two pieces of fabric on the straight of grain, 6 3/8” x 1 1/2” for under the sleeve packets.
3: With wrong sides of the under-sleeve placket together, fold under in half lengthwise and press.
4: On each long side of placket, fold 1/4” (0.6 cm) to the wrong side and press. (Figure 2)

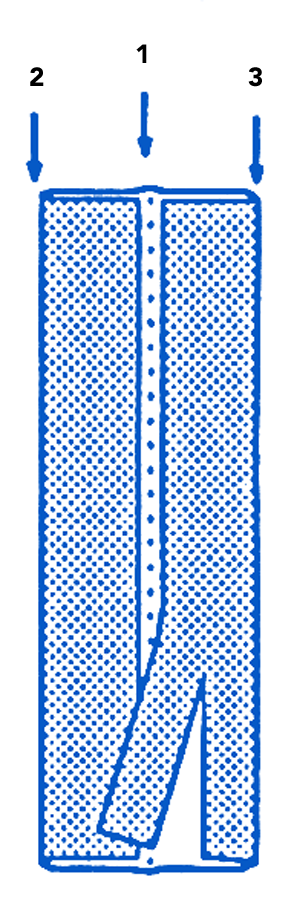
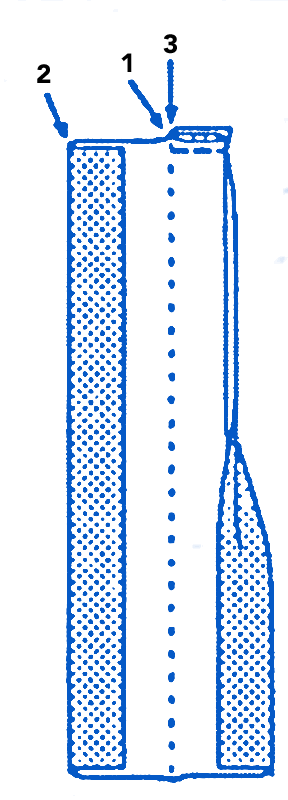
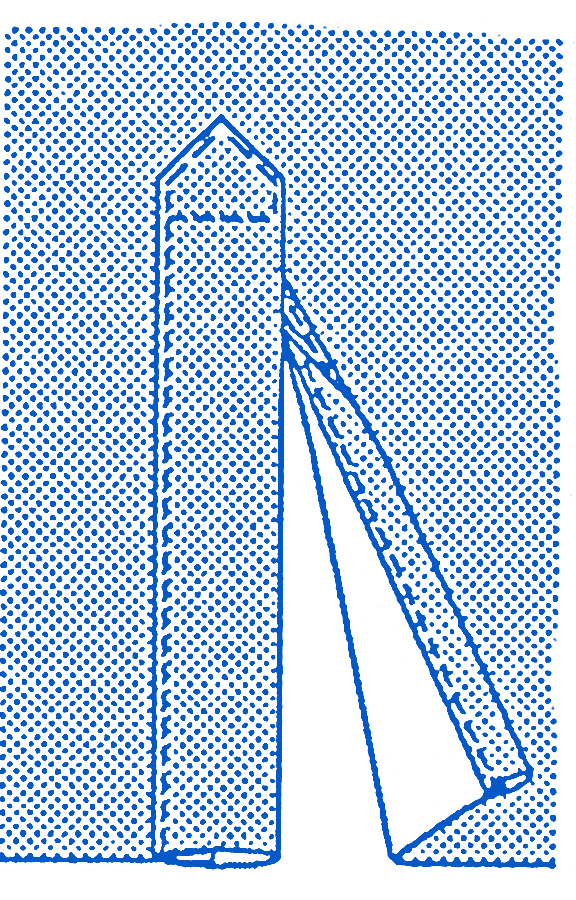
5. Insert the back side of slash on the sleeve between folds of the under-sleeve placket, matching cut edges inside, as illustrated. (Figure 3)

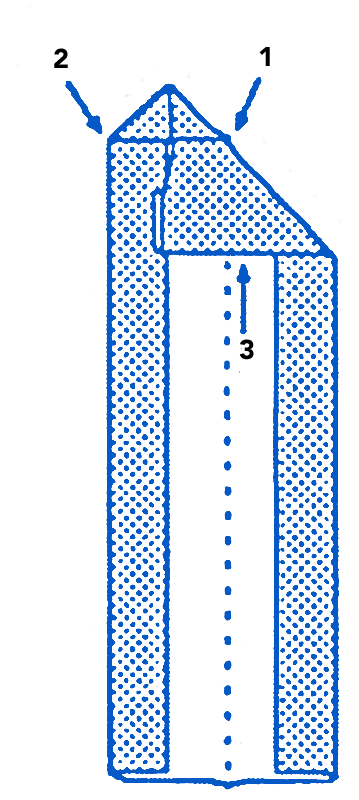
6. Pin in position and edgestitch on under-sleeve placket as illustrated, being sure to catch placket in the stitching on the underside. Trim the excess placket even with lower edge of the sleeve.(Figure4)
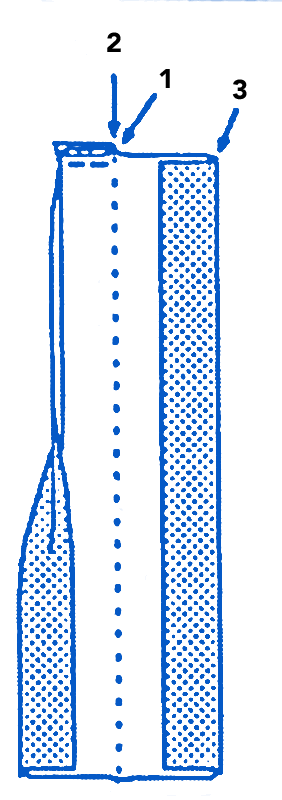
7. Fold each of the 6 3/8” x 4” (cut on the straight of grain) sleeve plackets wrong sides together on center foldline and press in crease #1.
8. With wrong sides together, fold cut edge on each side to meet crease #1. Press, forming creases #2 and #3. (Figure 5)
9. Trim 1/2″ (1.3 cm) from the side edges.
Right Sleeve
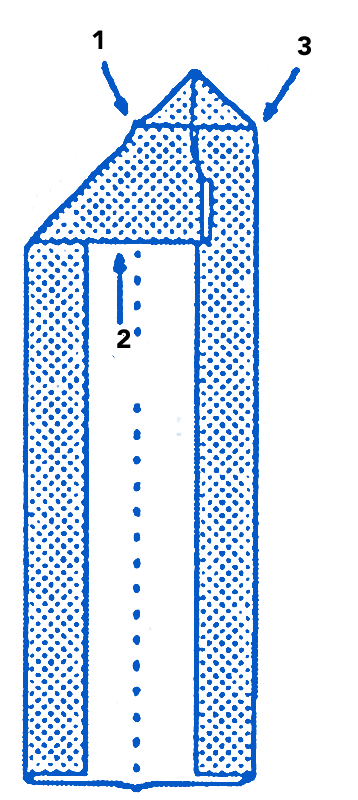
10. For placket on right sleeve, fold placket right sides together, taking care to match crease #2 to crease #1. Stitch across upper edge with a 1/8″ (0.3 cm) seam allowance. (Figure 6)
11. Turn right side out and form the point of the placket by matching the seamline to the trimmed edge. (Figure 7)
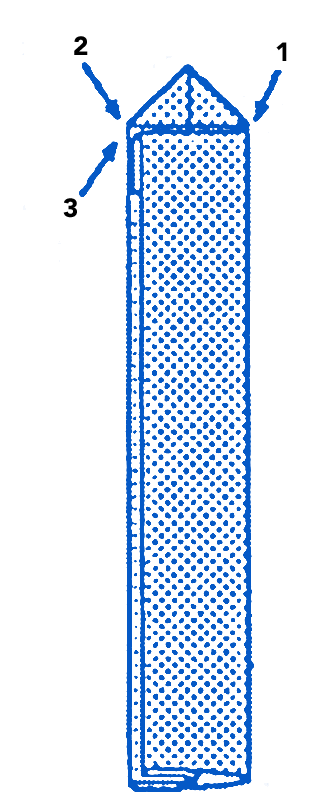
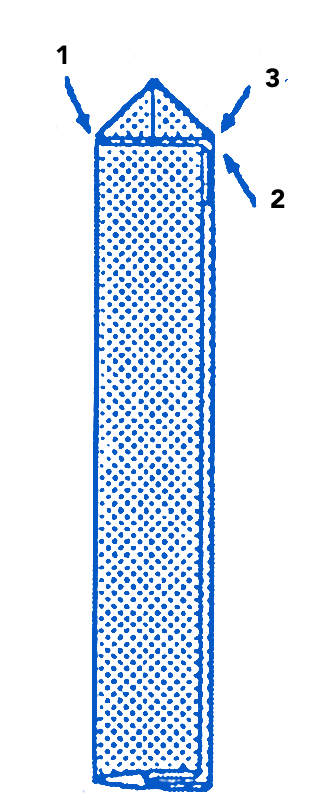
12. With wrong sides together bring crease #3 to crease # 2 and arrange the corners of placket. Press. (Figure 8)
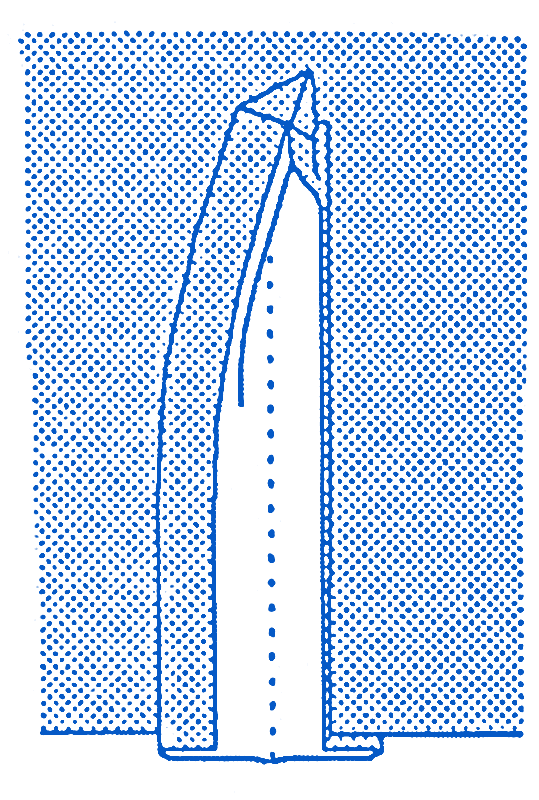
13. Insert front side of sleeve slash between the folds of the placket, matching cut edges inside as illustrated. (Figure 9)
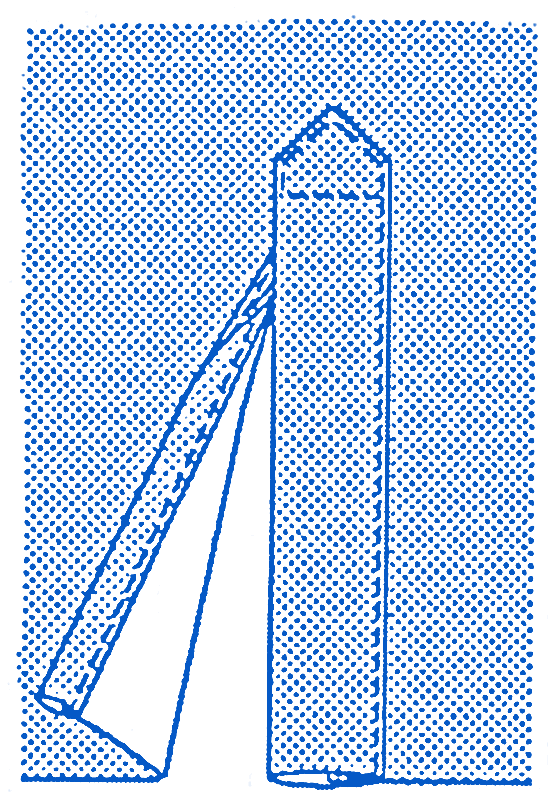
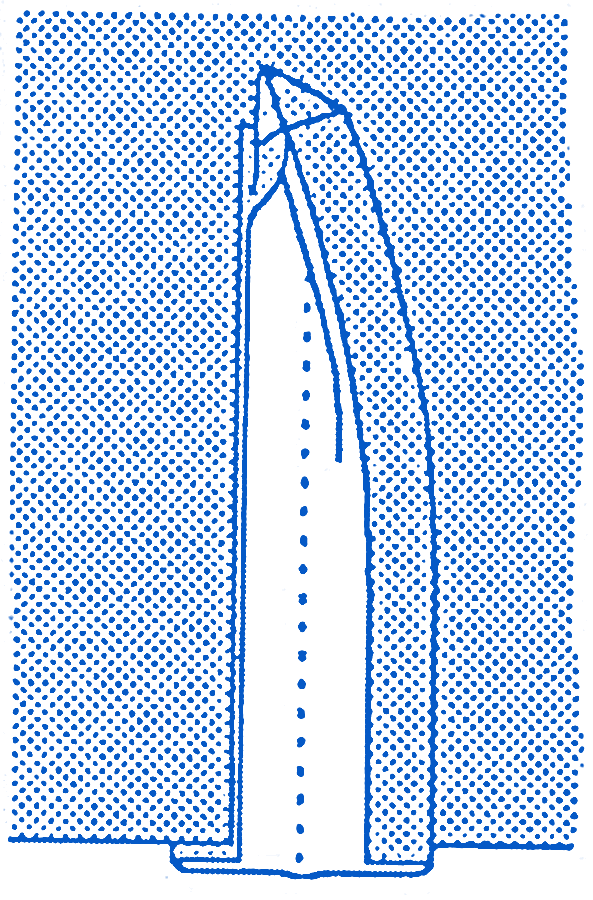
14. Pin in position and edgestitch on the placket, sewing around the box, and continuing to lower edge of sleeve, being sure to catch the placket in the stitching on underside. Trim excess placket even with the lower edge of sleeve. (Figure 10)
Left Sleeve
15. For placket on the left sleeve, fold placket right sides together, matching crease #3 to crease #1. Stitch across upper edge with a 1/8″ (0.3 cm) seam allowance. (Figure 11)
16. Tum right side out and form point of placket by matching the seam line to the trimmed edge. (Figure 12)
17. With wrong sides together, bring crease #2 to crease #3 and arrange the corners of the placket. Press. (Figure 13)
18. Insert front side of sleeve slash between folds of placket, matching cut edges inside. (Figure 14)
19. Pin in position and edgestitch on the placket, sewing around the box, and continuing to lower sedge of sleeve, being sure to catch placket in stitching on underside. Trim excess placket even with lower edge of sleeve. (Figure 15)
~Reprinted with permission
