


Perhaps that title should be con-fusing facts instead with so many different fusibles available on the market today, but there are some commonalities in the use of these labor-saving components. That said, the disclaimer is of course to always read and follow the specific directions that come with the product you’re using.
Whether you’re working with fusible interfacing, stabilizer or stiffener, one thing is for sure—if you don’t pay attention, the fusible portion can easily end up on your iron and/or the ironing board.
Pre-treating
Some advocate for woven interfacings to be pre-shrunk before using. If you opt to do this, simply fill a basin with warm water and place the folded interfacing into the water so it’s covered. Let it sit until the water cools, then hang it to dry.
You can also steam-shrink woven and knit fusible interfacings by placing them adhesive side up on the ironing board, then hovering the iron over them with steam. Be careful to keep the iron about an inch above the interfacing surface to avoid activating the adhesive component.

Cutting Tips
- If you need to cut several small pieces, like facings, collars, cuffs, etc., from interfacing, it’s easier to fuse the interfacing to an appropriately sized section of fabric prior to cutting out the pieces. If you cut the fabric and interfacing pieces separately, matching them up exactly can be a challenge.
- When using heavy or stiff interfacings and stabilizers, it’s a good idea to cut those pieces separately without the seam allowance to reduce bulk in the seams.
- The grainline on a woven interfacing should match the grainline on the fabric layer of a garment. Woven and knit interfacings have more stretch in the crosswise direction than lengthwise.
- Be sure to test the chosen interfacing on a scrap of the fabric before committing to the entire project to be sure that you like the hand of the interfaced fabric, and that there’s no damage in the fusing process. On some fabrics, a sew-in interfacing is a better choice so as not to damage the fabric texture.
Proper Fusing
As noted, manufacturer’s instructions differ by product, so be sure to read them before you begin the fusing process. You may want to have a non-stick pressing sheet and some iron cleaner on hand in case you need them for any oops.
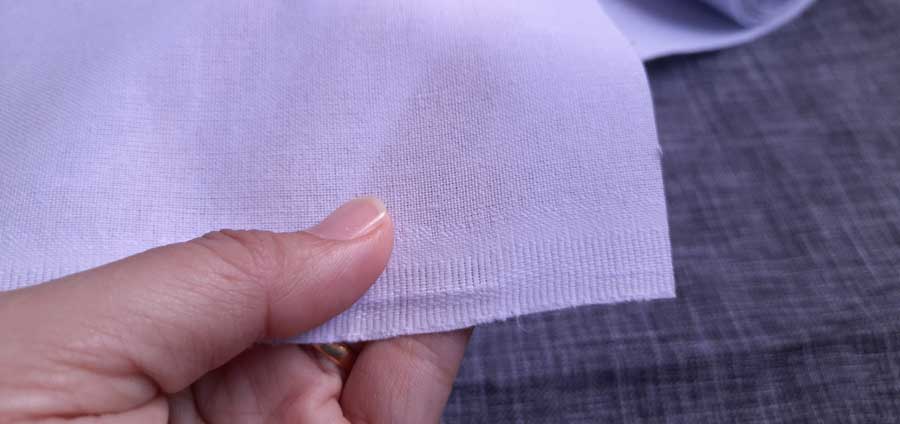
The fusible side of the interfacing has randomly placed dots of adhesive and the texture feels a little rough compared to the non-adhesive side. When properly fused, these adhesive dots meld into the fabric and are no longer visible as dots.
Place your fabric wrong side up on the ironing board, then position the fusible with the adhesive side down on top of the fabric, matching edges as needed. If there is any overhang, the adhesive will meld to your ironing board cover, so be sure the edges match, or trim as needed.
Fusing is a process, it’s not just a once-over pressing, and it’s important not to slide the iron during fusing. After you’ve pressed for the recommended amount of time, pick up the iron and move it to the next location, slightly overlapping the first area. Repeat the process to cover the entire surface.
Depending on the product, the fusing process may simply involve steam from your iron, or it could also require a damp press cloth used with a dry iron.
A good fuse requires applying heat and moisture (if applicable) to both sides of the fabric, so fuse the interfacing side first, then flip the fabric over and repeat the process from the right side. Let the fused piece cool thoroughly before moving it, and be sure it’s flat, not hanging over the ironing board edges.
If you’re fusing an area larger than your ironing board surface, fuse it and then let it thoroughly cool before moving it to access the next area.
When fusing is complete, double check that the interfacing is firmly adhered to the entire fabric surface. If you see ripples, that indicates areas that are not properly fused, so go back to that area and repeat the fusing process.
~Linda Griepentrog
Linda is the owner of G Wiz Creative Services and she does writing, editing and designing for companies in the sewing, crafting and quilting industries. In addition, she escorts fabric shopping tours to Hong Kong. She lives at the Oregon Coast with her husband Keith, and two dogs, Yohnuh and Abby. Contact her at gwizdesigns@aol.com.
