


The dilemma…to sew over pins or not?
In the sewing world there are few topics that are controversial, but topping the list of differences of opinion might be the notion of whether or not it’s OK to sew over pins. Let’s look at some pros and cons on this pointed topic.
You CAN sew over pins, but SHOULD you sew over pins?
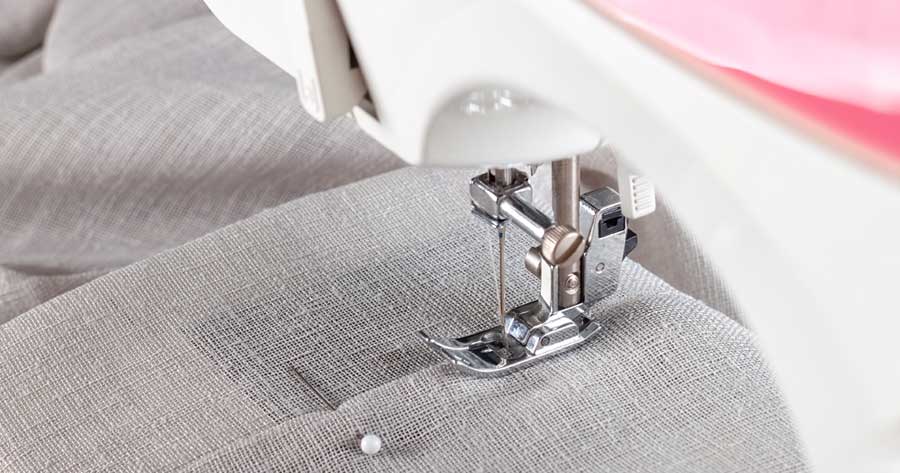
There are a host of different types of pins—from long and skinny shafts with plastic heads to short, bolder shafts with metal nub heads. The type of pin you choose varies by the task and the fabric, but the pin’s function is the same. We use pins to hold layers of fabric together while sewing a seam and sometimes for marking a design detail, like an opening that needs to be left unsewn to insert elastic or a drawstring. We also pin-mark fabrics that might otherwise be damaged by traditional marking tools.

If your machine hits a pin, there can be considerable damage to the pin, the machine and/or to you. The most common catastrophe is a broken needle and shards of that needle may never be found. They can fly across the room, into your face or become lodged in the machine mechanism. Ditto for the pin that’s broken in half by the piercing needle. If the pin doesn’t break, it can be seriously bent and play havoc with your machine’s bobbin area requiring a mechanic to fix the issue. And it’s not just the needle that can cause issues sewing over pins—there’s also the presser foot toes that can snag on a pin, distorting your stitches and potentially torquing the pin shape, jamming it into the machine throat plate.
Be wary that on some machines, sewing over pins can cause tension and stitch quality issues.
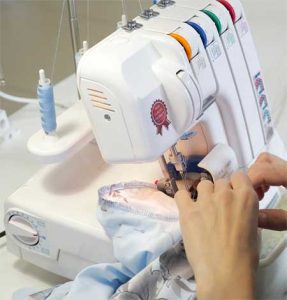
NEVER sew over pins if you’re using a serger. The sharp blades of the knife can cut the pin into pieces and you can face the same risks listed above.
Goin’ for it
Let’s just say that you’re someone who is convinced they can successfully sew over pins and throws caution to the wind. Here are some helpful hints for a more risk -free maneuver:
- Place the pins perpendicular to the seamline with the head to the right. Position the pins so that the shaft is spanning the seamline and embedded into the fabric. Some experts suggest placing the pin so that just the tip is spanning the seamline, not the shaft.
- Sew more slowly than you normally might.
- Use a slightly longer than normal stitch length.
- Never position the pins so that your seamline is near the pin’s head—that’s a collision course for sure with more potential damage than the pin shaft itself.
- If you use fine, thin pins, there’s less chance of the needle hitting them, but on the other hand, if the needle does hit them, they’re more likely to seriously bend or break causing damage to the machine.
A Safer Option
If you’re wary about sewing over pins (and you should be), think about removing them as you stitch. Use pins to keep thick or delicate layers in place and place the pins perpendicular to the seamline, but as you approach them, pull them out two to three stitches ahead of the touchdown. Yes, we know you have to stop for a moment to do this.
If precision isn’t needed when seaming, move pins outside the seam allowance to hold layers together, so there’s no chance of hitting them.
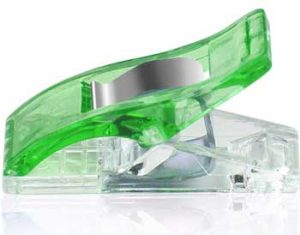
Or think about an alternative for holding potentially shifting fabric layers together. Spring clips are ideal and you can whiz right by them if they’re placed along the fabric’s edge.
Another option for a secure hold, especially when matching plaids or stripes, is to hand-baste the fabric layers together along the seamline or a hair inside it before taking the piece to the sewing machine. Then, sew right over the basting or next to it, depending on the positioning.
The choice to sew over pins or not is a personal one but know the risks (and expense) you could face if you do it. Is it worth it?
~Linda Griepentrog is the owner of G Wiz Creative Services and she does writing, editing and designing for companies in the sewing, crafting and quilting industries. In addition, she escorts fabric shopping tours to Hong Kong. She lives at the Oregon Coast with her husband Keith, and three dogs, Yohnuh, Abby, and Lizzie. Contact her at gwizdesigns@aol.com.
