


What causes little pulled marks and discolored threads in my fabric?
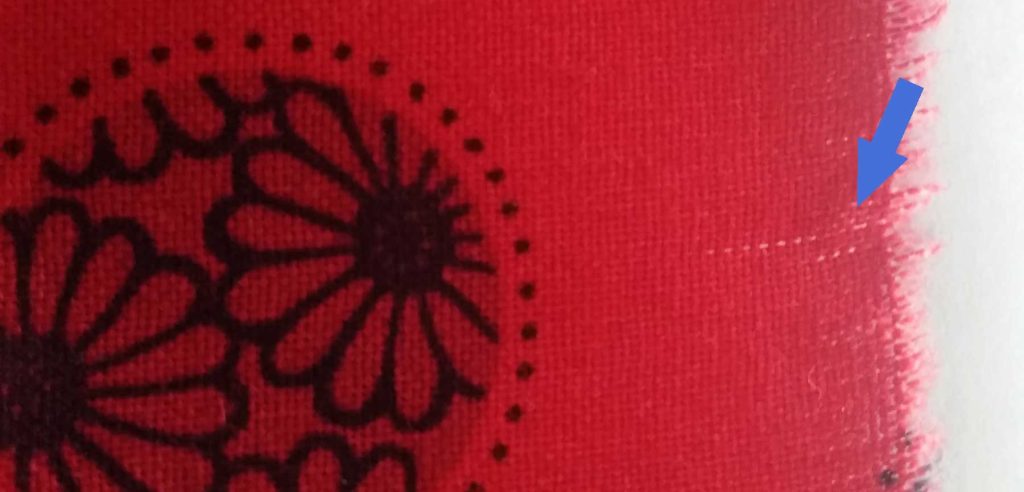
There are a variety of causes for pulled marks in fabric. First, there can be an actual flaw in the fabric, whether in the weave, the dyeing process or the printing process. But, if the mark occurs as you cut, the culprit is very likely a dull or damaged spot on either your scissor blades or your rotary cutter blade, which in turn snags the fabric threads.
Pulled threads can also result if you tear the fabric on either the crosswise or lengthwise grain. The stress of the tearing process shifts threads and can expose undyed areas. Better to cut than tear.
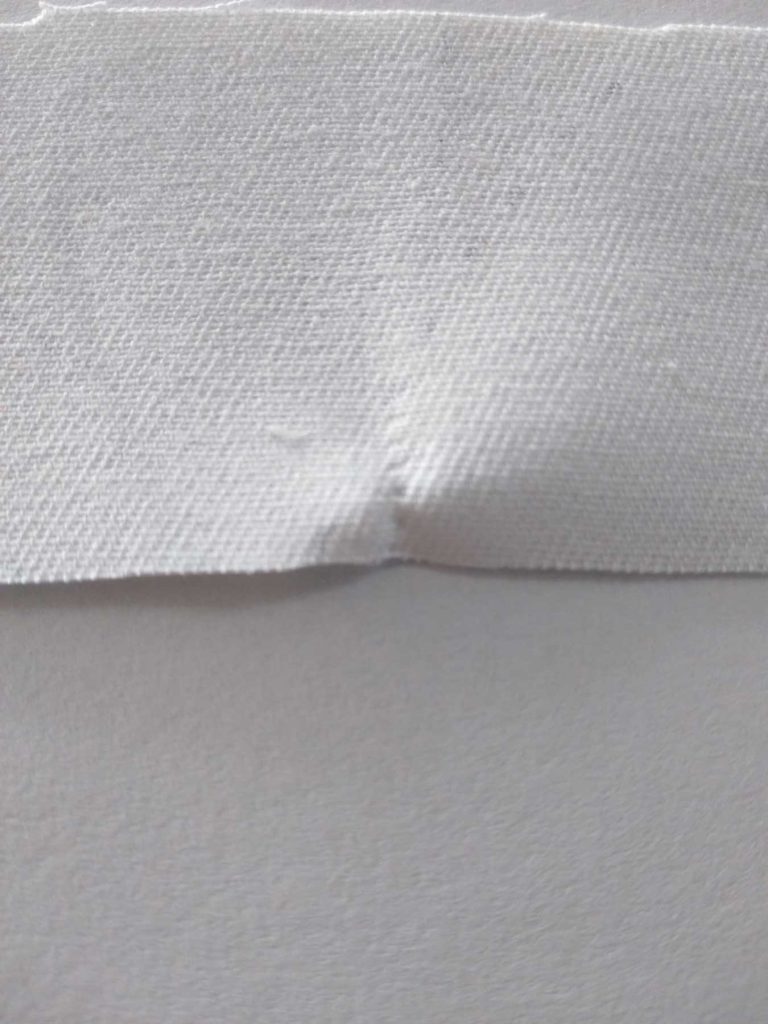
If the issue of pulled threads occurs while you’re sewing a seam, the likely offender is a dull or damaged needle that’s catching on the fabric weave. It may show up as an isolated instance, or at regular intervals, depending on the extent of the damage.
The solution to all these situations to prevent fabric damage is to maintain the sharpness of your tools, and replace needles on a regular basis.
I’m making a sherpa jacket, but not sure what type of closure is appropriate for this very bulky fabric. What are good options?

The bulk of sherpa, or any faux fur, makes it an unlikely candidate for the traditional button and buttonhole closure. The pile surface makes it almost impossible to get a good-looking buttonhole, and also to keep it from stretching out of shape.
If you really want a button closure, consider using large buttons with loops instead of buttonholes, or toggle sets. Extra-large hook-and-eye closures are another option—look for them designated as “fur hooks”.
The best solution for furry fabrics is to use large snaps for closures. They don’t interfere with the bulky surface and they come in a variety of finishes to coordinate with any fabric. You can also paint them with nail polish or a paint designed for metal if you want a custom color, or cover them in a coordinating lining fabric.
Depending on the jacket style, another closure option is an exposed sport-weight separating zipper. The heavier teeth are sturdy and don’t tend to catch the fuzzy fabric surface.
How often should I clean my machine?
The answer depends on the type of sewing you do and the types of fabrics you’re sewing. A simple answer would be to clean the bobbin and feed-dog area after every project. But, if your fabric is very fuzzy and lint prone, you may need to do it more often.
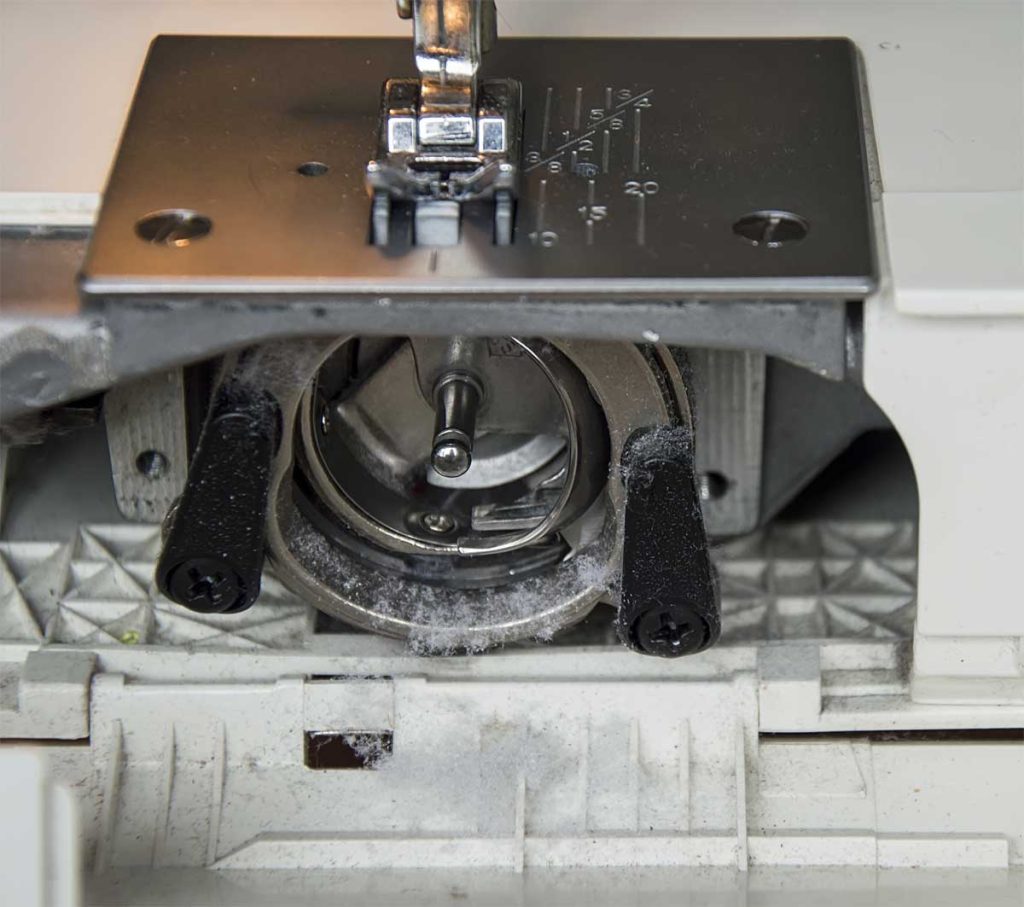
Fabrics like fur, wool, fleece, etc. produce more lint than hard-surface fabrics and that can build up around the feed-dogs. If the lint becomes too compacted, your machine won’t stitch properly and if you have a built-in thread cutter, it may not work properly. If you continue to sew without cleaning out the lint build-up, it can become more compacted and driven into the internal mechanism of the machine. That could mean an expensive repair.
It’s easy to take off the machine needle plate and use a small stiff brush to remove built-up lint from around the feed-dogs, thread cutter and in the bobbin area. It’s important to remove the lint and not push it into the machine. Avoid the temptation to use canned air, as the force of the blast simply pushes lint further into the machine.
Consult your owner’s manual for cleaning instructions specific to your model, and note the areas needing regular maintenance. The book will also include information on properly reassembling the machine after you’ve taken it apart for cleaning. Like any expensive piece of equipment, your machine will last longer with proper and regular maintenance.
You may be surprised at the amount of lint that builds up after even a single project!
~Linda Griepentrog is the owner of G Wiz Creative Services and she does writing, editing and designing for companies in the sewing, crafting and quilting industries. In addition, she escorts fabric shopping tours to Hong Kong. She lives at the Oregon Coast with her husband Keith, and three dogs, Yohnuh, Abby, and Lizzie. Contact her at gwizdesigns@aol.com.
