


With all due respect to traditional hand sewing techniques, if there’s a faster, easier way to do it by machine—I’m in. So I started wondering: could I replicate needlepoint with my sewing machine? Turns out, I can!”
Full disclosure: I don’t do needlepoint by hand, so if you sense a lack of familiarity with the subject or terminology, that’s why.
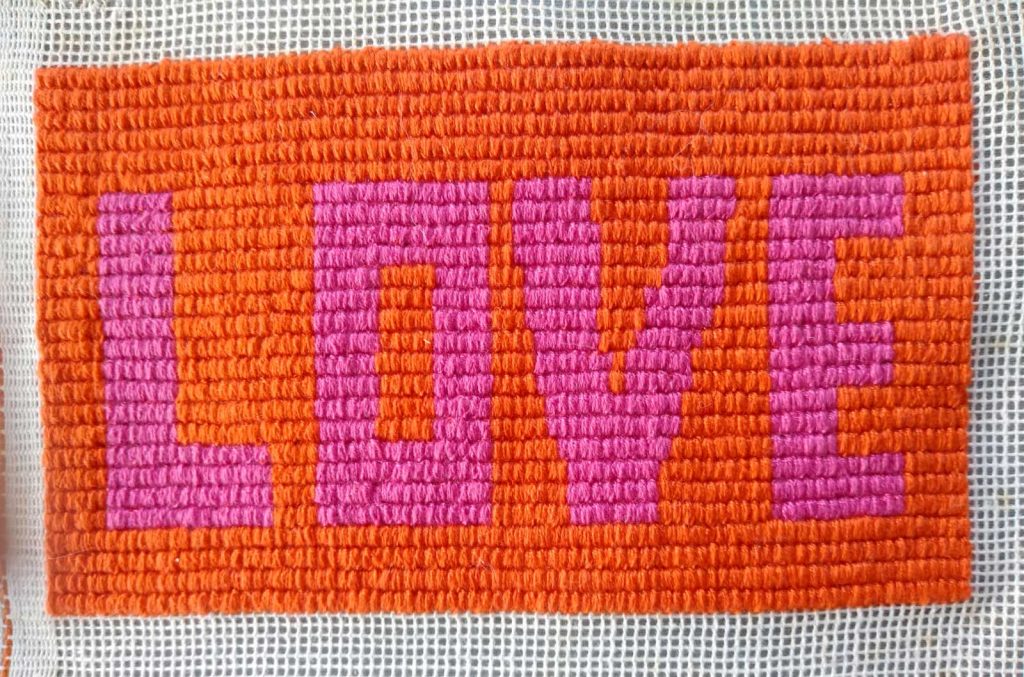
You’ll find plenty of simple needlepoint patterns available, or you can create your own. Coloring books offer a great source of easy designs to experiment with or just grab a sheet of graph paper and start sketching!
Machine Needlepoint Basics
Thread
The world is your oyster in terms of thread, but there are several on the market that mimic hand needlepointing wools. These specialties can be acrylic, wool or blends—they are thicker than normal sewing threads and have a fuzzy texture.
Examples of these threads include:
- Sulky’s Filaine (100% acrylic)
- Aurifil’s Lana (50% acrylic/50% wool)
- Madeira’s Burmilana (50% wool/50% acrylic) or BurmalanaCo (50% cotton/50% wool)
- Wonderfil’s Ellana™ (50% wool/50% cotton).
In addition to those fuzzy strands, you can also use this technique with metallic threads, finer pearl cotton, or buttonhole- and topstitching-weight threads for a less fuzzy look to the stitching.
Machine Set-up
- You’ll need a large-eye needle for any of these specialty threads—a 100/16 topstitching needle is a good choice because of its elongated eye.
- As you test stitch, if the fuzzy threads tend to shred, move up a needle size to avoid damaging the thread and the look of your piece.
- Thread a matching standard or bobbin-weight thread in the bobbin, and the specialty thread on the top of the machine. Use a needle threader if you need help to get fuzzy threads through the needle eye.
- Some machines may require slight tension adjustments with the heavier threads, so be sure to test-stitch and adjust as needed.
- Lower the feed dogs on the machine and if you have a darning or open-toe foot, use it for better visibility.
- Keep a tiny lint brush handy as fuzz will build up on the machine’s needle area and in the feed dog area, so frequently cleaning is encouraged.
Canvas
- Choose a canvas for your base. Canvasses are designated by the number of spaces (holes) per inch. For machine work, use a 10- to 14-count mesh, depending on the thread you’re using—a smaller number for heavier threads and a higher number for lighter weight threads.
- Draw your design either directly onto the canvas, or onto a piece of stabilizer that you can secure to the canvas underside so you can see the design through the canvas holes.
- Cut the mesh with enough room around the design for the intended use. If you’re going to frame the piece or sew it into something else, allow extra space for those finishings. It’s also helpful to leave space enough to hang onto as you work.
Getting Started
Note: Test-stitch before you begin your project to get a feel for what you’re doing and the look you want to the finished piece.
This technique is admittedly quite mindless, as all you’re doing is stitching back and forth in adjacent canvas holes.
- Set the machine for a zigzag with a width compatible to the span of the needlepoint canvas holes. The more holes you span, the wider the stitch width. Working with adjacent holes produces a tighter looking design than spanning multiples.
- Stitch the zigzag between the holes to fill the space (5-6 times for heavier threads). Don’t stitch too many times or you’ll create a mound of thread rather than a flat finish. The important part of this test is to count the number of stitches, as you want each set of stitches to be the same.
- If your machine has memory capabilities, save the number of zigs and zags so it will be the same on each set of holes.
- Stitch slowly, as it’s important to stay within the hole openings and not stray to adjacent openings.
- Once you’ve filled a hole pair, move the canvas so that you can stitch again in an adjacent set of holes, moving across the design in a horizontal row pattern.
- Continue filling the hole pairs across the width of one row of the design. At the end of the row, move to the next row and do the same, noting that the needle goes into one of the holes of the previous stitching area each time.
- Be aware of your design, as thread color changes are needed as you stitch the various design areas.

Once you’ve completed the entire design, steam and block the work before framing it or incorporating it into a project.
Voilà—easy peazy!
~Linda Griepentrog is the owner of G Wiz Creative Services and she does writing, editing and designing for companies in the sewing, crafting and quilting industries. In addition, she escorts fabric shopping tours to Hong Kong. She lives at the Oregon Coast with her husband Keith, and three dogs, Yohnuh, Abby, and Lizzie. Contact her at gwizdesigns@aol.com.
