


Stitch ‘n weave embellishment techniques refer to a variety of decorative techniques that involve combining stitching and weaving methods to create unique textures, intricate patterns, or unusual designs on fabric. Decorative yarns, threads, cords or ribbons are woven through pre-sewn machine stitching, twisting, turning, looping or knotting if desired.
Stitch ‘n weave could include couching, laid work, raised embroidery, Brazilian embroidery, and lastly, thread weaving, which is the focus of this article. The process typically involves stitching or embroidering onto a base fabric and then weaving additional threads or fibers through the stitches to create added dimension and texture, resulting in visually stunning designs. This combination of stitching and weaving allows for the creation of intricate patterns, raised surfaces, and interesting visual effects and are often used in textile arts, embroidery, and surface embellishment.
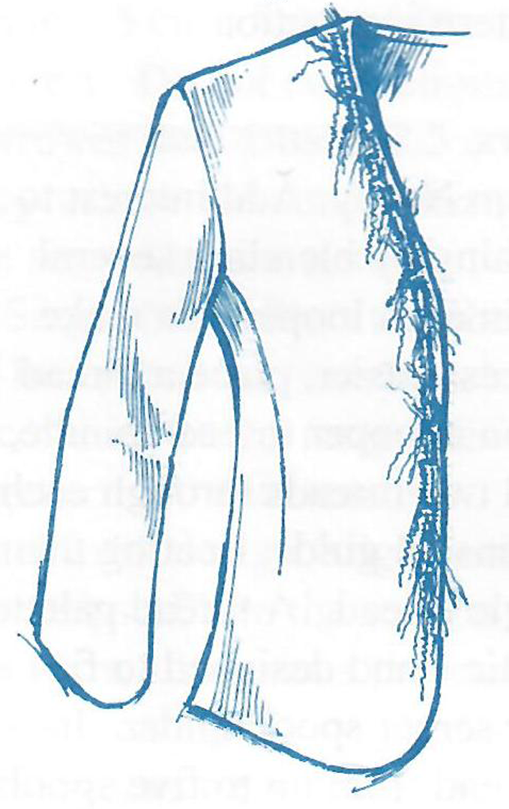
The machine’s stitched patterns can be abstract, specific design shapes, or used for borders (Figure 1). It can be done using various weaving techniques, such as over-under weaving or wrapping threads around existing stitches. Unlike couching, the yarns can be exchanged for new colors and textures next season by gently pulling out the original yarns and weaving in new ones. These patterns of multiple-stitched rows can also be a tone-on-tone design element without the weaving. Add the thread weaving at a later time and your friends and colleagues will think you have a new garment!
Use this embellishing technique on both ready-to-wear and made-to-wear garments.
Stitching Choices
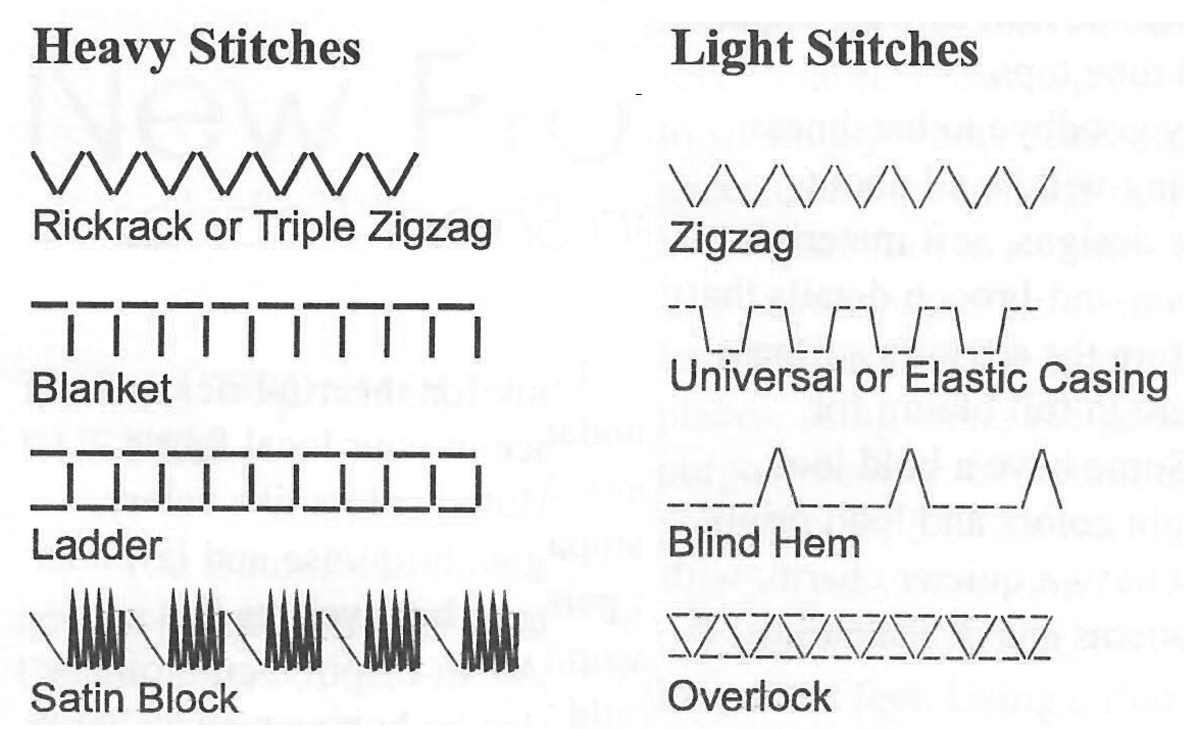
Suitable machine stitches for this technique have a wide stitch width (3mm or wider) without an intermediate stitch, as they swing across the stitch width. To showcase the weaving, stitch with machine embroidery thread that matches or blends with the fabric background. To add a bit of sparkle, use metallic thread. Heavy stitches like the rickrack or triple zigzag, blanket, ladder and satin block stitches will be more visible than those with less stitch repetition. Light stitches include the standard zigzag, universal or elastic casing stitch, blind hem, and some overlock or overedge stitches (Figure 2).
Weaving Materials
Use any decorative yarns, threads, cords or ribbons that can be woven under the machine’s crosswise stitches. If they can be threaded through a double-eye needle, they probably can be used to weave. There are several companies that package 5-10 yard assortments of yarns in a particular color grouping — these cards have plenty of yarn for an average project. If the yarns are slim, twist and weave two together. Add ribbon or other cords to the blend for texture or to give a color punch.
Weaving Notions
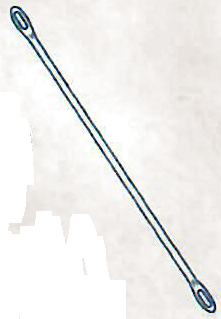
Use a double-eye needle for the weaving process (Figure 3). The flat, blunt end makes the needle easy to feed under the stitches, especially those with repeating stitch patterns. Any yarns, ribbons or cords that can be threaded through a double-eye needle can be used for stitch ‘n weave.
Other notions include:
- Water or air soluble marking pen to mark the basic design stitching lines on the fabric
- Sealant to keep the cut ends of the thread or yarn from fraying
- Tear-away stabilizer to place under the design area when stitching
Stitch ‘N Weave Basics
Always check your stitch and yarn combination for compatibility before starting the actual project. And make sure to test drive using your weaving materials with various stitches on your project fabric.
Stitching
Draw the design lines on the fabric right side with the marking pen. Then place tear-away stabilizer underneath the design area.
Stitch with machine embroidery thread in the needle and all-purpose or bobbin thread in the bobbin. If the project’s underside will not be concealed by a facing, use matching thread in the bobbin for a neater look.
After stitching, secure the thread ends. The tear-away stabilizer can be removed before or after the weaving is completed.
Weaving:
Thread one end of the double-eye needle with yarn and weave the unthreaded end over-and-under the long stitches. Use one or more yarns — whatever will feed under the threads.
Work with strands approximately 18″ in length or shorter and keep one end of the single strand close to the threaded needle eye. Or, for a border, stripe, or as a trim on a garment edge, use short pieces of yarn with the same length tails and weave them between two stitched rows, cutting the yarns to remove the needle (Figure 4).
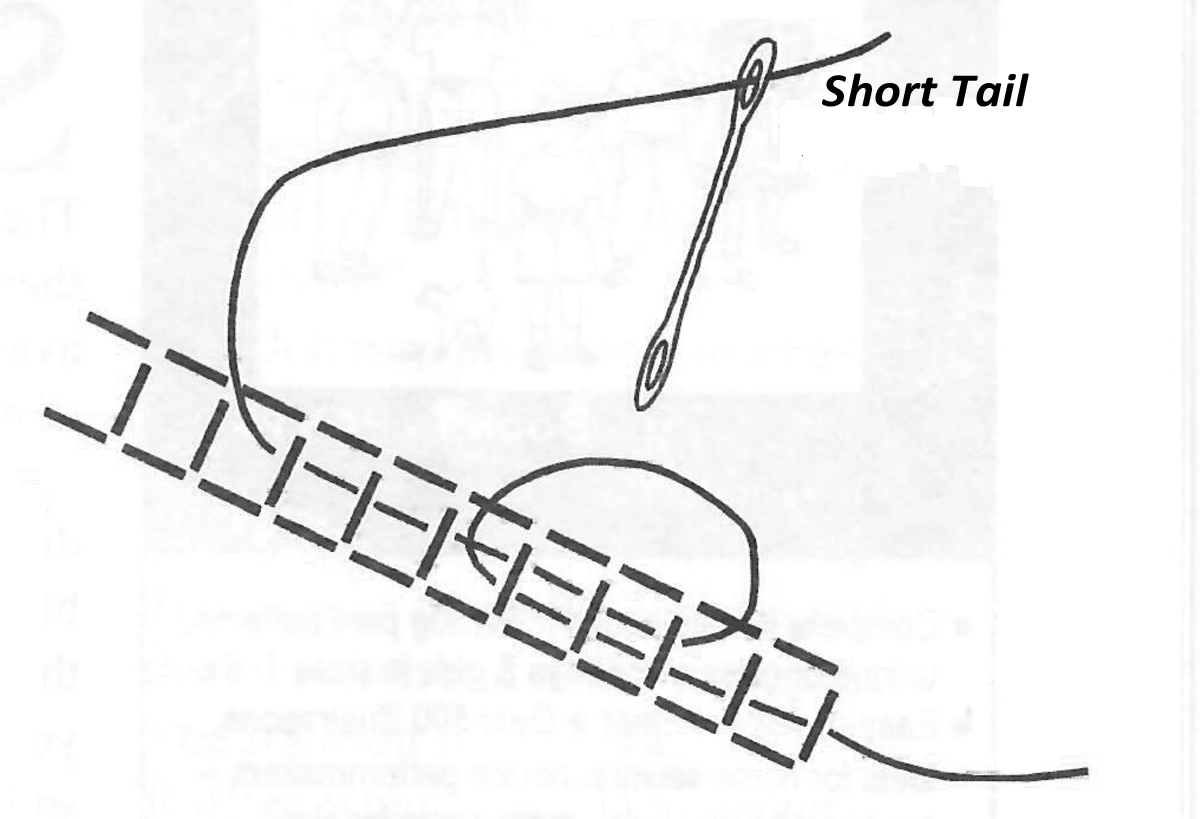
To secure the strands when beginning to weave, loop the ends over one or more of the machine stitches, similar to a backstitch (Figure 5). Weave short spans, pulling the strand(s) through looping or knotting as desired.
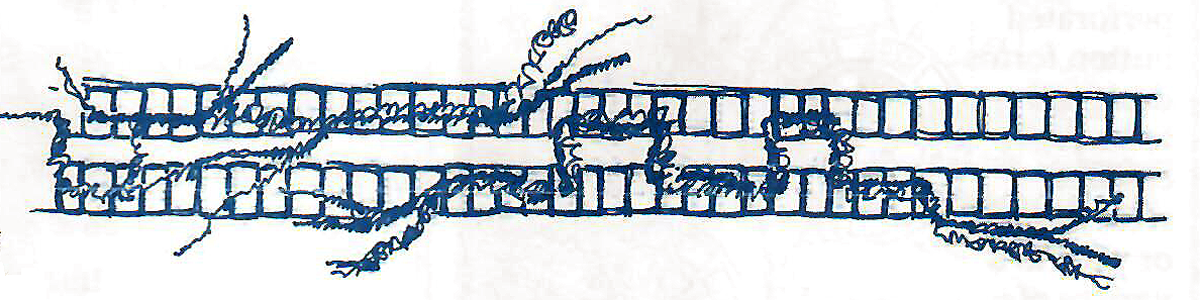
Backstitch near the end of the weaving to secure the finishing end. The finishing ends of the yarns can be woven into the design and hidden, or they can be left free for a fringe effect.
Use a seam sealant to prevent the ends from fraying or to keep chenille-like yarns from losing their fluff.
~This is an edited and updated article containing some content originally written by Sallie J Russell and inspired by her book, Dynamic Dimensional Designs (printed with permission).
