American Sewing Guild (ASG)

Visit our blog Visit the ASG Facebook page Visit ASG on Pinterest Visit ASG's YouTube channel Visit ASG on Instagram
  • Home
  • Join ASG
    • Join Online
    • Chapter Locations
    • Member Benefits
    • Member Brochure
    • Join by Mail
  • Education & Classes
  • Resources
    • Contests & Awards
    • Giving Back
    • Hall of Fame
    • Links
    • Travel and Tours
    • Measurement Chart
  • Shop
    • ASG Store
    • Chapter Products
    • Video Resources
  • Blog
  • About
    • About Us
    • Donate to ASG
    • ASG Sensitivity Statement
    • FAQ’s
    • Start a Chapter
  • Contact
  • Member Login
    • Login First!
    • Members Only
    • Leadership Only
    • Website FAQ’s
    • Logout
  •  

September 29, 2023

The Heart of the Sewing Room

For most of us, the sewing machine is one of our most important possessions. And it’s no secret that the space we use to pursue our passion for sewing plays an important part in the ultimate enjoyment that we receive. The following suggestions are offered knowing that not everyone who sews has unlimited space, but to whatever extent the ideas can be incorporated into the space available, there will be a lessening of fatigue and a greater sense of freedom. Heart of your sewing room

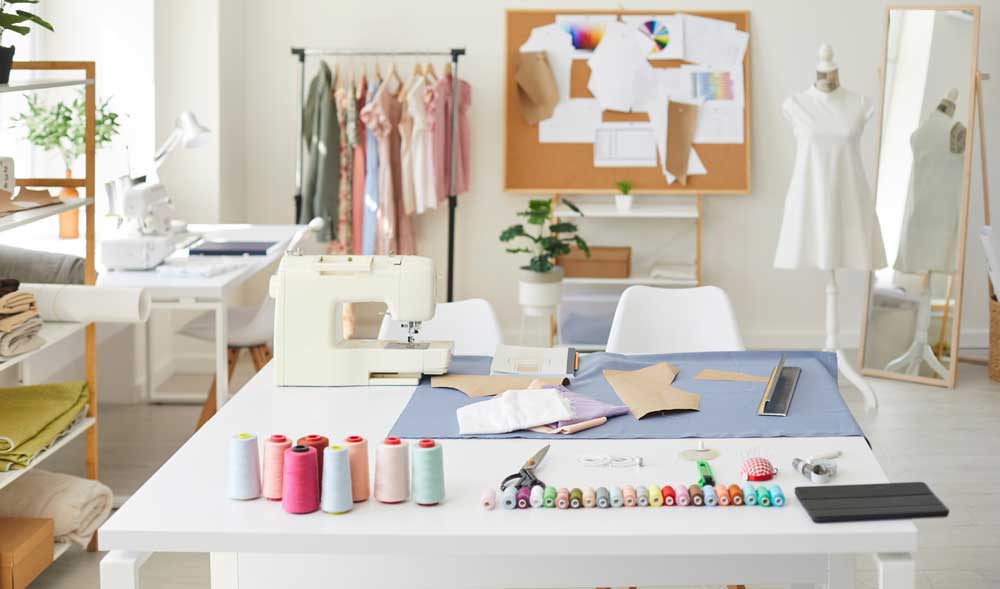
Position the Machine for Comfort

With the exception of when you are travelling or at sew-in meetings, never sew with the machine in a portable state because the fabric cannot be controlled properly when it is dropping off an edge. While you may succeed for a time, there will be greater strain on your back and wrists, and the end result of your project will not be as professional. If your machine is a frequent “traveler” though, you can purchase a portable tabletop or extension that fits around the arm of your machine and rests on the existing table that will help to alleviate any strain or fabric-skewing issues. Inset machine 
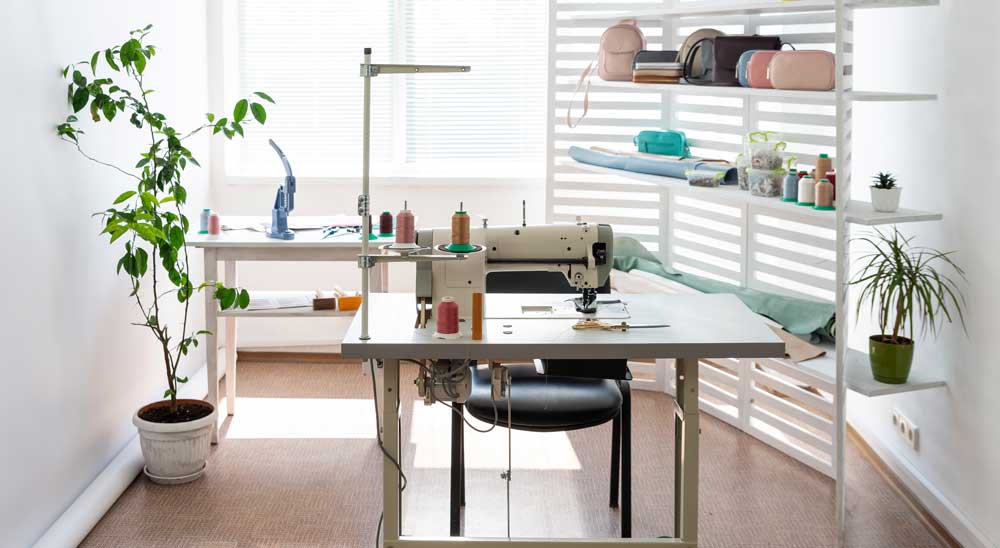
At home, a machine that is recessed into a table or cabinet at the correct height (usually about 30″ from the floor) is one of the best options. You should be able to sit comfortably with your back as straight as possible while resting your arms on the machine. While you may be leaning forward slightly, your back will still be straight. Accordingly, when using a portable machine, since it rises above the table, try to get a shorter table, adjustable table, or cut down the legs of an old table to bring it to the proper height. Also make sure the table is stabilized so that it doesn’t jiggle and jive when you press on the pedal.

Seating

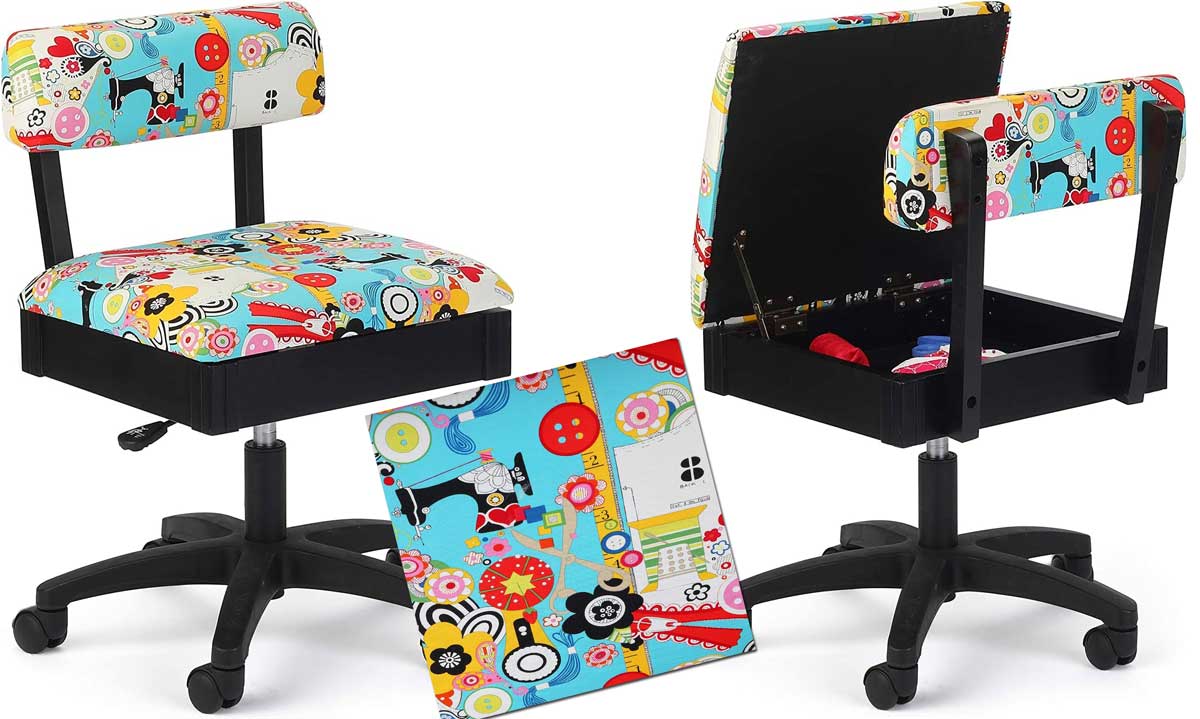
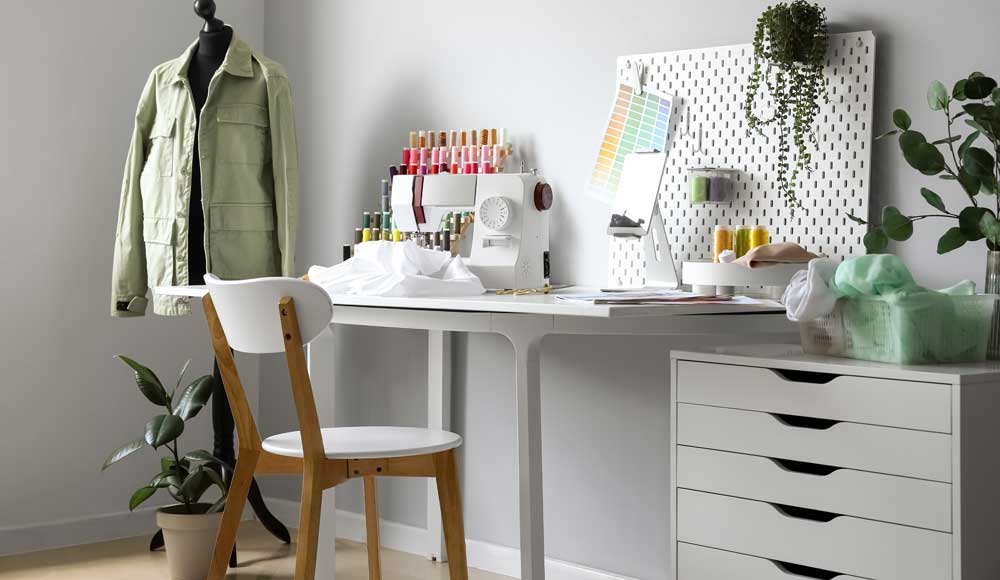
The choice of a chair is crucial to your comfort level. There are chairs that are specifically made for use at a sewing, quilting, or craft table, but any comfortable, sturdy, solid-backed chair that allows you to rest your arms comfortably on the machine without back strain will work. Look for chairs with adjustable features such as seat height and backrest angle to customize your seating position. A chair with adequate padding and cushioning on the seat and backrest will enhance your comfort during long sewing sessions. Some sewing chairs even come with built-in storage compartments or pockets for holding sewing supplies or tools. Look in your local sewing or craft store for chairs specifically made for the sewing room or check out an office supply store for armless secretarial chairs. If you have solid surface floors (tile, vinyl, etc.), note that a lightweight chair with wheels could be problematic and may be slip-sliding away from you. The chair should provide good support for your back, neck, and arms to prevent discomfort and strain during long sewing sessions. Remember that a comfortable and ergonomic sewing setup can make a significant difference in your sewing experience and help prevent fatigue or discomfort.
Sewing themed chair with storage available on Amazon.

Lighting

If you’re tiring quickly or your eyes are straining, lighting could be to blame. Try adding a clip-on lamp to the left side of your machine to add task lighting, but remember to clamp toward the back of the table so it doesn’t interfere with your work. When considering placement for the machine, never place it so that you face into a window. It may seem pleasant, but you’ll be facing into a glare. If you want to be by the window, place the machine perpendicular to the window so that your left shoulder faces the window.

Remember the 20-20-20 rule — blink often and look up from your machine or close-up work every 20 minutes and focus at least 20 feet away for 20 seconds.

Bright Ideas

Sometimes we need a little assistance with light. The following are some ideas from our members:
Lighted Headband Magnifying Glass available on Amazon
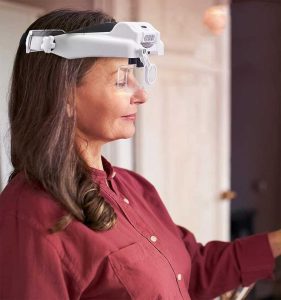
  • Jane uses a lighted magnifier worn on a headband which allows the lens piece to be tilted up when not in use.
  • Pattie uses all LED’s.
  • Cindy reports that she uses overhead can lights with LED bulbs above her cutting table and machines, with the addition of two under-counter LED lights at her worktable.
  • Virginia has LED bulbs in the overhead light in her room, along with some track lights. She also uses a large Ott light above her machine.
  • Denise uses a floor lamp, two table-top lamps, and one clamp-on light.
  • Mary loves her DayLight Company floor and table lamps.
  • Karen enjoys skylights and a window in her room and adds goose-neck Ott Lights for task lighting.
  • Betsy has an overhead 4′ LED light, a fluorescent task light (circular) with magnifying glass at the machine; and an incandescent banker’s desklight on the table with the backup machine.
  • Janice added several mirrors to her sewing space to help reflect the light.
  • Finally, Becki says her philosophy is that if the 7:15 from Atlanta isn’t trying to land in your sewing room, then you should buy ‘Luminos Task Lamps’ from the Daylight Company.

Solutions

Former couture sewist and garment industry technical assistant, Margaret Islander, shared these tips with ASG many years ago and they are still applicable today: Extend your sewing table:
  1. Attach a strip of wood on the wall directly across from the back edge and at the same height as the back edge of your machine.
  2. Make a canvas sling the width of the back of the machine table and the desired length needed from the wall to extend it to carry the bulk of fabric.
  3. Hem the sides and ends of the sling and attach a row of grommets to each end.
  4. Attach hooks to the mounted board and to the back edge of machine table to match the placement of grommets and hook on the sling. This will give you a much larger “table” space. You can use any means of attachment that will be sturdy.
When not in use the machine can be pushed back to the wall and the sling allowed to hang down invisibly between the machine and wall. Alternatively, if you have two machines in your sewing space, try facing the tables toward each other and set up the sling between them. Department Mania
  • Set up your sewing space with special departments. Consider repurposing a trusty older machine just for topstitching.  Then, instead of rethreading with contrast thread and changing stitch length each time you need to topstitch, simply move over to your Topstitch Deparment.
  • Do you do a lot of buttonholes? Set up a Buttonhole Department for standard and keyhole buttonholes. (Some of the old machines with template buttonholers were great!)
  • Finally, if you are in the business of sewing, an industrial sewing machine that is designed to speedily accomplish straight and zig-zag stitches will allow you to use your preferred machine for the specialty touches.

Did you enjoy this article?
Are you an ASG member?
This field is for validation purposes and should be left unchanged.

Tagged With: sewing room

May 12, 2023

Bobbin Storage

OK, raise your hand if your bobbin storage area looks like the photo below. Just what I thought…few hands in the air, and certainly not mine! Keeping these pesky little rounds handy and neat is an ongoing chore, but thankfully, there are some notions that can come to our rescue.

Bobbin Storage, available on Amazon
Bobbin Storage, available on Amazon.

How you store your bobbins is a matter of personal choice—Do you like them safely attached to their matching thread spools, or tucked away separately with other like rounds? Either way, it’s possible to keep them neat and tidy.

Before you invest in a bobbin storage item of any kind, note the size of your bobbin, as some containers are specific to a size or bobbin type.

Separate Quarters

Little boxes with foam or molded inserts help to organize bobbins easily. See-through versions allow you to check out the contents without opening, and lids keep bobbins dust-free. Whether you have individual slots or long channels depends on the storage device.

HONEYSEW Bobbin Case for Bernina

Not into rectangles? Perhaps you’d like a donut instead. These pliable plastic containers allow for aligning bobbins around an open center space. Since they come in multiple colors, you can choose one for each machine you own.

Eurotions BobbinSavers

Bobbin racks have wooden pegs that you can fill with your colorful rounds. Hang them on the wall or use a tabletop model, depending on your space. Or, put in a drawer to keep bobbins dust-free.

Bobbin Rack


Some bobbin racks have flexible plastic snap-on holders that can be stacked.

Clover Stack ‘n Store Tower


Plastic storage tubes are yet another idea to keep bobbins organized and dust free. They’re also handy for toting to class when you just need a few for you planned projects.

If your machine has metal bobbins, there’s the option of a magnetic bobbin holder to keep them in place.

Euronotions Grabobbin

Togetherness

If you prefer to keep your thread spools and matching bobbins together, there are a host of options for this neatness. Some devices snap onto the top of the thread spools, while others push into the top hole in the spool.

60 Pieces Bobbin Holder Thread Spool Holder Stack Bobbins on Spool Tops

DIY Options

If you’re sew inclined, there are many ideas for creating your own bobbin storage device.

Empty pill bottles are ideal for dust-free bobbin storage and the clear ones let you see what’s inside. Just be sure to check the size of your bobbins to be sure they fit inside.

Pick up a multi-day medicine dispenser with mini-compartments perfectly sized to fit your bobbins.

Foam toe separators are a quirky option for bobbin storage, but handy if you just need to take a few with you to a class. The foam also keeps the thread ends in place.

bobbin storage toe separator

For storing bobbins with thread spools, simply wrap a rubber band around the spool and around the matching bobbin.

A paper clip can be inserted into the top of a thread spool and through a matching bobbin for inexpensive togetherness. A pipe cleaner can be used in the same manner.

Visit your office supply store for a large metal ring that opens—simply thread the bobbins onto the ring for organized storage.

Wrapping Up

Bobbin Holders for Thread Spool Sewing Bobbin Small Clips Sewing Tool Accessory Clear Thread Clips Holder Tool

No matter how you store your bobbins, there’s always the issue of thread ends. But taming them is easy if you just get one of small wrap clamps available. Clip it over the bobbin thread for neat-as-a-pin storage.

Or, for a DIY option, get some small clear tubing from the hardware store and slice down one side. Cut it into length that fits your bobbin thread height, then snap in place around the loose thread end. {photo}

No matter how you store them, there’s always a cat or dog willing to unroll your bobbins at the most inopportune time, it seems.


~Linda Griepentrog is the owner of G Wiz Creative Services and she does writing, editing and designing for companies in the sewing, crafting and quilting industries. In addition, she escorts fabric shopping tours to Hong Kong. She lives at the Oregon Coast with her husband Keith, and three dogs, Yohnuh, Abby, and Lizzie. Contact her at .

Did you enjoy this article?
Are you an ASG member?
This field is for validation purposes and should be left unchanged.

Tagged With: bobbin storage, bobbins, sewing room

November 5, 2021

Ironing Board Basics

Ho hum! You may never give much thought to your ironing board—it works fine for pressing and that’s all you need…or so you thought. There are lots of options for this important sewing room tool.

Depending on the amount of space you have, the ironing board can be freestanding, fold down from a wall cabinet, slide out from a drawer, hang over a door or sit on a tabletop.

Brabantia Ironing Tables with Iron Rests

Im-pressing Profiles

Boards are available in a variety of shapes and sizes. Most standard floor models are 14”-18” wide and 48”-54” long. Almost all brands offer one wide end and one tapered end to make ironing clothes easier, but when the board is located in your sewing room, check for some other features as well.

If you’re a quilter, there are larger wooden surfaces that fit over a standard board to extend it in both directions so there’s more support for a large quilt top.

Most ironing boards offer adjustable heights so they can be used sitting or standing, and by users of differing heights. The board can also be locked into table-top height so you can use it as an additional work table surface if needed.

Surface Solutions

The top surface of an ironing board should be permeable so steam and moisture can pass through without damaging the pressing surface. Most board tops are metal mesh covered with a pad and a cotton cover to allow moisture pass-through.

Support Systems

Ironing boards come with a variety of leg styles—from loops and T-shapes to three or four legs—so be sure to double check for stability if you’re purchasing one in person. Accidental tipping can be dangerous to both you and your iron.

Household Essential Euro Styl ironing board with wide T-leg

  • Some boards offer wheels for easy transport, but check that they lock in place for use if you opt for this feature.
  • If you need a place to store pressing tools, spray bottles or more fabric, some boards have a shelf underneath them for extra space.
  • And, don’t forget a slide-out or clip-on iron rest so that you can use the entire board surface for pressing. Cord clips are also available to keep the cord safely off to the side of the board.

Covering Up

Brabantia board cover fasteners

If your ironing board comes with a standard metallic cover and thin foam pad, consider replacing them with natural fiber options. Cotton or wool padding allows for steam absorption and it should be thick enough so as not to see the imprint of a metal mesh board top on your project.

Look for a cotton cover that’s removable and washable. Some designed specifically for quilters and sewers offer printed grid lines, bias lines or common appliqué shapes on them.

Whatever cover you choose should fit tautly on the board to avoid wrinkles. Look for one with a drawstring, elastic or use stretchy clamps to keep it in place.

For even more fun, make your own ironing board cover from colorful cotton prints. Use the original as a guide for sizing and shape and add a casing around the edge. Thread elastic or a drawstring through the casing and pull it tautly over the board.


~Linda Griepentrog
Linda is the owner of G Wiz Creative Services and she does writing, editing and designing for companies in the sewing, crafting and quilting industries. In addition, she escorts fabric shopping tours to Hong Kong. She lives at the Oregon Coast with her husband Keith, and two dogs, Yohnuh and Abby. Contact her at .

Did you enjoy this article?
Are you an ASG member?
This field is for validation purposes and should be left unchanged.

Tagged With: ironing board, pressing, sewing room

Become a Member

Join the only national organization dedicated to Advancing Sewing as an Art and Life Skill.

Join Now button

Blog Article Categories

  • ASG Conference
  • Chapter Stories
  • Embroidery
  • Fitting
  • Learn to Sew
  • National Sewing Month
  • Products, Books, & Patterns
  • Projects
  • Quilting
  • Sewing
  • Sewing Techniques
  • Sewing Tips
  • Sewing Tours
  • Videos
  • Disclaimer
  • Privacy Policy

American Sewing Guild
National Headquarters
9660 Hillcroft, Suite 230
Houston TX 77096
713-729-3000 | 713-721-9230 Fax
www.ASG.org

ASG wordcloud - education, conference, discounts, videos, special offers, tours and more

Copyright © 1998–2025 · American Sewing Guild · All Rights Reserved