


Fusibles
Fusible interfacings are de rigueur for today’s tailoring aficionados. They are easy to apply and a great option for building structure and shape into a tailored garment without laborious hand stitching.
Types of Fusibles
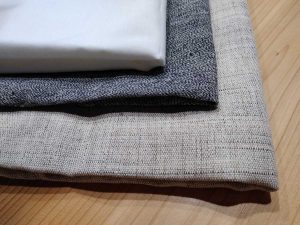
- Wovens have lengthwise and crosswise threads that make them stable in both directions. If they’re cut on the bias, they offer some stretch and draping, like on a jacket roll line or lapel. Hair canvas, a type of woven interfacing, is often used in tailored garments to build shape.
- Knits offer built-in stretch for shaping and draping, and can also be used to back an entire garment section to add body to fabrics like loosely woven bouclés or lightweight wool flannels.
- Non-wovens are crisp and paper-like, and generally aren’t used in tailoring projects since they offer no draping or molding attributes. They’re better saved for craft projects.
Note that each type of interfacing is available in several weights, from light to heavy, and should be chosen to match the weight of the garment fabric.
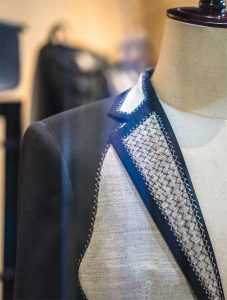
More than one type of interfacing is often used in a single tailored garment. For example, a lightweight knit might be used to back a jacket front and back, while fusible hair canvas is applied over it in the upper shoulder and lapel areas. A heavier weight bias-cut woven may be used in a collar stand area, over hair canvas applied directly to the entire collar. The choices depend on the end result you’re looking for—soft and drapable to firm and supported. Always test before you fuse!
Preshrinking
Preshrink all interfacings, as later shrinkage can ruin your garment. Simply fold the interfacing and submerge it in warm water for 30 minutes, then hang or lie flat to dry. Do not press fusible interfacing.
Cutting
Your pattern guide should tell you where to use interfacing and may have separate pattern pieces for cutting it. Common places to add stability are the garment back to support the shoulder, armscye and neck areas; on facings (behind buttonholes) and lapels, in sleeve hems, sleeve caps, and on collars, cuffs and pockets. Depending on the interfacing weight, you may want to trim it out of the seam allowances and/or darts to help reduce bulk.
Fusing
One side of fusible interfacing has adhesive dots on it, and the opposite side does not. It’s important that you place the interfacing with the adhesive side against the fabric wrong side. Once fused, the interfacing and fabric behave as one entity as far as drape, handling and sewability are concerned.
 Different types/brands of interfacings require different fusing techniques, so be sure to read the label. Some require steam, others dry heat, while still others specify a damp press cloth. Note the fusing time and iron temperature for proper adherence.
To begin fusing, choose a flat pressing surface and smooth the interfacing onto the companion fabric piece wrong side. Be sure to press, not iron the pieces in place: Pressing is a lifting motion, while ironing is sliding the iron along the surface. To fuse properly, hold the iron in one place for the specified amount of time, then lift it and move to the next area, overlapping the first section slightly. Repeat to cover the entire garment area for complete fusing.
Always allow the fused garment sections to cool before moving them from the pressing surface. If you move them while warm, it can affect adhesion and cause distortion.
For smaller garment pieces, like collars and cuffs, it’s easier to fuse an entire fabric section and then cut out the pieces than it is to try and match up small cut pieces of interfacing with pre-cut garment sections.
Once all the interfacing pieces are fused to their matching garment sections, transfer the pattern markings to the interfacing layer and move forward with construction.
~Linda Griepentrog
Linda is the owner of G Wiz Creative Services and she does writing, editing and designing for companies in the sewing, crafting and quilting industries. In addition, she escorts fabric shopping tours to Hong Kong. She lives at the Oregon Coast with her husband Keith, and two dogs, Yohnuh and Abby. Contact her at gwizdesigns@aol.com.
