


Gorgeous! Amazing! Exquisite! So detailed!
But how LONG did it take?
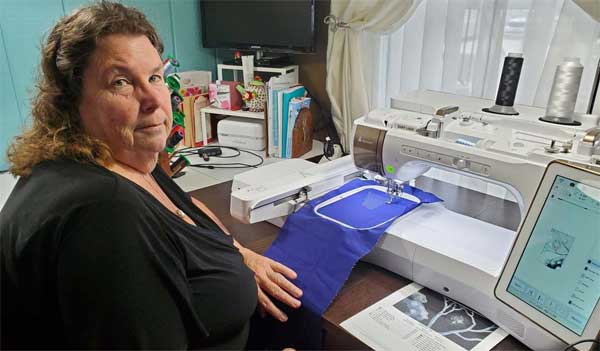
Diana Latino of the Princeton Chapter is getting used to comments like these that come every time she shares one of her completed tile embroideries. And she has a number of them done already.
What’s Tile Embroidery?
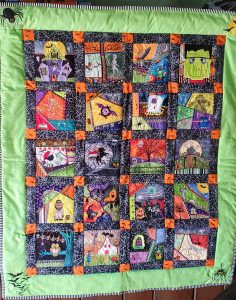
Tile embroidery is a complex design done on an embroidery machine in which up to 32 separate, usually very dense designs are stitched independently and then sewn together to create a complete picture for a wall size quilt.
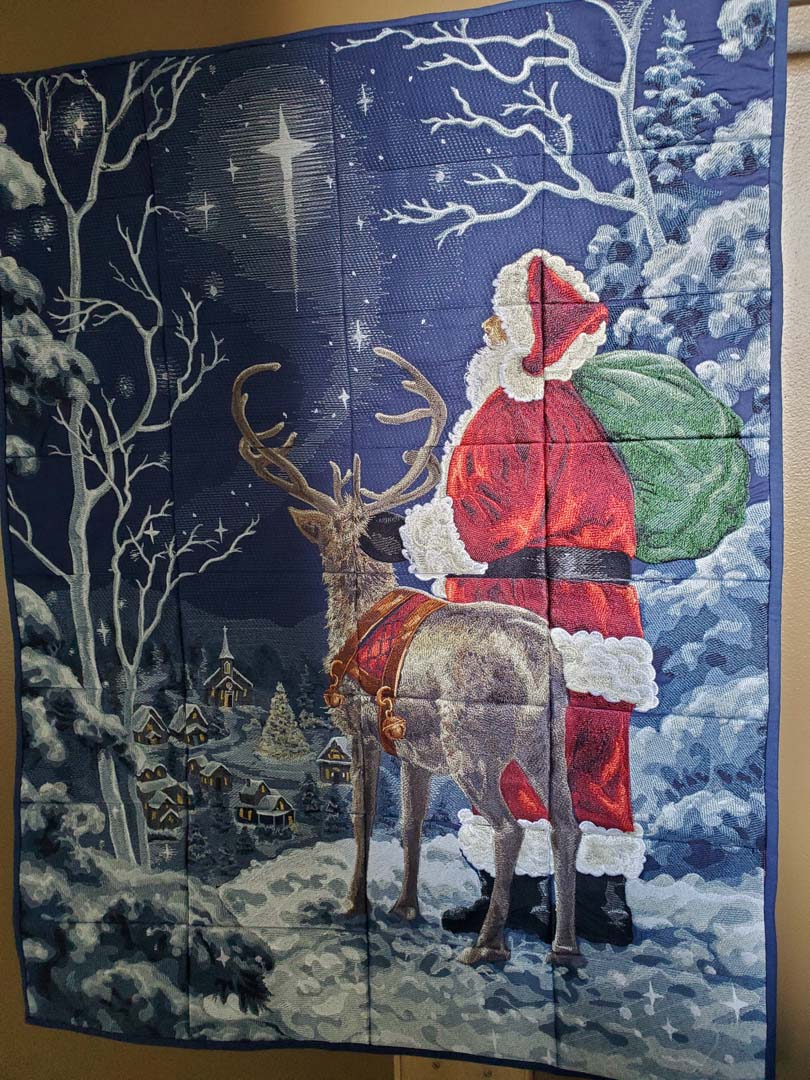 Diane’s holiday design, Starry Night Santa from OESD is the perfect example of this intricate style. With the light just right, you can see where the separate tiles have been sewn together to create the image of Santa standing on a snowy landscape looking up at the Christmas star. Each tile is created by the embroidery stitches with a myriad of threads to create the subtle shadings. The entire design was more than a million stitches with about 32 thread changes per tile. And as for how long did it take, Diana claims to have completed the embroidery in just a week. Then she added, “But that was stitching 8 hours or more a day, every day,” and credits husband Mike with doing all the cooking which allowed her to focus on the stitching. With 32 tiles and each tile taking up to 3 hours to embroider, that was an intense 96 hour work week! But the results are spectacular.
Getting Started
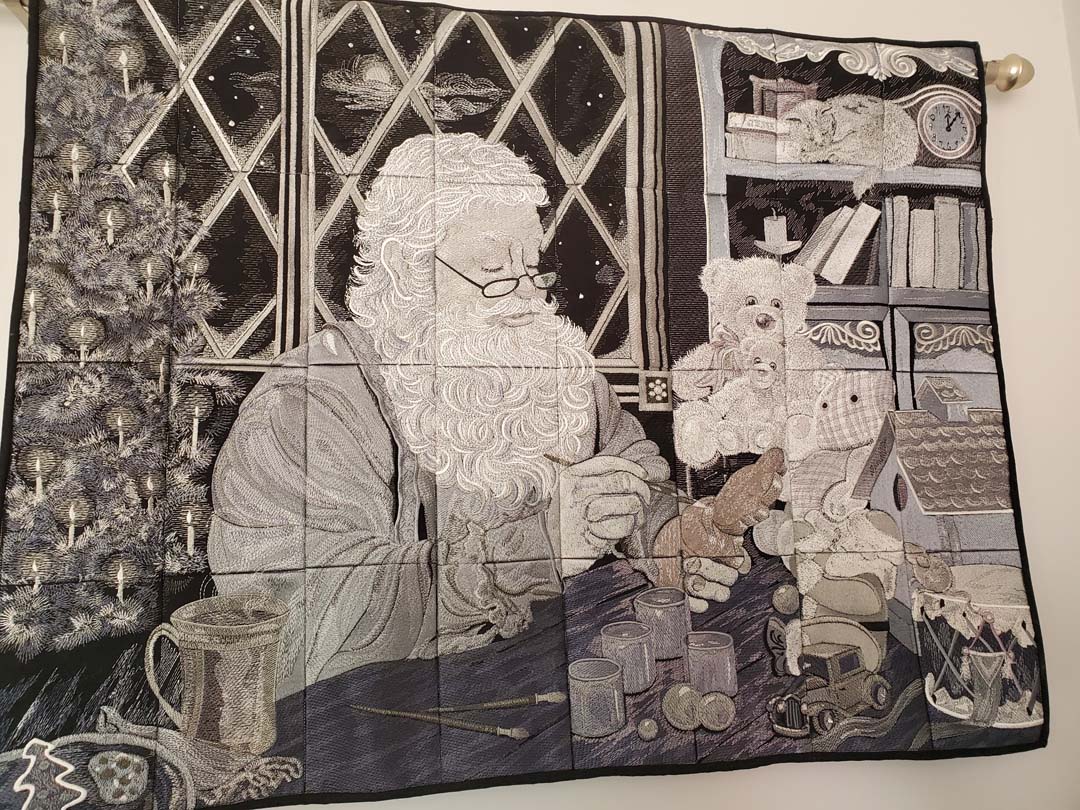
Diana began embroidering in 2005, and discovered the tiles in 2010 when she got tired of just sewing for her kids and wanted something more challenging. She says she gets such a feeling of accomplishment when she puts the finishing touches on one of these designs, and even though many are holiday themed, she leaves them hanging all year. Her Santa’s Workshop, also from OESD, is another Christmas themed design. This one appears to be in black and white, but achieves its detail and subtle shadings through the use of 18 different shades of gray thread. Keeping the thread names, numbers, and spools coordinated is one of her biggest challenges. In fact, she once relied on the color name that came up on her machine and ended up with a blue ear on Santa! Now she lines up all her threads and labels them BEFORE she begins her first tile.
Adding Machine Appliqué
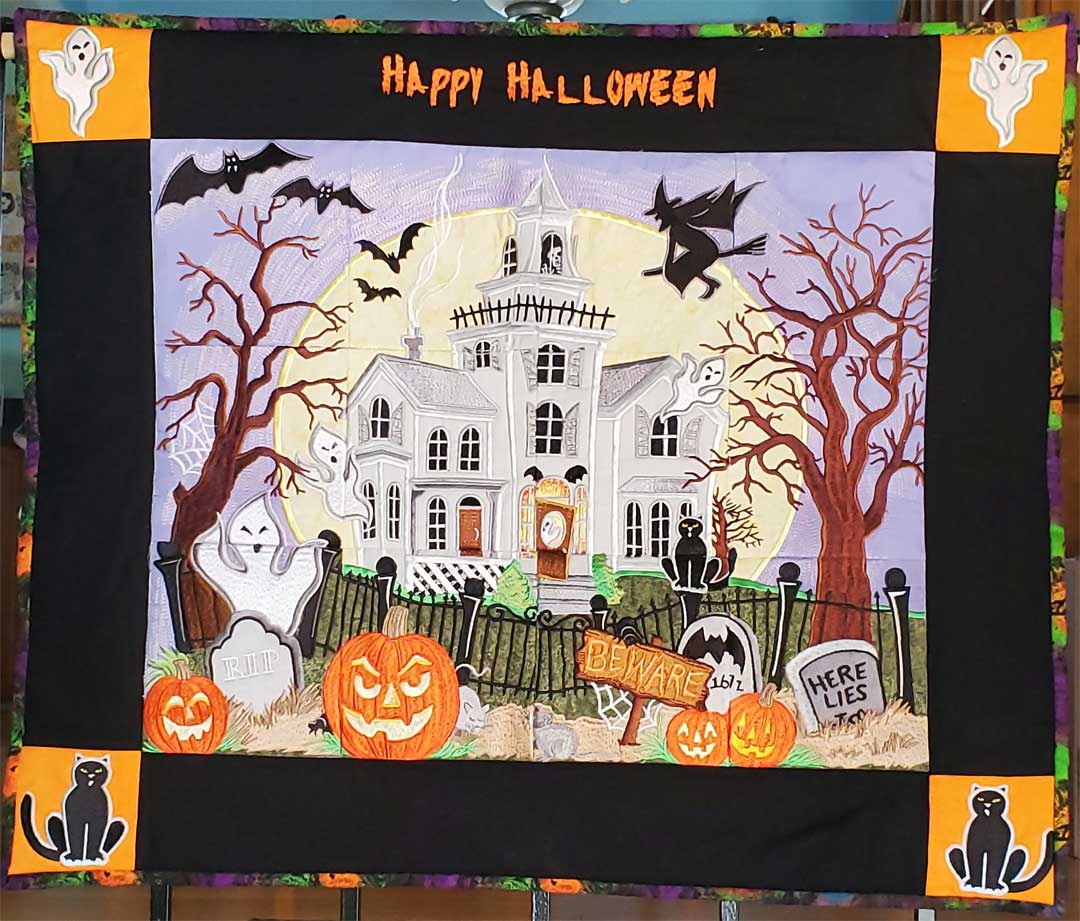
Some of the designs like Poppy also incorporate machine appliqué with the stitching. The use of fabrics cuts down the embroidery time and gives a more traditional quilting look to the finished project. Her Halloween from Molly Mine designs is another example of the use of appliqué. And another Halloween design this time from Anita Good is Haunted House.
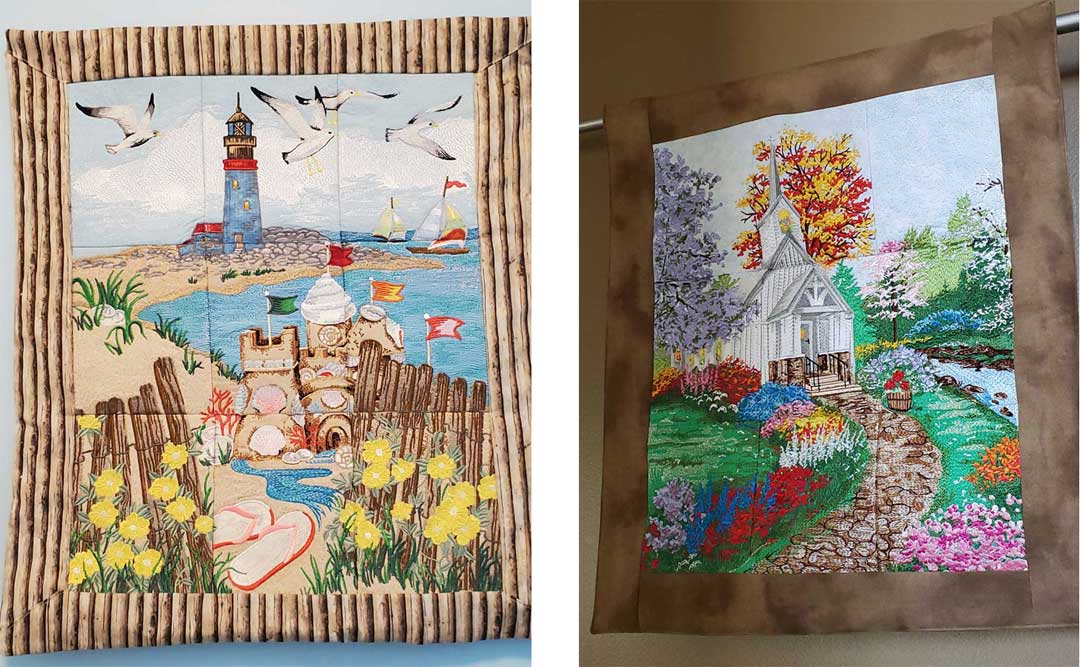
Not all of her efforts go into holiday designs. Diana shared some pictures of floral designs from Anita Good, Connecting Flowers and County Church as well as the landscape, Beach.
Tips
If you have been inspired to try a tile embroidery, Diana has a few suggestions.
 Organization is essential for any project, but especially when working with tiles.
- Be sure to have the right threads and label them so you can easily select the correct color.
- To save fabric, instead of cutting out and hooping separate blocks, cut fabric into longstrips the required width for the hoop. This allows you to hoop the next design without the large areas of wasted fabric outside the hoop.
- To make stitching the tiles together easier, on each completed tile, label the back with the number of the tile to make sewing the project more organized.
- To line up the tiles more accurately, a bright colored thread in the bobbin for the outline stitch makes the alignment more visible.
- Trim the blocks to a ½” seam allowance instead of the ¼” recommended. The ½” is more manageable.

Diana regularly shares her embroidery projects with the online embroidery group of the Princeton Chapter where she has inspired and motivated members to experience the fun of machine embroidery.
~Diana Latino, Princeton Chapter
