


Zippers don’t have to be under flaps—they can be showcased on the outside of a project and embellished as well.

It’s All About the Stitches
You know all those stitches in the machine that you admire, but may not use often? Many of those are perfect to highlight an exposed zipper. Just pick one that’s to your liking and adjust the width to be less than ½” so you don’t run into the zipper teeth.
Choose a narrow presser foot that can ride along the zipper tape, but still allow for the width of your stitch. Adjust the needle position and stitch width to finesse the placement. Most zipper feet will allow you to sew a motif stitch with a narrow width, as opposed to just straight stitch. Key to this effort is testing by turning the handwheel manually throughout the entire stitch sequence to be sure the needle doesn’t hit the foot (or the zipper teeth) during any portion of the motif sewing. Once you’ve determined that, you’re ready to stitch on the zipper tape.
Any type of thread can be used for embellishing zippers—choose a metallic thread to accent metal zipper teeth, a bold color for prominence, or even a variegated thread for interest.
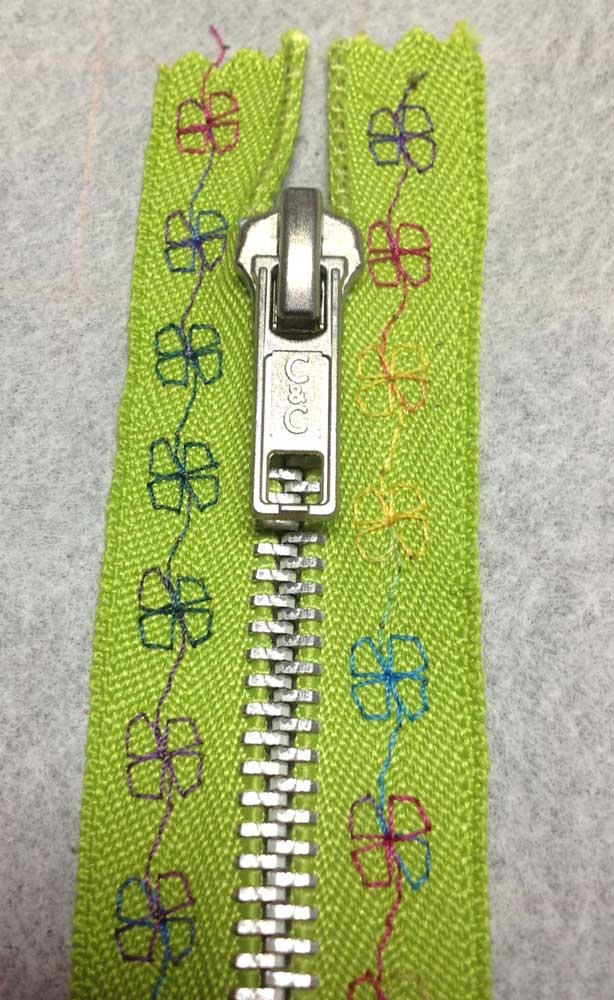
Sport-weight zippers have wider tapes than all-purpose zippers, making them ideal for using decorative stitching since there’s more room for embellishing. Some will allow for multiple rows of stitches, depending on the stitch width used.
There are actually two ways you can embellish a zipper tape—one is stitching only on the zipper tape itself, and the second is to stitch on the tape as you’re applying it to the garment or other project.
If you want to embellish the tape prior to applying the zipper, some machines find it challenging to grab the narrow tape and feed it evenly under the foot. To resolve that dilemma, adhere the zipper to a removable embroidery stabilizer to support the narrow tape. Water-soluble or tear-away stabilizers work well, as does a removable adhesive version. You can pin the zipper to the stabilizer or use temporary spray adhesive if you’re stabilizer doesn’t have adhering properties itself.

Once the zipper is adhered to a larger backing, simply stitch up the center of the tape, stop your stitching, and slide the zipper pull out of the way as needed for access. Then continue stitching.
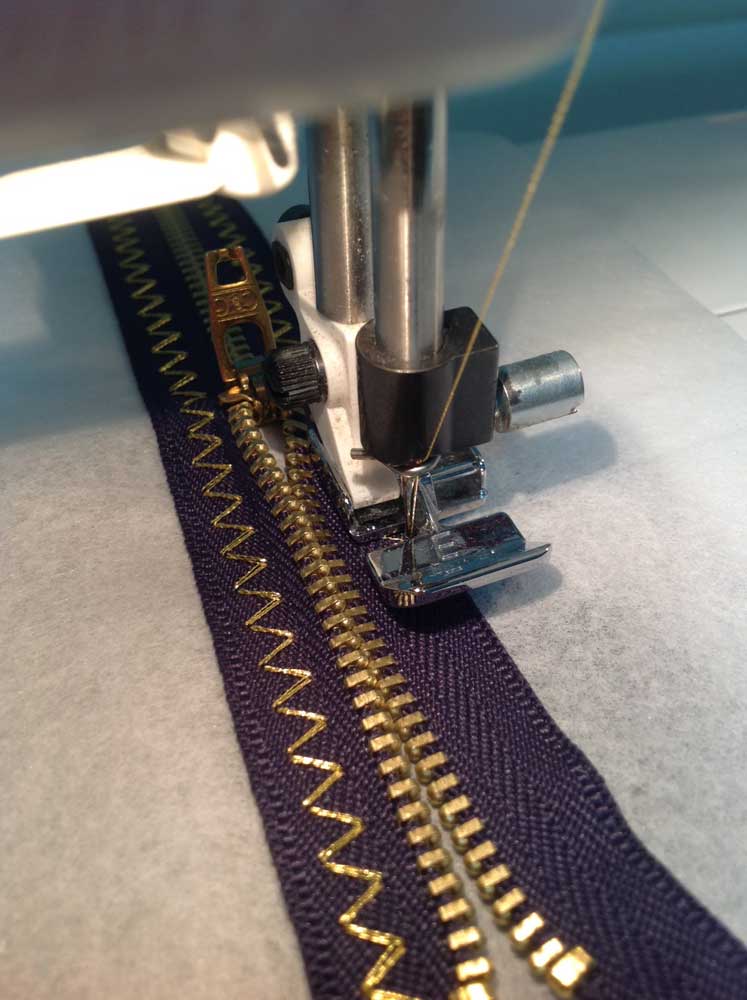
When your embellishing is complete, remove the stabilizer following the manufacturer’s instructions.
Attaching the Zipper
To attach the exposed zipper, fold under the placket opening edges, pin the zipper in place keeping the finished edge away from the teeth so the zipper can function, and topstitch the zipper tape outer edge in place using matching thread and straight stitching.
If you prefer to do the decorative stitching directly onto the zipper/garment layers, it’s easiest to apply it flat, prior to cutting the placket opening. Using water-soluble basting tape, adhere the zipper in place over the marked opening and decoratively stitch along the zipper tape edges. The lower zipper tape edges can be turned under if desired prior to stitching. After stitching is complete, carefully slice open the garment placket layer down the zipper center and fold back the edges. Stitch again with straight stitching to hold the edges in place if desired, or use a narrow strip of fusible web for that purpose. A knit fabric underlayer can simply be trimmed close to the zipper teeth so the zipper can actually function without the fabric getting caught in the teeth.

~Linda Griepentrog is the owner of G Wiz Creative Services and she does writing, editing and designing for companies in the sewing, crafting and quilting industries. In addition, she escorts fabric shopping tours to Hong Kong. She lives at the Oregon Coast with her husband Keith, and three dogs, Yohnuh, Abby, and Lizzie. Contact her at gwizdesigns@aol.com.
