American Sewing Guild (ASG)

Visit our blog Visit the ASG Facebook page Visit ASG on Pinterest Visit ASG's YouTube channel Visit ASG on Instagram
  • Home
  • Join ASG
    • Join Online
    • Chapter Locations
    • Member Benefits
    • Member Brochure
    • Join by Mail
  • Education & Classes
  • Resources
    • Contests & Awards
    • Giving Back
    • Hall of Fame
    • Links
    • Travel and Tours
    • Measurement Chart
  • Shop
    • ASG Store
    • Chapter Products
    • Video Resources
  • Blog
  • About
    • About Us
    • Donate to ASG
    • ASG Sensitivity Statement
    • FAQ’s
    • Start a Chapter
  • Contact
  • Member Login
    • Login First!
    • Members Only
    • Leadership Only
    • Website FAQ’s
    • Logout
  •  

July 18, 2025

A Special Visit to the Textile Center

ASG member, and former Board member, Joi Bostic, recently had an opportunity to visit to the Textile Center in Minneapolis. The following is a recap of Joi’s visit, in her own words:

I was incredibly excited to learn that my brother-in-law who lives in the Minneapolis/St Paul area and knows about my love of sewing, had planned a trip to the Textile Center in Minneapolis during my visit. Due to road construction, we had to enter through the rear of the building, so I covered my eyes and carefully navigated the hallways until we reached the front. He really wanted me to experience the space from the front entrance, and he was absolutely correct.    
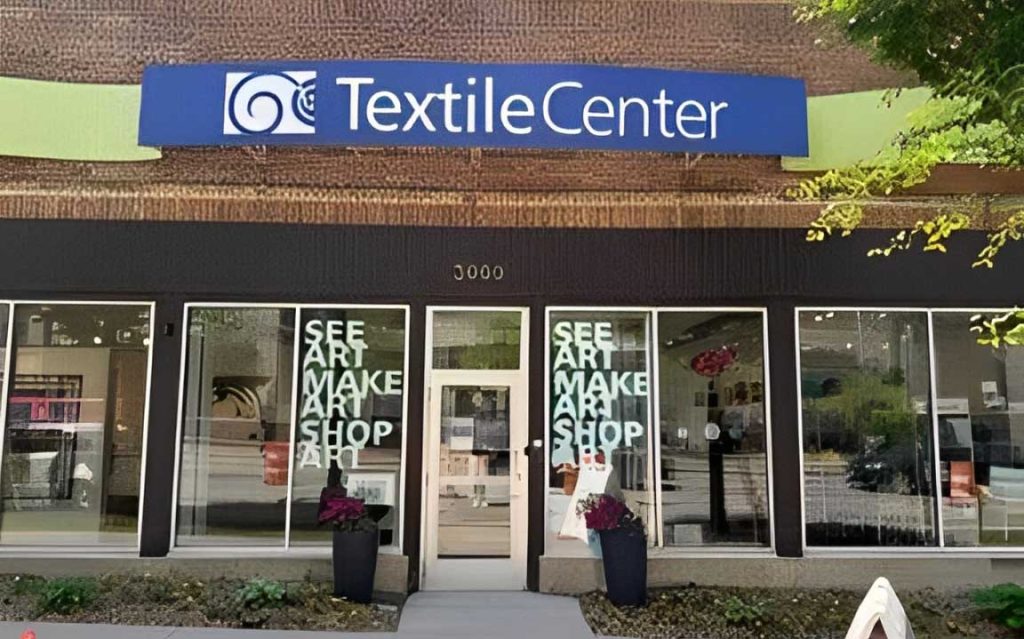
Textile Center in Minneapolis

Upon my second time “entering” the building, I was greeted by a beautiful quilt exhibit to my left and a store to my right that was filled with treasures just waiting to go home with me.

But let’s start with the exhibit… 

We were able to move through “Stitching Black Legacy: The Quilts of Carolyn Mazloomi.”  Ms. Mazloomi’s attention to detail is amazing—the quilts were done in black and white with some having a splash of color to better tell the story. The most impressive part of the 19 quilts is that they were all created between 2024 and 2025 and the story that each one told was breathtaking. The “Stitching Black Legacy” exhibit will be there through July 12 in case you find yourself in Minneapolis. 

Then, the Shop
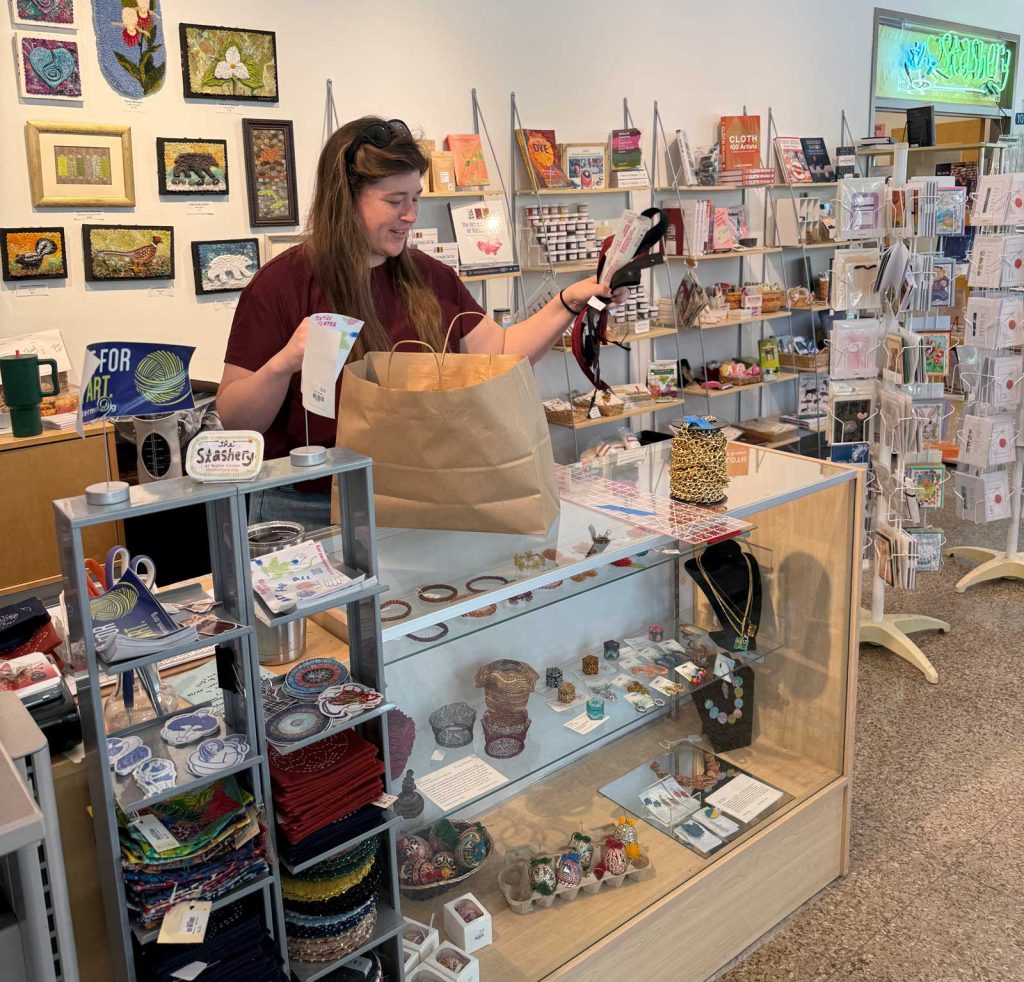
To the right was the Textile Center Shop which was filled with handmade fiber art and gifts featuring over 100 artists, as well as supplies to purchase for use in creating your own masterpiece.
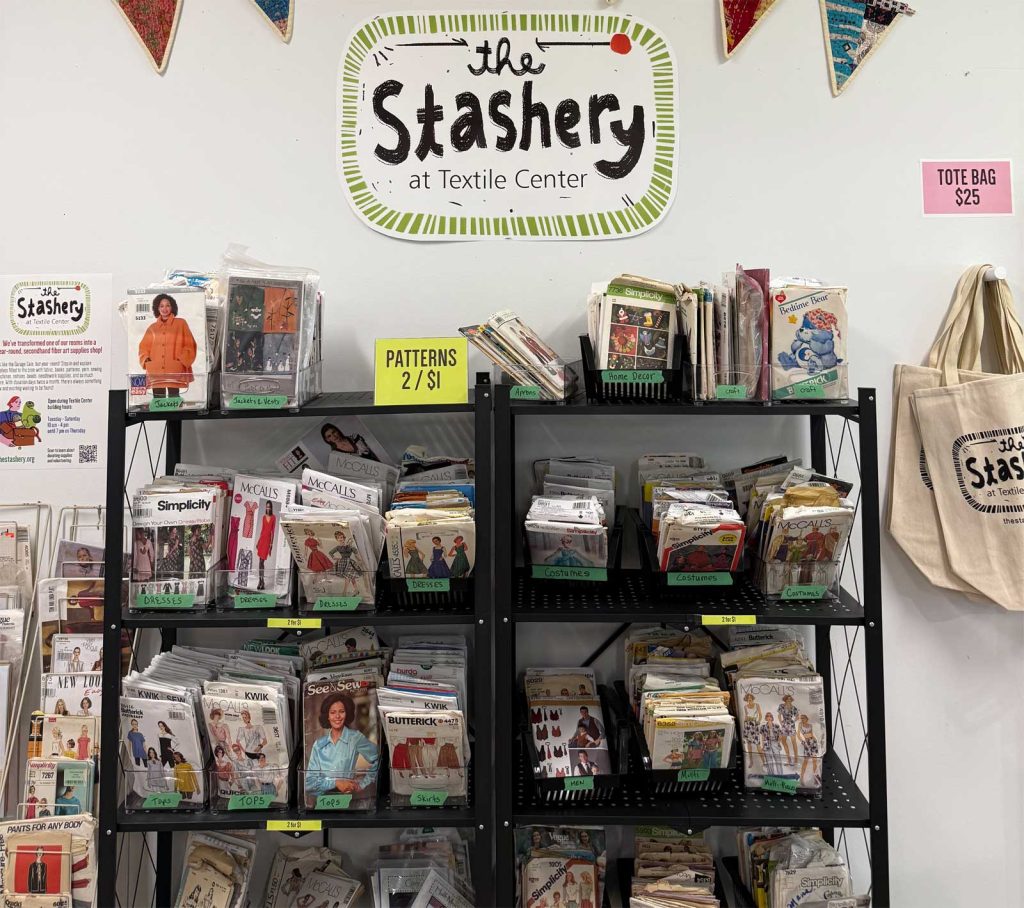
Towards the rear of the shop was the entrance to a lounge area where a young lady was making yarn cakes for knitters or crocheters. The lounge area then ushered me into The Stashery. This area is where you can find a variety of previously loved materials at great prices. I had to exercise great restraint as I walked through and repeatedly reminded myself that I flew to the area and would not be able to fit the fabric, rulers, or big bundles of thread in my suitcase, not to mention not being able to transport rotary cutters or shears in my carry-on bag. Note that due to its nature, their selection changes constantly, but I was impressed that there were items for every type of fiber artist. 

Into the Library

Across the hall from The Stashery is the phenomenal library. In this space, you can find the largest collection of fiber arts books, magazines, and media materials in the country with over 35,000 holdings. The stacks are arranged by topic, so all quilting materials are together, then sewing, then surface design which is subdivided by type of design. Finally, there is a a catch-all section. The end of each aisle features what can be found on that stack.   
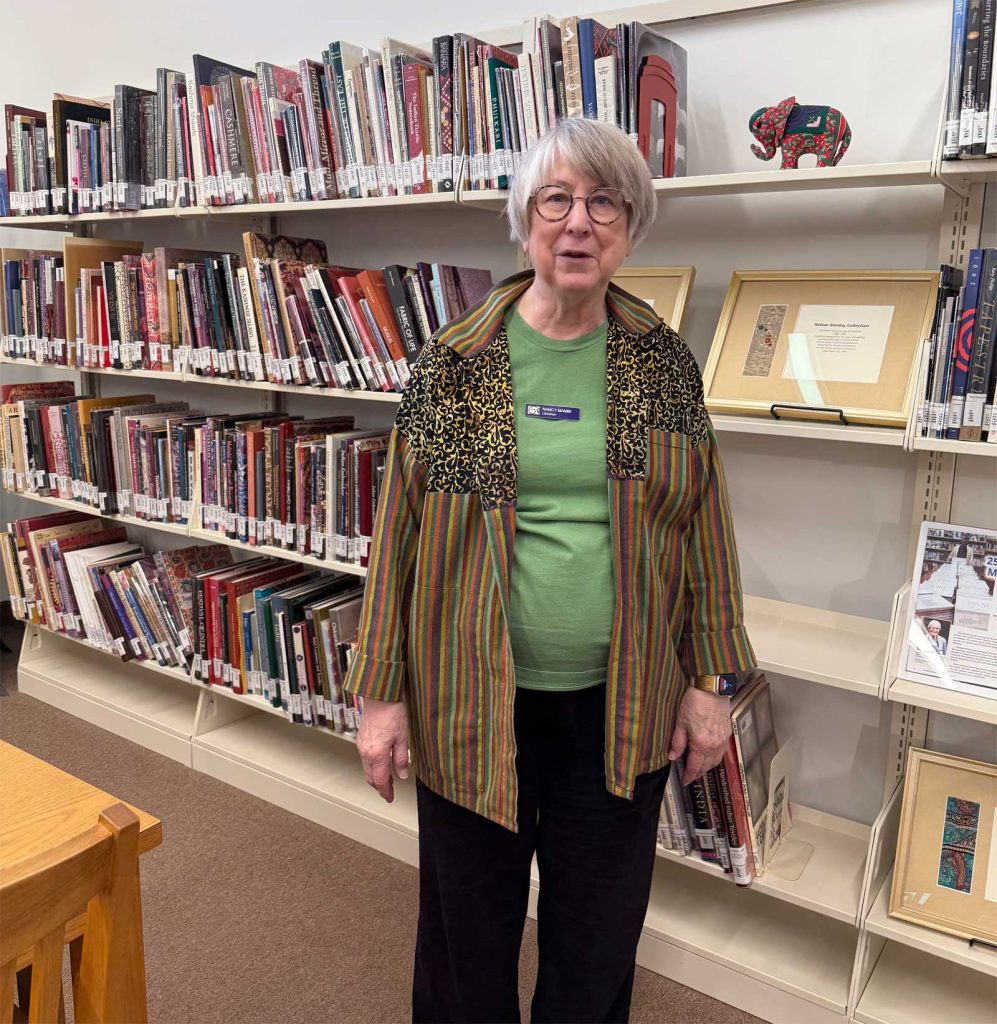
The librarian is a wonderful 81-year-old woman named Nancy. Nancy took the time to walk us through the entire library and explain how to find things. At one point she mentioned that members of various guilds can check out materials so, of course, I asked whether American Sewing Guild members could take advantage of checking out materials and the response was “YES!”

Ms. Nancy has an interesting story—she was a schoolteacher for many years then, after she retired, she started volunteering at the Textile Center. The librarian at the time became pregnant and needed to leave the Center and Ms. Nancy was asked if she could step into the role temporarily. Twenty years later, she is still their librarian and continues doing a fabulous job. 

On to the Classroom
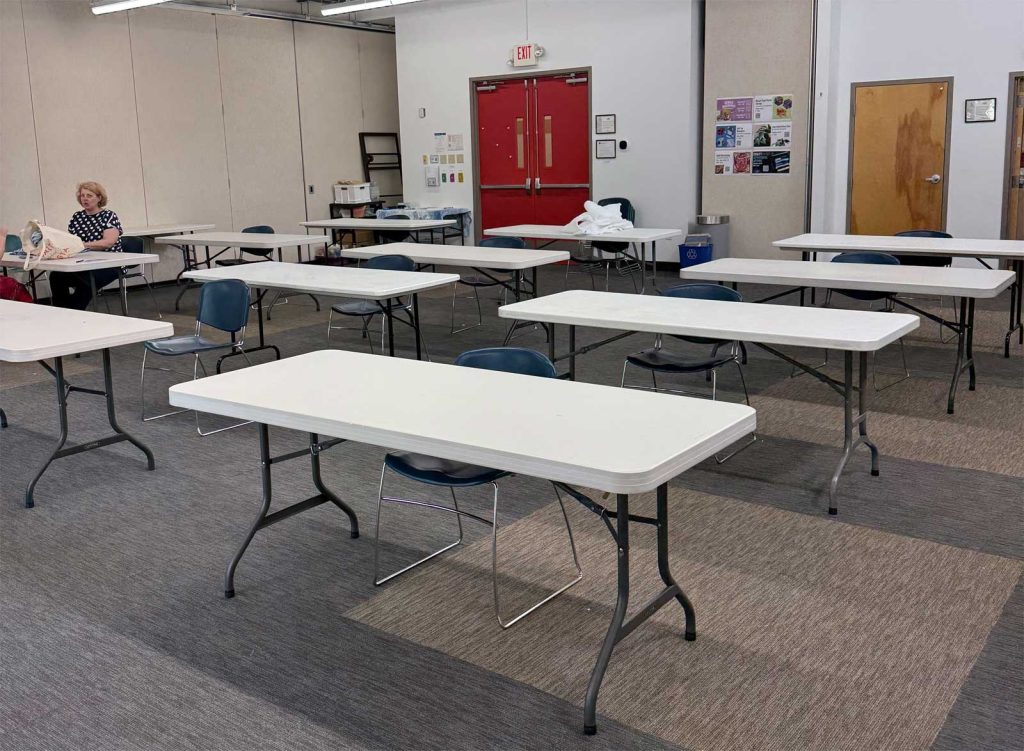
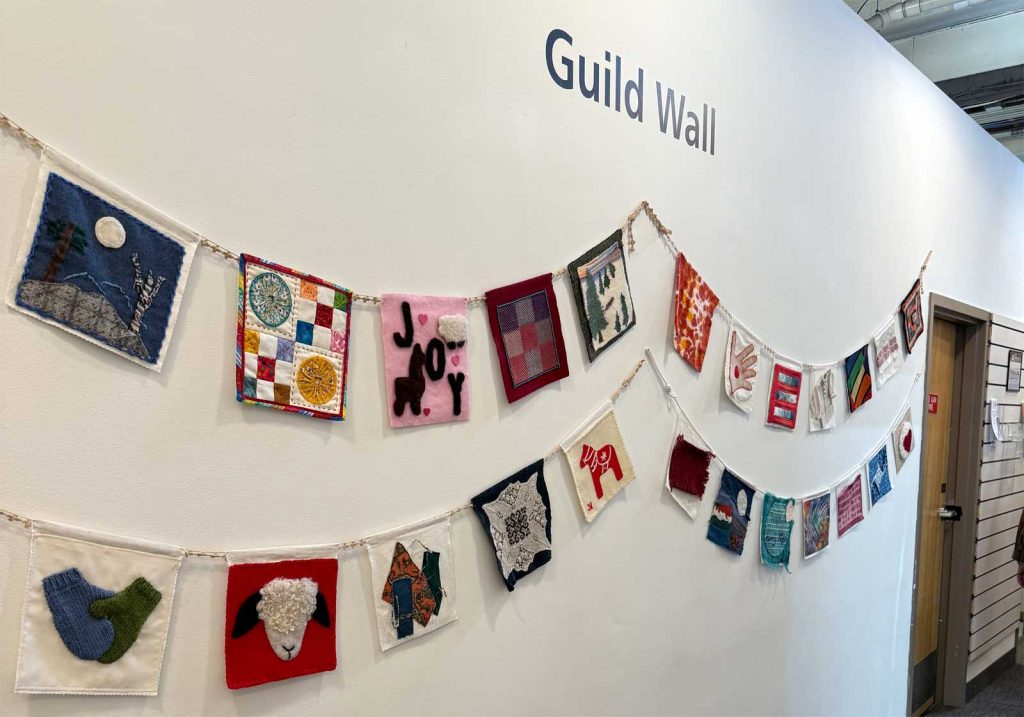
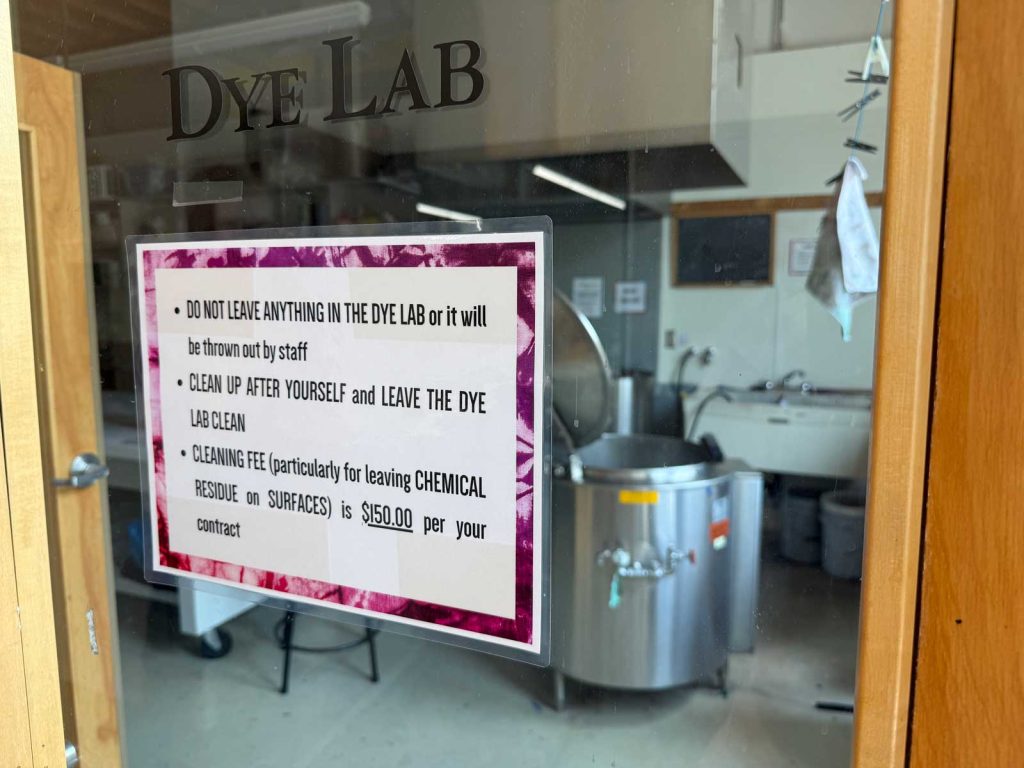
Down the hall from the library is a large classroom. This is a versatile space which can used for a number of purposes. When we arrived, a class was being held, but I didn’t see what it was as I was shielding my eyes to make my way to the front. Across from the classroom is a Dye Lab. Ooh, how I wished I had the time to play is that space! Along one of the hallways is a Guild Wall where fiber creations are featured. 
Needless to say, I am grateful to know about the Textile Center. Its mission is to honor textile traditions, promote excellence and innovation, and inspire widespread participation in fiber art. It does my heart good to know that fiber arts continues to be appreciated and is here to stay for a long, long time.
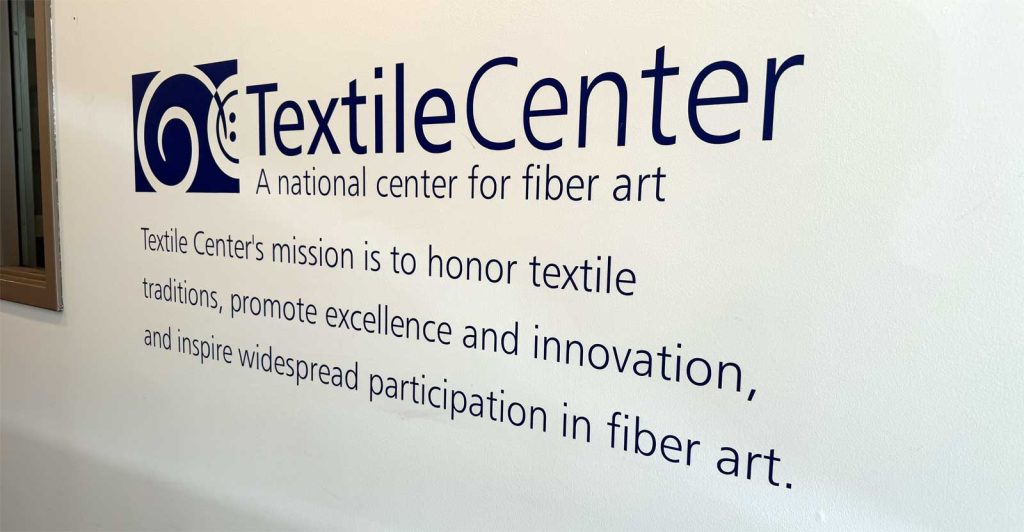
Learn more about the Textile Center at https://textilecentermn.org/.   


~Joi Bostic, ASG Member

July 11, 2025

Fabric Q&A

Q. What is English Netting, and how is it different from nylon net or tulle?

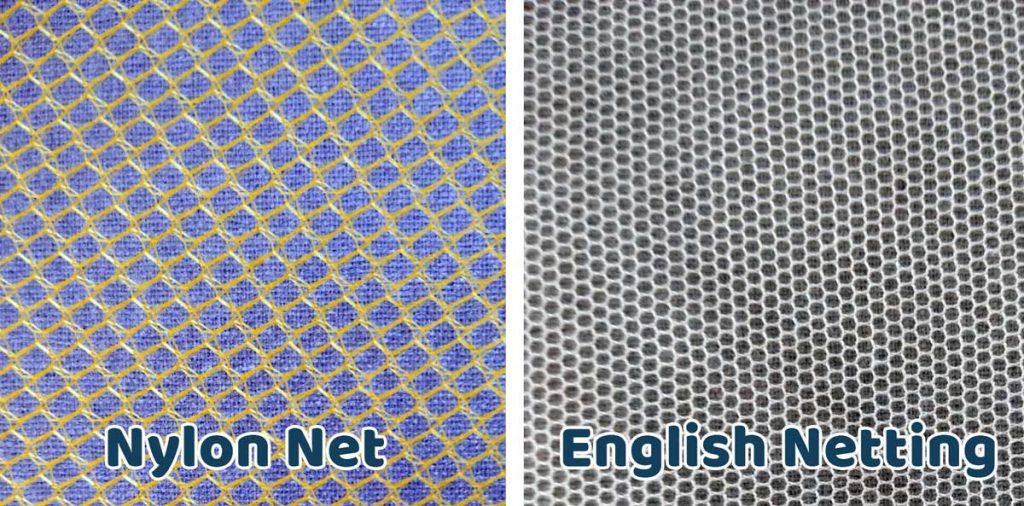
A. English netting is a very soft, pliable and drapeable fabric used for bridal veils, bridal gown overlays and as a basis for machine embroidered lace. It’s most often 100% cotton or a blend of cotton/polyester. The threads are matte finish and slightly thicker than most other nettings. It’s characterized by hexagon shaped holes. The netting is sometimes used for trim on knit garments due to its slight stretch. English netting gives the look and drape of silk without the added cost.

Nylon net is much stiffer and has larger holes than either tulle or English netting. It’s available in wide widths (up to 108”) and is used to add fullness, like on a costume or tutu. Because of its crispness, nylon net isn’t very comfortable for a garment as it’s too stiff.

Netting photos

Tulle is a finer version of nylon net with smaller holes and a softer touch. Tulle is sheerer than either of the other two nettings mentioned so it’s often used most often for bridal veils.


Q. Why are some fabrics made from more than one fiber?

Fabric bolts

A. Fibers are often blended to take advantage of the attributes of each. For example, some fabrics have a small amount of Lycra added for stretch, or a bit of silk is sometimes added to cotton or wool for added sheen. Polyester is often blended with cotton to improve wrinkle resistance. Fibers are also blended to help with cost—luxury fibers like cashmere or alpaca can be added to wool in small amounts to create a better hand at a still reasonable price. When caring for blended fabrics, be sure to follow the bolt instructions for proper laundering/cleaning methods, and be aware of the blended fibers in choosing an iron temperature for pressing.


Q. Do I need to pre-shrink fabric before cutting out a garment?

Washing machine

A. The answer depends on the fiber content of the fabric. Look for guidance on the bolt end, but as a general rule, you should pre-treat the fabric as it will be cared for in the finished project. If the fabric is washable, send it through a wash/dry cycle before cutting. If you’re concerned about shrinking, multiple launderings may be in order. Fabrics like denim and flannel will often shrink more with each repeated washing, so it’s a good idea to purchase a little extra fabric to compensate for that. Note that fabric shrinkage amounts are often listed on the bolt end with indicators like “3-4% residual shrinkage may occur”. That amount of shrinkage can affect the fit of a garment.

For dry-clean-only fabrics, either take them to the drycleaner to be steam shrunk, or complete that process at home. If you’re working with home décor fabrics, steam-press them, but do not launder as protective finishes may be removed.


Q. I bought fabric for a jacket but after washing it, it’s way too soft to hold its shape. Is there anything I can do to salvage it?

A. The easiest way to change the fabric hand and make it firmer for your project is to fuse interfacing to the wrong side. A lightweight tricot knit interfacing can be fused to all the cut pieces to add body and support to make it more appropriate for the intended project. Some prefer to fuse the interfacing to the yardage prior to cutting instead of trying to match it up to individual cut pieces later. You’ll need a large flat surface and plenty of steam, and perhaps a press cloth, depending on the interfacing brand and application instructions. Be sure to follow the instructions for applying it and allow the fabric to cool flat before moving.


~Linda Griepentrog is the owner of G Wiz Creative Services and she does writing, editing and designing for companies in the sewing, crafting and quilting industries. In addition, she escorts fabric shopping tours to Hong Kong. She lives at the Oregon Coast with her husband Keith, and three dogs, Yohnuh, Abby, and Lizzie. Contact her at .

Tagged With: fabric, learn to sew, sewing, sewing tip

June 27, 2025

Smocking: The Art of Elegant Fabric Shaping

Smocking is one of those enduring needle arts that quietly transcends trends. While it’s often associated with heirloom baby dresses and delicate children’s clothing, smocking is far more versatile than its sweet, vintage reputation suggests. At its heart, smocking is a form of embroidery that adds stretch, texture, and beauty to pleated fabric. Whether used for function or flair—or both—this technique has stood the test of time for good reason. Smocking is also often called “shirring;” however, there are differences. Shirring is a sewing machine gathering technique, while smocking is an embroidery technique on pre-pleated fabric.

The technique originated centuries ago as a practical solution for shaping garments. It allows an item of clothing to fit close to the body for a flattering look but also be super comfortable because there’s plenty of give. Before elastic, smocking allowed clothing to stretch and move with the body. Farm workers in England wore “smocks” with stitched panels that gathered fullness across the chest, back, or sleeves. Over time, what began as a functional feature evolved into a decorative art. Smocking, aka shirring,

English smocking is worked over a panel of evenly spaced pleats. Each stitch catches the top third of adjacent pleats, forming a flexible chain across the fabric. The stitches can be simple or elaborate, depending on the design. Pleats are usually created using a hand-crank pleater, which feeds the fabric through a set of rollers and onto threaded needles. These gathering threads form a grid that serves as the guide for embroidery.

A popular method of smocking in the 40’s, 50’s, and 60’s was the “pick up the dots” method. This technique involved transferring dotted patterns onto flat fabric, usually by ironing a transfer on the fabric, then stitching and pulling the threads to form pleats as you worked—a process that felt like cutting-edge technology at the time.

Then, in the early 1980’s a true game-changer arrived in the form of the hand-crank pleater. Smockers would feed a flat piece of on-grain fabric (usually batiste) through the geared rollers, and would carefully turn the handle. Like magic, the gears would fold fabric into crisp, even pleats. The pleats were then pushed onto threaded needles, which held them in place. When the fabric was pulled off the needles, it remained gathered on the threads that were buried partway into the pleats and created something ready for smocking. The thread grid served as a handy guide for stitching charted designs. Today, smocking (or shirring) can be done using your sewing machine.

In the mid-1990s, a new style emerged called “stacking” or “picture smocking.” This technique stacks stitches to form recognizable images—teddy bears, toy trucks, Christmas trees. However, these motifs become distorted when stretched so an additional layer of stabilizing stitches is worked on the back to hold the panel in place. Picture smocking is most often used as a decorative insert, rather than a stretchable garment section.

Classic smocking is rooted in geometric patterns—zigzags, diamonds, hearts—repeated across “the pleated fabric. Traditionally, geometric smocking serves a structural role in clothing—shaping yokes, blouse fronts, sleeve caps, or ruffled dress shoulders. The smocked sections are anchored by flat fabric, which controls the stretch and gives garments a graceful silhouette without losing structure.

Shirrring with your Sewing Machine

Work with lightweight woven fabrics like cotton voile, chambray, or rayon challis. The lighter the fabric, the more it will gather during the shirring process.  As a general rule, a lightweight fabric will shrink to about half its original width after smocking—sometimes slightly more depending on the fabric and stitch spacing.

  1. Wind the Bobbin by Hand
  • Use elastic thread to wind your bobbin by hand, not with the machine.
  • Wind it evenly and with just very slight tension—don’t over-stretch the elastic as you wind.
  • Place the bobbin in your machine as usual.
  1. Thread the Top as Usual
  • Use regular thread in the needle and thread your machine like normal.
  1. Mark Your Stitching Lines
  • On the right side of the fabric, use a washable fabric marker or chalk to draw evenly spaced horizontal lines. Common spacing is ½” to ¾” apart.
  • Mark as many rows as you want shirring. Start with 4–6 lines for a small area like a cuff or waistband.
  1. Adjust Stitch Settings
  • Set your machine to a longer straight stitch (3.0–4.0 mm).
  • Do not backstitch at the beginning or end—just leave long thread tails to tie off.
  1. Start Sewing
  • Begin sewing on the first marked line. Sew slowly and evenly.
  • As you stitch, the fabric will begin to gather. That’s the elastic doing its job!
  • Repeat with each marked line, sewing rows parallel to each other.
  1. Secure the Threads
  • At the beginning and end of each row, tie the thread tails together to keep the elastic from pulling out.
  • You can also backstitch, but tying is usually more secure with elastic thread.
  1. Steam or Press
  • After sewing all rows, use a steam iron to press the smocking.
  • Hold the iron above the fabric and blast it with steam—don’t press hard.
  • The heat will tighten the gathers and give a polished look.

Smocking or shirring adapts to suit nearly any vision. It can be bold or delicate, sweet or sophisticated. From vintage to contemporary, from baby clothes to bold fashion statements, smocking stretches far beyond its origins and remains a timeless technique that allows fabric—and imagination—to gather, flex, and flourish. And while it requires patience, the end result is a textured work of art that adds charm and craftsmanship to any project.

More Information

  • Smocking explanation and examples
  • Smocking by Machine
  • Machine Smocking Techniques

June 20, 2025

Speedy Stitches: Exploring Machine Needlepoint Techniques

With all due respect to traditional hand sewing techniques, if there’s a faster, easier way to do it by machine—I’m in. So I started wondering: could I replicate needlepoint with my sewing machine? Turns out, I can!”

Full disclosure: I don’t do needlepoint by hand, so if you sense a lack of familiarity with the subject or terminology, that’s why.

You’ll find plenty of simple needlepoint patterns available, or you can create your own. Coloring books offer a great source of easy designs to experiment with or just grab a sheet of graph paper and start sketching!

Machine Needlepoint Basics

Thread

The world is your oyster in terms of thread, but there are several on the market that mimic hand needlepointing wools. These specialties can be acrylic, wool or blends—they are thicker than normal sewing threads and have a fuzzy texture.

Examples of these threads include:

  • Sulky’s Filaine (100% acrylic)
  • Aurifil’s Lana (50% acrylic/50% wool)
  • Madeira’s Burmilana (50% wool/50% acrylic) or BurmalanaCo (50% cotton/50% wool)
  • Wonderfil’s Ellana™ (50% wool/50% cotton).

In addition to those fuzzy strands, you can also use this technique with metallic threads, finer pearl cotton, or buttonhole- and topstitching-weight threads for a less fuzzy look to the stitching.

Machine Set-up

  • You’ll need a large-eye needle for any of these specialty threads—a 100/16 topstitching needle is a good choice because of its elongated eye.
  • As you test stitch, if the fuzzy threads tend to shred, move up a needle size to avoid damaging the thread and the look of your piece.
  • Thread a matching standard or bobbin-weight thread in the bobbin, and the specialty thread on the top of the machine. Use a needle threader if you need help to get fuzzy threads through the needle eye.
  • Some machines may require slight tension adjustments with the heavier threads, so be sure to test-stitch and adjust as needed.
  • Lower the feed dogs on the machine and if you have a darning or open-toe foot, use it for better visibility.
  • Keep a tiny lint brush handy as fuzz will build up on the machine’s needle area and in the feed dog area, so frequently cleaning is encouraged.

Canvas

  • Choose a canvas for your base. Canvasses are designated by the number of spaces (holes) per inch. For machine work, use a 10- to 14-count mesh, depending on the thread you’re using—a smaller number for heavier threads and a higher number for lighter weight threads.
  • Draw your design either directly onto the canvas, or onto a piece of stabilizer that you can secure to the canvas underside so you can see the design through the canvas holes.
  • Cut the mesh with enough room around the design for the intended use. If you’re going to frame the piece or sew it into something else, allow extra space for those finishings. It’s also helpful to leave space enough to hang onto as you work.

Getting Started

Note: Test-stitch before you begin your project to get a feel for what you’re doing and the look you want to the finished piece.

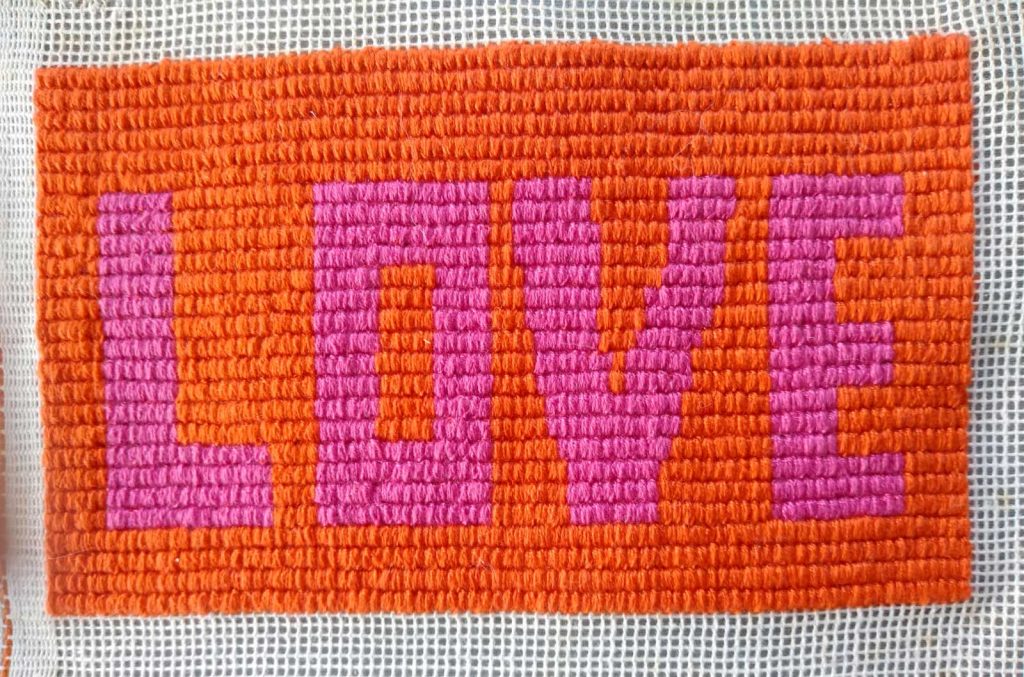
This technique is admittedly quite mindless, as all you’re doing is stitching back and forth in adjacent canvas holes.

  • Set the machine for a zigzag with a width compatible to the span of the needlepoint canvas holes. The more holes you span, the wider the stitch width. Working with adjacent holes produces a tighter looking design than spanning multiples.
  • Stitch the zigzag between the holes to fill the space (5-6 times for heavier threads). Don’t stitch too many times or you’ll create a mound of thread rather than a flat finish. The important part of this test is to count the number of stitches, as you want each set of stitches to be the same.
  • If your machine has memory capabilities, save the number of zigs and zags so it will be the same on each set of holes.
  • Stitch slowly, as it’s important to stay within the hole openings and not stray to adjacent openings.
  • Once you’ve filled a hole pair, move the canvas so that you can stitch again in an adjacent set of holes, moving across the design in a horizontal row pattern.
  • Continue filling the hole pairs across the width of one row of the design. At the end of the row, move to the next row and do the same, noting that the needle goes into one of the holes of the previous stitching area each time.
  • Be aware of your design, as thread color changes are needed as you stitch the various design areas.
Needlepoint diagram

Once you’ve completed the entire design, steam and block the work before framing it or incorporating it into a project.

Voilà—easy peazy!


~Linda Griepentrog is the owner of G Wiz Creative Services and she does writing, editing and designing for companies in the sewing, crafting and quilting industries. In addition, she escorts fabric shopping tours to Hong Kong. She lives at the Oregon Coast with her husband Keith, and three dogs, Yohnuh, Abby, and Lizzie. Contact her at .

June 13, 2025

Wise Words and Witty Threads

Every now and then, while we’re elbow-deep in the archives digging for something entirely different (like sewing archaeologists), we stumble upon a true gem—an “oldie but goodie” that makes us stop, smile, and say, “Well this aged like a fine seam ripper.” This blast from 2010 is one such treasure: a hilarious and heartfelt presentation delivered by an ASG member at a Los Angeles chapter annual meeting. As we read it—nodding, laughing, and maybe snorting once or twice—we realized it’s still sew true today. So of course, we had to share:

Most sewers find sewing creative and fulfilling, if occasionally frustrating, and produce lovely projects. But there’s another aspect of sewing that we can explore…the very human side of sewing.

We learn early on about stitching standards and we face them every time we run up a seam. We ponder, “Move on? Or rip and re-stitch?” We aim for professionalism, but lest we be too perfectionistic and fussy, we might consider the standard told to me by a dear quilting friend whose grandmother critiqued iffy stitching quality thusly: Could you see it from a galloping horse at 30 feet? The message? Relax! It needn’t be perfect. According to my artist sister-in-law, minor flaws are the mark of human craftsmanship.

True Sewing Confessions

Chapter meetings, Neighborhood Group meetings, and sewing classes are wonderful places to meet some super ladies—accomplished, talented, friendly, and helpful women. And I am amazed at what’s shared when a session turns into a gabfest. I mean, there’s such trust and comfort level that we confess our sometimes-dumb behavior, publicly revealing our moments of distraction and mental lapses. Where else would someone confide they nearly burned the house down because they left a hot iron face down on fabric or plastic? Or volunteer that they swear at their sewing machine? Or share that they stitched an entire seam without noticing the needle wasn’t threaded or the bobbin was empty?

In addition, we also admit to things like cutting out two left sleeves and affixing iron-on interfacing to the front of the fabric. Or cutting out an entire project with the fabric facing the wrong direction so the obvious one-way theme is upside down and lament…what was I thinking?

We love classes and can sometimes feel we’re transporting most of our sewing paraphernalia to them, but we can also skid into class late and loaded with gear, and suddenly realize we’ve left not only the machine at home, but the project as well. If you’ve felt chagrined and embarrassed, you’re not alone!

Most of us over a certain age swap frustrations about the most necessary and basic visual requirement of sewing: the challenge of getting the thread through the eye of the needle. And those eyes seem to be getting smaller all the time.

Then we have the grown-up version of grade school show-and-tell, one notable use being to tout new notions discoveries. We’re excitedly sharing our latest find and then someone says, “Oh, those have been around forever!” Or “I bought one last week.” And we secretly feel crestfallen because we wanted everyone to clamor for a demo so we’d be a hero.

 The Big Three Topics

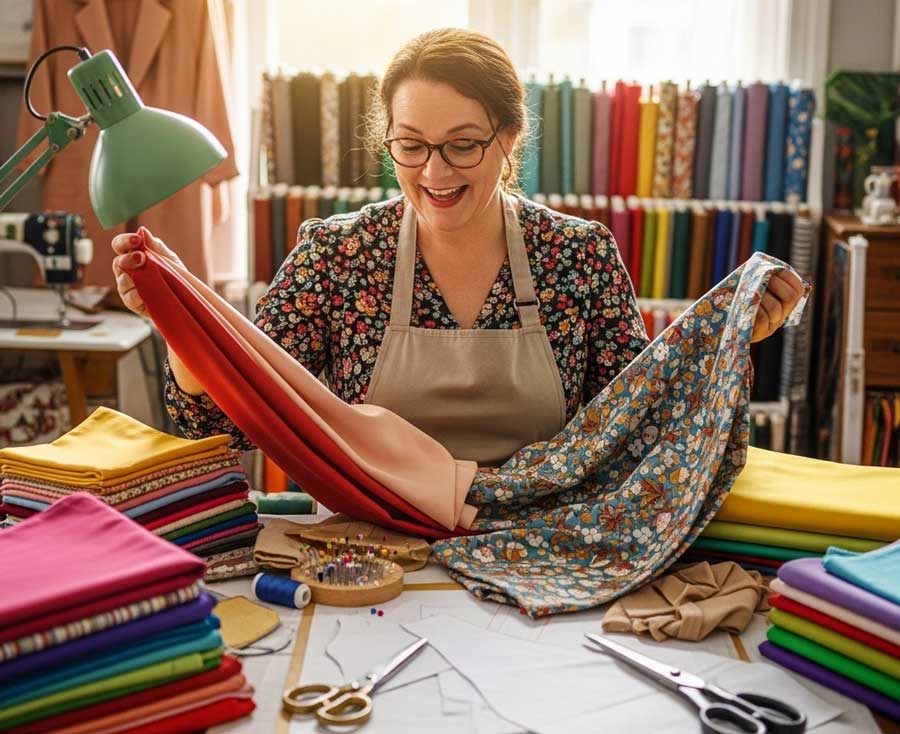
There are three topics that create a buzz among sewers. The first is fabric stashes—for which there is near-universal embarrassment and guilt about the addictive lure that keeps it growing. We develop a love affair with fabrics, dreaming up projects, inspired by the sight and feel, color and texture, print and pattern of textiles, and sales that beckon with irresistible bargains. And sometimes we just go crazy!

Woman excited with fabric

I’m sure you all have your stories. For me it was a piece of fabric so exquisite my heart did flip-flops. It’s a delicate white silk emblazoned with colorful butterflies in breathtaking detail—absolutely gorgeous—and I gasped at the price—in triple digits! But I was smitten and had to have it so I splurged and bought a quarter-yard. It’s art on fabric and I gaze at it in awe every now and then. So, if your fabric purchases are sometimes accompanied by excitement with a tinge of guilt—welcome to the club. You have lots of company.

The second topic that creates buzz is paused projects—those begun with every intention of swift completion. But if we get stuck, we set them aside to figure out how to get past the problem, and then it’s out of sight, out of mind. Or we start another project, nagged by the memory of that unfinished one. Or… sound familiar? You have lots of company.

The third topic is pattern fitting. The bane of many sewers is adjusting commercial patterns to fit our bodies, which, for many of us, do not remotely resemble the models on the pattern envelopes! We struggle with tissue patterns, fitting shells, and muslin trials, trying to mold pattern pieces to our unique curves and bulges so clothes will fit, feel comfortable, and flatter us. And all this must take place before the cut material slides under the needle, by which time—according to one ASGer—her fickle body has changed size and shape.

The Praise Factor

We sewers freely pass out compliments when we see each other’s projects. But I have a pet peeve about this process. Folks, modesty does not require that you describe all the places you struggled with. My advice to compliment recipients is, “Would you please say “Thank you” before launching into a detailed description of all the flaws you perceive? Honestly, I probably wouldn’t have noticed them and it’s very awkward when I have to defend my own compliment. So, when complimented, look pleased, acknowledge the praise, and share a feature you love about your creation. We’ll both feel good. Then you can vent about the vexations and confess the imperfections.

Our contacts with other sewers enrich our lives. We meet sewers who make clothing and create crafts, are crazy about quilting, or into embroidery, all sharing what they love and helping each other. Let’s celebrate our sewing sisterhood!


 Inspired by the late writer Erma Bombeck, former ASG member Deborah Sumner delivered this humorous look at sewing at the Los Angeles, CA chapter’s annual meeting in November, 2010.

  • 1
  • 2
  • 3
  • …
  • 84
  • Next Page »

Become a Member

Join the only national organization dedicated to Advancing Sewing as an Art and Life Skill.

Join Now button

Blog Article Categories

  • ASG Conference
  • Chapter Stories
  • Embroidery
  • Fitting
  • Learn to Sew
  • National Sewing Month
  • Products, Books, & Patterns
  • Projects
  • Quilting
  • Sewing
  • Sewing Techniques
  • Sewing Tips
  • Sewing Tours
  • Videos
  • Disclaimer
  • Privacy Policy

American Sewing Guild
National Headquarters
9660 Hillcroft, Suite 230
Houston TX 77096
713-729-3000 | 713-721-9230 Fax
www.ASG.org

ASG wordcloud - education, conference, discounts, videos, special offers, tours and more

Copyright © 1998–2025 · American Sewing Guild · All Rights Reserved