American Sewing Guild (ASG)

Visit our blog Visit the ASG Facebook page Visit ASG on Pinterest Visit ASG's YouTube channel Visit ASG on Instagram
  • Home
  • Join ASG
    • Join Online
    • Chapter Locations
    • Member Benefits
    • Member Brochure
    • Join by Mail
  • Education & Classes
  • Resources
    • Contests & Awards
    • Giving Back
    • Hall of Fame
    • Travel and Tours
    • Measurement Chart
  • Shop
    • ASG Store
    • Chapter Products
    • Video Resources
  • Blog
  • About
    • About Us
    • Donate to ASG
    • ASG Sensitivity Statement
    • FAQ’s
    • Start a Chapter
  • Contact
  • Member Login
    • Login First!
    • Members Only
    • Leadership Only
    • Website FAQ’s
    • Logout
  •  

August 7, 2026

Mixing Knits and Wovens Successfully

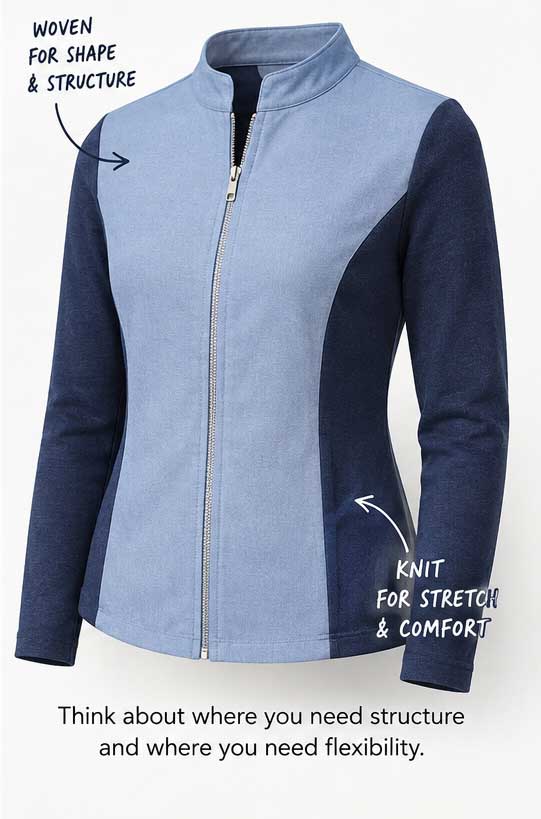
Walk through any clothing store, and you’ll notice that many of today’s garments combine knit and woven fabrics. A jacket may feature knit side panels for comfort, a blouse might pair a woven front with a knit back, or a dress could use stretch knit sleeves with a woven bodice. These thoughtful combinations offer the best of both worlds—structure where you want it and flexibility where you need it.
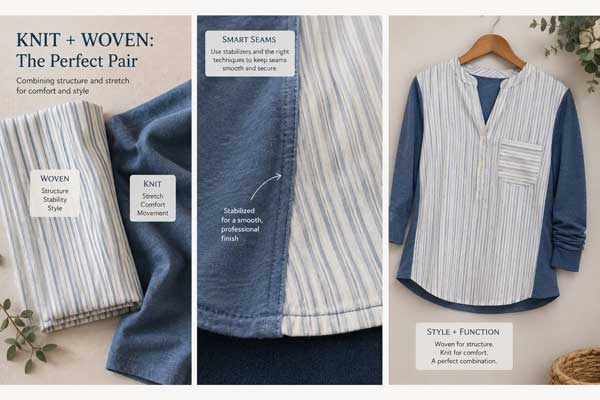
Using knit and woven fabric

For home garment sewers, however, combining fabrics with different characteristics can sometimes be intimidating especially when one fabric stretches while the other doesn’t. One may drape fluidly while the other holds its shape. The secret to success isn’t avoiding these pairings—it’s understanding how each fabric behaves and designing your project so they work together rather than against each other.

Start with Compatible Fabrics
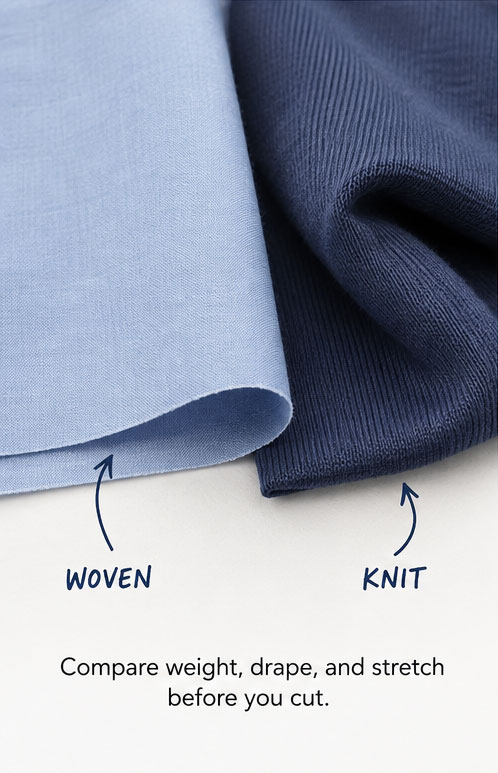
Knit and woven fabric side by side

The biggest mistake you can make is choosing fabrics based solely on color or print. Instead, evaluate how the fabrics behave.

  • Begin by comparing their weight. A lightweight rayon challis paired with a heavyweight ponte knit will likely pull out of balance, while a cotton lawn and a lightweight jersey may complement each other beautifully.
  • Next, consider drape. Fabrics should move in a similar way. If one fabric flows softly while the other stands away from the body, the garment may twist, sag, or feel awkward when worn.
  • Finally, pay attention to texture. A smooth woven linen and a textured sweater knit may technically work together, but the contrast should be intentional rather than accidental.

Before cutting your project, hold both fabrics together, let them hang over your hand, and observe how they move. If they seem comfortable together, chances are they’ll sew together well, too.

Let Each Fabric Do What It Does Best

Successful mixed-fabric garments take advantage of each material’s strengths. Use woven fabrics where structure matters. Shirt collars, cuffs, waistbands, button plackets, and tailored bodices all benefit from the stability of woven fabric. Reserve knits for areas where comfort and movement are important. Side panels, sleeves, backs, neckbands, and fitted waist sections can all benefit from the stretch that knit fabrics provide.

Think about how your body moves throughout the day. Placing knit panels where you bend, reach, or sit can make a garment noticeably more comfortable without sacrificing the crisp appearance of woven fabric.

Stabilize Seams Between Fabric Types
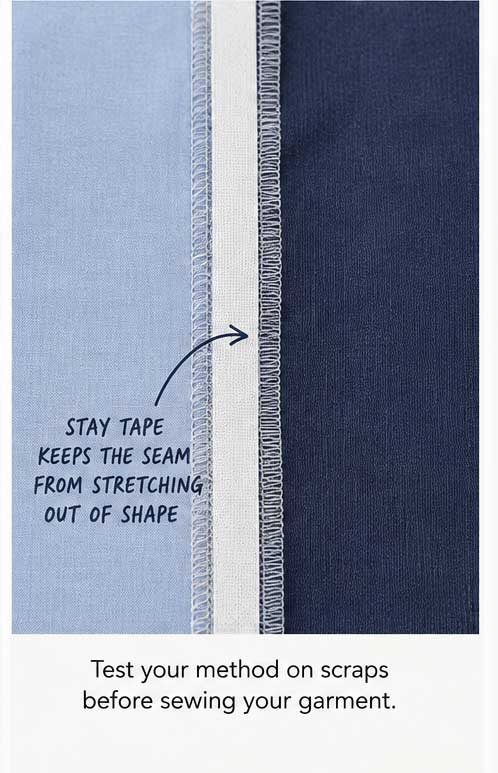
Stabilizing seams

Joining a knit to a woven is where many projects begin to misbehave. Because the knit naturally stretches while the woven does not, the seam can become wavy or distorted during construction. The solution is stabilization.

A strip of lightweight fusible stay tape, clear elastic, twill tape, or even a narrow strip of lightweight interfacing can help keep the seam from stretching out of shape. The appropriate stabilizer depends on the garment and fabric, but the goal is always the same: preserve the intended shape while allowing the garment to remain comfortable.

As always, test your chosen stabilizer on fabric scraps before using it on your garment.

Choose the Right Needle and Stitch

One garment may require more than one sewing setup.

  • For sections sewn entirely in woven fabric, a universal or sharp needle and a standard straight stitch often work perfectly.
  • When sewing knit sections, switch to a ballpoint or stretch needle to prevent skipped stitches and fabric damage. Depending on your machine and fabric, a narrow zigzag or stretch stitch may produce seams that retain flexibility.
  • If you’re sewing across a seam that joins both fabric types, test your stitch settings first. A small sample can reveal puckering, tunneling, or skipped stitches before they become part of your project.

Consider the Direction of Stretch

Whenever knit fabric is part of a design, think carefully about where the stretch belongs. A knit side panel should stretch around the body, while a knit waistband may need more recovery than a knit sleeve. Pay attention to the greatest direction of stretch as you lay out your pattern pieces.

Likewise, remember that woven fabrics generally control the fit of the garment. If a woven front is paired with a knit back, the woven piece usually determines the finished size. Simply adding a stretchy panel won’t automatically create a looser fit if the woven sections remain restrictive.

Press with Care

Pressing becomes even more important when different fabric types meet.

  • Use the temperature appropriate for the most delicate fabric, and always test first. Excessive heat can flatten textured knits, create shine on synthetic fibers, or distort stretch fabrics.
  • A press cloth is particularly helpful when working with mixed fabrics, allowing you to press seams thoroughly without damaging the surface.
  • Take your time pressing seam allowances so they lie flat before moving on to the next construction step. This small habit helps different fabrics blend together visually.

Sample Before You Commit
Perhaps the best habit when mixing knits and wovens is making a test sample. Sew several inches of the actual seam using the same fabrics, thread, stabilizer, needle, stitch length, and pressing method you intend to use on the garment. Stretch it gently, press it, and evaluate how it behaves.

A five-minute sample can answer questions that might otherwise lead to frustration halfway through a project.

A Creative Way to Expand Your Sewing

Combining knit and woven fabrics opens the door to endless design possibilities. It allows you to add comfort to tailored garments, introduce structure to relaxed styles, and make creative use of fabric already in your stash.

With thoughtful fabric selection, careful stabilization, and a willingness to test before sewing, you’ll discover that mixing fabric types isn’t something to avoid—it’s another skill that expands your creative toolbox. Once you become comfortable pairing the strengths of both knits and wovens, you’ll start seeing opportunities for custom details and designer-inspired garments everywhere.


~ American Sewing Guild

Tagged With: fabric, garment sewing, knit, woven

July 11, 2025

Fabric Q&A

Q. What is English Netting, and how is it different from nylon net or tulle?

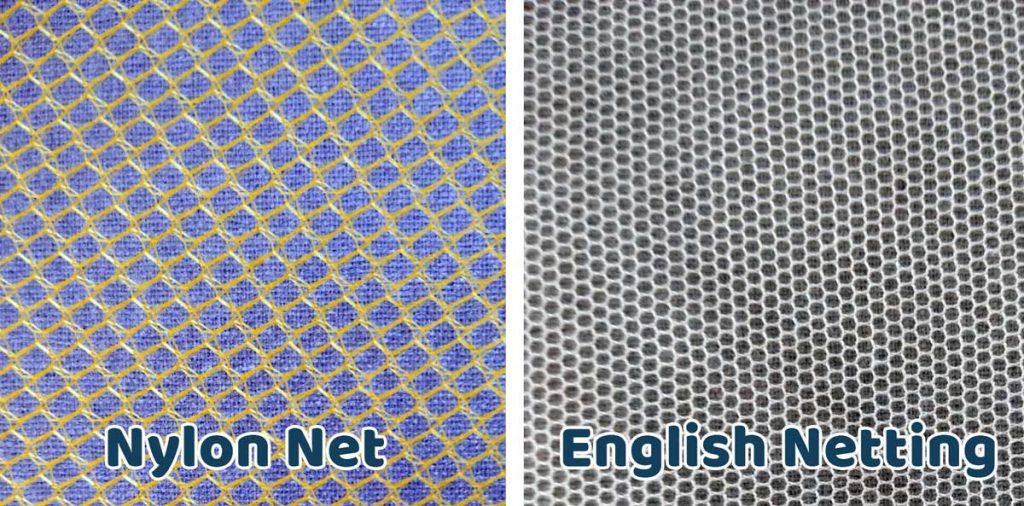
A. English netting is a very soft, pliable and drapeable fabric used for bridal veils, bridal gown overlays and as a basis for machine embroidered lace. It’s most often 100% cotton or a blend of cotton/polyester. The threads are matte finish and slightly thicker than most other nettings. It’s characterized by hexagon shaped holes. The netting is sometimes used for trim on knit garments due to its slight stretch. English netting gives the look and drape of silk without the added cost.

Nylon net is much stiffer and has larger holes than either tulle or English netting. It’s available in wide widths (up to 108”) and is used to add fullness, like on a costume or tutu. Because of its crispness, nylon net isn’t very comfortable for a garment as it’s too stiff.

Netting photos

Tulle is a finer version of nylon net with smaller holes and a softer touch. Tulle is sheerer than either of the other two nettings mentioned so it’s often used most often for bridal veils.


Q. Why are some fabrics made from more than one fiber?

Fabric bolts

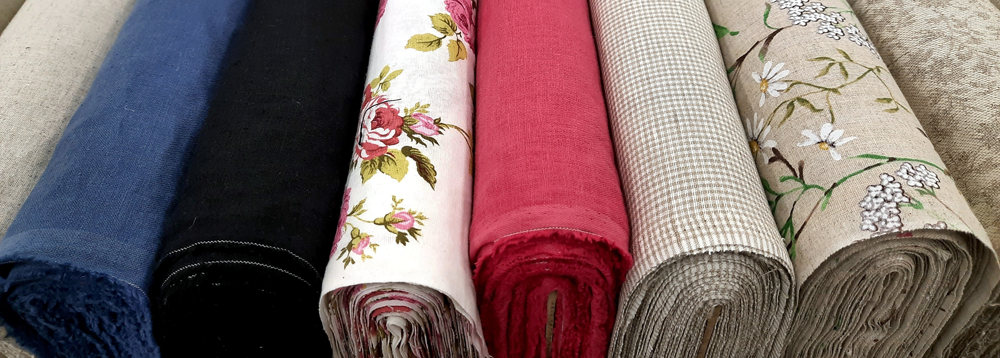
A. Fibers are often blended to take advantage of the attributes of each. For example, some fabrics have a small amount of Lycra added for stretch, or a bit of silk is sometimes added to cotton or wool for added sheen. Polyester is often blended with cotton to improve wrinkle resistance. Fibers are also blended to help with cost—luxury fibers like cashmere or alpaca can be added to wool in small amounts to create a better hand at a still reasonable price. When caring for blended fabrics, be sure to follow the bolt instructions for proper laundering/cleaning methods, and be aware of the blended fibers in choosing an iron temperature for pressing.


Q. Do I need to pre-shrink fabric before cutting out a garment?

Washing machine

A. The answer depends on the fiber content of the fabric. Look for guidance on the bolt end, but as a general rule, you should pre-treat the fabric as it will be cared for in the finished project. If the fabric is washable, send it through a wash/dry cycle before cutting. If you’re concerned about shrinking, multiple launderings may be in order. Fabrics like denim and flannel will often shrink more with each repeated washing, so it’s a good idea to purchase a little extra fabric to compensate for that. Note that fabric shrinkage amounts are often listed on the bolt end with indicators like “3-4% residual shrinkage may occur”. That amount of shrinkage can affect the fit of a garment.

For dry-clean-only fabrics, either take them to the drycleaner to be steam shrunk, or complete that process at home. If you’re working with home décor fabrics, steam-press them, but do not launder as protective finishes may be removed.


Q. I bought fabric for a jacket but after washing it, it’s way too soft to hold its shape. Is there anything I can do to salvage it?

A. The easiest way to change the fabric hand and make it firmer for your project is to fuse interfacing to the wrong side. A lightweight tricot knit interfacing can be fused to all the cut pieces to add body and support to make it more appropriate for the intended project. Some prefer to fuse the interfacing to the yardage prior to cutting instead of trying to match it up to individual cut pieces later. You’ll need a large flat surface and plenty of steam, and perhaps a press cloth, depending on the interfacing brand and application instructions. Be sure to follow the instructions for applying it and allow the fabric to cool flat before moving.


~Linda Griepentrog is the owner of G Wiz Creative Services and she does writing, editing and designing for companies in the sewing, crafting and quilting industries. In addition, she escorts fabric shopping tours to Hong Kong. She lives at the Oregon Coast with her husband Keith, and three dogs, Yohnuh, Abby, and Lizzie. Contact her at gwizdesigns@aol.com.

Tagged With: fabric, learn to sew, sewing, sewing tip

February 21, 2025

Life as a Fabricholic

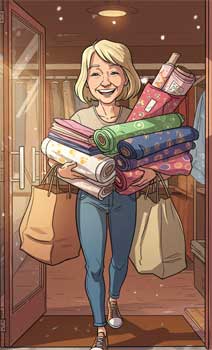
I’m happy to share with you that I am indeed a fabricholic. My husband claims that we have an inventory control problem. He means that the fabric comes into our house faster than it becomes something and goes out. And (my husband says) I also live under the delusion that fabric instantly becomes a project or a garment-without any labor on my part. In fact, I often buy fabric to go with things that I have, like shoes and jewelry. Unfortunately, the shoes wear out while the fabric still sits there waiting to become something.

Fabricholism manifests itself in a variety of symptoms. You don’t need to raise your hands or openly confess… but think about your answers to these questions:

  1. Do you purchase fabric whether you need it or not?
  2. Do you have more fabric than you could comfortably sew in… A week? A month? A lifetime?
  3. Have you ever said, “I’m not going to purchase any more fabric until I sew up what I have?”
  4. Do you have fabric under the bed? In closets? Under garments that are hanging on hangers in your closet?
  5. Do you have patterns that you’ve never used?
  6. Have you ever purchased any patterns for your daughter… who now has a granddaughter?
  7. Did you ever buy more fabric than you intended when you went to a fabric store?
  8. Have you ever refused to purchase a ready-to-wear garment because you thought you could make it cheaper and better?

But, I NEED it!

As a fabricholic, I can offer many rationalizations for buying fabric.

  1. Buying fabric is hedging against inflation. You know that the price can only go up.
  2. If I don’t get it, somebody else will.
  3. Stuff always looks better on the cutting table than it does on the bolt.
  4. Buying fabric is cheaper than psychotherapy. It’s not immoral, it’s not illegal, and it’s not fattening. Fabric has no calories!
  5. I don’t have any other bad habits. I don’t drink; I don’t smoke; and the question of whether or not I overeat depends on what I’m wearing on any given day.
  6. Buying fabric is environmentally safe and proven to be helpful to the recycling industry.
  7. Fabric has good insulating properties.
  8. I view collecting fabric as an historical thing, like charm bracelets or postcards. I have traveled extensively and have always tried to buy a piece of fabric in each city. When I get home, I can sit on the floor of my sewing room, look in my closet, and bring back memories. It’s like scrapbooking in a different form.
  9. From my mother I inherited the idea that if you keep something long enough, it comes back in style. Vintage fabric happens to be “in” and depending on your age, vintage fabric makes its own definition.
  10. Buying fabric gives you a sense of social responsibility because you are actually keeping people employed at those stores.
  11. Fabric is easy to care for. It doesn’t require refrigeration. You don’t have to cook it, feed it, water it, wipe it, or walk it. It’s low maintenance compared to other things you might have around the house (commence staring at your children).
  12. If it’s on sale, that’s a good clue that you should have it.
  13. Your friends made you buy it.
  14. It’s good when you think of yourself as being worth this purchase—it reinforces your ego.
  15. If you move frequently, fabric can become good packing material.
  16. Everything in the fabric store fits you.
  17. And my favorite: “God wants me to have this!” How do I know that? Because I looked at it a few days ago and it’s still here. And there was a parking space right in front of the store.

You have to decide if you are going to feel guilty about this whole scenario or just go with the flow and say “I am a fabric collector.” There are people who collect stamps; there are people who collect coins. You collect fabric for what it is. You don’t have to have an intended use.

Being a fabricholic is not a bad thing. We all have wonderful friends who share our passion and it adds a lot of enjoyment to our lives. Recognize that collecting fabric and sewing fabric should be considered two separate activities. Sometimes they’re not even related!


~Linda Griepentrog is the owner of G Wiz Creative Services and she does writing, editing and designing for companies in the sewing, crafting and quilting industries. In addition, she escorts fabric shopping tours to Hong Kong. She lives at the Oregon Coast with her husband Keith, and three dogs, Yohnuh, Abby, and Lizzie. Contact her at gwizdesigns@aol.com.

Tagged With: fabric, sewing humor

January 13, 2023

Just Encase

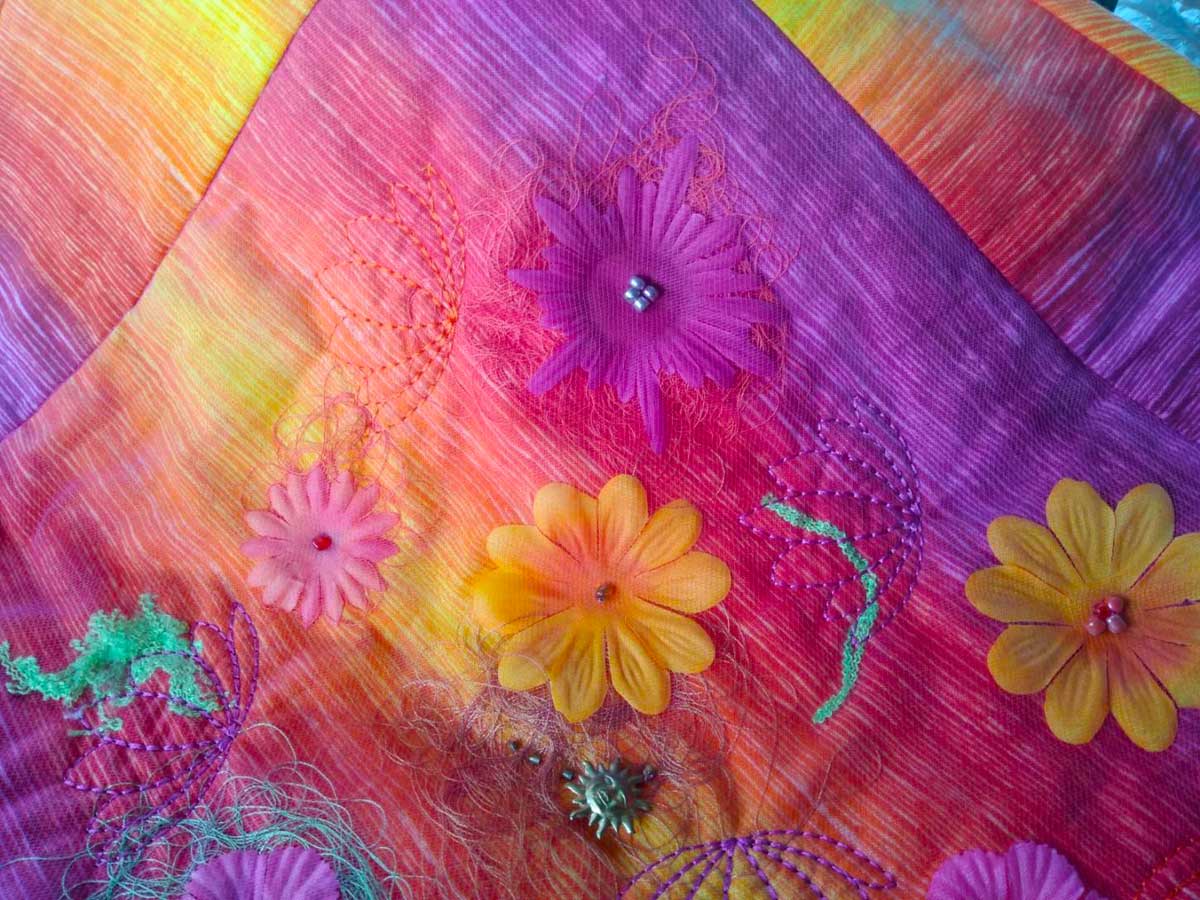
There are times when you want to add a bit of texture and fun to a project, but you may not be quite sure what to do. Think about encasing something under tulle, which serves to hold it in place and protect the addition at the same time.

What to encase?

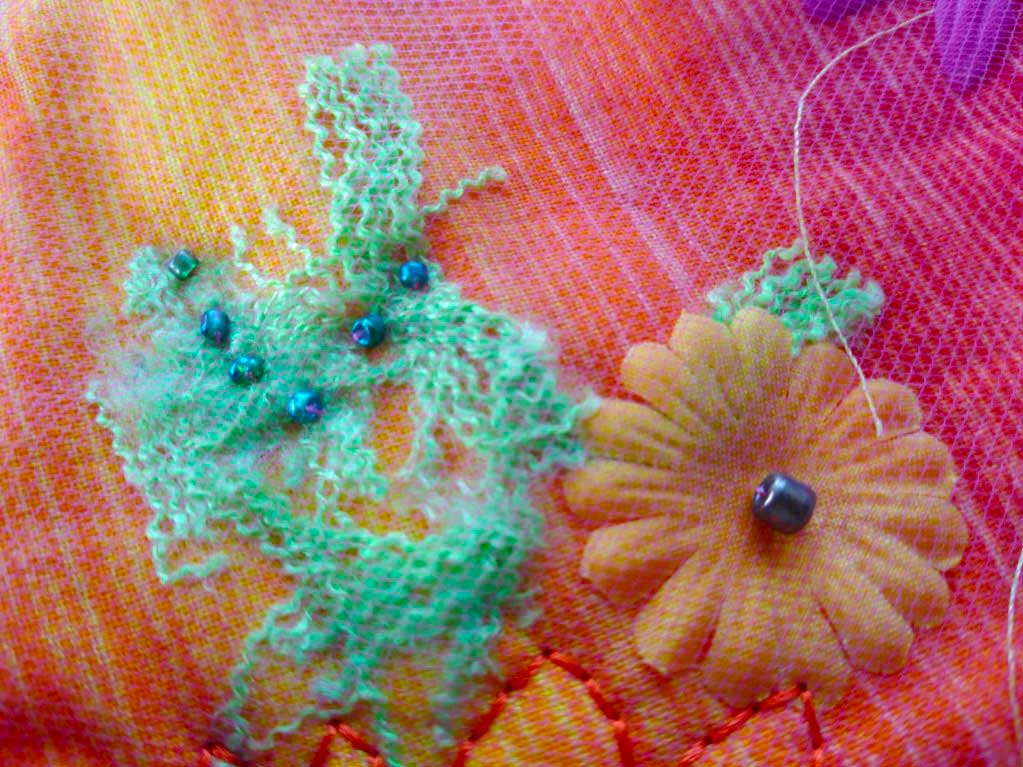
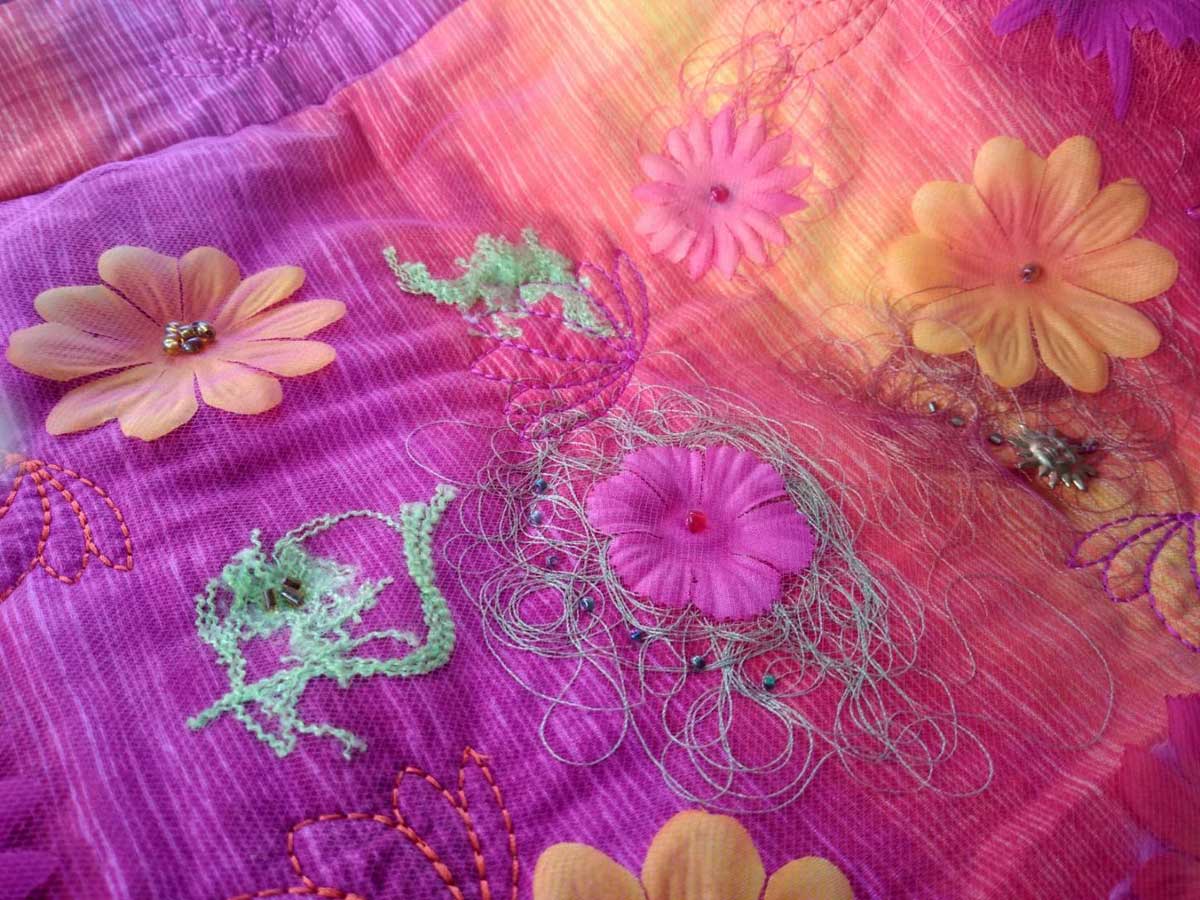
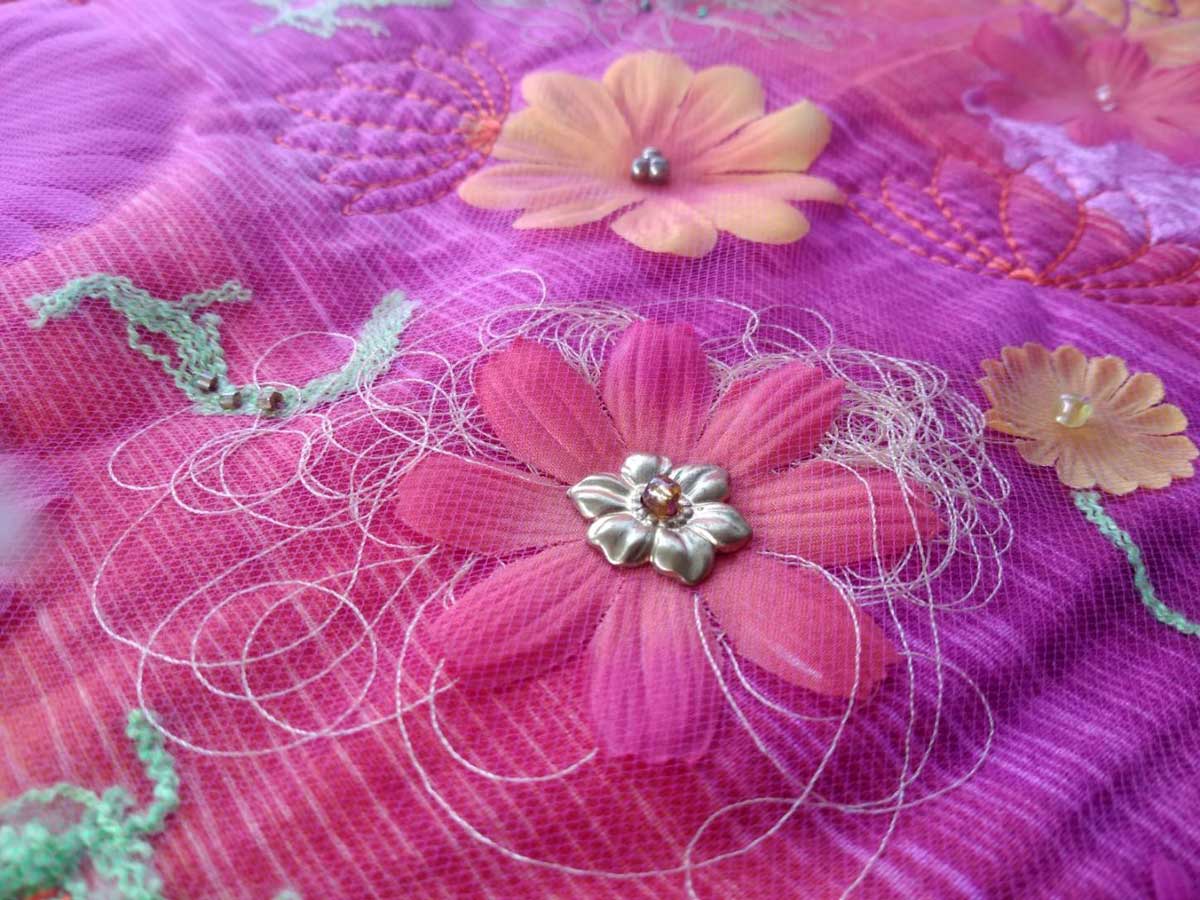
Depending on the project you’re making, there are many choices. Silk flowers are a fun addition to home décor items or special-occasion wear. They’re affordable and look beautiful. Envision a long skirt fully embellished with silk flowers. OK, if you’re not quite that ambitious, think about a collar, pocket or tote bag. Take apart the flowers to use single layers or individual petals.

silk flower on fabric

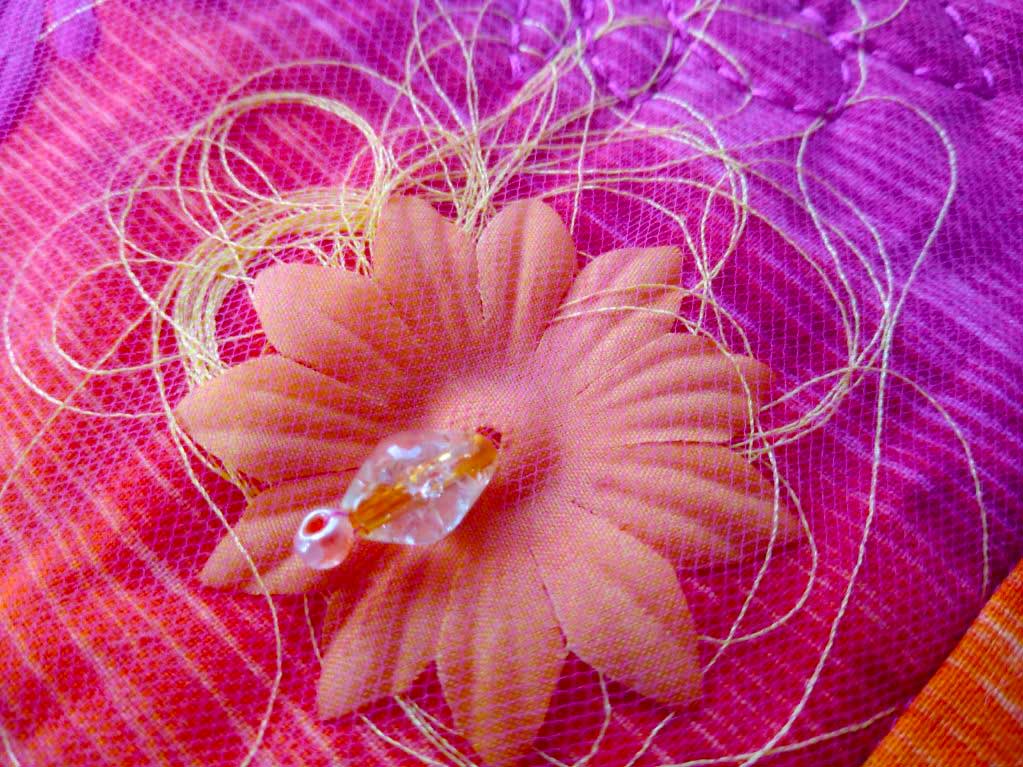
Bits of novelty threads, yarns or trims are another option. They can form a pattern or be totally free-form embellishments.

silk flower on fabric with beads

A collage of fabric bits is another idea—those tiny but colorful slivers of fabric you trim with a rotary cutter are ideal, as are small shapes of fabric purposefully cut for this technique. If the project isn’t going to be washed (like a wall hanging), then you can think more broadly to small rocks, shells, photos, etc.

Over the Top

Tulle is ideal for going over the top of your treasures—it’s very thin and almost invisible, depending on the color used and the base color, but it adds a “just-right” layer to help hold things in place.

Tulle is a fine mesh fabric found in the special occasion department of the fabric store, and it comes in myriad colors. It’s lighter and finer than the holes in net for a more invisible look. Note that some tulle is nylon and will easily melt, so check the fiber content and adjust the iron temperature as needed before pressing.

silk flower on fabric

Covering Up

In addition to the items you want to encase, some fabric glue is helpful to hold multiple items in place. If you prefer not to glue, then use long pins to temporarily hold things until the finish stitching is done.

Cut the base fabric in the size needed. For example, if it’s a garment and you want to embellish the pocket, collar or perhaps an entire skirt, cut the pattern piece from the fashion fabric. If it’s a pillow or wall hanging, cut the fabric pieces as required by the pattern.

Position the accent items where you want them on the right side of the base fabric. Add a dot of fabric glue behind to hold it place—don’t cover the entire surface as you want to have some dimension. If you’re using silk flower petals, just a glue dot at the center is sufficient for securing.

silk flower on fabric with thread and beads

Audition your creation with different colors of tulle to see the variation in look depending on the color used. When you’ve chosen an appropriate color, cut the tulle about 1” larger than the base fabric shape and press out any wrinkles. If your encasements, are thicker, cut the tulle larger to allow for full coverage.

Pin the tulle over the base fabric, placing some pins along the edges and some in and between the encased accents.

Now comes the fun—adding embellishments to hold things in place.

Embellishing

To help hold items in place, think about hand- or machine stitching around them to make a “pocket”, add some beads through the layers (especially nice for silk flower petals), or add hand- or machine embroidery to keep things where you want them.

Whatever technique is done over the layers keeps the tulle from being loose and “bagging out” if it’s not anchored in some way.

silk flower on fabric with beads and thread

You can use free-motion stitching to go around shapes, or keep the presser foot on for a more controlled look. Single motifs of decorative stitches are ideal for flower centers or weave rows of decorative stitches in and out of the encased items.

For machine embroidery motifs, add a layer of stabilizer underneath for hooping. When hand-stitching, sew through both the tulle and base layer, and the same for attaching beads, charms or baubles. The more stitching that’s done, the flatter the finished piece will be.

When the embellishing process is complete, stitch around the edge of the entire piece and trim the tulle to match the base shape.

Finishing

Use your embellished piece in your finished garment or project, just as you would if it were plain fabric—you’ve created your own unique fabric worthy of compliments and questions about how you did it, as the tulle is elusive.


~Linda Griepentrog is the owner of G Wiz Creative Services and she does writing, editing and designing for companies in the sewing, crafting and quilting industries. In addition, she escorts fabric shopping tours to Hong Kong. She lives at the Oregon Coast with her husband Keith, and three dogs, Yohnuh, Abby, and Lizzie. Contact her at gwizdesigns@aol.com.

This field is for validation purposes and should be left unchanged.
Did you enjoy this article?
Are you an ASG member?

Tagged With: embellishment, fabric, texture, tulle

September 23, 2022

Decorative Stitches: Accenting a Print

Who doesn’t love a great print fabric? But, sometimes, it might “just need a little something” to make it pop. Enter the myriad decorative stitches found in your sewing machine…those that often sit unused and those you’ve always wanted to use but didn’t quite know where.

Accenting a print is easy! Just look at the lines and pick a place to embellish.

Preparation

Most cotton prints will require some kind of stabilization to avoid puckering, especially if you plan to use a dense satin-stitch type design. The stabilizer can be as simple as a fusible interfacing added to the underside, or an “official” stabilizer you may have in your machine embroidery supplies. Some sewers use a liquid stabilizer to saturate the fabric and when it’s dried and pressed, the fabric becomes paper-like to better support the stitches. After stitching, it’s simply washed away.

The choice of stabilizer is also influenced by the fabric’s final use. If it’s part of a tote or bag, or even a quilt, batting or fusible fleece on the underside may suffice to stabilize the fabric. But, if it’s a pocket, cuff or yoke of a garment, batting isn’t a likely option, so select something else.

If you do a lot of decorative stitching, you likely have a stash of various types of stabilizers to experiment with.

Planning

Whenever possible, it’s best to end any accent stitching in seam allowances. This eliminates the need to tie off thread ends, and crossing the stitching with another seaming ensures no pull-out issues.

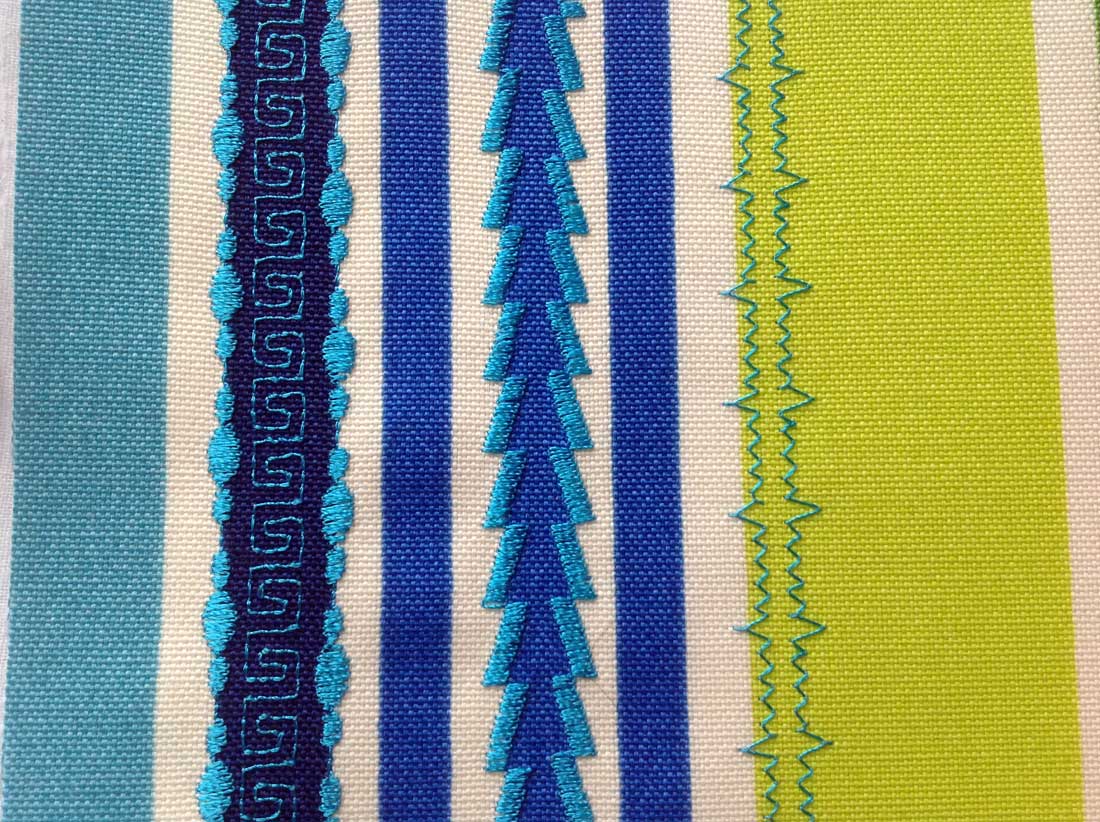
Stripes are one of the easiest prints to accent, as there are already lines and spaces to follow. Simply pick a place on your presser foot to follow the printed stripe with the added stitching.

Decorative stitch - stripes

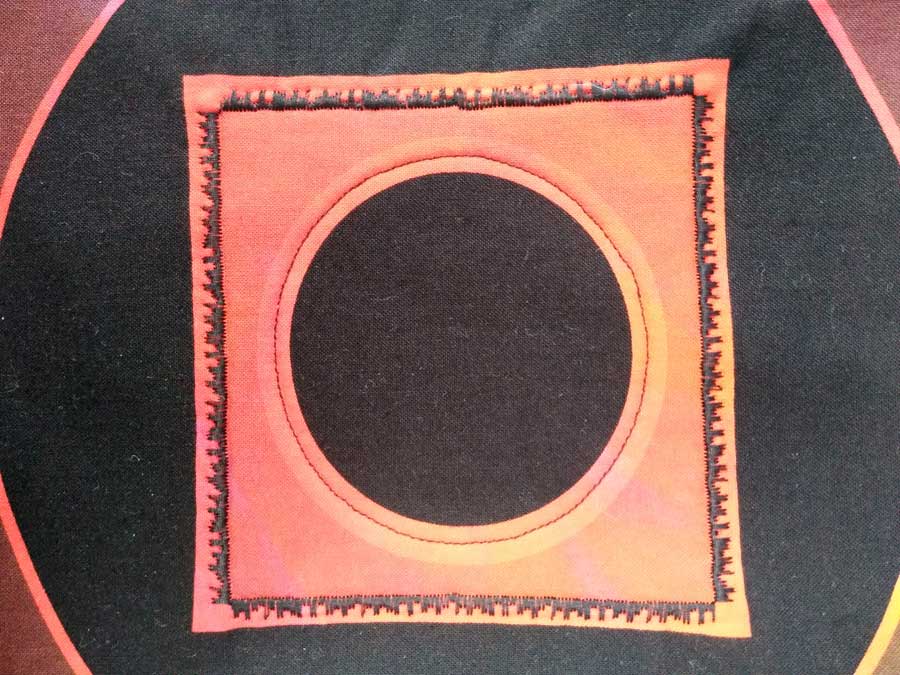
Does your fabric have circles or squares on it? If so, think about what will happen if you outline the design area and the stitches come together to complete the shape… it’s almost impossible to plan an exact match, and you may have a “blip” in the design area. Are you OK with that? Can you cover it with another type of embellishment, like a tassel, button, or charm, to hide the mismatch? If that’s not in your plan, select a stitch without distinct motifs—one that looks continuous—so there’s no visible mismatch at the joining.

If your print motifs have corners, how will you handle those? Again, it’s a good idea to choose embellishing stitches that don’t have distinct motifs and look continuous, then stop the needle on the inside of the stitch, turn and continue on, leaving an open corner.

If your machine has programmable features, it’s possible to figure out exact lengths of repeats to outline a print motif with whole stitched motifs, or you can combine stitches to have, for example, a line of straight stitches with five flower repeats and another line of straight stitches, making it a no-brainer for corner turning with aplomb.

At the end of the outline stitching, do not overlap the motifs but instead stop stitching exactly at the beginning point. Pull threads to the underside and tie off to secure, or use a lock-stitch feature on your machine to sew a few stitches in place to anchor the thread ends.

It’s a good idea to use a bobbin thread that matches the top thread to avoid any visible tension issues and, of course, you should test-stitch on the same fabric/stabilizer you plan to embellish before actually committing to the project.

Accent Options

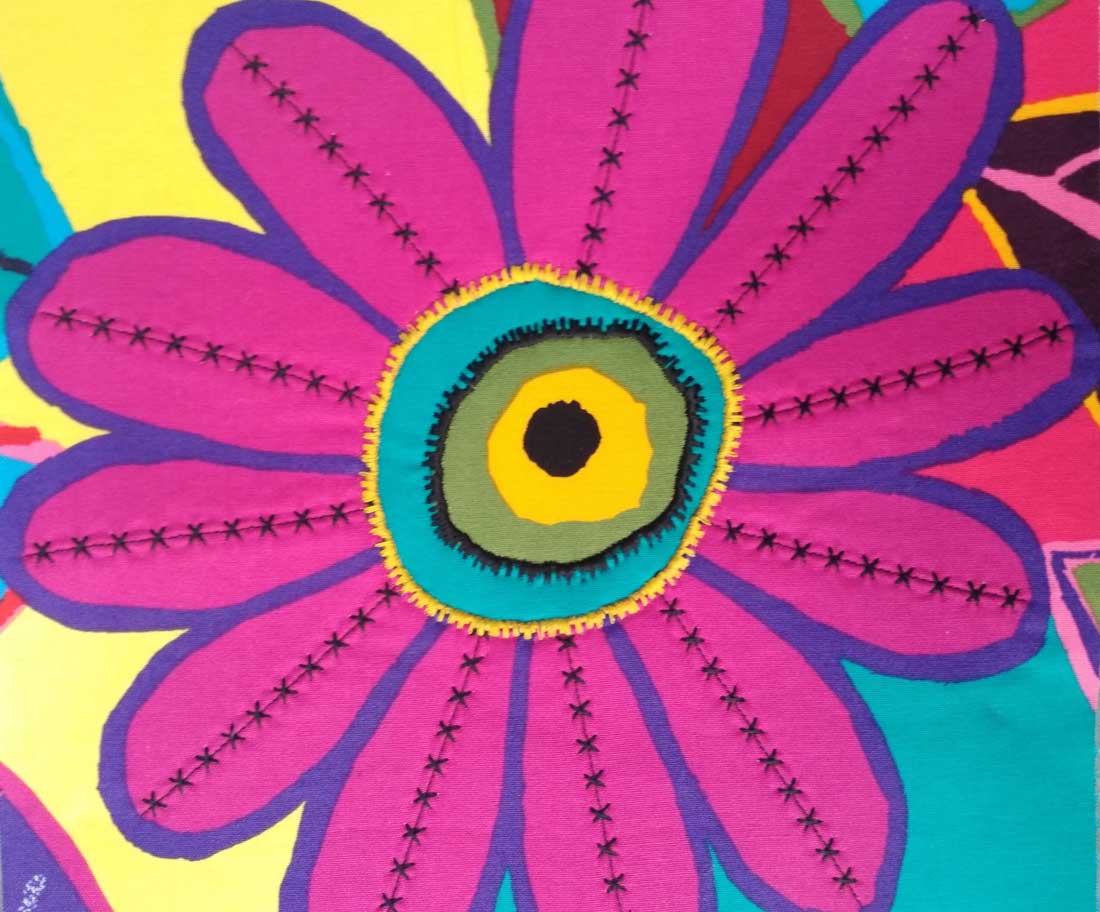
For large flower petals, like our funky daisy, consider stitching down the petal centers for accents, then around center printed motif(s) for additional color.

Decorative stitch application

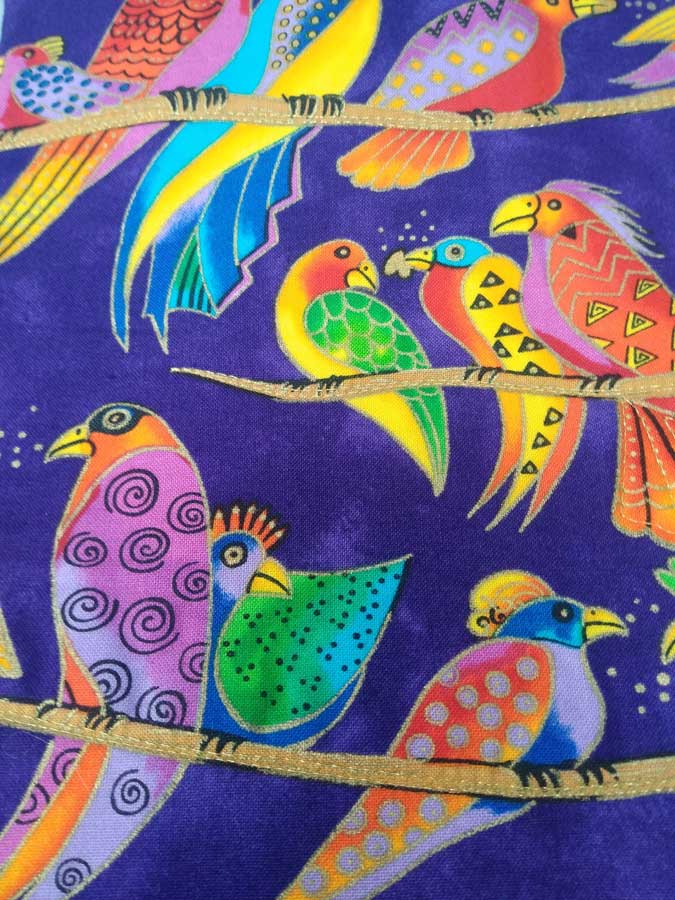
Some prints look great with simply a straight-stitch accenting. On the parrot fabric, a straight stitch with gold metallic thread accents their perches and adds just a small touch of bling to the fabric. Be sure to use a metallic needle with a larger eye to avoid shredding delicate metallic threads. Straight stitch accents can be done using the presser foot, or with free-motion techniques.

Decorative stitching on parrot-themed fabric

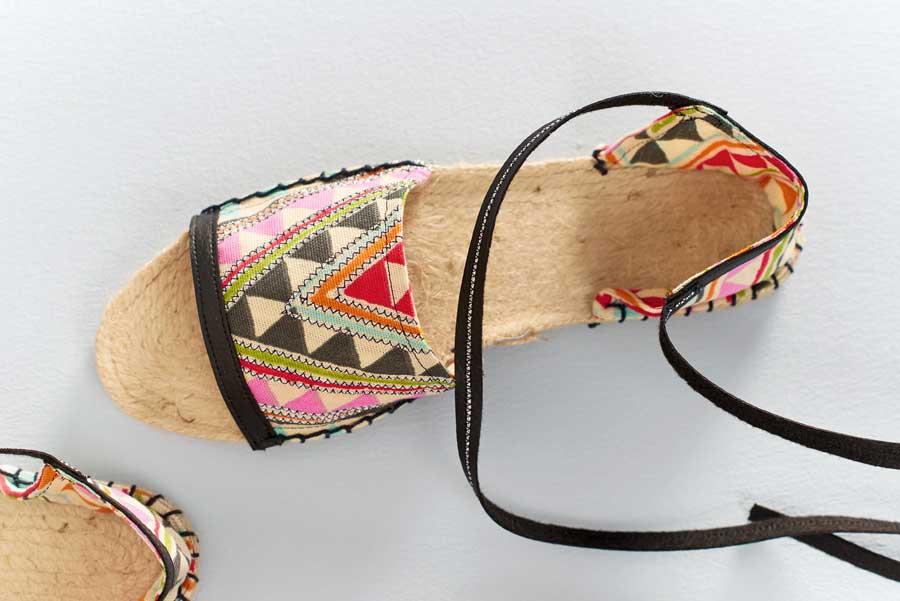
Finally, a simple zigzag stitch can be used to accent any geometric print.

Photo courtesy of Bernina

Stitch Options

More articles on using decorative stitches:

  • Sewing Machine: Using the Built-In Specialty Stitches
  • Decorative Stitches, Part 2: In the Hoop
  • The Triple Straight Stitch

~Linda Griepentrog Linda is the owner of G Wiz Creative Services and she does writing, editing and designing for companies in the sewing, crafting and quilting industries. In addition, she escorts fabric shopping tours to Hong Kong. She lives at the Oregon Coast with her husband Keith, and three dogs, Yohnuh, Abby, and Lizzie. Contact her at gwizdesigns@aol.com.

This field is for validation purposes and should be left unchanged.
Did you enjoy this article?
Are you an ASG member?

Tagged With: decorative stitches, embellishment, fabric, stitching

  • 1
  • 2
  • 3
  • …
  • 5
  • Next Page »

Become a Member

Join the only national organization dedicated to Advancing Sewing as an Art and Life Skill.

Join Now button

Blog Article Categories

  • ASG Conference
  • Chapter Stories
  • Embroidery
  • Fitting
  • Learn to Sew
  • National Sewing Month
  • Products, Books, & Patterns
  • Projects
  • Quilting
  • Sewing
  • Sewing Techniques
  • Sewing Tips
  • Sewing Tours
  • Videos
  • Disclaimer
  • Privacy Policy

American Sewing Guild
National Headquarters
9660 Hillcroft, Suite 230
Houston TX 77096
713-729-3000 | 713-721-9230 Fax
www.ASG.org

ASG wordcloud - education, conference, discounts, videos, special offers, tours and more

Copyright © 1998–2026 · American Sewing Guild · All Rights Reserved