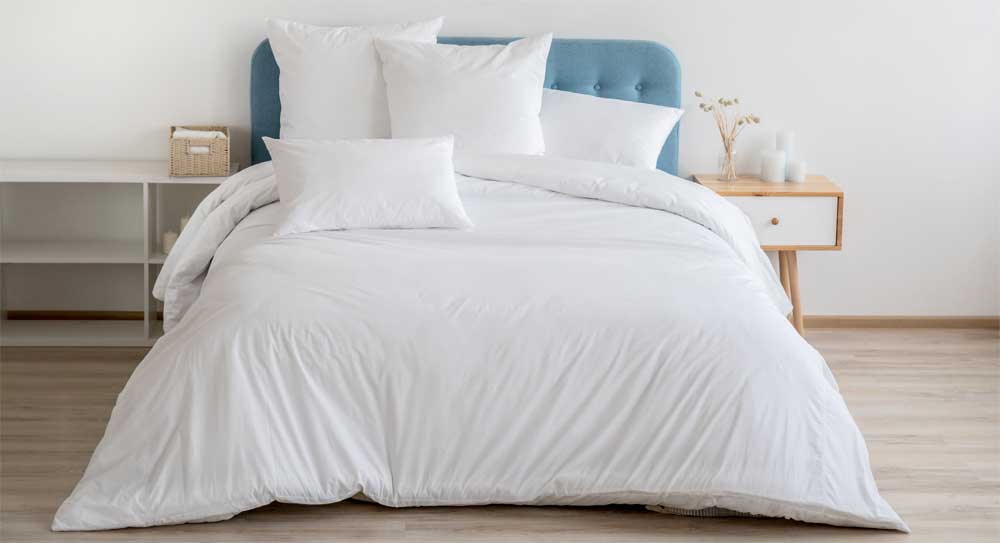
Creating a new duvet cover is an easy and practical project that can transform your bedroom without the mess of paint or moving furniture. Not only does it allow you to personalize your bedding with fresh, vibrant fabrics that reflect the season’s aesthetic, it also enhances comfort by the opportunity to select materials that are breathable and cool for warm summer nights or warm and cozy to combat the chill of winter. Duvet covers are also eco-friendly. By choosing sustainable, reclaimed, or from-your-stash fabric, you can create a unique, comfortable, and stylish duvet cover tailored just for you. They can also be easier to clean than other bed cover options.
Comforter or Duvet?
Do you know the difference?
- A comforter can be used by itself on a bed and will typically have a design or pattern on it. It often covers more of a bed than a duvet and is usually available in bedding sets.
- A duvet is a white puffy bed covering that is filled with down, feathers, or synthetic materials, then stitched closed. It is meant to be inserted inside a duvet cover
- A duvet cover is basically a flat sleeve made with some type of closure to protect the duvet insert.
If you prefer an oversized look on your bed, consider purchasing an oversized comforter and making a duvet cover for it, or simply purchase a larger size duvet than you need.
Fabric
You’ll want a fabric that is durable and easy to launder. Unless your duvet will be for aesthetics only and not actually be used to sleep under, a breathable fabric that has a moisture-wicking quality is the best choice.
- Linen is light weight and will soften with every wash.
- Silk is breathable and luxurious and is the go-to fabric for allergy or asthma sufferers due to its ability to repel dust.
- Polyester and cotton-poly blends won’t wrinkle or fade and the fabric will typically be the least expensive choice. However, these types of fabrics are not breathable and will trap moisture and heat while you’re sleeping.
- Cottons are the most popular choice, whether a cotton sateen, jersey knit, quilting cotton, or for extra warmth, cotton flannel. Just like with sheets, Egyptian, Pima, and Supima cotton, along with organic cotton, are more luxurious choices.
What is the difference between Egyptian, Pima, and Supima cotton?
- Pima is a generic term that means “better” cotton. Pima cotton will feel luxuriously soft and strikes a balance between quality and value.
- Egyptian cotton references the country of origin and is not a measurement of quality. While some Egyptian cotton is extra-long staple, most is long-staple or may even be regular cotton. Egyptian cotton will be a little more durable and has a lustre that adds a touch of elegance.
- Supima cotton is a superior cotton that is grown only in the U.S. (in CA, AZ, TX, and NM) and represents less than 1% of the cotton grown in the world. Supima cotton has an extra-long staple fiber that results in a softer and more luxurious fabric that resists pilling. It is a trademarked product and can only be sourced with a licensed supply chain.
If you can’t find fabric that suits your needs, purchase sheets to match your bedding to make your duvet cover.
When choosing fabric, you can use the same fabric for both sides of the duvet cover or choose a complimentary color or pattern for one side. You can also use your chosen fabric for the top and a coordinating flat sheet for the bottom, or two flat sheets to make the top and bottom.
You will need approximately 6 yards of 54′-60″ fabric for the top and the same amount for the bottom, unless you are using a flat sheet. Consider using large fabric scraps to piece together to make fabric for the top. If you love the look of a quilt, you can also use an (unquilted) pieced quilt top and add a light backing to the top. Alternatively, you can quilt the top with a thin batting (such as Thermore), add a lightweight muslin backing, and use it as the top of your duvet cover. Note that this will add both weight and warmth to the duvet cover.
Step-by-Step:
1. Measure Your Duvet
Start by measuring the length, width, and thickness of your duvet. Add about 2 inches to the length and width for seam allowances. If your duvet is especially thick, add an extra inch or two to each side to ensure a comfortable fit.
2. Cut Your Fabric
Use the full width of your fabric for the center panel. Cut your needed length, plus a 1″ seam allowance (suggested 1″). Cut your remaining fabric to the needed length, plus a 1″ seam allowance (suggested 1″). Then cut the panel in half lengthwise for each side, making sure to add a 2″ seam allowance.

3. Prepare the Top Panel
If doing a 3-panel top, with right sides together, sew the left and right panels to the middle panel of the top fabric, making sure to match any pattern or nap on the fabric. Press your seams open.
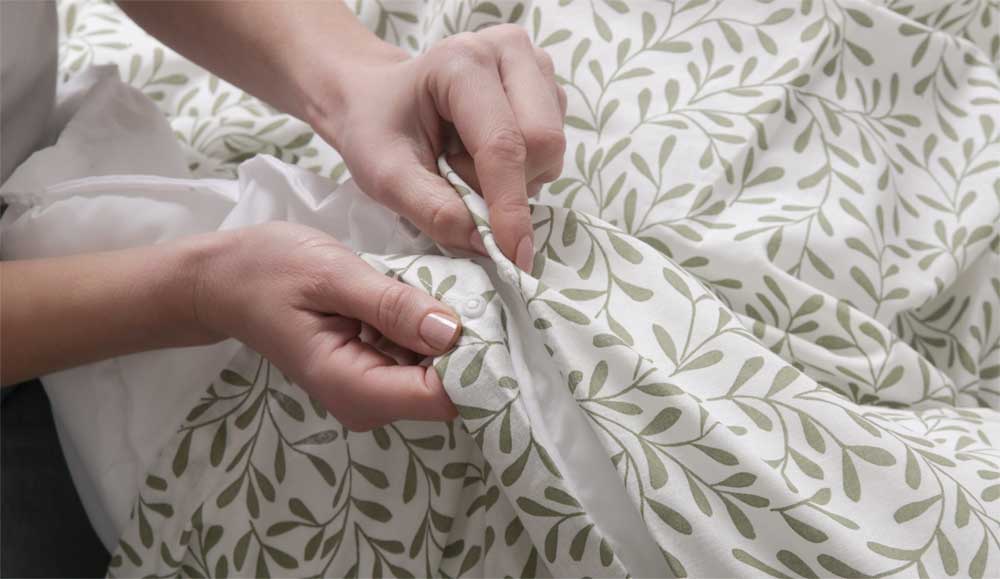
4. Prepare the Closure Edge
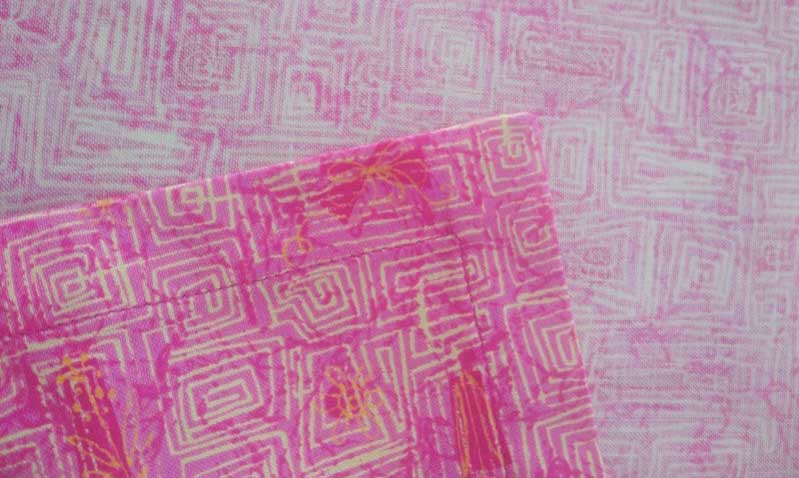
Decide which edge of the duvet cover will have the opening for inserting the duvet. Typically, this is the bottom edge. To finish the edge, fold over a1/4″ of fabric on both front and back pieces and press with an iron. Then, fold over again to enclose the raw edge, and press once more. Pin in place and sew a straight stitch along the fold.
If you’re using a zipper, now is the time to sew it in place along this edge. Alternatively, you can add buttonholes, snaps, snap tape, velcro, or even sew ties to this edge.
Tip: add small strips of ribbon to the inside of your cover at the corners before sewing your seams to use as ties to anchor your duvet. Sew corresponding ties onto your duvet.
4. Sew the Duvet Cover
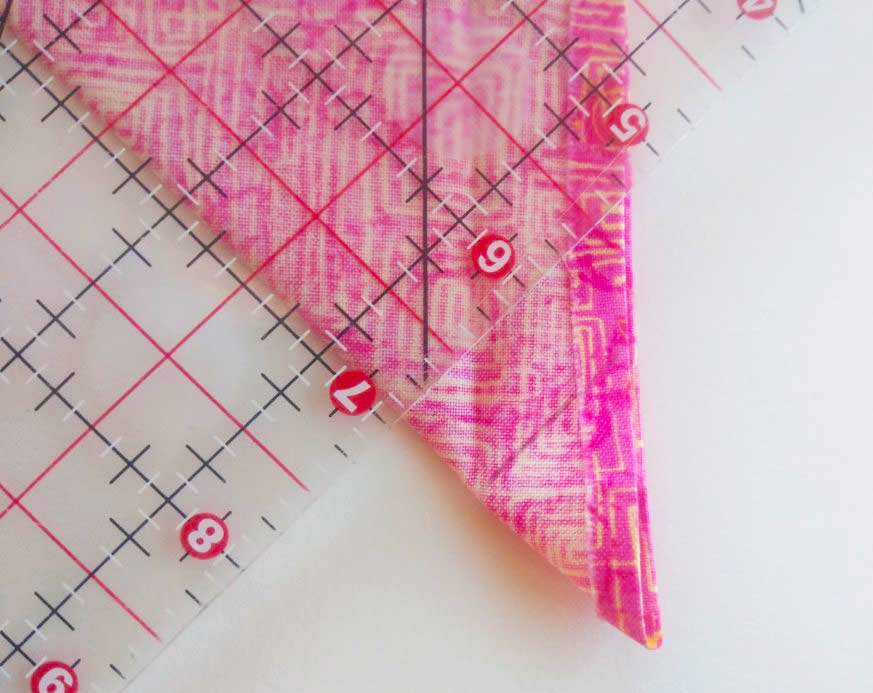
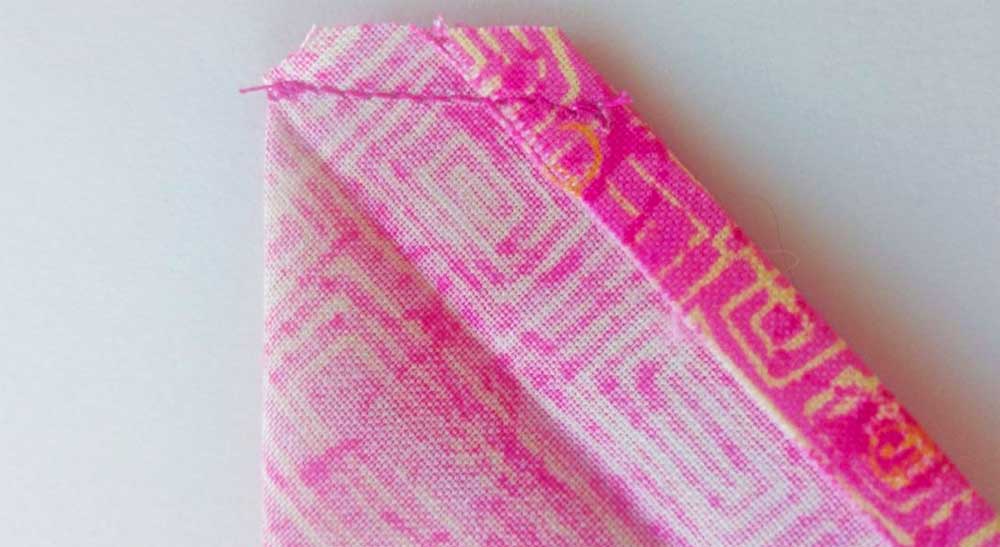
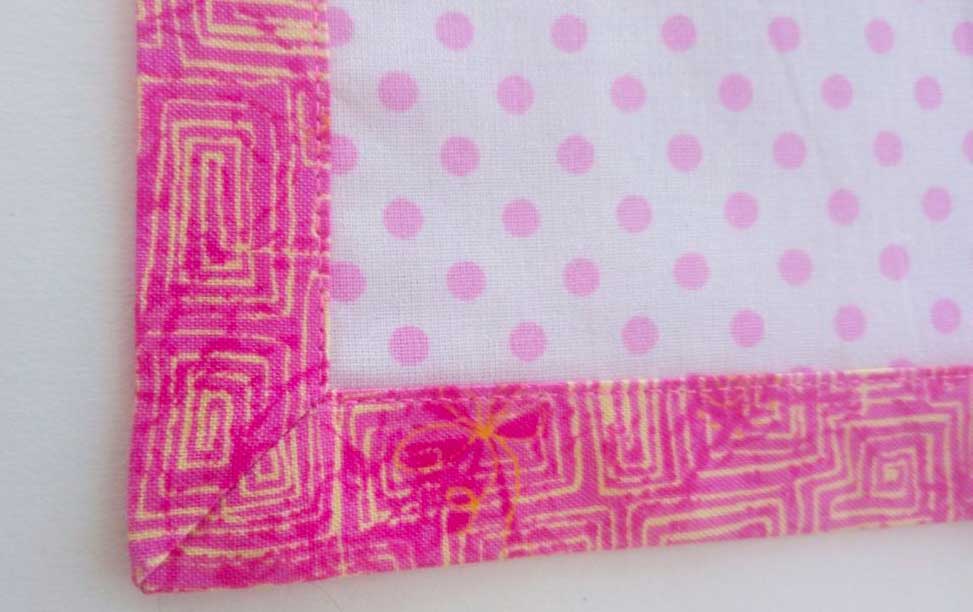
Place the two pieces of fabric together with the right sides facing each other. Pin or clip the fabric together and sew around the edges using a 1/2″ seam allowance. Reinforce the corners by sewing diagonally across each corner.
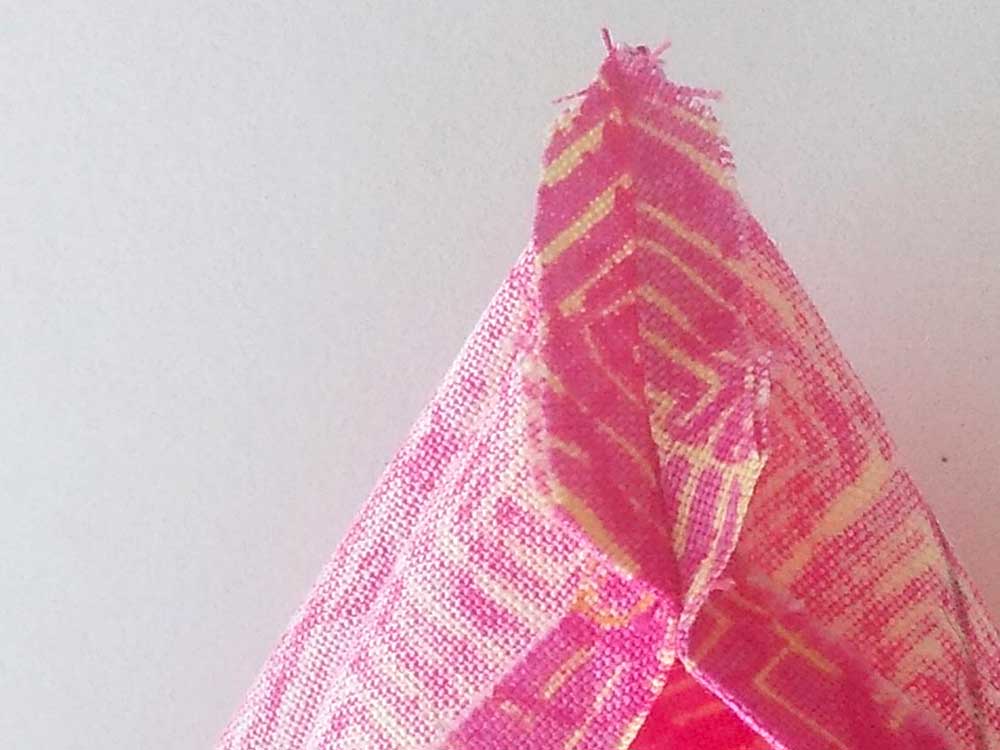
5. Trim and Finish the Seams
Once you’ve sewn around the edges, trim the excess fabric from the seams, especially at the corners, to reduce bulk. You can finish the seams by using a zigzag stitch or serger to prevent fraying, or you can use pinking shears to trim the edges.
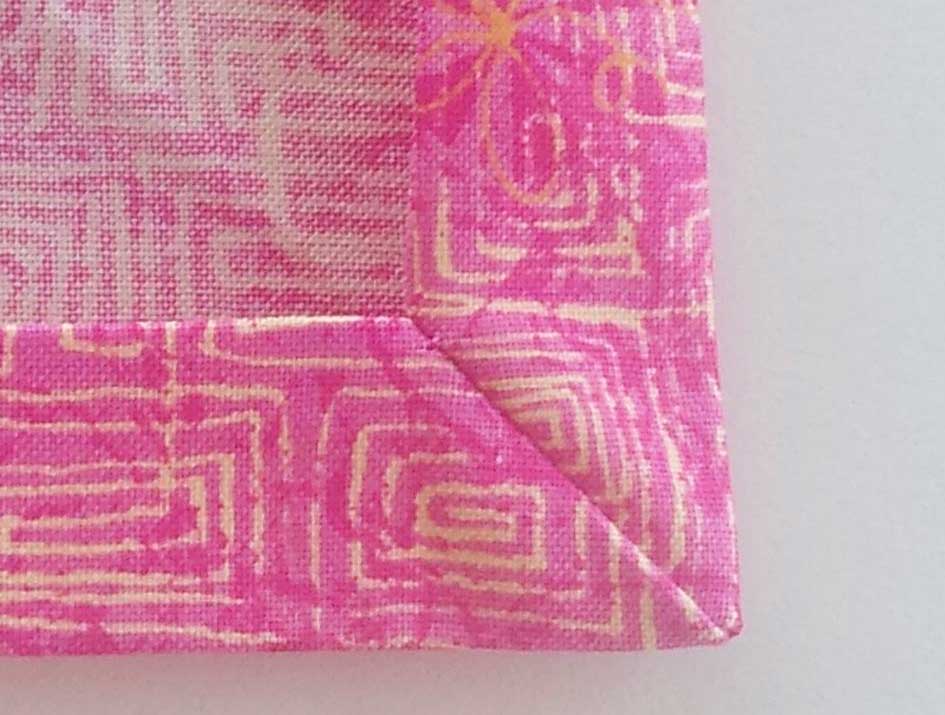
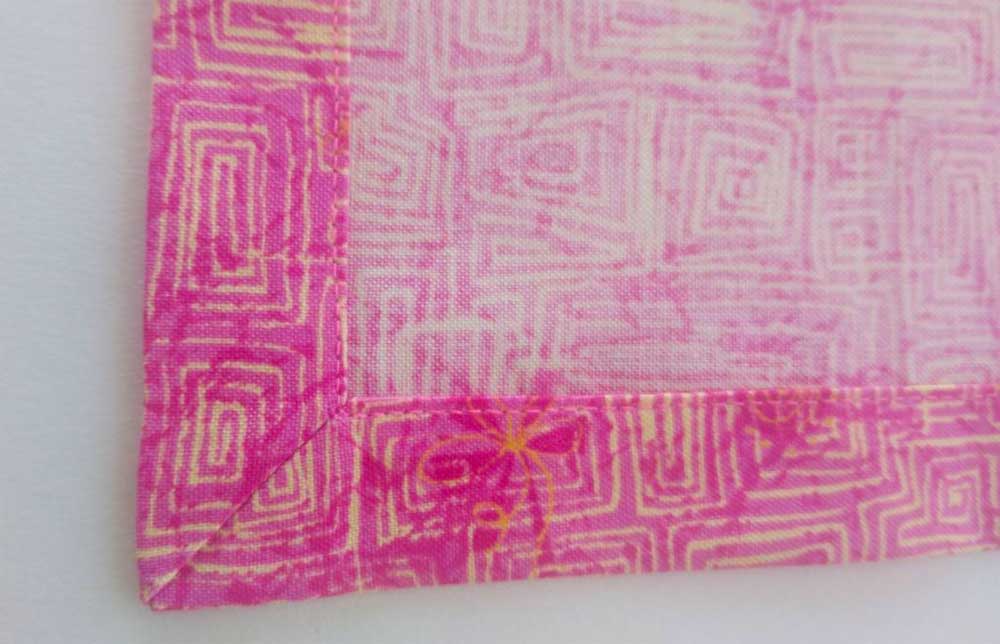
6. Turn the Duvet Cover Right Side Out
Reach through the opening and turn the duvet cover right side out. Use a pointed object, like a knitting needle or chopstick, to push out the corners for a crisp finish.
7. Iron the Duvet Cover
Iron the duvet cover to smooth out any wrinkles and press the seams flat. Pay special attention to the closure edge, ensuring it lies flat.
8. Add the Closure
If you haven’t already added your closure, now is the time to do so. For buttons, sew the buttonholes along one edge of the opening and attach buttons to the other side. If you’re using ties, sew them at intervals along the opening edge.
9. Insert the Duvet
- Turn your duvet cover inside out, then place it on top of your bed (the opening should face the head of the bed).
- Lay your duvet insert on top of the duvet cover, then line up the corners and tie any ribbons at the bottom end that you may have included
- Pinch the corners of both the insert and cover and flip the cover right-side out.
- Starting at the top corner, stuff and adjust the insert inside the cover. Tie the final set of ribbons.
- Hold up the duvet cover and shake it a few times until the insert is evenly distributed within.
- Button, snap, or zip up the duvet cover, then give it a good fluff.
Tips for Success:
- Pre-wash your fabric to prevent shrinkage after the first wash.
- Use contrasting fabric for the front and back for a reversible duvet cover.
- Add embellishments like piping, appliqué, or embroidery before sewing the two sides together to personalize your duvet cover.