American Sewing Guild (ASG)

Visit our blog Visit the ASG Facebook page Visit ASG on Pinterest Visit ASG's YouTube channel Visit ASG on Instagram
  • Home
  • Join ASG
    • Join Online
    • Chapter Locations
    • Member Benefits
    • Member Brochure
    • Join by Mail
  • Conference & Education
  • Resources
    • Contests & Awards
    • Giving Back
    • Hall of Fame
    • Links
    • Travel and Tours
    • Measurement Chart
  • Shop
    • ASG Store
    • Chapter Products
    • Video Resources
  • Blog
  • About
    • About Us
    • Donate to ASG
    • ASG Sensitivity Statement
    • FAQ’s
    • Start a Chapter
  • Contact
  • Member Login
    • Login First!
    • Members Only
    • Leadership Only
    • Website FAQ’s
    • Logout
  •  

October 6, 2023

Meant-to-be-Seen Seams

Most of our sewing positions seams on the inside of a garment or project, but there are times when you may want to showcase a seam on the outside of your creation. Why, you ask? Seams can be fun!

Inside Out

Traditional seams are sewn right sides together and the resulting seam allowances are on the inside of the garment but turn that around for some fun. Try stitching the seams wrong sides together so that the seam allowances are showcased on the outside. For a very casual look, leave the edges raw.

Unfinished seam pressed open

You can choose to topstitch the seam allowances open flat with a straight or zig-zag stitch.

Topstitched seam

For added pizzazz, use a contrasting decorative stitch. For easier decorative stitching, use a narrow strip of fusible web to hold the seam allowances in place. For even more fun use decorative scissors, like pinking, scallop or wave, to trim the exposed seam allowance edges.

Seam with scallop stitching

If you prefer, instead of pressing the seam allowances open, press them to one side and topstitch.

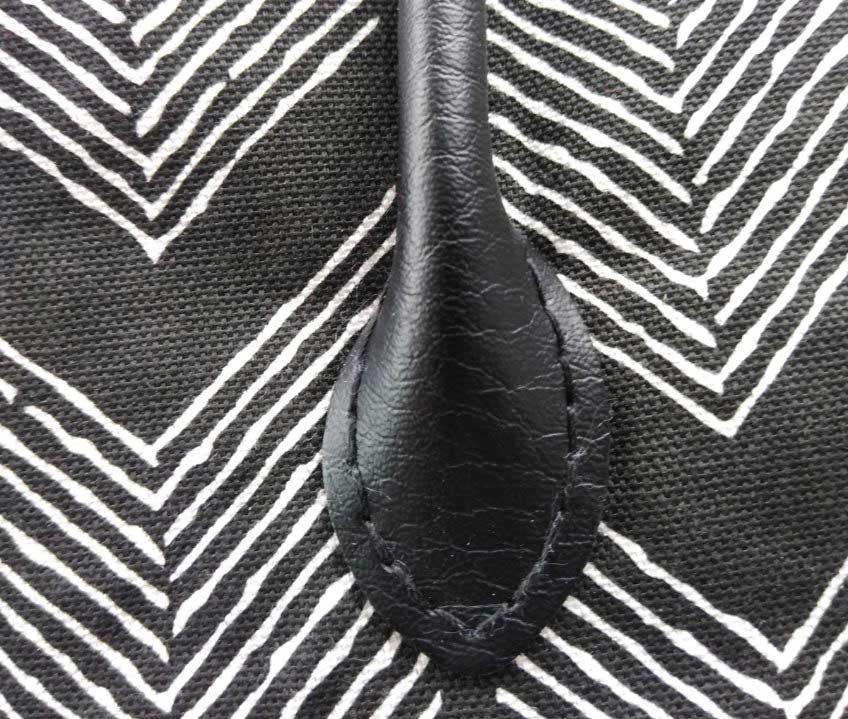
Seam allowances can also be finished with serging, using either matching or contrasting thread colors {pic}. For a more decorative look, use a novelty thread or yarn in the loopers.

Seam with serged finish

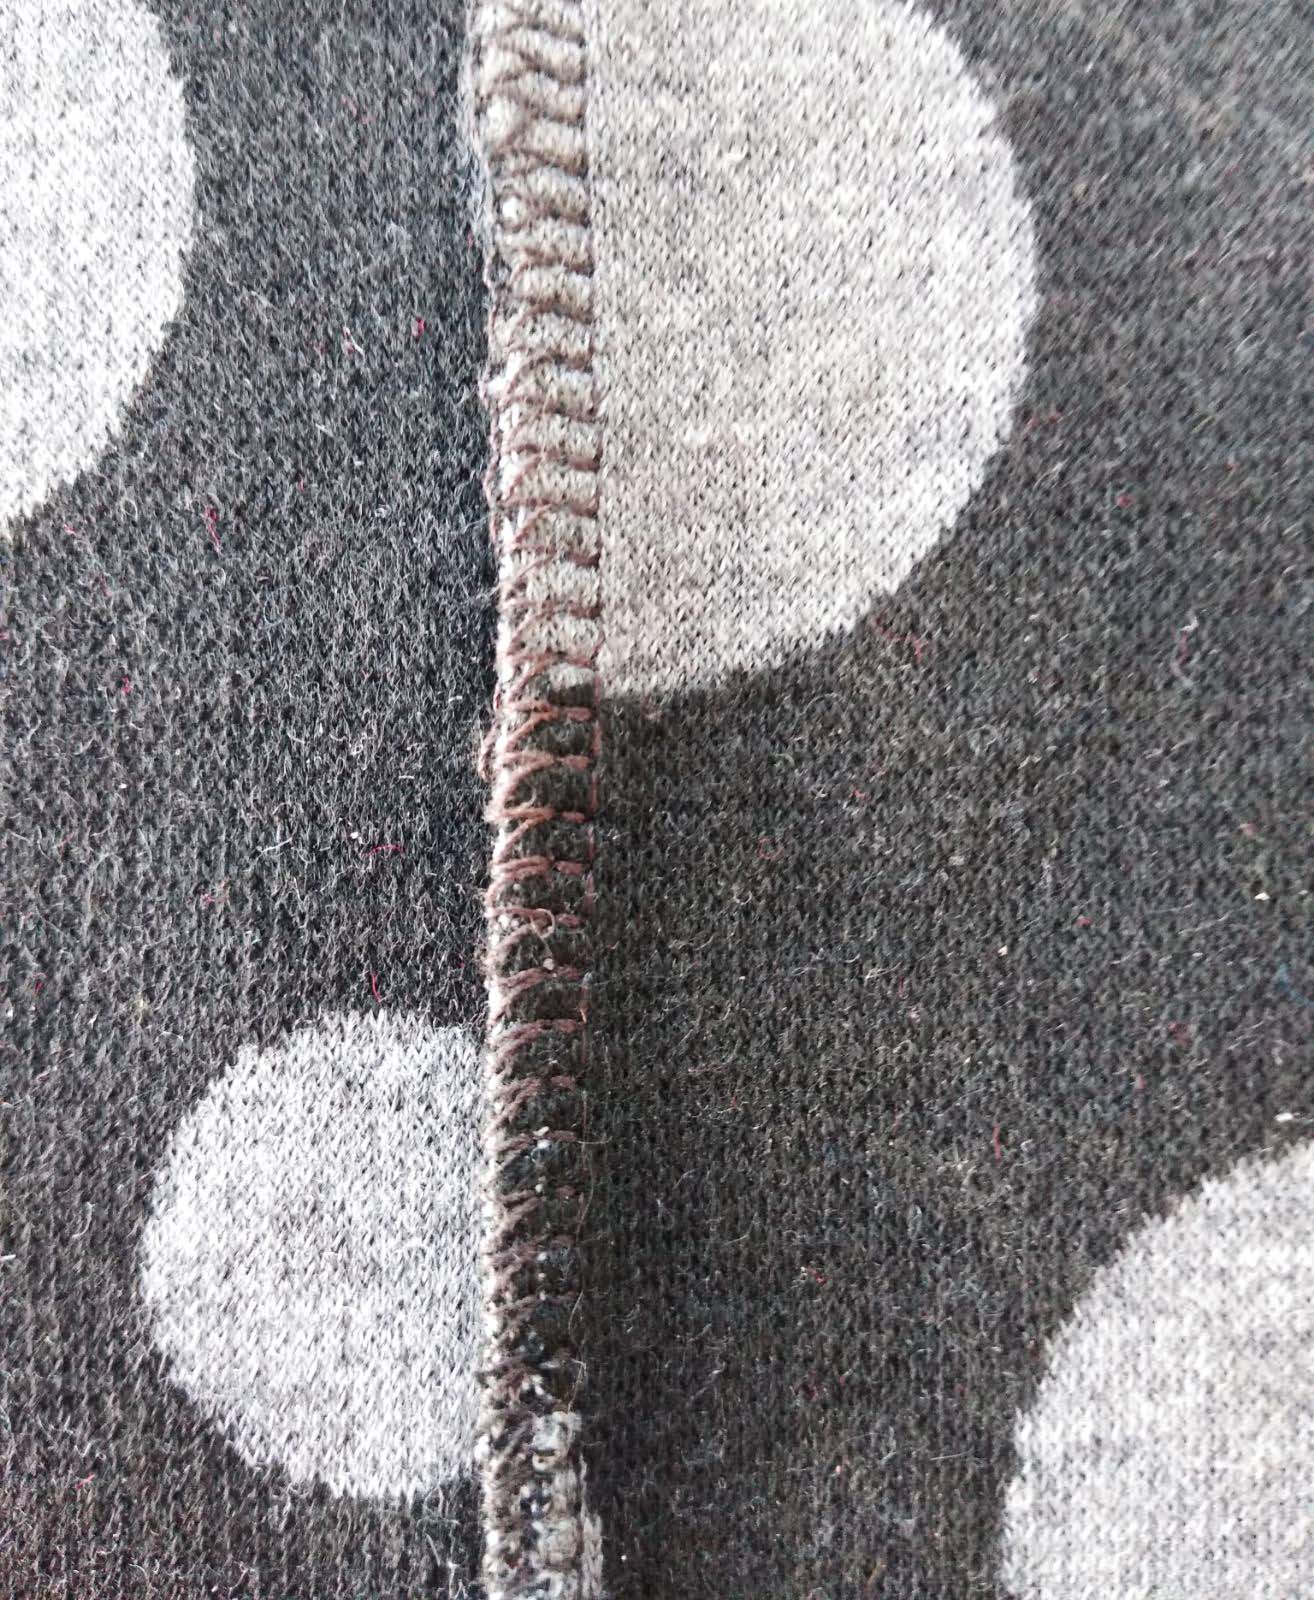
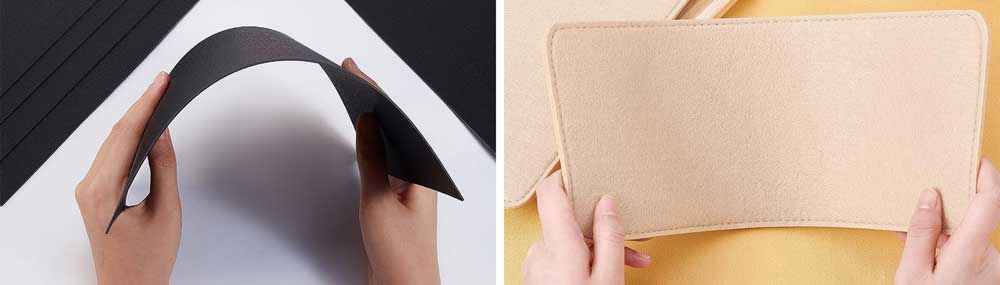
This technique is especially fun if the wrong side of the fabric looks significantly different from the face side. Denims, double knits, double-wovens and fleece are good candidates for outside seaming. Lightweight leather also works, showcasing the sueded side to the outside.

Abutted Seam

Abutted seam with zigzag finish


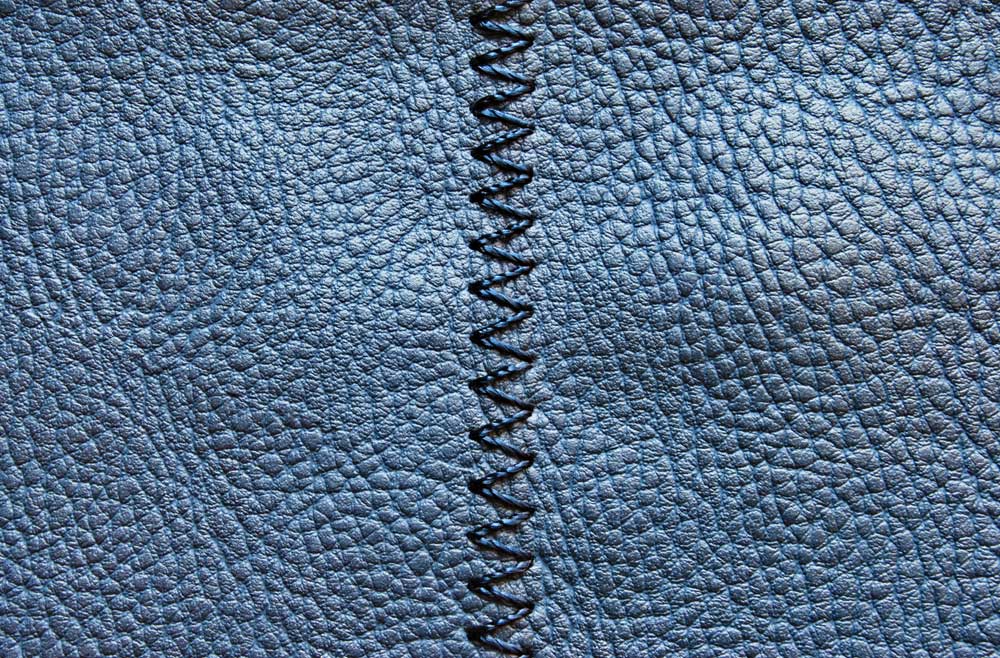
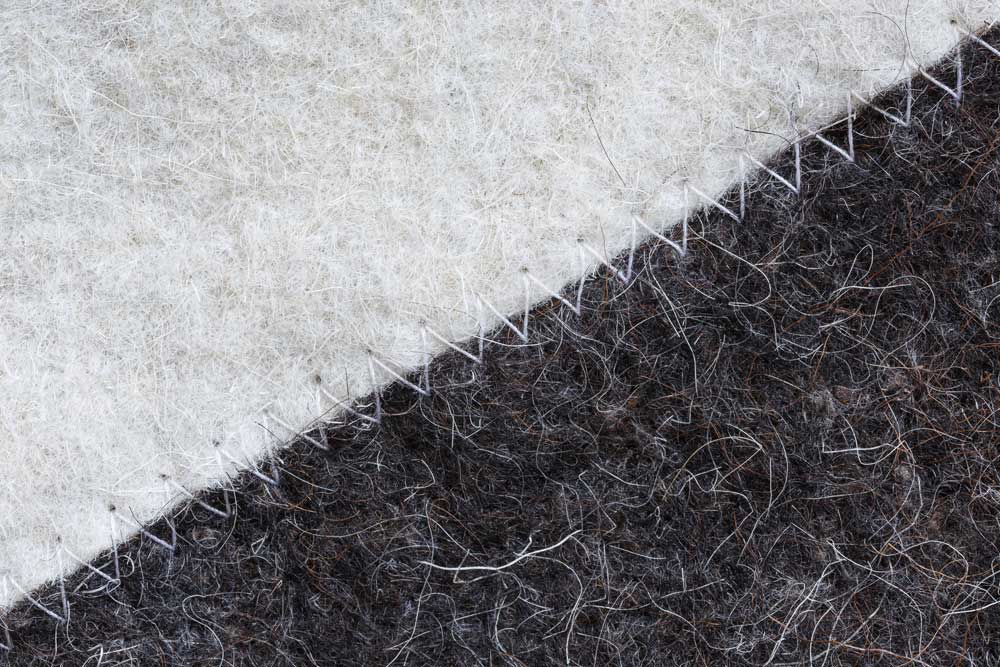
Non-woven fabrics, such as faux leather or suede, faux furs and some knits work well with this flat seam, as do some heavy wools like melton. To create an abutted seam, trim the seam allowances of adjacent seamlines, then push the edges together and join with a zigzag or three-step zig-zag stitch, or even a decorative stitch that spans the two edges. It’s important for strength that the selected stitch catches both edges securely.

For a little extra strength, fuse a narrow strip of lightweight interfacing under the abutted edges prior to stitching. This also helps keep stretchy fabrics from distorting and rippling during the stitching process.

You can use this seam finish with woven fabrics as well, simply press under the seam allowance edges rather than trimming them off. Then, abut the folded edges for joining.

Lapped Seam

Lapped seam sewn with a zigzag

Instead of stitching a conventional seam, a lapped seam is created simply by lapping one section over an adjacent one and stitching in place. A lapped seam is ideal for non-wovens, leather, felted fabrics, boiled wools, etc. where fraying isn’t an issue.

To create a lapped seam, trim the entire seam allowance from the overlapping layer only. Using a removable marker, mark the seam allowance line on the right side of the underlap layer. Place the trimmed layer over the bottom layer and topstitch in place using one or two rows of stitching. You can either stitch twice, or use a double-needle to create the parallel stitching lines. The underlayer can be trimmed to reduce bulk if desired.

To make this process even easier, use a narrow strip of fusible web between the layers to keep them in place for stitching.

For a bit of pizzazz, trim the overlapping seam allowance edge with decorative scissors before stitching, or use one of your machine’s decorative stitches for the stitching lines. If the seam is in a stress-free area, a single line of stitching can suffice.

Which way should the seams lap? They can lap whatever way you prefer, but traditionally, front goes over back at side seams and shoulders, armholes go over sleeves, and left back goes over right back.
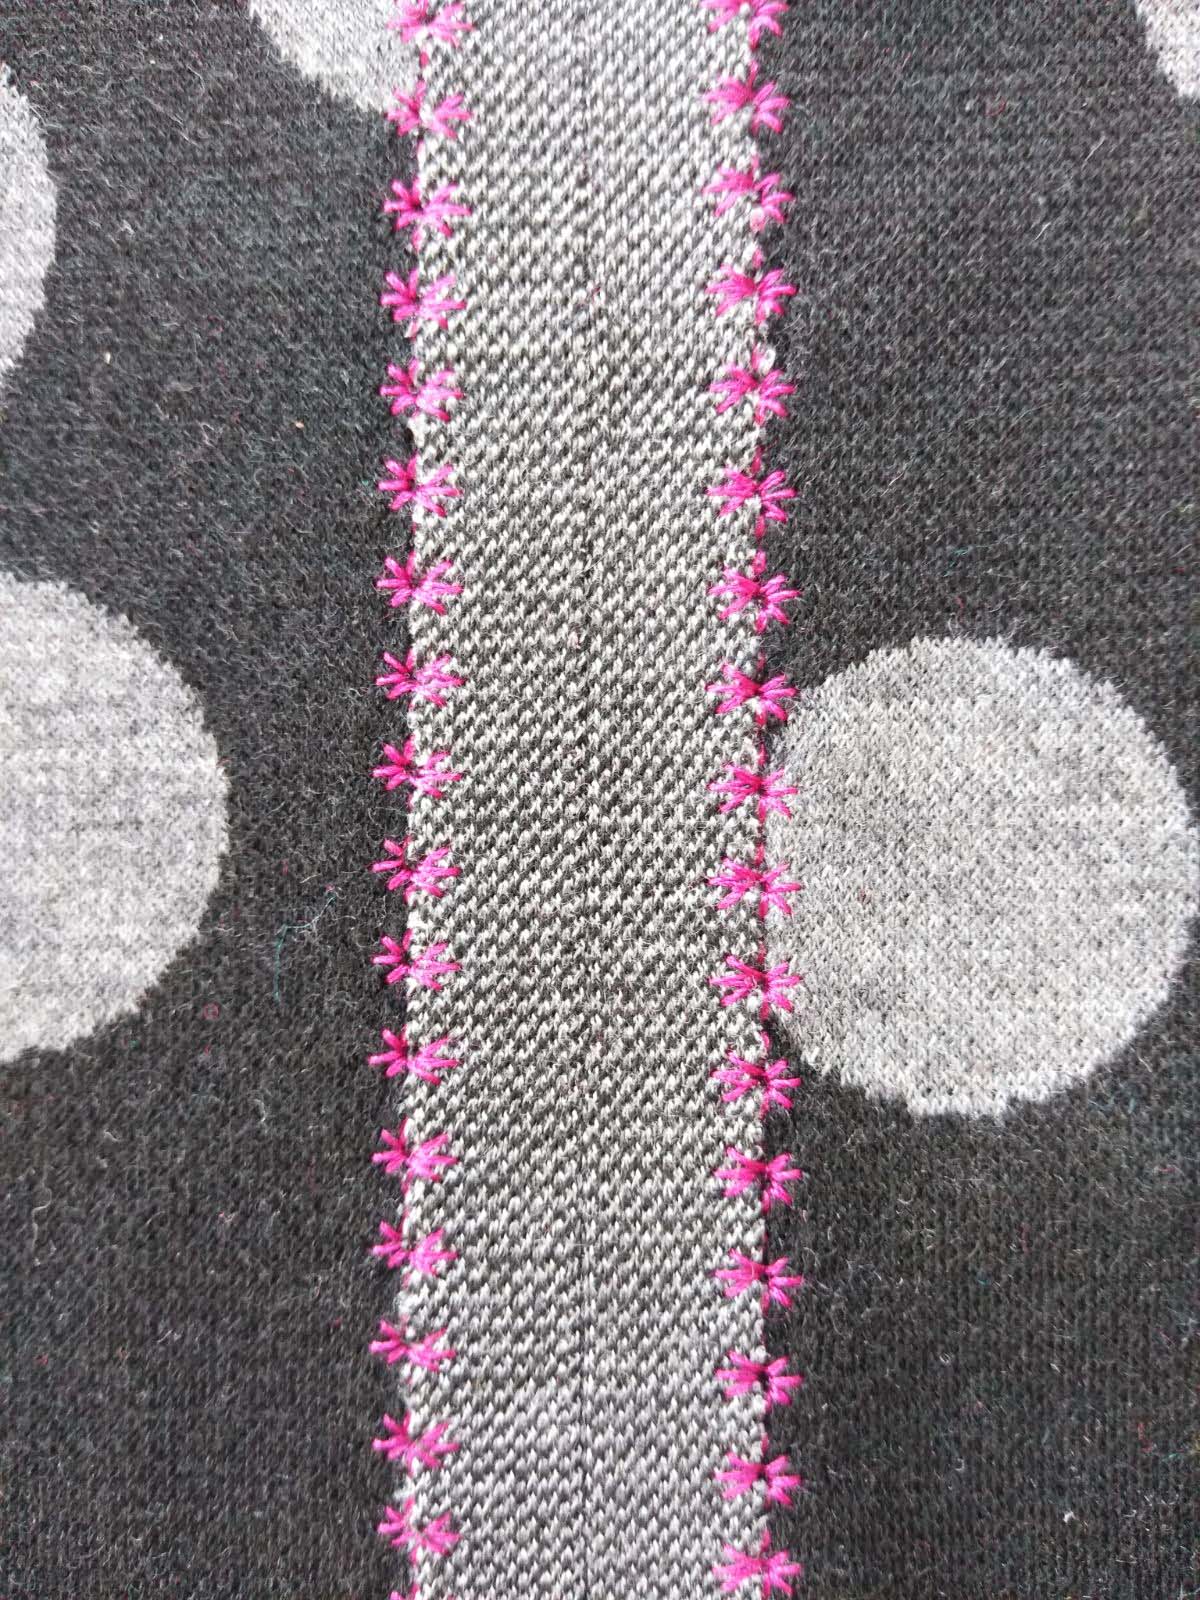
Strapped Seam

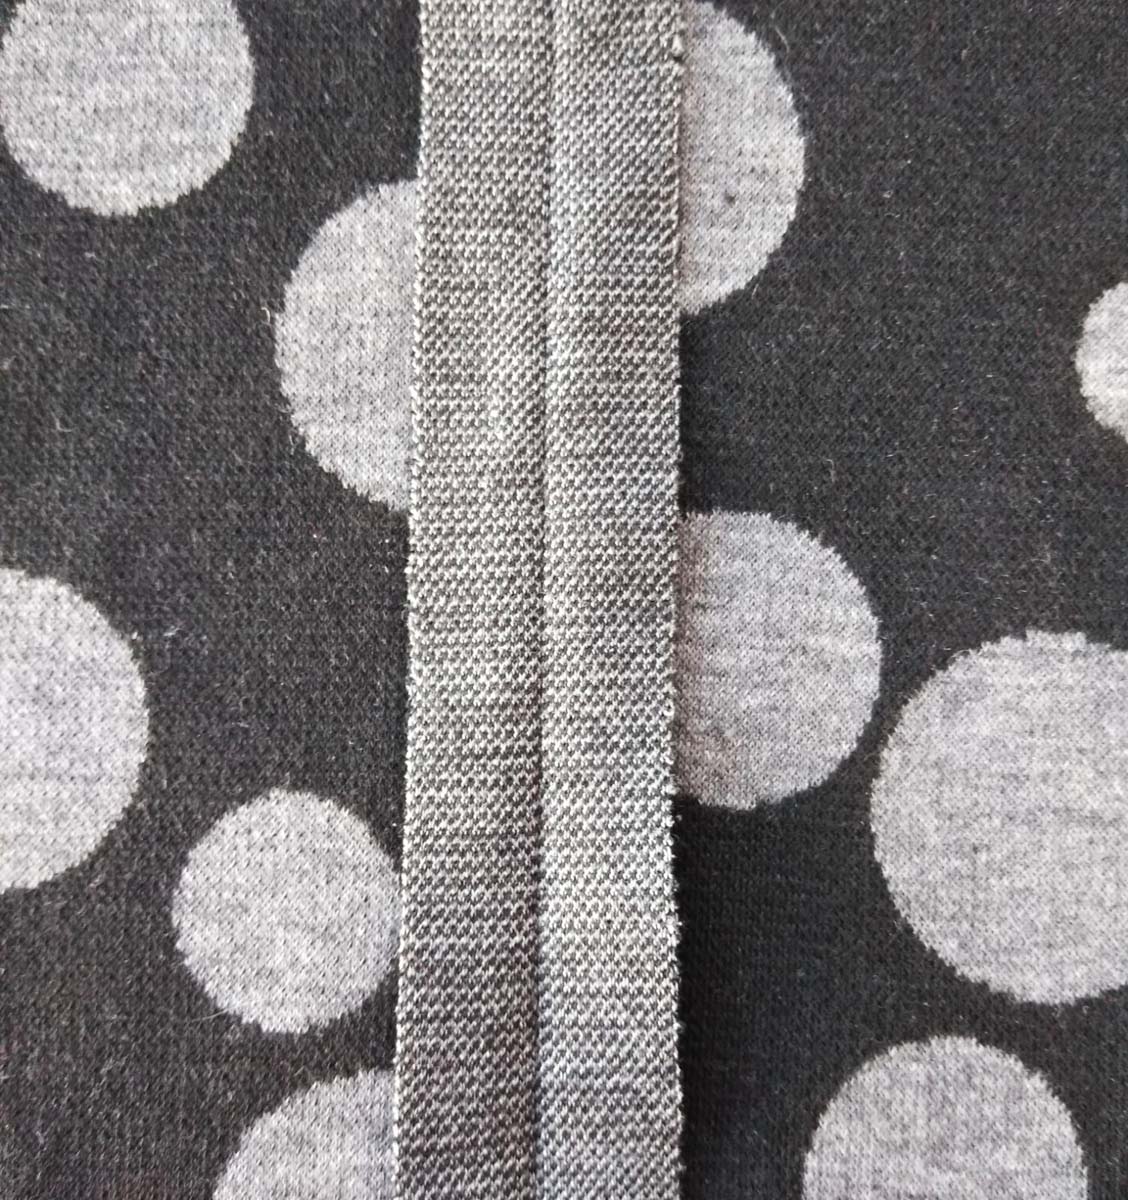
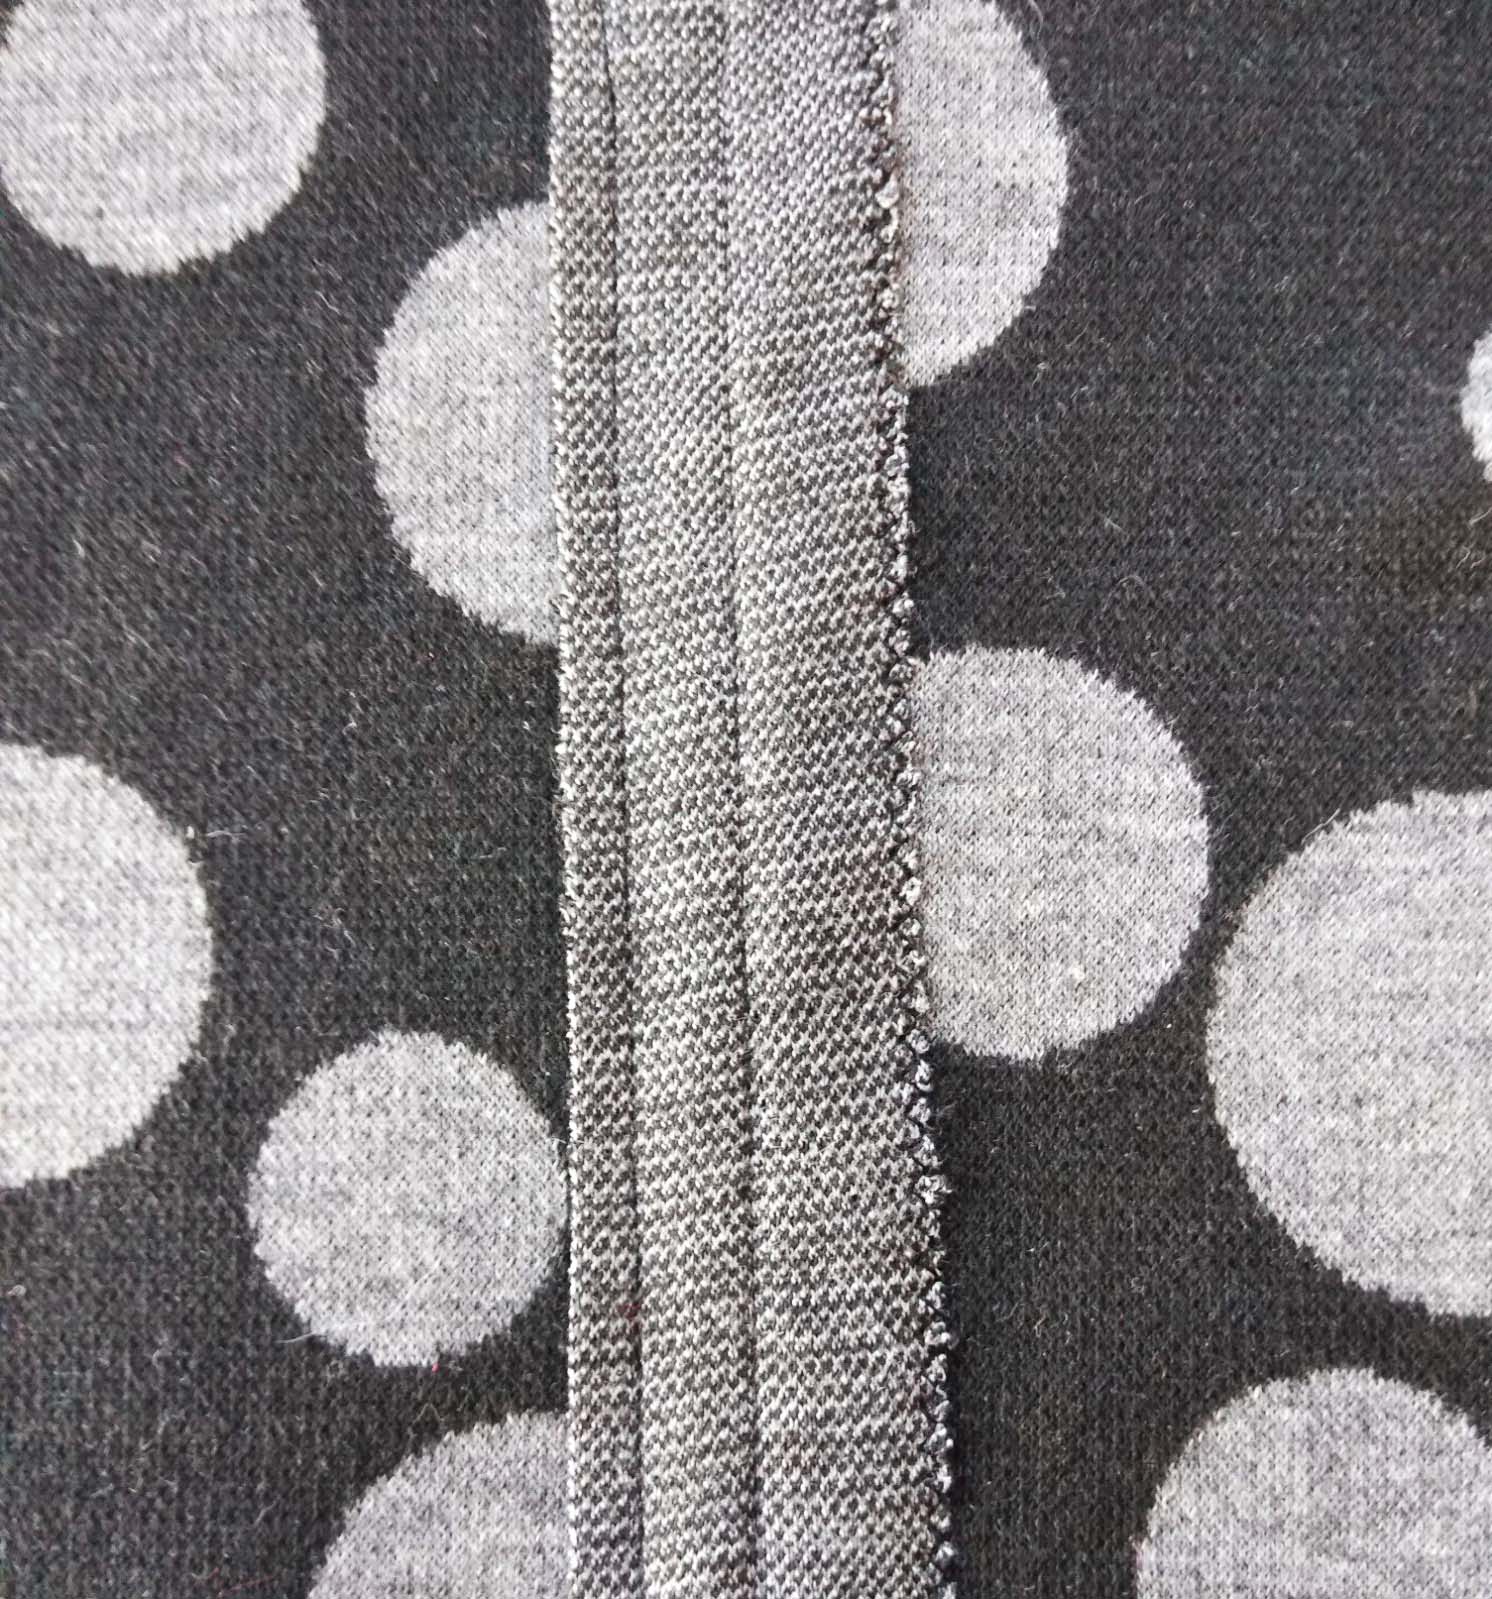
A strapped seam is sewn wrong sides together, then the seam allowances are trimmed and pressed open. Another piece of fabric or trim (contrasting or matching) is centered over the seamline and topstitched in place. The seam allowances are totally hidden by the strapping, so the garment inside is simply flat and finished.

This type of seam is a great way to add reflective trim on outerwear, add ribbon or a contrast fabric, as long as the addition is wider than the pressed-open seam allowances. The strapping strip edges need to be finished before applying if the fabric frays. Options for finishing include decorative scissor cutting, decorative stitching or serging, or choose a pre-made tape trim.

Strapped seams are often found on faux leather garments or those made from heavy wool, melton or felted fabrics, as this finish creates a flat seam that can also be decorative.

All these seam finishes can be used on reversible garments, so you can double the fun!


~Linda Griepentrog is the owner of G Wiz Creative Services and she does writing, editing and designing for companies in the sewing, crafting and quilting industries. In addition, she escorts fabric shopping tours to Hong Kong. She lives at the Oregon Coast with her husband Keith, and three dogs, Yohnuh, Abby, and Lizzie. Contact her at .

Did you enjoy this article?
Are you an ASG member?
This field is for validation purposes and should be left unchanged.

September 29, 2023

The Heart of the Sewing Room

For most of us, the sewing machine is one of our most important possessions. And it’s no secret that the space we use to pursue our passion for sewing plays an important part in the ultimate enjoyment that we receive. The following suggestions are offered knowing that not everyone who sews has unlimited space, but to whatever extent the ideas can be incorporated into the space available, there will be a lessening of fatigue and a greater sense of freedom. Heart of your sewing room

Position the Machine for Comfort

With the exception of when you are travelling or at sew-in meetings, never sew with the machine in a portable state because the fabric cannot be controlled properly when it is dropping off an edge. While you may succeed for a time, there will be greater strain on your back and wrists, and the end result of your project will not be as professional. If your machine is a frequent “traveler” though, you can purchase a portable tabletop or extension that fits around the arm of your machine and rests on the existing table that will help to alleviate any strain or fabric-skewing issues. Inset machine At home, a machine that is recessed into a table or cabinet at the correct height (usually about 30″ from the floor) is one of the best options. You should be able to sit comfortably with your back as straight as possible while resting your arms on the machine. While you may be leaning forward slightly, your back will still be straight. Accordingly, when using a portable machine, since it rises above the table, try to get a shorter table, adjustable table, or cut down the legs of an old table to bring it to the proper height. Also make sure the table is stabilized so that it doesn’t jiggle and jive when you press on the pedal.

Seating

The choice of a chair is crucial to your comfort level. There are chairs that are specifically made for use at a sewing, quilting, or craft table, but any comfortable, sturdy, solid-backed chair that allows you to rest your arms comfortably on the machine without back strain will work. Look for chairs with adjustable features such as seat height and backrest angle to customize your seating position. A chair with adequate padding and cushioning on the seat and backrest will enhance your comfort during long sewing sessions. Some sewing chairs even come with built-in storage compartments or pockets for holding sewing supplies or tools. Look in your local sewing or craft store for chairs specifically made for the sewing room or check out an office supply store for armless secretarial chairs. If you have solid surface floors (tile, vinyl, etc.), note that a lightweight chair with wheels could be problematic and may be slip-sliding away from you. The chair should provide good support for your back, neck, and arms to prevent discomfort and strain during long sewing sessions. Remember that a comfortable and ergonomic sewing setup can make a significant difference in your sewing experience and help prevent fatigue or discomfort.
Sewing themed chair with storage available on Amazon.

Lighting

If you’re tiring quickly or your eyes are straining, lighting could be to blame. Try adding a clip-on lamp to the left side of your machine to add task lighting, but remember to clamp toward the back of the table so it doesn’t interfere with your work. When considering placement for the machine, never place it so that you face into a window. It may seem pleasant, but you’ll be facing into a glare. If you want to be by the window, place the machine perpendicular to the window so that your left shoulder faces the window.

Remember the 20-20-20 rule — blink often and look up from your machine or close-up work every 20 minutes and focus at least 20 feet away for 20 seconds.

Bright Ideas

Sometimes we need a little assistance with light. The following are some ideas from our members:
Lighted Headband Magnifying Glass available on Amazon
  • Jane uses a lighted magnifier worn on a headband which allows the lens piece to be tilted up when not in use.
  • Pattie uses all LED’s.
  • Cindy reports that she uses overhead can lights with LED bulbs above her cutting table and machines, with the addition of two under-counter LED lights at her worktable.
  • Virginia has LED bulbs in the overhead light in her room, along with some track lights. She also uses a large Ott light above her machine.
  • Denise uses a floor lamp, two table-top lamps, and one clamp-on light.
  • Mary loves her DayLight Company floor and table lamps.
  • Karen enjoys skylights and a window in her room and adds goose-neck Ott Lights for task lighting.
  • Betsy has an overhead 4′ LED light, a fluorescent task light (circular) with magnifying glass at the machine; and an incandescent banker’s desklight on the table with the backup machine.
  • Janice added several mirrors to her sewing space to help reflect the light.
  • Finally, Becki says her philosophy is that if the 7:15 from Atlanta isn’t trying to land in your sewing room, then you should buy ‘Luminos Task Lamps’ from the Daylight Company.

Solutions

Former couture sewist and garment industry technical assistant, Margaret Islander, shared these tips with ASG many years ago and they are still applicable today: Extend your sewing table:
  1. Attach a strip of wood on the wall directly across from the back edge and at the same height as the back edge of your machine.
  2. Make a canvas sling the width of the back of the machine table and the desired length needed from the wall to extend it to carry the bulk of fabric.
  3. Hem the sides and ends of the sling and attach a row of grommets to each end.
  4. Attach hooks to the mounted board and to the back edge of machine table to match the placement of grommets and hook on the sling. This will give you a much larger “table” space. You can use any means of attachment that will be sturdy.
When not in use the machine can be pushed back to the wall and the sling allowed to hang down invisibly between the machine and wall. Alternatively, if you have two machines in your sewing space, try facing the tables toward each other and set up the sling between them. Department Mania
  • Set up your sewing space with special departments. Consider repurposing a trusty older machine just for topstitching.  Then, instead of rethreading with contrast thread and changing stitch length each time you need to topstitch, simply move over to your Topstitch Deparment.
  • Do you do a lot of buttonholes? Set up a Buttonhole Department for standard and keyhole buttonholes. (Some of the old machines with template buttonholers were great!)
  • Finally, if you are in the business of sewing, an industrial sewing machine that is designed to speedily accomplish straight and zig-zag stitches will allow you to use your preferred machine for the specialty touches.

Did you enjoy this article?
Are you an ASG member?
This field is for validation purposes and should be left unchanged.

Tagged With: sewing room

September 22, 2023

Tote Tactics

Colorful tote bagTotes are one of the easiest projects sewers can make and are often a first project for beginners. They can be lined, unlined, open-top, zipper-top or even closed with a magnetic fastener, and some offer inside and/or outside pockets as an extra convenience. Tote bags generally have flat bottoms and corner shaping, though they can also simply be flat. These handy carryalls have gained popularity in recent years as many shoppers sport their own bags to the store to carry home their purchases.

The simple design of a tote makes it ideal for many fabrics from canvas to ripstop, quilting weights and home décor styles, even leather. Unlined totes made in lightweights like ripstop are ideal for grocery hauling, as they fold totally flat, but are still strong for carrying cans, produce and other vittles.

There are many patterns available for tote bags, or you can easily make your own simple version with two rectangles and some straps. But, no matter the style, there are some handy tips for tote making.

Inside Scoop

Unless your tote is unlined, it’s a good idea to reinforce the bag sides with interfacing or sewable foam for added stability and shape retention. Judge the type of stabilization needed by the fabric weight—lighter weight fabrics require a sturdier interfacing.

Fusible interfacings, fleeces and foams are ideal backing for tote sides. Cut the pieces the same size and shape as the outer bag pieces. Some sewers like to trim the seam allowances from the backing pieces prior to fusing to reduce bulk. Be sure to follow the manufacturer’s instructions for proper fusing and always allow the pieces to cool before moving them.

Bottom Basics

Flat tote bottoms can be further stabilized by adding an insert of the same size after constructing the bag. Materials available for inserts are acrylic shapes, very stiff interfacing or a rectangle of heavy plastic canvas and often come in various sizes, colors, and styles, or as cut-your-own. If the tote is unlined, simply cover the bottom insert with matching fabric. For lined totes, the stabilizer goes between the outer and lining layers. To keep the bottom insert from shifting, it’s a good idea to loosely tack it in place at the side seams.

Bottom of bags
Tote bag base shapers are available on Amazon.

Solid Footing

Adding bag feet to a tote bottom is a great way to help keep the tote cleaner, as it allows the fabric itself to stay off the ground. Bag feet come in a variety of shapes, colors and sizes, and they are applied prior to any lining, but after interfacing. Feet can be applied like a magnetic fastener with two prongs inserted into a small hole in the desired corner location on the finished bottom. A piece of foam or stiff interfacing is placed over the prongs for reinforcement, then the metal prongs are folded outward and flattened. To further protect the bag lining, a piece of fleece or interfacing can be placed over the prongs as a cushion. Feet are also available in screw-back versions and can be padded and reinforced as needed.

Bag feet available on Amazone
Bag feet available on Amazon.

Getting a Handle on it

Tote bagThere are a wide variety of options for tote handles. They can be short or over-the-shoulder length, and made from self-fabric, webbing, rope or leather (real or faux). The handles can simply be sewn to the tote top hem, or they can straddle the entire length of the tote and included in the bottom seam. Or, they can be applied to the outside tote surfaces, depending on the desired look.

If the tote is unlined, it’s a good idea to have a double hem at the top for stability when attaching handles to the opening.

Tote handles made of fabric need some kind of reinforcement to make them sturdy—so insert interfacing or fleece inside and topstitch both edges to flatten.

If you’re attaching finished straps to the tote outside, turn under any unfinished ends, then sew a square at each strap end, reinforced with an x for added strength.

Any handles applied to the outside of the tote should be attached prior to lining it so that the stitching or attachment backings are hidden. If you plan to carry heavy items in the tote, add a piece of stiff interfacing behind any outside handle attachments for reinforcement.

Leather handles can be attached several ways depending on the style. Some come with pre-punched holes for easy hand stitching; others require the use of screws or rivets to attach. One handy notion is called a Chicago screw—it’s a post and cap that fits into pre-made handle holes and, as the name implies, simply screws together to secure.

Flat leather handles attached with Chicago screws.

If you’re hand-sewing leather handles in place, use heavy thread and a backstitch for a sturdy application. Some lightweight leather handles can be machine stitched in place as well.

Leather strap on a tote
Rolled leather handles attached with hand-stitching.

Share your tote projects with us! Visit our Facebook page for today’s post and show us your own tote bag projects.


~Linda Griepentrog is the owner of G Wiz Creative Services and she does writing, editing and designing for companies in the sewing, crafting and quilting industries. In addition, she escorts fabric shopping tours to Hong Kong. She lives at the Oregon Coast with her husband Keith, and three dogs, Yohnuh, Abby, and Lizzie. Contact her at .

Did you enjoy this article?
Are you an ASG member?
This field is for validation purposes and should be left unchanged.

Tagged With: tote bags

September 15, 2023

Wearable Art with Asian Flair (preview)

Creating wearable art satisfies the desire for something special to wear, the craving you feel to express yourself, and a reason to use the luscious fabrics and threads you just bought. Now, what to make? Why not create a garment that takes you to a land far away… to an exotic place of serenity and ancient culture… to a place where style is timeless, tradition is honored, and nature is the essence of life? Creating wearable art with Asian flair allows you to fulfill that fantasy. Just select a simple pattern, colors that appeal to you, fabrics and motifs that inspire, and sewing techniques to embellish. Collect your treasured items and find some time for yourself.

Asian isnpired fabric


The full article is in the Members area of the website. CLICK HERE to read the full article. Not a member? Join online!


September 8, 2023

Sticking to It: Glue in Your Sewing Projects

OMG—for some of you, the very thought of using glue with any sewing project probably makes your inner home economics teacher cringe! But take a deep breath and consider that it could be a helpful tool when used properly.

Aleene’s glue available on Amazon.

Check Points

There are a number of types of glues on the market, and they’re used for very different purposes. Almost all can be helpful for sewing projects, but before you choose a glue, check out these basics by reading the label:

  • Is the glue suitable for use on porous surfaces like fabric?
  • Is the glue washable? This can actually mean two things—that the glue is temporary and will wash out, or that it can withstand washing and remain intact, so double check.
  • Is it permanent or temporary?
  • How long does it take to dry to the touch and to cure (the time needed for the chemical bonding)?
  • Is the glue repositionable, so something like an appliqué can be moved from one place to the other? Some glues are temporarily repositionable, then become permanent when they cure.
  • Does it dry clear and flexible? Flexibility is especially important if you’re using it on a knit garment, so that it doesn’t crack when the fabric stretches.
  • Is it non-toxic and acid-free to avoid damaging fabric?
  • Can you stitch through the glued area without damaging the sewing machine or the needle?
  • Is it colored, or does it have glitter with the glue for embellishing?

Glitter glue available on Amazon.

Getting it on

Glues can be applied in a variety of ways. Most come with a narrow tip applicator, but some come with a brush tip allowing for a broader application. Glue pens and sticks are also available, some offering twist-up applicators, and some pens that are refillable. Spray glues are also available for covering larger areas, but be sure to protect your work surface from overspray by covering it with plastic or paper.

For very fine applications, like individual beads or trim lines, look for needle-tip bottles, or apply the glue with a toothpick for precise placement.

Crafters Companion Glue Applicators available on Amazon.

If you’re opting for hot glue, a glue gun heats the glue stick for application, and that tool may come with assorted tips depending on what you’re using it for. Hot glue is harder to control, but it’s ideal for things like home décor uses like fabric headboards, etc. where fabric is being attached to another surface, like wood. But do note that hot glue can melt synthetic fabrics very quickly, so best to use another glue option for those.

Where might you use glue?

Tear Mender Instant Fabric and Leather Adhesive available on Amazon.

  • Adding embellishments to fabric items you can’t get into the sewing machine, like shoes, baseball caps, sun visors, etc.

    Plextone 1 Min Quick Bonding Fast Dry Sew Glue available on Amazon.
  • Temporary repairs, like a torn pocket or hem, until you can get to your sewing machine.
  • Holding buttons in place until they’re sewn on.
  • Keeping sew-in interfacings in place. Just put tiny dots within the seam allowances between the fabric and interfacing layers.
  • Attaching jewels, rhinestones, crystals or beads permanently without the need to sew them.
  • Applying ribbons or trims, lace and appliqués temporarily (until sewn) or permanently.
  • Hemming garments made from non-porous fabrics like leather (faux or real) or suede.
  • Finishing cord ends that tend to fray.
  • Basting zippers in place for sewing.
  • Creating temporary appliqués like for seasonal costumes.
  • Adding glitter or foil to a fabric surface.
  • Keeping seam allowances from fraying y using a very narrow bead along the edge.

So, before you cringe at the thought of glue for sewing uses, think again—it could be the perfect solution.


~Linda Griepentrog is the owner of G Wiz Creative Services and she does writing, editing and designing for companies in the sewing, crafting and quilting industries. In addition, she escorts fabric shopping tours to Hong Kong. She lives at the Oregon Coast with her husband Keith, and three dogs, Yohnuh, Abby, and Lizzie. Contact her at .

Did you enjoy this article?
Are you an ASG member?
This field is for validation purposes and should be left unchanged.

  • « Previous Page
  • 1
  • …
  • 15
  • 16
  • 17
  • 18
  • 19
  • …
  • 82
  • Next Page »

Become a Member

Join the only national organization dedicated to Advancing Sewing as an Art and Life Skill.

Join Now button

Blog Article Categories

  • ASG Conference
  • Chapter Stories
  • Embroidery
  • Fitting
  • Learn to Sew
  • National Sewing Month
  • Products, Books, & Patterns
  • Projects
  • Quilting
  • Sewing
  • Sewing Techniques
  • Sewing Tips
  • Sewing Tours
  • Videos
  • Disclaimer
  • Privacy Policy

American Sewing Guild
National Headquarters
9660 Hillcroft, Suite 230
Houston TX 77096
713-729-3000 | 713-721-9230 Fax
www.ASG.org

ASG wordcloud - education, conference, discounts, videos, special offers, tours and more

Copyright © 1998–2025 · American Sewing Guild · All Rights Reserved