American Sewing Guild (ASG)

Visit our blog Visit the ASG Facebook page Visit ASG on Pinterest Visit ASG's YouTube channel Visit ASG on Instagram
  • Home
  • Join ASG
    • Join Online
    • Chapter Locations
    • Member Benefits
    • Member Brochure
    • Join by Mail
  • Conference & Education
  • Resources
    • Contests & Awards
    • Giving Back
    • Hall of Fame
    • Links
    • Travel and Tours
    • Measurement Chart
  • Shop
    • ASG Store
    • Chapter Products
    • Video Resources
  • Blog
  • About
    • About Us
    • Donate to ASG
    • ASG Sensitivity Statement
    • FAQ’s
    • Start a Chapter
  • Contact
  • Member Login
    • Login First!
    • Members Only
    • Leadership Only
    • Website FAQ’s
    • Logout
  •  

November 22, 2024

Salvaging Sweaters

Whether you’re a thrift store junkie or just cleaning out your closet, sweaters can be a fun and creative source of fabric for new projects.

Image courtesy of Bernina

When thrift shopping for sweaters, look for the larger sizes so you’ll have more “fabric” to work with. If you plan to felt the sweater, small moth holes, pilled areas or small stains are OK, as they won’t be noticeable after the felting process. Look for sweaters with large, ribbed areas, like cowl collars, as the ribbing areas provide a coordinating trim readymade for your project. If the sweater is wool, its character can be changed dramatically through felting. But, for non-wool sweaters, it’s open season for transforming the chunky rib knits into something fun.

To Felt or Not to Felt

Sweaters made from at least 80% wool can be felted by machine washing in hot water and drying with hot temperatures. Use detergent and add some tennis balls for additional agitation, then wash the sweaters on the longest and hottest cycle available. The sweater will look shrunken and distorted after the washing process, but you can do it again if you want more shrinkage. Then, pop the sweaters into a hot dryer until thoroughly dry.

The resulting fabric is dense and stable as the fibers shrink together for stability, and it doesn’t fray. Depending on the amount of felting, the sweatering fabric may no longer have any stretch, so it can be used like any woven fabric or felt.

If your project requires stretch to fit, such as a hat, felting is not recommended; instead use the sweater as-is to take advantage of the knit’s stretch.

Sweater Attributes

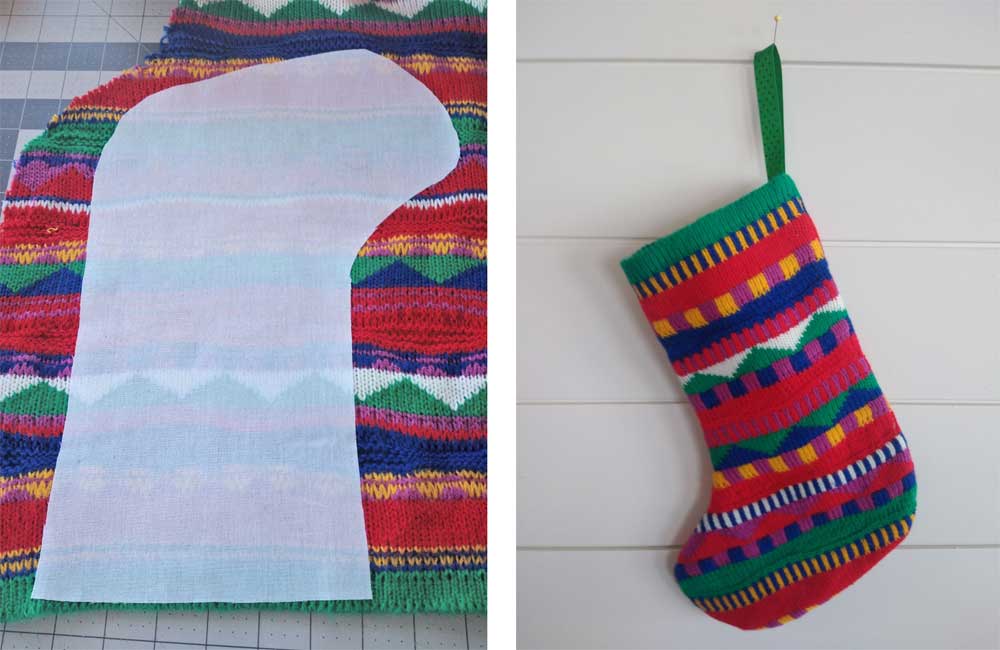
Depending on what you’re making, the sweater sleeves can be used as-is, just cut them away at the armhole seaming. Sleeves are ideal for making stuffed toy snakes like the one shown.

Sweater snake


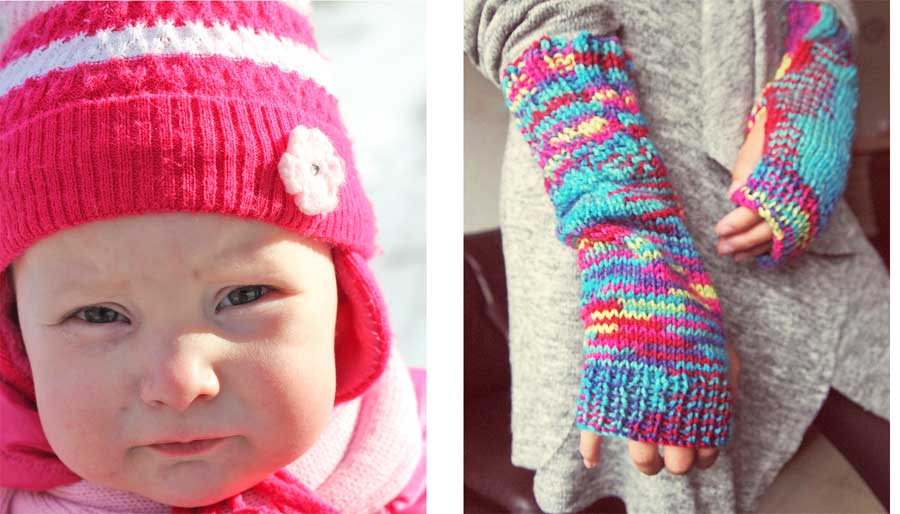
On larger sizes, the sleeves can be cut down to make a child’s hat with the cuffs becoming the lower edge rib finish. They can also be used to make knit leggings or arm wamers, depending on the size. Sweater scraps can be used to make pet sweaters.

Hat and arm warmers made from sweaters


Sturdy ribbing can also be used as the top edge on a tote but be sure to stabilize the wrong side to avoid stretching.

Working with Sweatering

If your project requires stability and you’re using a non-felted sweater, there’s an easy fix for that. Cut the project pieces from a woven iron-on interfacing and fuse them to the wrong side of the fabric before cutting. That will keep the sweatering in shape and prevent stretching. Then use the interfacing edge as your cutting line.

When the project is sewn, the interfacing is caught in the seam allowances to keep the piece stable. A colorful lining can hide the interfacing.

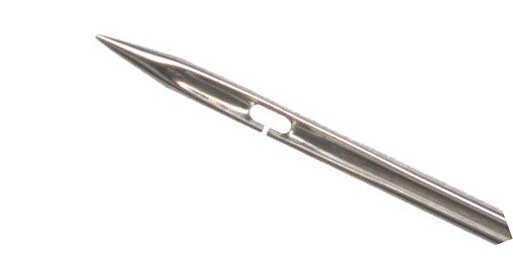
For projects that require stretch, use a serged seam or a regular seam sewn with a narrow zigzag to keep stitches from popping. A universal needle works just fine on most sweater knits.

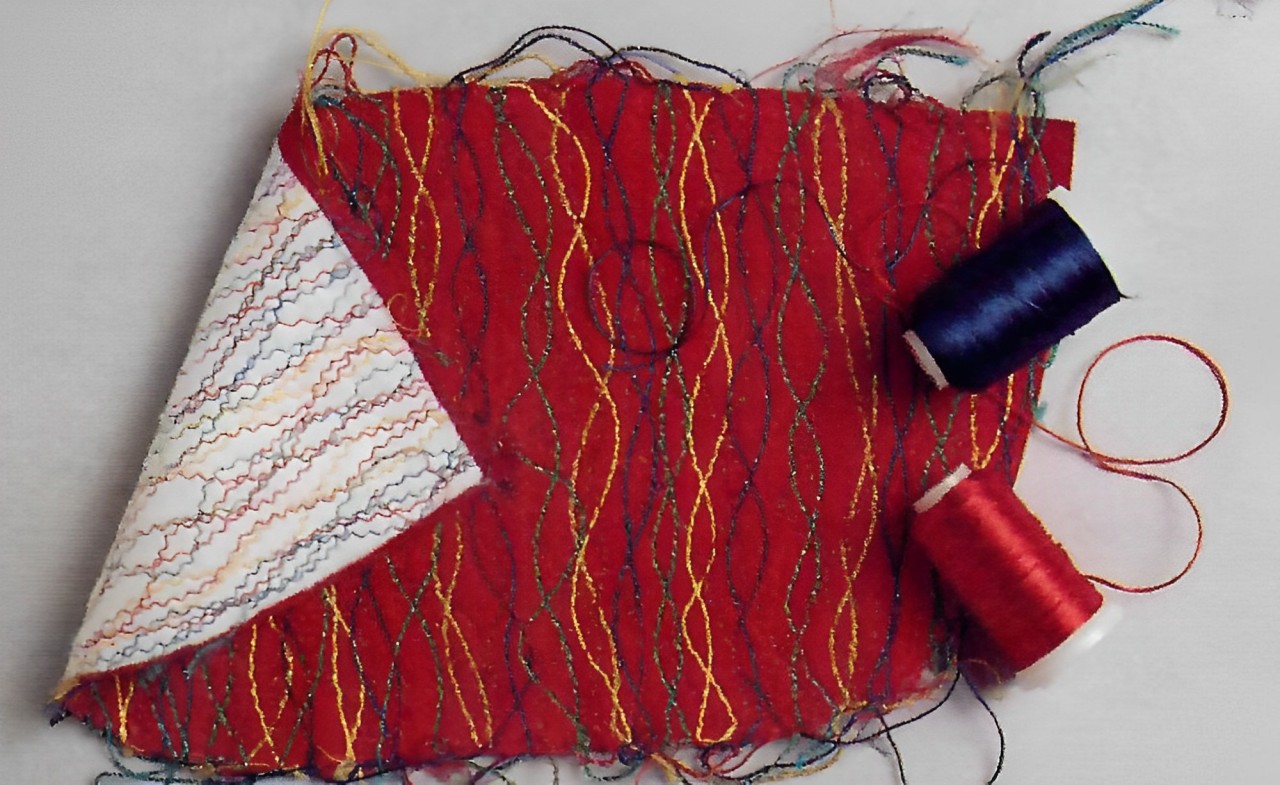
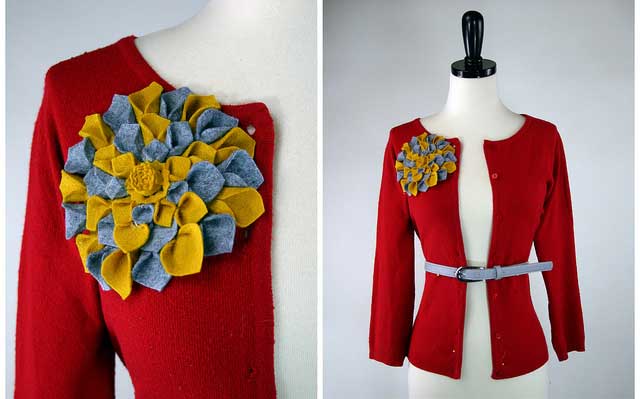
Never throw away sweater scraps, as they can be used for piecing or appliqués. If the scraps are felted, there’s no worrying about finishing the edges and you can simply make lapped or butted seams for pieced projects since there’s no fraying. They’re also great for trims on other sweaters.
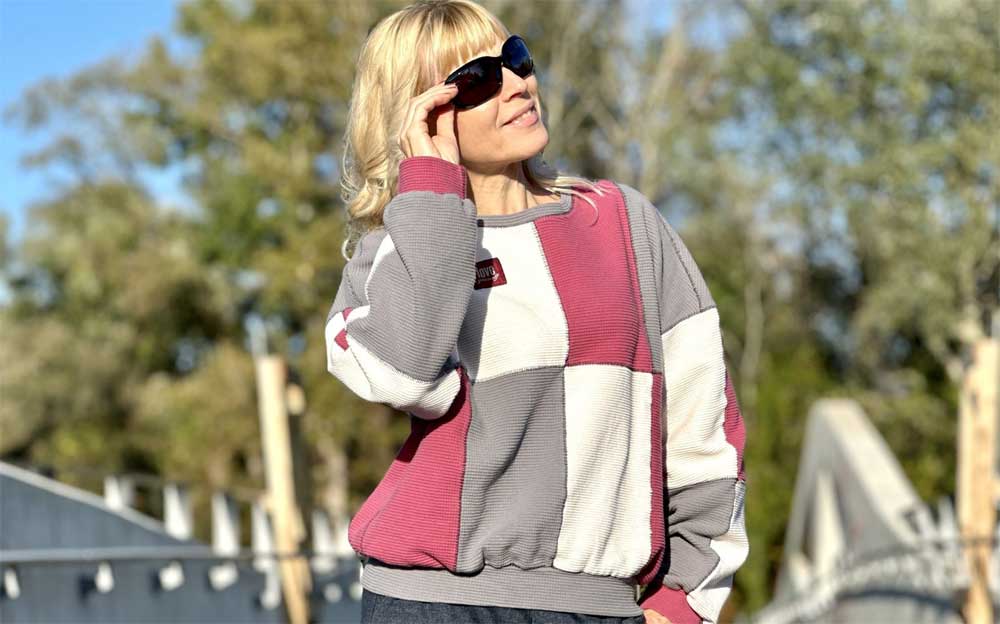
Image courtesy of Bernina.

Merging Sweaters

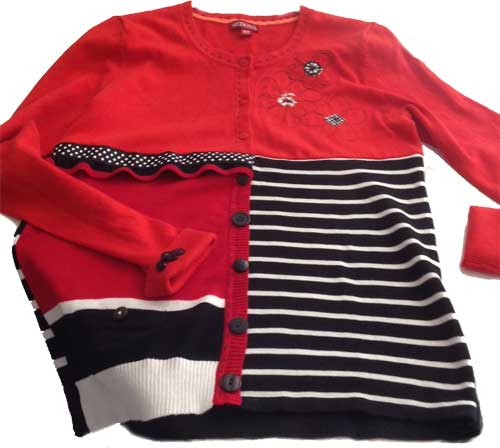
If creativity is on your mind, consider “merging” parts from multiple sweaters into one. Just be sure to stabilize the seams with stitching before cutting apart the bits and pieces and resewing them as you wish.

One note: Harvesting sweaters can be addictive, so beware!


~Linda Griepentrog is the owner of G Wiz Creative Services and she does writing, editing and designing for companies in the sewing, crafting and quilting industries. In addition, she escorts fabric shopping tours to Hong Kong. She lives at the Oregon Coast with her husband Keith, and three dogs, Yohnuh, Abby, and Lizzie. Contact her at .

November 15, 2024

Couching

Couching is the method of embroidery used to attach a thread or group of threads to fabric when they are too thick, too highly textured or too fragile to be stitched through the fabric. A second thread, normally finer, is used to stitch over the couched thread, thus anchoring it to the fabric. The name comes from the French word coucher, meaning to lay down. In couching, a design is created by hand or machine stitching over threads, cords, or yarns that have been arranged on the surface of a material. With the availability of more embellishments such as sequins, beads, pearls, and ribbons, and additional feet available for your machine, couching takes on a new dimension.

Couching materials

The market is overflowing with wonderful threads designed for the upper and lower loopers on sergers, yet are still heavy enough to use in the sewing machine needle. These metallic threads, braids, ombres and ribbons, pearl rayons and cottons, and other decorative yarns are perfect for couching. Other threads and yarns intended for hand embroidery, needlepoint, knitting, and related crafts can also transfer to couching. They glide through a couching foot, maintaining their position and making couching by machine a simple, quick process for creating an ornament or trim. Start by choosing your couching thread or threads, and then choose a needle thread.

Plan Your Layers

Each type of couching thread and ribbon could have multiple options for couching. To begin, apply the widest, flattest layers first, in colors that need to be subtle in the project. As layers progress, add the more bulky layers like edgestitched ribbon, beads, and sequin yardage.

¼” Satin Ribbon

When a centered stitching is desired on ¼” ribbon, use the open two embroidery foot, making accuracy a breeze. More open decorative stitches, staggered satin stitches, the honeycomb stitch, or double needle feather stitches produce a beautiful texture. Experiment with the stitch length and width for different effects. Be careful with the stitch width when using the double needle. The wider the distance between the needles, the narrower the width must be to prevent the needle from breaking. The double needle button on most new machines allows the machine to stitch up to a certain width. Be sure to push the button.

Ribbon Thread and 1/8” Ribbon

Ribbon thread or floss and 1/8” satin ribbon are suitable for couching in a variety of ways. Use the braiding foot to center the ribbon by the needle. Set the decorative stitch width to allow the needle to go over the edge of the ribbon and not beyond. Consider the daisy, ladder, or feather stitch for these narrow ribbons or any stitch with open spaces for the ribbon to show. Combinations of stitches are another alternative using memory.

Serger Threads

Heavier threads for the serger loopers are easy to couch single or twisted width with other colors. The tendency is to match colors so well that they are not visible once stitched. Add a contrast in color visibility. Use thread colors you would never buy in fabric. Thread is only a small portion of the garment.

The Proper Stitch

Most instructions suggest using a zigzag stitch to hold twisted threads in position. However, it tends to mat the beautiful threads down. My preference is the multi-step zigzag stitch. Alter the stitch width to the width of the twisted threads. Lengthen the stitch to about 1.5 or 2. By using variegated thread that do not match, the needle thread is barely visible and it doesn’t draw attention to itself but does add sparkle to the couching thread.

Occasionally I work with braids or ribbons that are so tightly woven, it’s difficult for the needle to penetrate using the multi-step zigzag stitch. In this case, use a clear monofilament thread in the needle and a zigzag stitch.  Be sure the needle swings over these couching threads rather than piercing them to avoid pulls.

Choose the foot with the hole closest to the size of the couching threads to maintain proper alignment. A too-large hole will cause the couching threads to move around too much, missing stitches. A too-small hole will catch on the couching threads, causing the fabric to gather. Some feet have an adjustable screw to alter the size of the hole.

Using a Multi-hole Cording Foot

Cording feet with tiny holes through which three to nine heavier threads may pass allow many combinations of types and colors of thread. The different holes align the threads perfectly, resulting in the illusion of ribbon.

A subtle variegated design is achieved with slightly different shades of a color or a bolder appearance with sharper, brighter colors. The possibilities are endless because a great variety of colors is available in specialty threads.

Ordinarily, all holes in the foot are threaded at once. Just because there are a number of holes in a foot does not mean all holes must be used at the same time. Creativity happens when rules are broken. Sometimes, only the outer holes are used with a decorative stitch set to the maximum width.

Other times, odd holes are used, allowing space between the lanes of couching threads. Incorporate a variety of uses from the same foot into the same project. Every row stitches can be a different application.

Tips:

  • Always test needle thread and couching thread combinations as they sometimes change colors after they are stitched.
  • Whenever possible, begin and end on the cut edge of the garment.
  • Couching may cause the base fabric to shrink slightly. Cut out the garment 1” larger before beginning to stitch.
  • Use the foot that makes the task easier.
  • When threading is difficult, use a floss threader to thread the foot.
  • Effective couching uses threads of high contrast colors and texture. The spools of thread laying side-by-side may look awful together. Twist several threads together before making a final choice because, sometimes, what looks ugly on the spool becomes wonderful in small amounts.
  • Have several full bobbins handy. Decorative stitches use more thread than straight stitches.
  • To hide a skipped stitch, overlap another row of couching. Note that it’s not necessary to relocate the needle into the stitch pattern.


~from the book, Creating Texture with Textiles by Linda McGehee (reprinted with permission), available from Ghee’s.

ASG members receive a discount with a code available from the Members Only area.


Linda McGehee from Ghee’s brings 50 years of rich and varied sewing expertise, spanning everything from garment creation and handbags to piecing, heirloom sewing, and surface manipulation. She skillfully blends multiple techniques into samplers showcasing her broad skill set. A seasoned demonstrator and lecturer, Linda has shared her knowledge worldwide through her books and patterns. Highly sought after at trade shows, machine conventions, consumer events, guilds, shops, and on television, Linda’s teaching style is engaging, fun, and detailed.

November 8, 2024

Sew Comfortably: Adaptive Sewing Tools

Some things, like fine wine and artisanal cheeses, seem to get better with age. But not everything follows suit—as we age, some sewing tasks can become more difficult. Savvy manufacturers have designed some tools specifically to help those with ongoing needs and challenges.

Seam Guide

If you find stitching lines easing toward wobbly, get help from a magnetic seam guide that simply snaps into place on the machine’s throatplate. Abut your seam edges for perfectly placed stitching lines. Look for one with both curved and straight edges for versatility.

Available at your favorite retailer or on Amazon. (affiliate link).

Threading Needles

Perhaps one of the most challenging tasks as we age is threading needles—whether hand or machine. But, there’s help for that as well with a variety of types of needle threaders. Choose a sturdy wire looped device to fit easily through the eye of your hand needle or check out a table-top model.

Photo courtesy of NeedleThreaders.com.

Many modern sewing machines come with built-in needle threaders, so put pride aside and use it to effortlessly pull that strand through the eye. Or check out a slotted “Quick Threading” needle to avoid the threading process all together—just pull the thread into the slot by feel.

Slotted needle. Photo courtesy of Euronotions.


Make it Big

For help with threading manually or with a threader, invest in a magnifier that easily attaches to the machine front and has a flexible neck for positioning where you need the magnification.

Available at your favorite retailer or on Amazon. (affiliate link).

If you prefer not to use a threader, you can put a white card behind the eye of the needle for better visibility as you’re guiding the strand through the eye.

Lighting

Need a little extra light on your machine’s sewing surface? Check out a line of LED lights you can easily add for more lumens. Or invest in a task light for your sewing table—perhaps a clip-on to allow for moving it around easily to shed light where you need it.

Available at your favorite retailer or on Amazon. (affiliate link).

Measuring

Measuring can be tricky if things look a bit blurry, so look for a tape measure with darker markings or tactile markings that are slightly raised.

Available at your favorite retailer or on Amazon. (affiliate link).


Needle Guard

Consider adding a needle guard onto the presser foot area if low vision is an issue, as it will keep you from stitching up your fingers as you guide the fabric.

Available at your favorite retailer or on Amazon. (affiliate link).

Seam Ripper

It’s inevitable that sometimes things don’t go as planned, so helpful to have a seam ripper nearby. Two available features for extra help include large handled rippers for better grip for anyone who has arthritis or joint issues, and you can get a seam ripper with a light and a magnifier attached for better visibility.

Available at your favorite retailer or on Amazon. (affiliate link).


Available at your favorite retailer or on Amazon. (affiliate link).


Cutting

Comfortable cutting can be an issue, so look for ergonomically designed tools that help take the strain off joints. Cushioned handled scissors and those with spring-loaded blades are ideal to make cutting easier as they don’t have small finger holes. Rotary cutters with special shaping can also help make cutting more comfortable.

Available at your favorite retailer or on Amazon. (affiliate link).

Pins

Choose sewing pins with large, easy-grip heads for better handling.

Available at your favorite retailer or on Amazon. (affiliate link).

Final Thoughs

If memory is an issue, look for an iron that shuts itself off after a certain amount of time, just in case you forget to unplug it.

And, if tools sometimes seem to disappear, consider putting them around your neck—either individually or on a chatelaine, so you always know where to find them.

So, no matter what your sewing challenge is, there’s likely a solution to help resolve it.


~Linda Griepentrog is the owner of G Wiz Creative Services and she does writing, editing and designing for companies in the sewing, crafting and quilting industries. In addition, she escorts fabric shopping tours to Hong Kong. She lives at the Oregon Coast with her husband Keith, and three dogs, Yohnuh, Abby, and Lizzie. Contact her at .

November 1, 2024

Press Perfect

Even if your stitching is perfect and the fit divine, pressing is a step that can make the difference in whether a garment looks ho-hum or professionally finished. Proper pressing helps to set seams without puckers, create clean folds, remove wrinkles and construction imprints or ridges, and assure there are no shine or iron marks on the outside of the project. Understanding how to press different fabrics and garment features with the correct equipment and pressure is a critical step in sewing.

PRESSING OR IRONING? The key distinction between pressing and ironing lies in the technique. Ironing involves gliding the iron across the fabric to smooth out large areas quickly, while pressing requires you to lift the iron and press it down onto specific sections. This controlled movement minimizes stretching or shifting, which is especially important for garments that need precise shaping, like tailored suits, collars, or pleats. The pressing technique preserves the fabric’s integrity, especially on delicate or textured fabrics, where excessive friction could cause damage.

Pressing Different Types of Fabric

Different fabrics require specific pressing methods to maintain their quality and shape. Here are a few guidelines for common types of fabric:

  • PressingCotton: Cotton can withstand high heat and steam, making it relatively easy to press. Use a hot iron with steam, and press seams open on both sides to get crisp edges.
  • Linen: Linen is similar to cotton but tends to wrinkle easily. Pressing linen requires a high heat setting with plenty of steam, and it should be pressed slightly damp for best results.
  • Wool: Wool fabrics should be pressed with low to medium heat and a pressing cloth to avoid creating a sheen. Using steam is essential, but be sure to lift the iron instead of sliding it to avoid flattening the fibers.
  • Silk: Silk requires a delicate approach. Use a low heat setting and press on the wrong side with a pressing cloth to prevent damage and maintain its luster.
  • Synthetics: Synthetic fabrics like polyester should be pressed with a cool iron, as high heat can cause melting. Avoid steam on synthetics, as it can create water spots.

Although we might like to have every pressing tool on the market, the budget usually won’t allow that. Then it is necessary to decide what really is necessary. The “must haves” are a good iron; a padded ironing surface with a cotton cover; a ham; a seam roll; a wooden or bamboo pointer, and a variety of pressing cloths.

Iron

Is it time to replace your “old Faithful” iron? If it spouts and spews, a thorough cleaning may help, but it may be time to spring for a new iron.

Tip: Old irons can be used for craft projects and are great for removing old wallpaper.

  • Steam Power and Settings:  Steam is vital for removing wrinkles and pressing fabric efficiently. Look for an iron with adjustable steam settings to control moisture levels based on fabric type. High-wattage irons usually offer better steam production, which is especially helpful for thicker materials like denim or linen. A steam burst or vertical steaming feature is also beneficial for quick touch-ups on hanging garments.
  • Temperature Control: A good iron will have customizable temperature settings for different types of fabrics. Check for clear labeling of settings (e.g., silk, cotton, linen) or a digital display, as this helps you avoid damaging delicate fabrics. You’ll need the ability to set low temperatures for synthetic fabrics and high heat options for natural fibers.
  • Soleplate Material: The soleplate, or base, of the iron impacts how smoothly it glides over fabric. Stainless steel and ceramic soleplates are popular choices because they distribute heat evenly and resist sticking. Stainless steel is durable and scratch-resistant, while ceramic can offer a gentler glide. Avoid aluminum soleplates as they can scratch and snag over time.
  • Weight and Ergonomics: An iron that feels balanced and comfortable in hand reduces fatigue during extended pressing sessions. Lightweight irons are easier to maneuver, but a slightly heavier model may press more effectively with less effort.
  • Cord: Check that the cord length is adequate for where you want to locate the iron. It’s best to plug the iron directly into a wall outlet; however, if you choose to use an extension cord, make sure the cord is not only rated for the power requirements of the iron, but that the iron is the only thing plugged in to the extension cord. Note that the cord position is important as well, especially if you are left-handed.
  • Water: Check to be sure the water tank is easy to fill. If you decide on a gravity-feed tailor’s iron, do you have room for the tank? Research many brands before making your decision.

Ironing Surface

Your ironing surface can be a table, chest top, or a traditional ironing board. It should be padded and covered with a cotton cover. Note that 100% unbleached cotton or teflon are often the best choices. Note that teflon or other “silver” type covers can trap or reflect heat, potentially causing damage to delicate fabrics


DIY Ironing Board Cover

If you can’t find a cotton cover in the store, buy cotton ducking, drill cloth, or white denim.

  1. Trace the shape of the ironing surface onto the cloth.
  2. Add approximately 2 to 3 inches on all sides of the outline, then zigzag or serge over twine or small cording for a draw-string casing.
  3. Position the cover and pad on the surface, pull the cord tightly and secure it. The padding should have some “give” to it but should not be too spongy or soft.
  4. Note that cotton batting (Warm and Natural is often recommended) or even an old woolen blanket work well for the padding. Many seamstresses swear by Insul-Brite with has a foil layer to provide heat protection and reflection but you still should consider a layer of batting with this as well.

Seam Rolls

A seam roll or alternatives can be used for pressing seams either open or to the side. The seam is pressed flat first (melded) and is then positioned over the cylindrical shape. Because it is curved and the iron is flat, the only point of contact is at the stitching line so the seam allowances fall over the edges and are not mashed into the garment, thereby eliminating any ridges or impressions.

pressing

Press Cloths

A variety of press cloths are also needed.

  • A see-through cotton cloth is needed for fusing interfacings and general pressing. These can be purchased in the notions section of fabric stores, or you can make your own with 1/2 yard of batiste, broadcloth, or sheeting. That can make two good-sized press cloths. It’s a good idea to label one “fusing cloth” and the other “pressing cloth.” Then you don’t risk getting residue from fusible interfacings onto the right side of your garment. (Here is where the alphabet feature of a computerized sewing machine is handy.) Just make sure that your label won’t transfer with heat and/or steam.
  • A heavy cotton cloth, like drill or denim, is good for setting creases or when a lot of heat and steam are needed, as it will create a barrier preventing fabric damage.
  • A piece of wool is good to use as a press cloth on woolen fabrics.
  • A scrap of the fabric in use can also be utilized.

Point Presser

Until you can get a point presser/clapper or similar tool, a bamboo or wooden point turner will help you press points. Insert it into the corner or point of a collar, lapel, jacket edge, etc., and press the seam open with the tip of the iron. Be careful not to press the edges of the seam allowances to prevent imprints. It is easier to press the seams open before trimming.

Pressing is more than a finishing touch—it’s a skill that enhances the overall quality and durability of garments. With the right techniques and tools, pressing elevates homemade pieces to a professional standard, ensuring a crisp, tailored look that lasts.

Iron Tips

Cleaning an iron soleplate

  • Unplug an iron before refilling the water tank.
  • Don’t use water that has comes from a home water-softening system as the added minerals could harm the iron and possibly even your garment.
  • Drain the water from the iron when you’re finished using it and while the iron is still hot to prevent pitting of the soleplate.
  • Tap water leaves behind mineral deposits that can clog the iron’s steam and spray mechanisms. Some steam irons have a self-cleaning function that blows out sediment at the touch of a button. If your iron has this feature, use it after every ironing session. Otherwise, use a commercial steam iron cleaner or flush the tank with a 50-50 solution of white vinegar and water at the first sign of sediment. If you find that your iron needs frequent cleaning, try using distilled water instead of tap water.
  • Clean any buildup off of the soleplate with a sponge and a soleplate cleaner. A mild detergent with baking soda and water also work. Make sure to keep any cleaner out of the steam vents and never immerse your iron in water.

See our other articles on Pressing & Ironing

  • Pressing Matters: Choosing the Right Iron
  • Ironing Board Basics
  • Best Pressed Without an Iron


October 25, 2024

Tantalizing Trapunto

Trapunto [ truh–poon-toh ] is a funny sounding word that is an Italian term meaning “quilting.”

Trapunto

It’s used to describe not just ordinary quilting, but a design that stands above the rest of the quilt surface in high relief. It can be used throughout a piece, or as a focal point like on the yoke of a tote or centered on a pillow. Trapunto is also a perfect accent on garments—like along a jacket front band, on a sleeve hem, or gracing a front or back yoke.

Center a trapunto motif in a pillow block.

There are multiple ways to achieve this raised look—one method involves using an embroidery machine, another involves free-motion or handwork, and yet a third involves stuffing by hand.

Trapunto can be done with tone-on-tone stitching, or threads can contrast for emphasis. Or mix it up within a project for added interest.

Combine tone-on-tone stitching with contrast stitching.

Embroidery Machine Trapunto

  • Choose an embroidery design specifically digitized for trapunto, available from several different design companies. Hoop up your stabilizer, then a layer of thick batting or foam, and stitch the design outline. The machine will tell you when to stop stitching.
  • Remove the hoop from the machine, but don’t un-hoop the design, then trim the batting very close to the design stitching using small sharp scissors or duckbill scissors.
Trim closely around the stitched design.
  • Position a layer of fabric over the outlined motif and continue stitching the full design for the next step in the embroidery process.
  • After the stitching is complete, remove the stabilizer and finish your project.  If it’s a quilt, add another layer of lightweight batting and backing.

The motif will rise above the remaining design area because of the added batting to give it more dimension than the surrounding quilting area.

Free-motion/Non-embroidery Machine Trapunto

  • Trace the desired design onto the right side of your project fabric using a removable marker or chalk.
  • Add a layer of high-loft batting or foam below the design area and stitch around the shape outline. Some people like to use water-soluble thread for this purpose so it can be dissolved later.
  • Once you’ve outlined the shape, turn the fabric over and carefully trim the batting very close to the stitching line.
  • Place another layer of lighter weight batting and backing under the entire project, and begin your free-motion quilting, stitching tightly outside the outlined motif. The tighter the quilting stitches, the more the design motif stands out.
  • Finish the project with binding, or incorporate it into a bag, pillow, garment, etc.
Tightly quilt around the stitched motifs for emphasis.

Note: This technique can be done with hand-stitching instead of machine stitching, if desired.

Stuffed Trapunto

  • The initial design outline can be done using hand or machine stitching, or even an embroidery machine. Instead of layering the fabric with batting, simply stack two layers of fabric together before stitching. A sheer fabric can be used for the upper layer.
  • Once all the design areas are outlined, use a trapunto needle threaded with yarn to create a tiny hole in the underside of the backing fabric only. Stuff yarn into the design area to the desired fullness. You can also use a small crochet hook to stuff fiberfill into the outlined design area.
  • To create shadow trapunto, use a contrasting yarn color for elevating the design area. Fill the area firmly, but not too stiffly as overstuffing can distort the design shape.
  • To finish a stuffed project, add a layer of batting and backing to the underside to hide the holes created during the stuffing process.
Stuff the design area with a contrasting color to create shadow trapunto.

Print Options

Instead of creating trapunto with a stitched design motif, substitute a fabric print and create a raised shape using the outline of the print motif. This works great for kid’s quilts or garments—think of a stuffed whale or a giraffe.

Photos courtesy of Bernina.


Cutting it Close

To trim batting very close to the design stitching, use duckbill or appliqué scissors. They can cut close to the stitching without damaging it.

Duckbill scissors available from your preferred retailer or on Amazon. Note we may receive a small commission if you purchase from this link.

~Linda Griepentrog is the owner of G Wiz Creative Services and she does writing, editing and designing for companies in the sewing, crafting and quilting industries. In addition, she escorts fabric shopping tours to Hong Kong. She lives at the Oregon Coast with her husband Keith, and three dogs, Yohnuh, Abby, and Lizzie. Contact her at .

  • « Previous Page
  • 1
  • …
  • 3
  • 4
  • 5
  • 6
  • 7
  • …
  • 82
  • Next Page »

Become a Member

Join the only national organization dedicated to Advancing Sewing as an Art and Life Skill.

Join Now button

Blog Article Categories

  • ASG Conference
  • Chapter Stories
  • Embroidery
  • Fitting
  • Learn to Sew
  • National Sewing Month
  • Products, Books, & Patterns
  • Projects
  • Quilting
  • Sewing
  • Sewing Techniques
  • Sewing Tips
  • Sewing Tours
  • Videos
  • Disclaimer
  • Privacy Policy

American Sewing Guild
National Headquarters
9660 Hillcroft, Suite 230
Houston TX 77096
713-729-3000 | 713-721-9230 Fax
www.ASG.org

ASG wordcloud - education, conference, discounts, videos, special offers, tours and more

Copyright © 1998–2025 · American Sewing Guild · All Rights Reserved