American Sewing Guild (ASG)

Visit our blog Visit the ASG Facebook page Visit ASG on Pinterest Visit ASG's YouTube channel Visit ASG on Instagram
  • Home
  • Join ASG
    • Join Online
    • Chapter Locations
    • Member Benefits
    • Member Brochure
    • Join by Mail
  • Conference & Education
  • Resources
    • Contests & Awards
    • Giving Back
    • Hall of Fame
    • Links
    • Travel and Tours
    • Measurement Chart
  • Shop
    • ASG Store
    • Chapter Products
    • Video Resources
  • Blog
  • About
    • About Us
    • Donate to ASG
    • ASG Sensitivity Statement
    • FAQ’s
    • Start a Chapter
  • Contact
  • Member Login
    • Login First!
    • Members Only
    • Leadership Only
    • Website FAQ’s
    • Logout
  •  

November 1, 2024

Press Perfect

Even if your stitching is perfect and the fit divine, pressing is a step that can make the difference in whether a garment looks ho-hum or professionally finished. Proper pressing helps to set seams without puckers, create clean folds, remove wrinkles and construction imprints or ridges, and assure there are no shine or iron marks on the outside of the project. Understanding how to press different fabrics and garment features with the correct equipment and pressure is a critical step in sewing.

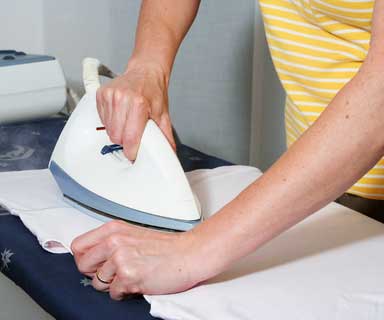
PRESSING OR IRONING? The key distinction between pressing and ironing lies in the technique. Ironing involves gliding the iron across the fabric to smooth out large areas quickly, while pressing requires you to lift the iron and press it down onto specific sections. This controlled movement minimizes stretching or shifting, which is especially important for garments that need precise shaping, like tailored suits, collars, or pleats. The pressing technique preserves the fabric’s integrity, especially on delicate or textured fabrics, where excessive friction could cause damage.

Pressing Different Types of Fabric

Different fabrics require specific pressing methods to maintain their quality and shape. Here are a few guidelines for common types of fabric:

  • PressingCotton: Cotton can withstand high heat and steam, making it relatively easy to press. Use a hot iron with steam, and press seams open on both sides to get crisp edges.
  • Linen: Linen is similar to cotton but tends to wrinkle easily. Pressing linen requires a high heat setting with plenty of steam, and it should be pressed slightly damp for best results.
  • Wool: Wool fabrics should be pressed with low to medium heat and a pressing cloth to avoid creating a sheen. Using steam is essential, but be sure to lift the iron instead of sliding it to avoid flattening the fibers.
  • Silk: Silk requires a delicate approach. Use a low heat setting and press on the wrong side with a pressing cloth to prevent damage and maintain its luster.
  • Synthetics: Synthetic fabrics like polyester should be pressed with a cool iron, as high heat can cause melting. Avoid steam on synthetics, as it can create water spots.

Although we might like to have every pressing tool on the market, the budget usually won’t allow that. Then it is necessary to decide what really is necessary. The “must haves” are a good iron; a padded ironing surface with a cotton cover; a ham; a seam roll; a wooden or bamboo pointer, and a variety of pressing cloths.

Iron

Is it time to replace your “old Faithful” iron? If it spouts and spews, a thorough cleaning may help, but it may be time to spring for a new iron.

Tip: Old irons can be used for craft projects and are great for removing old wallpaper.

  • Steam Power and Settings:  Steam is vital for removing wrinkles and pressing fabric efficiently. Look for an iron with adjustable steam settings to control moisture levels based on fabric type. High-wattage irons usually offer better steam production, which is especially helpful for thicker materials like denim or linen. A steam burst or vertical steaming feature is also beneficial for quick touch-ups on hanging garments.
  • Temperature Control: A good iron will have customizable temperature settings for different types of fabrics. Check for clear labeling of settings (e.g., silk, cotton, linen) or a digital display, as this helps you avoid damaging delicate fabrics. You’ll need the ability to set low temperatures for synthetic fabrics and high heat options for natural fibers.
  • Soleplate Material: The soleplate, or base, of the iron impacts how smoothly it glides over fabric. Stainless steel and ceramic soleplates are popular choices because they distribute heat evenly and resist sticking. Stainless steel is durable and scratch-resistant, while ceramic can offer a gentler glide. Avoid aluminum soleplates as they can scratch and snag over time.
  • Weight and Ergonomics: An iron that feels balanced and comfortable in hand reduces fatigue during extended pressing sessions. Lightweight irons are easier to maneuver, but a slightly heavier model may press more effectively with less effort.
  • Cord: Check that the cord length is adequate for where you want to locate the iron. It’s best to plug the iron directly into a wall outlet; however, if you choose to use an extension cord, make sure the cord is not only rated for the power requirements of the iron, but that the iron is the only thing plugged in to the extension cord. Note that the cord position is important as well, especially if you are left-handed.
  • Water: Check to be sure the water tank is easy to fill. If you decide on a gravity-feed tailor’s iron, do you have room for the tank? Research many brands before making your decision.

Ironing Surface

Your ironing surface can be a table, chest top, or a traditional ironing board. It should be padded and covered with a cotton cover. Note that 100% unbleached cotton or teflon are often the best choices. Note that teflon or other “silver” type covers can trap or reflect heat, potentially causing damage to delicate fabrics


DIY Ironing Board Cover

If you can’t find a cotton cover in the store, buy cotton ducking, drill cloth, or white denim.

  1. Trace the shape of the ironing surface onto the cloth.
  2. Add approximately 2 to 3 inches on all sides of the outline, then zigzag or serge over twine or small cording for a draw-string casing.
  3. Position the cover and pad on the surface, pull the cord tightly and secure it. The padding should have some “give” to it but should not be too spongy or soft.
  4. Note that cotton batting (Warm and Natural is often recommended) or even an old woolen blanket work well for the padding. Many seamstresses swear by Insul-Brite with has a foil layer to provide heat protection and reflection but you still should consider a layer of batting with this as well.

Seam Rolls

A seam roll or alternatives can be used for pressing seams either open or to the side. The seam is pressed flat first (melded) and is then positioned over the cylindrical shape. Because it is curved and the iron is flat, the only point of contact is at the stitching line so the seam allowances fall over the edges and are not mashed into the garment, thereby eliminating any ridges or impressions.

pressing

Press Cloths

A variety of press cloths are also needed.

  • A see-through cotton cloth is needed for fusing interfacings and general pressing. These can be purchased in the notions section of fabric stores, or you can make your own with 1/2 yard of batiste, broadcloth, or sheeting. That can make two good-sized press cloths. It’s a good idea to label one “fusing cloth” and the other “pressing cloth.” Then you don’t risk getting residue from fusible interfacings onto the right side of your garment. (Here is where the alphabet feature of a computerized sewing machine is handy.) Just make sure that your label won’t transfer with heat and/or steam.
  • A heavy cotton cloth, like drill or denim, is good for setting creases or when a lot of heat and steam are needed, as it will create a barrier preventing fabric damage.
  • A piece of wool is good to use as a press cloth on woolen fabrics.
  • A scrap of the fabric in use can also be utilized.

Point Presser

Until you can get a point presser/clapper or similar tool, a bamboo or wooden point turner will help you press points. Insert it into the corner or point of a collar, lapel, jacket edge, etc., and press the seam open with the tip of the iron. Be careful not to press the edges of the seam allowances to prevent imprints. It is easier to press the seams open before trimming.

Pressing is more than a finishing touch—it’s a skill that enhances the overall quality and durability of garments. With the right techniques and tools, pressing elevates homemade pieces to a professional standard, ensuring a crisp, tailored look that lasts.

Iron Tips

Cleaning an iron soleplate

  • Unplug an iron before refilling the water tank.
  • Don’t use water that has comes from a home water-softening system as the added minerals could harm the iron and possibly even your garment.
  • Drain the water from the iron when you’re finished using it and while the iron is still hot to prevent pitting of the soleplate.
  • Tap water leaves behind mineral deposits that can clog the iron’s steam and spray mechanisms. Some steam irons have a self-cleaning function that blows out sediment at the touch of a button. If your iron has this feature, use it after every ironing session. Otherwise, use a commercial steam iron cleaner or flush the tank with a 50-50 solution of white vinegar and water at the first sign of sediment. If you find that your iron needs frequent cleaning, try using distilled water instead of tap water.
  • Clean any buildup off of the soleplate with a sponge and a soleplate cleaner. A mild detergent with baking soda and water also work. Make sure to keep any cleaner out of the steam vents and never immerse your iron in water.

See our other articles on Pressing & Ironing

  • Pressing Matters: Choosing the Right Iron
  • Ironing Board Basics
  • Best Pressed Without an Iron


October 25, 2024

Tantalizing Trapunto

Trapunto [ truh–poon-toh ] is a funny sounding word that is an Italian term meaning “quilting.”

Trapunto

It’s used to describe not just ordinary quilting, but a design that stands above the rest of the quilt surface in high relief. It can be used throughout a piece, or as a focal point like on the yoke of a tote or centered on a pillow. Trapunto is also a perfect accent on garments—like along a jacket front band, on a sleeve hem, or gracing a front or back yoke.

Center a trapunto motif in a pillow block.

There are multiple ways to achieve this raised look—one method involves using an embroidery machine, another involves free-motion or handwork, and yet a third involves stuffing by hand.

Trapunto can be done with tone-on-tone stitching, or threads can contrast for emphasis. Or mix it up within a project for added interest.

Combine tone-on-tone stitching with contrast stitching.

Embroidery Machine Trapunto

  • Choose an embroidery design specifically digitized for trapunto, available from several different design companies. Hoop up your stabilizer, then a layer of thick batting or foam, and stitch the design outline. The machine will tell you when to stop stitching.
  • Remove the hoop from the machine, but don’t un-hoop the design, then trim the batting very close to the design stitching using small sharp scissors or duckbill scissors.
Trim closely around the stitched design.
  • Position a layer of fabric over the outlined motif and continue stitching the full design for the next step in the embroidery process.
  • After the stitching is complete, remove the stabilizer and finish your project.  If it’s a quilt, add another layer of lightweight batting and backing.

The motif will rise above the remaining design area because of the added batting to give it more dimension than the surrounding quilting area.

Free-motion/Non-embroidery Machine Trapunto

  • Trace the desired design onto the right side of your project fabric using a removable marker or chalk.
  • Add a layer of high-loft batting or foam below the design area and stitch around the shape outline. Some people like to use water-soluble thread for this purpose so it can be dissolved later.
  • Once you’ve outlined the shape, turn the fabric over and carefully trim the batting very close to the stitching line.
  • Place another layer of lighter weight batting and backing under the entire project, and begin your free-motion quilting, stitching tightly outside the outlined motif. The tighter the quilting stitches, the more the design motif stands out.
  • Finish the project with binding, or incorporate it into a bag, pillow, garment, etc.
Tightly quilt around the stitched motifs for emphasis.

Note: This technique can be done with hand-stitching instead of machine stitching, if desired.

Stuffed Trapunto

  • The initial design outline can be done using hand or machine stitching, or even an embroidery machine. Instead of layering the fabric with batting, simply stack two layers of fabric together before stitching. A sheer fabric can be used for the upper layer.
  • Once all the design areas are outlined, use a trapunto needle threaded with yarn to create a tiny hole in the underside of the backing fabric only. Stuff yarn into the design area to the desired fullness. You can also use a small crochet hook to stuff fiberfill into the outlined design area.
  • To create shadow trapunto, use a contrasting yarn color for elevating the design area. Fill the area firmly, but not too stiffly as overstuffing can distort the design shape.
  • To finish a stuffed project, add a layer of batting and backing to the underside to hide the holes created during the stuffing process.
Stuff the design area with a contrasting color to create shadow trapunto.

Print Options

Instead of creating trapunto with a stitched design motif, substitute a fabric print and create a raised shape using the outline of the print motif. This works great for kid’s quilts or garments—think of a stuffed whale or a giraffe.

Photos courtesy of Bernina.


Cutting it Close

To trim batting very close to the design stitching, use duckbill or appliqué scissors. They can cut close to the stitching without damaging it.

Duckbill scissors available from your preferred retailer or on Amazon. Note we may receive a small commission if you purchase from this link.

~Linda Griepentrog is the owner of G Wiz Creative Services and she does writing, editing and designing for companies in the sewing, crafting and quilting industries. In addition, she escorts fabric shopping tours to Hong Kong. She lives at the Oregon Coast with her husband Keith, and three dogs, Yohnuh, Abby, and Lizzie. Contact her at .

October 18, 2024

Sewing Tips: Fleece

Fleece is a general term for a soft, insulating fabric that is usually made from polyester but can be made from a variety of materials, including polyester, bamboo, cotton, and hemp. Fleece is usually lightweight, soft and cuddly and its fibers work to trap air which makes it effective in retaining body heat. Fleece is also hydrophobic, meaning its threads don’t absorb water.

Exploring Different Types of Fleece Fabrics

Fleece fabrics come in various types, each with distinct properties, making them suitable for a range of applications. Each type of fleece offers unique advantages, from lightweight comfort to heavy-duty insulation, catering to different weather conditions and fashion preferences. Here’s a breakdown of the most common varieties:

  • Polyester Fleece: A general term for a soft, insulating fabric that can be made from a variety of materials, including polyester, bamboo, cotton, and hemp. The fabric is brushed during manufacturing to give the fibers more volume and make the material soft and fuzzy.
  • Polar Fleece: This is the most popular type, known for being lightweight, soft, and warm. Polar fleece is quick-drying and moisture-wicking, making it ideal for outdoor apparel and blankets. It ranges in thickness, with 100-weight (lightweight), 200-weight (medium), and 300-weight (heavy) varieties. Polar fleece was originally created as a synthetic alternative to wool chinchilla. It has a two-sided pile and is often made from polyester or a blend (sometimes made from recycled plastic bottles). Polar fleece comes in different weights and in both anti-pill and non anti-pill varieties with the anti-pill option being a bit more expensive, although longer lasting.
  • Microfleece: Microfleece is a thinner, more breathable version of fleece. It’s soft to the touch and  and its moisture-wicking properties make it popular in activewear. Microfleece has a clear right and wrong side. It’s the softest of the fleece options and is often used for children’s clothes or as a light layer under a jacket. Although like other fleeces, it doesn’t fray, the edges can be stretched out of shape so it’s best to finish the edges.
  • French Terry Fleece: This fabric is a blend of cotton and synthetic fibers with a smooth outer surface and looped interior. It is unbrushed on both sides so it lacks the usual fluffy nap of other fleeces. It offers moderate warmth and is breathable, making it popular for casual wear like hoodies and sweatpants.
  • Sherpa Fleece: Sherpa fleece mimics the texture of wool with its fluffy, high-pile surface. It’s often used as a lining for jackets or blankets and is prized for its cozy warmth.
  • Bonded Fleece: Bonded fleece consists of two layers of fleece fused together, sometimes with a waterproof or windproof membrane between them. It’s durable and provides excellent insulation, often used in performance outerwear.

Pattern Choices

Misses Cardigan | Simplicity Pattern #S8742

A pattern that is simple and has few design features is your best option.

  • Select patterns with 1/4″ seam allowances when possible; otherwise for conventional sewing, remove the excess 3/8″ before or after sewing.
  • Loose fitting styles are a good choice with as few seams as possible to eliminate bulk.
  • Zippers or buttons with toggles or loops are better choices for closures than standard buttons and buttonhole.
  • If possible, eliminate or replace the underside of collars and cuffs or use a cotton or cotton/polyester fabric instead.
  • Use a lining fabric for the back or underside of pockets.

Sewing with Fleece

Fleece fabrics are warm, soft, and versatile, making them popular for clothing, blankets, and accessories. However, sewing with fleece requires some special considerations to achieve neat, professional results.

Tools and Materials

  • Needles: Use a size 12/80 or 14/90 or similar universal or ballpoint needle to prevent skipped stitches.
  • Thread: Polyester thread for both the top and bobbin works best due to its stretch and durability. Avoid cotton thread as it can break easily.
  • Pins or Clips: Traditional pins can leave holes so you can try using fabric clips, ballpoint pins, quilter’s” pins, or long (1 1/2″) glass-head pins. Remember to use lots of them as fleece has a tendency to shift.
  • Walking Foot or Teflon Foot: These help feed the thick fleece smoothly through the machine without bunching.

Cutting the Fabric

  • Use sharp scissors or a rotary cutter to avoid snagging or fraying.
  • Lay the fleece flat on a large surface since it tends to shift.
  • Mark your fabric using chalk or fabric markers since fleece doesn’t hold creases.

Adjusting Your Machine Settings

  • On a regular sewing machine, use a straight stitch and set a longer stitch length (8-10 stitches per inch) to prevent puckering. Do not use a stretch stitch.
  • Reduce the tension slightly if the fabric stretches or pulls as you sew.
  • On a serger, choose a wide 3- or 4-thread stitch. A 4-thread stitch will help to compact the fleece, resulting in less bulk. Set your serger at a 3mm length

Sewing Techniques for Fleece

  • Seam Allowance: Use a 1/2-inch or 5/8-inch seam allowance for better durability since fleece is bulky.
  • Edge Finishing: Fleece doesn’t fray, so serging or finishing edges is optional, but a zigzag stitch can prevent stretching.
  • Seam Flattening: Use a cool iron with light pressure or finger-press seams since fleece can melt under heat.

Common Challenges and Tips

  • Prevent Stretching: Avoid pulling the fabric through the machine. Let the feed dogs guide it naturally.
  • Avoiding Lint Build-up: Fleece creates a lot of lint, so clean your sewing machine regularly.
  • Handling Thickness: If your project involves multiple layers of fleece, sew slowly and use a walking foot for smooth stitching.

How to Care for Fleece Fabrics

Fleece fabrics are known for being soft, warm, and low-maintenance, but proper care is essential to maintain their texture and durability. Follow these tips to keep your fleece items looking fresh and cozy for longer.

Washing Fleece

  • Use Cold Water: Wash fleece in cold water to prevent shrinking and preserve its softness.
  • Mild Detergent: Opt for a gentle, liquid detergent. Avoid bleach or fabric softeners, as they can damage the fibers and reduce the fabric’s ability to wick moisture.
  • Wash Separately: Fleece tends to attract lint, so wash it separately or with similar soft fabrics.

Drying Fleece

  • Air-Dry or Tumble-Dry on Low: High heat can cause fleece to melt or lose its fluffiness. If using a dryer, select a low or no-heat setting.
  • Avoid Overdrying: Remove fleece from the dryer promptly to prevent static buildup and wrinkles.

Avoiding Pills

  • Wash Inside-Out: Turning fleece inside-out minimizes friction, helping to prevent pilling.
  • Use a Fabric Shaver: If pilling occurs, a fabric shaver or lint roller can easily remove the pills.

Storage Tips

  • Fold, Don’t Hang: Hanging fleece can stretch it out over time. Instead, fold it neatly and store in a dry place.
  • Keep Away from Heat: Avoid exposing fleece to high temperatures or direct sunlight for long periods to maintain its color and softness.


October 11, 2024

Q&A: Needle Notes

We’ve received a lot of needle-related questions lately, so let’s get some answers.

Q: My sewing machine has a needle-up/needle-down function. Why do I need that?

View needle-up/needle-down configuration.

A: The needle positioning option eliminates the need to turn the machine hand-wheel manually to get the needle where you want it to be—either above the fabric level, or piercing the fabric under the presser foot.

The needle-down position is a favorite of quilters allowing an easier time with sewing curves and pivoting at corners. With the needle down, it’s easy to lift the presser foot to adjust the position of the fabric as the needle keeps the fabric from moving or sliding while you’re making adjustments. It’s also helpful if you’re dealing with large, bulky items like quilts, as again it holds the fabric in place for you.

The needle-up position is handy for beginning and end a seam so you’re sure the needle is at its highest point and thread take-up level is as high as it will go, signaling that the stitch cycle is complete. It also allows you to use a thread cutter if your machine has one, without interference from the needle.

Many machines with the needle-up/needle-down function allow you to tap the foot pedal once to change the needle placement. For example, if you have the machine set to needle down and you want it up, simply tap the foot pedal and it will raise.

This function is not a necessity, as you can always move the hand-wheel to adjust the needle position, but it’s a handy feature if you do have it.


Q: What is a titanium needle and where should I use it?

Titanium needles
Available at your preferred retailer or on Amazon. (affiliate link)

A: A titanium needle shaft is coated with titanium nitride that resists adhesive found on embroidery stabilizers and it improves needle wear by making the needle about three times harder than the standard chrome versions. That increased strength makes these specialty needles ideal for sewing heavier fabrics like denim, as well as for stitching high-density embroidery designs. In addition to being stronger, a titanium needle also helps minimize thread breakage by deflecting the heat built up with fast sewing speeds (think embroidery, but also speedy sewing of seams). Titanium-coated needles last from five to eight times longer than non-coated needles. These needles are available from several companies and in several styles of needle points and sizes; some brands refer to them simply as “gold needles” due to their coloring.


Q: How often should I change my sewing machine needle?

A: This is probably the most frequently asked sewing question ever! Answers vary depending on who you ask, but the constant among them is that if the machine isn’t stitching properly, change the needle. When you think about how many times the needle penetrates the fabric you’re sewing a single project, it’s easy for the tip to become dull (especially when sewing on synthetic fibers), or damaged (especially if you sew over pins). If your machine stitches louder than normal, it could be a dull needle. If it doesn’t form stitches properly, it could be a damaged needle.

Damaged or bent needles can not only damage your machine, but also make tears or snags in your fabric. Obviously, if a needle breaks, you’ll need to replace it, but don’t necessarily wait for that travesty, as your fabric could be damaged by then.

Some experts recommend changing your needle with every sewing project just to be sure, or for every five to six sewing hours. If you don’t subscribe to that theory, then keep a watchful eye on the stitch quality and the sound of the stitching.

As important as it is to change the needle regularly, it’s equally important to choose the right type of needle for the fabric you’re sewing and the function you’re doing. Some needles are keyed to fabrics—like Jersey, Stretch and Denim options, while others are keyed to the function, like Embroidery, Quilting and Appliqué.


Q: Can my machine use a twin needle?

Twin needles available at your preferred retailer or on Amazon. (affiliate link)

A: With the exception of a straight-stitch-only machine, most can use a twin needle. If your machine has a zigzag needle hole, yes you can. But, double check your owner’s manual to be sure. Twin needles come in various types and width spacing, and some machines may have limitations of one or both of those factors.

Twin needles are used to sew two rows of stitching exactly parallel to each other, and they couple two separate needles onto a single shank that’s inserted into the machine as if it were one needle. The bobbin picks up both threads and forms a zigzag on the underside of the stitching. They can be used with straight or limited-width decorative stitches.


~Linda Griepentrog is the owner of G Wiz Creative Services and she does writing, editing and designing for companies in the sewing, crafting and quilting industries. In addition, she escorts fabric shopping tours to Hong Kong. She lives at the Oregon Coast with her husband Keith, and three dogs, Yohnuh, Abby, and Lizzie. Contact her at .

October 4, 2024

Pillow Talk

A throw pillow is a perfect accent for any room, and multiples make it even better! Pillows are an easy project for beginner sewers and success is almost assured.

throw pillows on a sofa

Shapes and sizes

Pillows can be almost any shape or size, from squares and rectangles to round or oblong. Common square sizes are 12”, 14”, 16”, 18”, 20” and 24”, and there are forms that fit inside these size options. Forms also come in rectangular sizes, round and roll sizes. Check out the offerings at your local fabric store or online source.

bed pillows

Inside options

Pillows can be filled with pre-made forms that are stuffed with foam or polyester fiberfill, or even your fabric scraps. Or, if you prefer, you can stuff pillows yourself using either of those materials, or with your collection of fabric scraps. Make your own form or simply stuff the finished pillow with loose fiber.

When choosing a pre-made form, purchase measure the exact size of your finished pillow and go an inch or two larger on your form to get a firm look to the pillow. Or, for a softer look, purchase the exact size of the finished pillow.

Close encounters

Pillows can be made with or without back closures, depending on your preference. Having a closure of some sort allows for the pillow covering to be easily washed or cleaned, depending on the fabric. Closure options include a zippered back, envelope back, hook-and-loop tape or snap-back opening. An envelope back is the easiest option for beginners, as it simply has two overlapping finished edges.

If the pillow has no closure and cleaning is needed, it requires opening the seam and removing the stuffing, then reassembling after cleaning.

On the edge

Tassels
Tassels available on Amazon. (affiliate link)

Some pillows offer decorative edge finishes like piping or novelty fringe trim. Both can be purchased ready-made and applied during construction or after the pillow covering is complete. Tassels may also be added to the corners for extra embellishment.

Fabric options

Pillows can get a lot of wear and tear, depending on where they’re used, so select sturdy fabrics. Home décor-weight fabrics are ideal, with tightly woven surfaces to avoid snagging. Prints or solids are both good options, depending on the decorating scheme, and nothing says that the pillow front and back have to be the same fabric—you can mix and match. This is especially helpful when purchasing more expensive decorator fabrics.

Simple pillow construction

  1. Cut the pillow front and back from the selected fabric(s), allowing 1” extra beyond the finished size for seam allowances. If the fabric has nap, be sure to mark the top on both pieces.
  2. Place the pillow front and back right sides together and pin the edges to hold them in place for stitching. Mark a 6” opening along one edge to leave open for turning and stuffing. The opening should be in the center of one side to avoid the corners. If you’re using a pre-made pillow form, it may be necessary to leave a larger opening.
  3. Beginning at one end of the opening, sew around the pillow shape using a ½” seam allowance and backstitching at each end of the seam. Pivot at each corner, taking two stitches diagonally across the corner.
  4. For bulky fabrics, trim the seam allowances diagonally at the corners.
  5. Reach into the opening and turn the pillow cover right side out. Gently poke out the corners to square them. Lightly press the edges.
  6. Insert the pillow form or stuffing through the opening. If the corners don’t look square, add some additional stuffing in those areas to fill them out before closing the seam.
  7. Hand-stitch the opening closed, tucking in the raw edges as you sew.

Envelope backing

If you prefer to have an overlapping opening on the pillow back, cut two backing pieces the width of the pillow by one-half the size, plus 5”. For example, a 16” finished square pillow requires two backing pieces 16 1/2” x 13”.

  • Hem one long edge of each pillow back piece with a double ½” turn-under. These will be the overlapping edges of the pillow back.
  • Overlap the hemmed edges so they create the same size piece as the pillow front. Baste the overlap side raw edges together.
  • Construct the pillow as detailed above and insert the form through the overlap area. If you want to add snaps or buttons to the closure, hand-stitch them in place at the over- and underlap edges.

Members can learn more about pillows in the article, Custom Decorative Pillows, available in the members-only area.


~Linda Griepentrog is the owner of G Wiz Creative Services and she does writing, editing and designing for companies in the sewing, crafting and quilting industries. In addition, she escorts fabric shopping tours to Hong Kong. She lives at the Oregon Coast with her husband Keith, and three dogs, Yohnuh, Abby, and Lizzie. Contact her at .

  • « Previous Page
  • 1
  • …
  • 4
  • 5
  • 6
  • 7
  • 8
  • …
  • 82
  • Next Page »

Become a Member

Join the only national organization dedicated to Advancing Sewing as an Art and Life Skill.

Join Now button

Blog Article Categories

  • ASG Conference
  • Chapter Stories
  • Embroidery
  • Fitting
  • Learn to Sew
  • National Sewing Month
  • Products, Books, & Patterns
  • Projects
  • Quilting
  • Sewing
  • Sewing Techniques
  • Sewing Tips
  • Sewing Tours
  • Videos
  • Disclaimer
  • Privacy Policy

American Sewing Guild
National Headquarters
9660 Hillcroft, Suite 230
Houston TX 77096
713-729-3000 | 713-721-9230 Fax
www.ASG.org

ASG wordcloud - education, conference, discounts, videos, special offers, tours and more

Copyright © 1998–2025 · American Sewing Guild · All Rights Reserved