


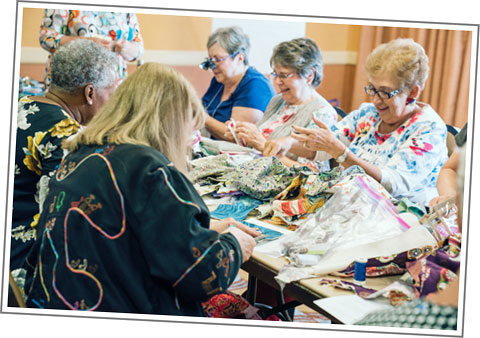
Enjoy the video from the One if by Land, Two if by Sea Fashion Show from the 2019 ASG Conference in Boston. The show was emceed by Nick Coman from Dragonfly Dyeworks.
Mannequins Throughout the Decades
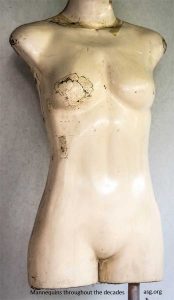 When mannequins were first introduced to storefront windows around the 1850’s in France, they were heavy beasts made of iron, wood and wax. The latter, as you could imagine, melted and the forms held stiff poses and were easily broken. In America, the stiffness relaxed in the early 1900s but the Women’s Christian Temperance Union’s view of them did not. The group took offense as apparently even these less-than-lifelike body replicas were too revealing when used to sell corsets. Some cities even passed laws that required store windows to be covered while mannequins were dressed and undressed.
New Materials
In the 1930s, the faux bodies became lighter as thin material enveloped metal skeletons and limbs were easier to reposition. Earlier, and for decades to come, mannequins reflected bodies and faces of recognizable celebrities. Plastic bodies were introduced during WWII but to ill effect. A chemical reaction from display windows turned mannequins green. During those war years, the mannequins were also hit by rationing; shorter and slimmer mannequins were the norm, but only for a few years. Once troops returned, plumped-up, voluptuous mannequins welcomed the soldiers home.
Soon thereafter, nipples became a no-no and those anatomically accurate nubs were sanded off of older mannequins. They become acceptable again in the 1960s, which also brought us silhouettes resembling Marilyn Monroe and her often unachievable hourglass shape. Barbie, with her much narrower waist, debuted at the end of the decade. Later, a 1990’s study revealed that mannequins from the ‘60s had smaller arm, hip, and thigh circumferences than their pre-WWII counterparts.
Changing Body Styles
Sturdier fiberglass produced lighter mannequins in the ‘70s and waif-like Twiggy influenced the shape. Celebrity bodies and faces were replaced with mannequins that sprouted heads with expressionless faces. Jane Fonda and the aerobics era arrived in the ‘80s and influenced mannequins with more toned body shapes. As that decade came to a close the movie Mannequin hit theaters.
Sporty gave way to waif again, or rather the sickly stick-thin figures of the 1990s and model Kate Moss. Even so, plus-sized mannequins emerged. Characteristically, they weren’t accurate representations of women’s bodies but amplified proportions of existing mannequins. The century turned and manufacturers churned out ubiquitous forms that, like the Grinch’s heart, were two sizes too small. The average American female body was size 14, according to the Centers for Disease Control. Mannequins were sized 8-10.
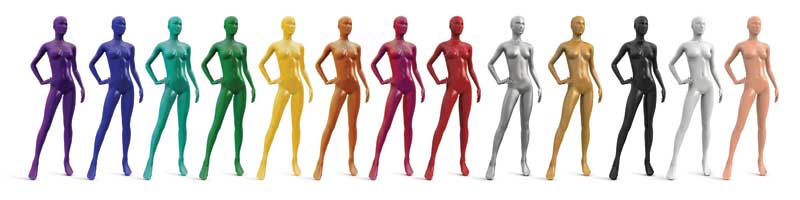
The winds of change blew and today’s mannequins are more diverse.
Curvier plus-sized shapes. Mannequins in wheelchairs. With freckles. Wearing hijabs. A better reflection of women in today’s world. It also has become easier to create new mannequins. Traditional manufactured forms are several hundred dollars each making it costly to replace an army of store mannequins. Today’s 3-D scanning and printing can produce different – and realistic – shapes faster and at lower costs.
Interested in reading more?
- https://nypost.com/2018/03/12/real-girl-mannequins-are-coming-to-a-store-near-you/
- http://www.hopesandfears.com/hopes/city/fashion/213389-history-of-mannequins
- https://fashion-history.lovetoknow.com/fashion-clothing-industry/mannequins
- https://www.racked.com/2017/6/28/15822408/mannequin-sizes-body-image
~Pamela Lardinois, Milwaukee ASG Off The Cuff, Apr/May 2019
Copyright © All content is copyrighted to the author and may only be reprinted with permission.
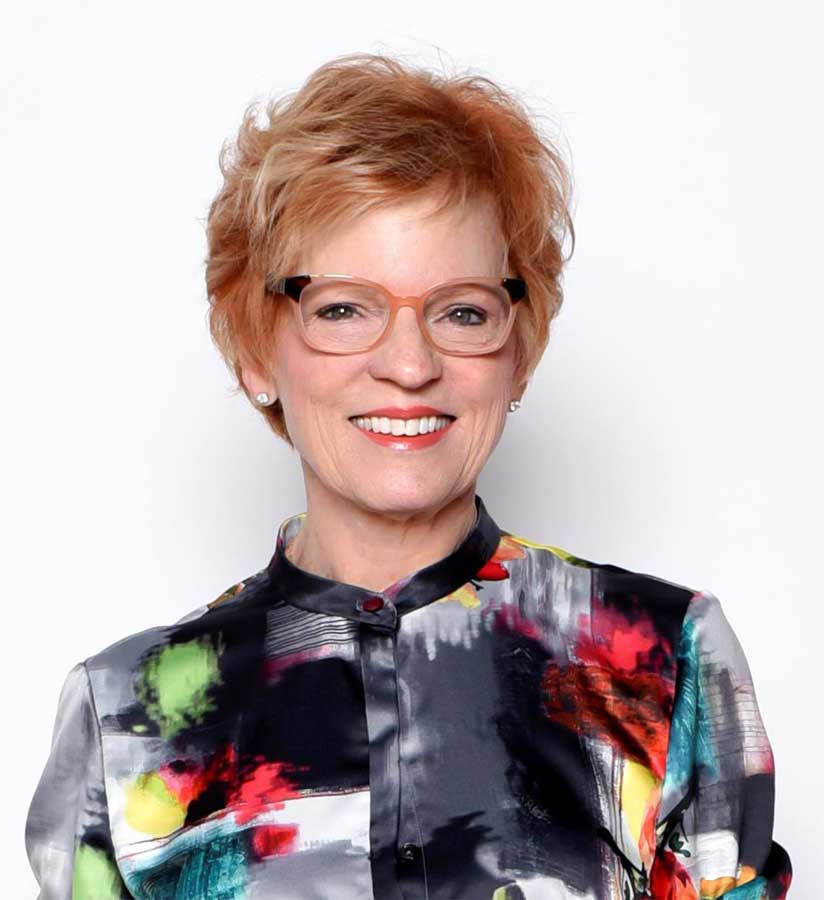
Meet Linda Lee
Congratulations to Linda Lee on her induction into the 2019 ASG Hall of Fame!
 Linda has long been one of ASG’s most popular educators at ASG conferences as well as a sought-after speaker at ASG chapters throughout the country. She began her sewing journey at a very young age sewing doll clothes and, by the sixth grade, she had begun her first business venture by making and selling felt beanie hats for $1 each. She soon expanded her line with dirndl skirts and a career was born. Her formal training began at Kansas State University with a degree in Interior Design which included two years as a Clothing and Textiles major.
Her resume reflects a number of business endeavors including I, a commercial and residential interior company; Threadwear, a retail fabric store; and The Sewing Workshop, a sewing school in San Francisco. When asked about how this all came about, Linda commented, “When you don’t have access to good fabric, then doesn’t it make sense to open a fabric store? It did to me. I had heard about a woman in Kansas City named Karen Ladish who knew the insides of the garment district in New York. She took me there and showed me how to buy fabric from the jobbers and brokers at the right prices. It was fascinating!”
![]()
As a shop owner, Linda took a class from sewing icon Sandra Betzina and said, “I couldn’t get enough of what she had to say. That was the first time I had ever heard of The Sewing Workshop, a sewing school in San Francisco. I went there and fell in love with the place. And it was Sandra who encouraged me to buy it. So let’s see, if you don’t have access to good sewing education, then doesn’t it make sense to buy a school? It did to me.”
Continuing to reflect on the path her career has taken, Linda said, “The best seamstress I have ever met, Shermane Fouche, was teaching at The Sewing Workshop at the time. One Sunday night I was in her studio while she was putting the finishing touches on her first pattern collection. This was before Fedex and I discovered that the patterns needed to be at her printer the following day in Manhattan, KS. Well, I was flying home to Kansas, so I offered to hand deliver the patterns to McCalls in Kansas. And that’s where the idea of starting a Sewing Workshop pattern collection began.”
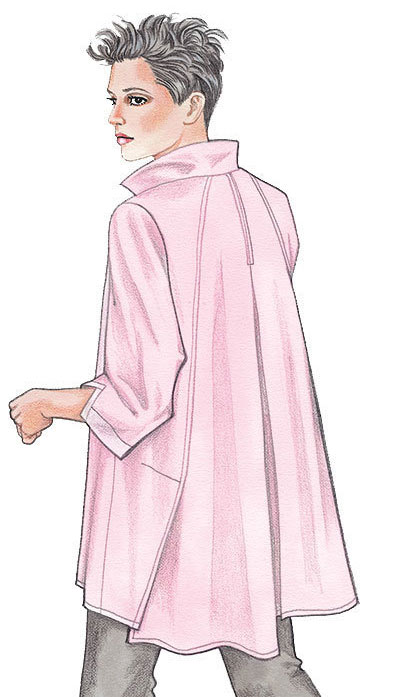 Linda describes these patterns as “designs that are simple but have a little ‘edge’ to them so they are more interesting to construct—a unique detail, a fine finish, asymmetry. I think it is important to teach people the correct way to do things and to offer some challenges as well. Over time, we have evolved from a pattern company that had mostly oversized Asian-inspired designs to a much more wearable wardrobe concept theme. They are designed to fit a lot of body types and to span the generations, too. If I wear them at 71 and my daughter at 30 wears them, then I consider that a success. The steps to construct each pattern are illustrated in great detail making it easy to make one of our patterns. All of the production of our patterns happens in-house so we are in complete control of every step. The only thing we sub-contract is the fashion illustration on the cover of the envelope.”
 Getting back to her career path, Linda continued, “At the same time, I started the Sewing Workshop pattern collection, I received a phone call from Vogue/Butterick pattern company in New York who wanted to use The Sewing Workshop as the site for filming a pilot television show. Of course I took that phone call and promptly converted the school to a filming studio for about a week. The pilot sold to PBS and 30 shows needed to be produced. They needed ideas for the 30 shows, so I became the content editor and writer for all of the shows. This is where I honed my skills for making step-out samples, writing scripts and boiling content down to a few minutes—all within a really tight timeline and budget.”
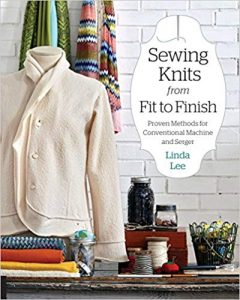 Linda also filmed over 100 how-to shows on HGTV, filmed shows for Sew It All and It’s Sew Easy for PBS, became a contributing editor to Threads magazine, and wrote 13 books related to sewing and home decorating. Her latest book is Sewing Knits from Fit to Finish. And if that wasn’t enough, she also produced a tutorial program called Sew Confident! featuring fitting, pattern variations, wardrobing, sewing techniques, and sewing inspiration with over 65 online sewing tutorials on her website.
With this wealth of knowledge and experience, it is no wonder that students flock to her classes when we are fortunate to have her teach at conference. And if you haven’t been able to get into one of her classes there, don’t despair. Linda also has a number of classes on Bluprint.com (formerly Craftsy).
 When asked what she has enjoyed most about her career, she was quick to respond, “I love the thrill of marketing and selling the best. I think that anyone who is in business needs to love that part of a business; otherwise, it is pointless. I am bored by the repetitive aspects of what my business requires such as sewing. I don’t like to make the same thing twice; however, unfortunately, that has to happen when developing a pattern. I like to think about things and then delegate. Don’t get me wrong, I love to sew, but I would prefer to sew without deadlines and just for me instead of constantly sewing for a purpose in the business. I do use some really fine seamstresses to make some of the samples but, ultimately, I need to sew most of the samples garments in order to understand the hurdles of a design or a particular fabric.”
Linda reflected, “Everything has come together and formed a rich career that I can’t seem to leave. But I am watching the young people in my company begin to implement new ideas and take charge. My daughter Alex will complete her Masters in Fashion Management from the London College of Fashion this October. Will she join my company? I hope so! I have never felt more positive about the future of sewing — it really is in good hands. I enjoy reading blogs, following mind-blowing fashions, and staying tuned into Instagram. I am looking forward to seeing where The Sewing Workshop will be in 10 years. Hopefully I will be starting some new project, because if I don’t have access to something I need, perhaps I will start it or buy it.”
Linda is a proud ASG member in the Kansas City Chapter and offers fellow ASG members a generous one-time per year discount of 25%. Check the Special Offers page in the Members Only area for the code. Be sure to check out Linda’s collection of patterns and other items on The Sewing Workshop website.
~Rosemary Fajgier
The American Sewing Guild is truly fortunate to be able to count many gifted sewing designers and instructors among our friends, members, and supporters. Throughout this coming year we will be featuring some of them in our Notions Blog. We hope you will enjoy reading about them and take the opportunity to get to know them better and explore their many talents by visiting their websites, taking their classes, and discovering the wide variety of designs they bring to the home sewing market.
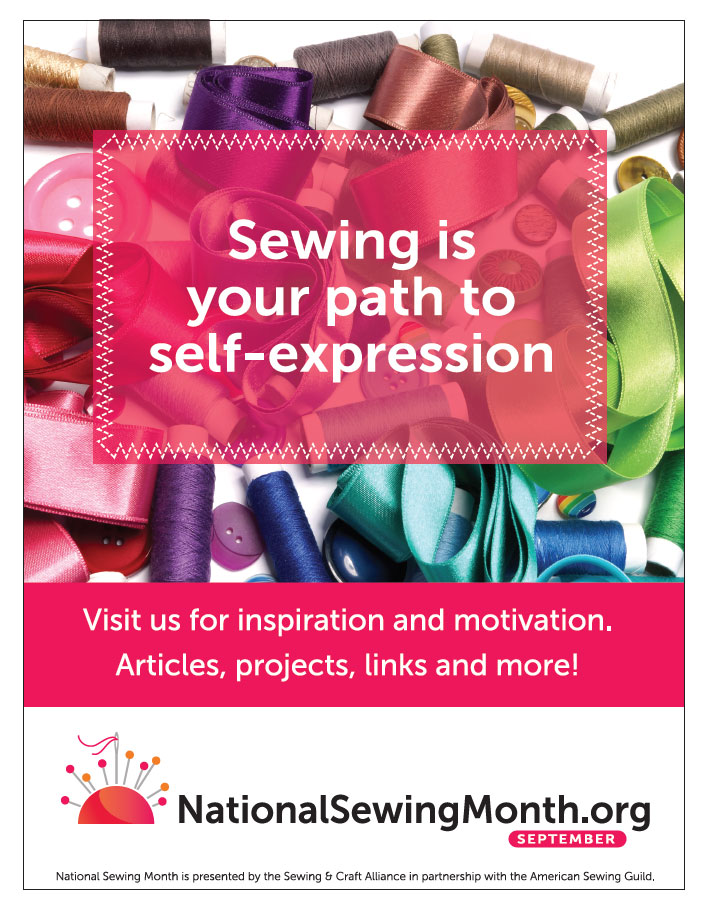
National Sewing Month 2019

On September 21, 1982, at the request of the American Home Sewing & Craft Association, an industry and trade association supporting the sewing and craft industries, President Ronald Reagan declared September as National Sewing Month “In recognition of the importance of home sewing to our Nation.”
Subsequent Proclamations in 1983, 1984, 1985 and 1988 celebrated sewing as an industry, skill and self-reliance which are so characteristic of our Nation.
President Reagan was no stranger to the benefits of sewing. His mother, Nellie, was a seamstress whose talents brought in precious funds during the Great Depression to supplement his father’s wages. And, at times, the income from Nellie’s stitching was the only income the family had.
Today, sewing continues to reflect the character of a nation built on an ever-evolving industry, creative skill and a fierce self-reliance that provides a path to self-expression. As a source of income, the doors have flung wide open to opportunities that wouldn’t have been considered in 1982. As opportunities for business have increased, so too have the ways to learn, share and connect with others who sew, whether it be for need, business or for the sheer pleasure of taking hand and/or machine to fabric and creating a personal masterpiece.
 National Sewing Month provides us with an opportunity to focus our voices as one and promote an activity that encourages stress relief, improves hand-eye coordination and fine motor skills, offers an opportunity for lifetime learning, stimulates brain growth, and increases happiness (until you’ve had to rip that seam out for the third time!). Sewing, whether one is a novice or an expert, opens the door to an entire community of people — and potential new friends — who share your passion, whether that be a local neighborhood group that meets weekly or an online chat group where encouragement, answers, suggestions and praise are simply a post away.
As we enter a new year for National Sewing Month, we recognize the changes that have brought us to where we are. The original champions of National Sewing Month, the American Home Sewing & Craft Association (later becoming the Home Sewing Association), closed its doors at the end of 2007. However, in early 2008, the American Sewing Guild (formerly a part of HSA) joined forces with the Sewing & Craft Alliance, a new program started by HSA’s former Executive Director and its former webmaster, to continue the promotion of National Sewing Month and provide a central location for the distribution of information and free advertising materials to organizations, educators, sewing enthusiasts and anyone else interested in promoting and/or participating in activities for National Sewing Month.

September is a time to celebrate our passion, but we know the creative, therapeutic and calming effects of sewing are joys that we can celebrate throughout the entire year. To learn more about National Sewing Month, learn the history of this celebration and download the free materials, visit www.NationalSewingMonth.org.
~Janice Blasko, Sewing & Craft Alliance & Webgoddess for ASG.org
You Sew, Could You…
Whenever I hear those words, every cell in my body goes on high alert. I never know what will follow, but it is rarely good. “Could you replace this zipper—in my jeans?” “Could you hem my daughter’s prom gown, all six layers with ruffles?” “Could you make floor to ceiling pinch pleat draperies for my 6 dining room windows by next Friday, just in time for my Christmas party?”
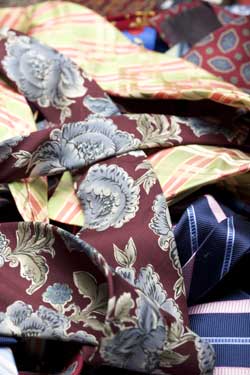 Over the years I have cultivated the ability to say NO to most of these requests, but when a dear friend approached me recently, what she offered was an interesting challenge. She handed me two identical designer ties and asked me to make “something” from them as a gag gift for the wife of a co-worker. She explained that it was a long standing tradition that she gave a designer tie to the co-worker each year for Christmas, and she recently found out that his wife liked the ties so much that she “dressed” him around the ties. Now that he was retiring, it was the wife’s turn to get a tie. She left the ties with me. First mistake.
I have seen curtains, vests, skirts, quilts, and other items made from a collection of old ties, but I had never seen anything from just two identical ones. My mind raced with a million practical questions like:
- How much fabric could possibly be in a tie?
- What could be constructed from something that is only about 4 inches across at the widest point and tapers down from there?
- How could I piece these varying narrow strips together and make it look good?
- What would be worth my time creating that might be a gag gift, but still be practical enough to use and look good?
“With each question, the level of dread rose steadily. How could I have allowed myself to be sucked into this undertaking? Why did I say yes? Did I even say yes or did she just leave the ties?”
Off to my sewing room I went, armed with two ties and a seam ripper. The deconstruction aspect was not as tiresome as I feared. Actually, it was quite easy, just some hand stitching to undo and remove the designer labels. Oh, but there was a receipt in the bag. The ties had cost $20 each, marked down from $40. That meant that for the two ties, the equivalent of about a quarter yard of fabric, she had paid $40. It didn’t take a genius to do the math and come up with an equivalent price of $160 per yard, marked down from $320! Oh, no pressure! I think it took me about a month before I gathered the courage to make the first cut, and then I did so gingerly for fear of wasting even a tiny inch of fabric and coming up short.
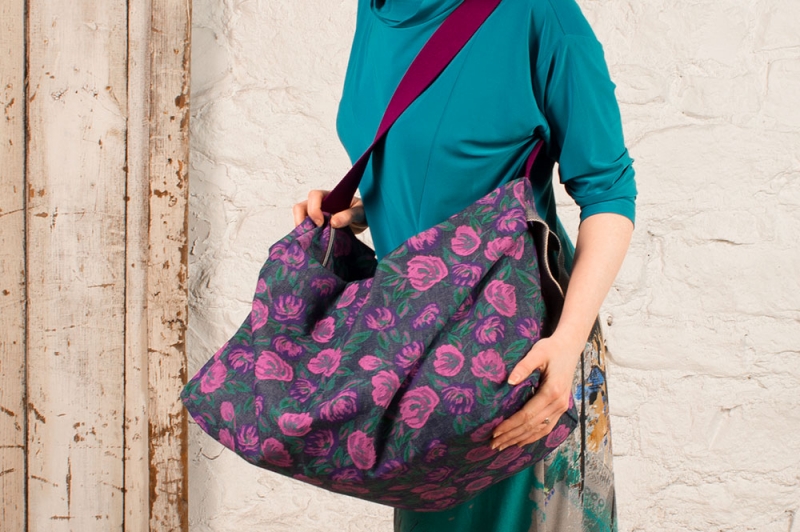
Could I, Should I… Make a Purse?
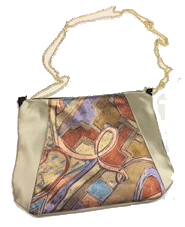 Since I love making purses, I decided to go in that direction. The deconstructed tie yielded a piece of fabric that was 7 ½ inches at its widest point. I took two foundation pieces of fabric and laid the wide points of the ties centered on the foundation. Then I played with the remaining pieces and tried to match the swirls of color on either side of the main sections. Luckily the ties were close enough to being identical that I was able to get both the front and back to look similar. But how could I attach the pieces and make them look attractive and not just patched?
Time for some creativity…
I solved this dilemma by making very narrow piping to place between the sections. It gave the impression of an accent piece and was just enough to divert the eye from seeing that the prints did not match up exactly. And the black made the royal purple of the tie pop.
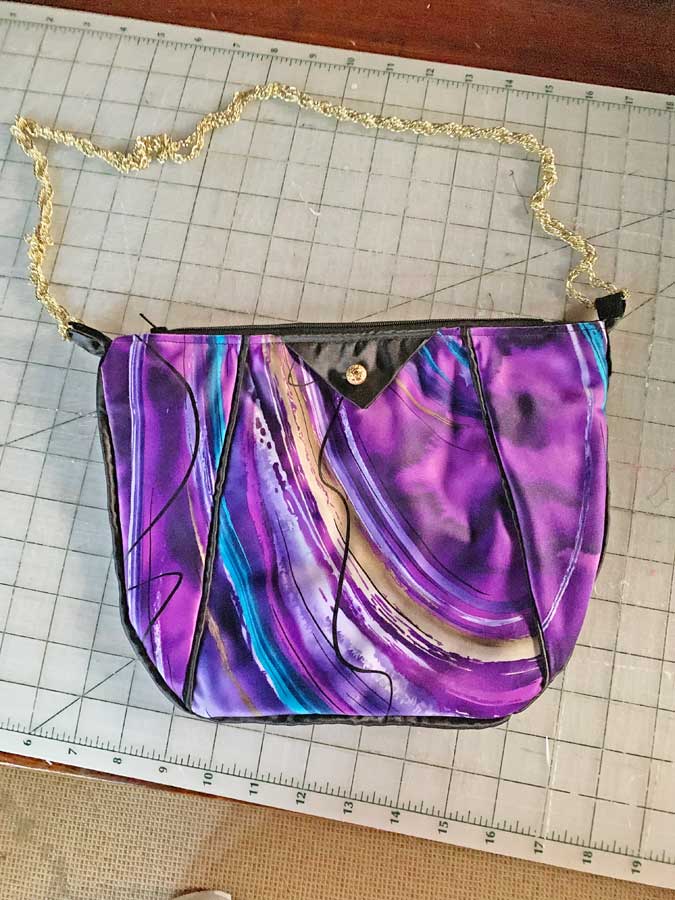 Once the three sections were stitched to the foundation piece, I gave the bag some shape by rounding the lower corners and making the front and back identical. From there it was easy. I cut a lining from the same black fabric that I had used for the piping, inserted a zipper between the two layers, then seamed around the outside edge, also using the piping to accent. I even made a prairie point accent on the front and sewed a gold button on it to bring a bit more glitz to the project. The handle was created from a piece of jewelry chain that I doubled and twisted together for added strength.
When it was done, I was amazed. It didn’t look like two ties thrown together. It looked pretty darn good! The finished bag measured about 9” x 12”, and there were still a few scraps left over. Not one to waste fabric (especially at that equivalent $160 per yard) I pieced the remaining sections together to make an eyeglass case and a credit card carrier.
Looking for handbag handles for your new bag? Amazon offers wooden handles, leather straps, chain, bamboo, cord, ribbon and more!

I was so pleased with the finished item, I took it to every ASG meeting I went to for “Show and Tell.” I was rewarded with not only their “ooohs” and “ahhhhs” but also requests to teach the project. These sewing friends gave me all the encouragement I needed to finally turn the purse over. And my friend was duly impressed. She said she couldn’t believe I had made something so large, attractive, and useful from those ties. She no longer thought of it as a gag gift, but rather a truly one of a kind designer purse.
So maybe I shouldn’t automatically say no when I hear someone say, “you sew… “ But I am still not replacing zippers in jeans!
ASG Members can access the instructions for making this Necktie Purse by logging in to Member’s Only and going to the ASG Online! area (under Education).
~Rosemary Fajgier
- « Previous Page
- 1
- …
- 74
- 75
- 76
- 77
- 78
- …
- 89
- Next Page »
