American Sewing Guild (ASG)

Visit our blog Visit the ASG Facebook page Visit ASG on Pinterest Visit ASG's YouTube channel Visit ASG on Instagram
  • Home
  • Join ASG
    • Join Online
    • Chapter Locations
    • Member Benefits
    • Member Brochure
    • Join by Mail
  • Education & Classes
  • Resources
    • Contests & Awards
    • Giving Back
    • Hall of Fame
    • Travel and Tours
    • Measurement Chart
  • Shop
    • ASG Store
    • Chapter Products
    • Video Resources
  • Blog
  • About
    • About Us
    • Donate to ASG
    • ASG Sensitivity Statement
    • FAQ’s
    • Start a Chapter
  • Contact
  • Member Login
    • Login First!
    • Members Only
    • Leadership Only
    • Website FAQ’s
    • Logout
  •  

May 18, 2023

Drape and Shape a One-Hour Vest (Preview)

East vest
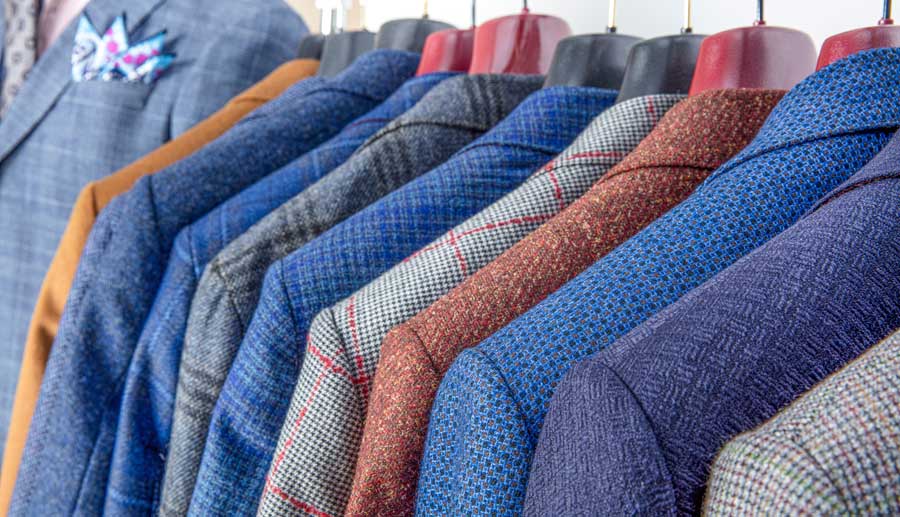
Vests are a popular garment for good reasons — they go many places and serve many purposes, from dressing-up an outfit for the holidays, to giving a skirt or pants a fresh look, to adding a colorful layer to a plain top, and to keeping you warm. With these simple drape-and-shape techniques, you can quickly make vests that flatter your figure and go anywhere, depending on the fabrics and embellishments.

Drape-and-shape construction has been the favored method for making clothes since people started wrapping themselves with animal hides and cloth. From caveman to couturiere, those who create garments know the best is achieved by draping-and-shaping the fabric on the wearer’s body (or on a form of his or her body). The vest uses a few of the simple drape-and-shape methods which means that anyone, regardless of their size or shape, can create gently fitted, graceful clothes. Fit the garments for how you want the final shape.

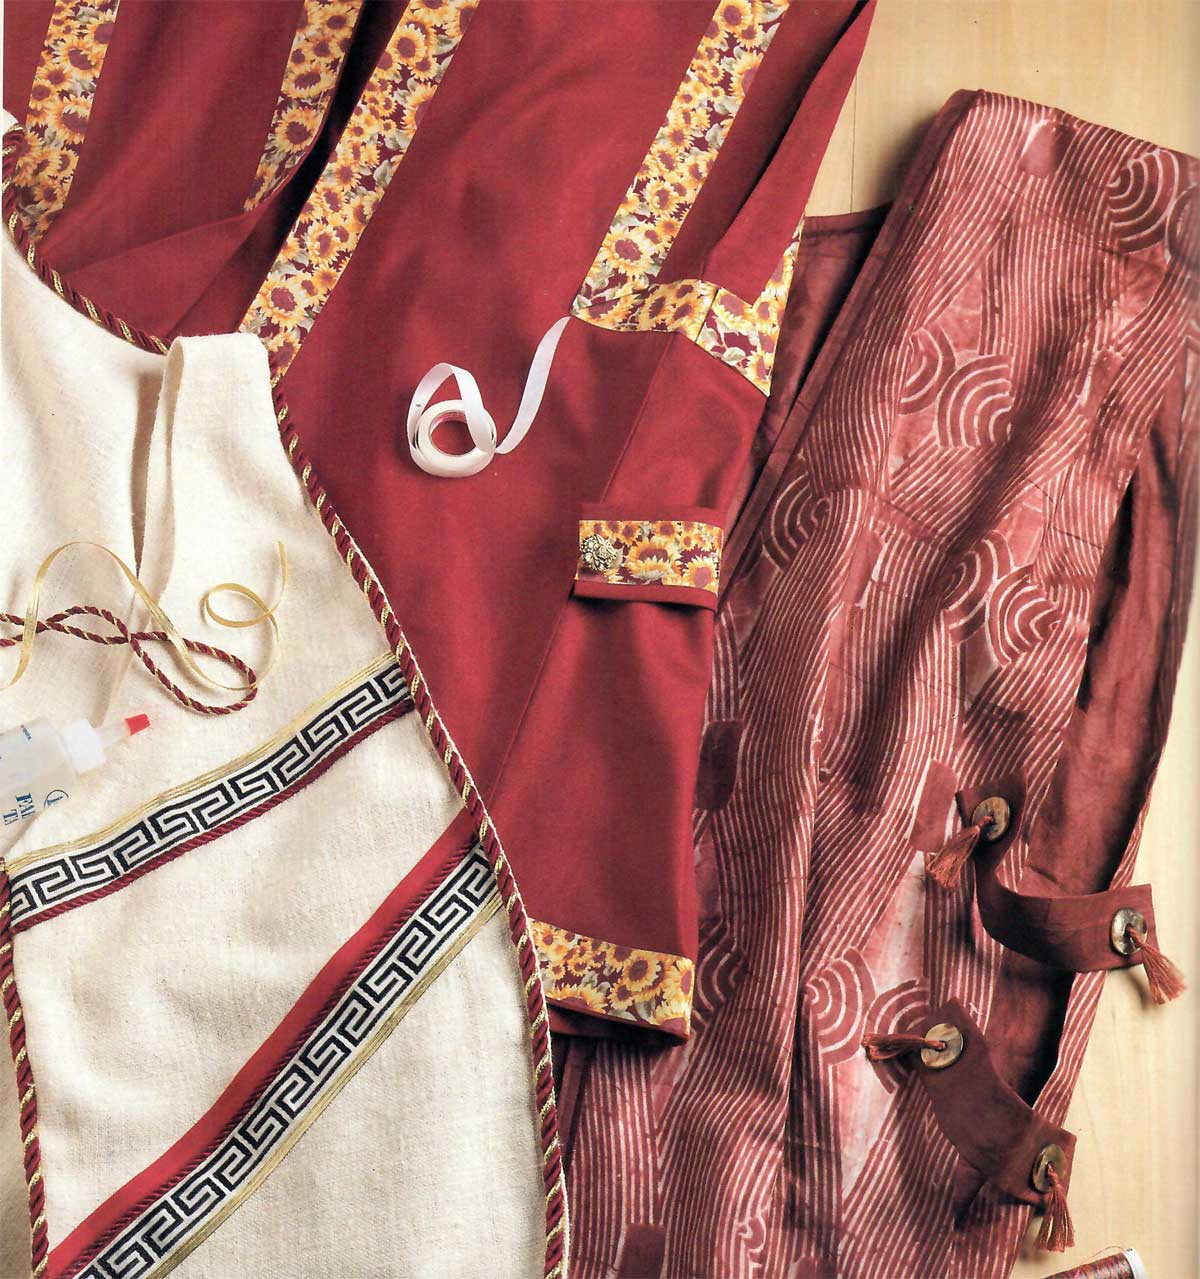
The vest in this project is long and flowing (Figure 1) and is designed for a medium-large figure (39-42″ bust and 41-44″ hip); however, it is easy to change in length or fullness to fit your particular figure.


The full article is in the Members area of the website. CLICK HERE to read the full article. Not a member? Join online!


Tagged With: drape and shape, vest

February 24, 2023

Canine Capers: Sewing for Your Furry Friend

We all love to sew, whether it’s for ourselves, for friends, for gifts or for our homes, but sometimes our pets need a little sewing love as well. Both of these dog toys are great gift ideas for your own dog or grand-dog, and are also ideal for community service projects or donating to your local animal shelter. They’re easy-peasy so even beginners (and kids) can create them, making them ideal for scouting and other group projects.

Bone Appétit

Denim dog bone toy

This cute bone toy with a squeaker inside is easy enough for kids and other beginners to sew, and your favorite pooch will love to carry it around.

It can be made from fabric, but the featured toy is made from recycled jeans—you know, those denims that are too good to throw away, but for one reason or another you don’t want to wear them. The bone is a perfect place to showcase that contrast topstitching we all love, fun seaming locations, and even a mini-pocket or two, depending on the size of the jeans you’re starting with.

If you have an embroidery machine, this is an ideal project for personalizing. Do your embroidery work on a larger piece of fabric/jean prior to cutting the bone shape.

What you’ll need

  • One pair of jeans (or ¼ yard of sturdy fabric, which will make multiples)
  • Matching thread
  • One 1 1/8” squeaker
  • Polyester fiberfill
  • Hand-sewing needle
  • Bone Pattern

You can change the size of the bone to fit the dog—from smaller puppy size to giant doggo size. Add additional squeakers for larger sizes.

Squeaker on Amazon
Purchase this squeaker on Amazon.

Cutting & Assembling

  1. Trace the Bone Pattern onto paper or card stock. If you’re making a large quantity of bone toys, trace the pattern onto Mylar, then cut it out.
  2. Select a portion of the jeans you’d like to feature and position the bone pattern to showcase that feature. Trace the outer pattern edge onto the jean and cut out.
  3. Cut a second bone shape for the backing. This can use the plain jean fabric, or can also showcase seams, topstitching, etc.
  4. Place the bone front and back right sides together and sew around the perimeter using a ¼” seam allowance. Leave open a 2” space along the straight section of the bone. Clip the inside corner. Trim the seam allowances slightly in the curved areas.
  5. Turn the bone right side out through the opening and push out the curves to shape. Press.
  6. Stuff the bone shape firmly, leaving space in the center. Insert the squeaker and add more stuffing on each side of the squeaker so that the center is firm.
  7. Turn under the seam allowances in the open area. Using the hand needle and double thread, whipstitch the opening closed. It’s important that this is done securely so curious dogs aren’t able to tear open the seam and get to the squeaker.

WARNING: If your dog does tear open the toy, immediately discard it, so that the squeaker isn’t ingested. Save the squeaker for another toy.

Happy Dog Tip: If you used a portion of a jeans pocket to make your toy, tuck a small bone treat into the pocket to surprise your dog. This is also a great presentation for gift-giving!


Tug Toy

Simple braiding is the key to making this tug toy sturdy enough for even the strongest of dogs. Make it from denim or fleece for non-stop fun. No sewing involved, so it’s also ideal for young children to create for their pup.


What you need

  • 1/3 yard sturdy fabric, such as denim, fleece or canvas

Cutting & Assembling

  1. Drawing Cut three strips 3 ½” x width-of-fabric strips. Note: Fleece that’s 60” wide will braid up to about 40” of toy length.
  2. Lay the three strips together and tie a firm overhand knot about 2” from one end of the fabric strips. Pull the knot as tight as possible.
  3. Firmly braid the strips together until you get about 4” from the unknotted end. Pull the strips as tight as possible as you braid.
  4. Tie a firm overhand knot joining the strip ends. Trim the strips about 2” from the end.
  5. The length of the toy will depend on the original fabric width and how tightly you braid the strips. If it’s longer than needed, make one or more knots along the braided length to shorten it and add additional areas for the dog to grab at the knots, or stop braiding when you reach the desired length, tie the knot and trim the excess length.
  6. Grab one end and give your pup a tug-o-war!

~Linda Griepentrog is the owner of G Wiz Creative Services and she does writing, editing and designing for companies in the sewing, crafting and quilting industries. In addition, she escorts fabric shopping tours to Hong Kong. She lives at the Oregon Coast with her husband Keith, and three dogs, Yohnuh, Abby, and Lizzie. Contact her at gwizdesigns@aol.com.

This field is for validation purposes and should be left unchanged.
Did you enjoy this article?
Are you an ASG member?

Tagged With: bone, dog toys, pets

August 26, 2022

Suit-ability: Repurposing Suits for Other Projects

Not all fabric we use in our projects comes from the fabric store—some comes from our own closets or from the closets of others near and dear.

Have you noticed in the past few years that there are fewer and fewer men wearing suits? Blame it on the popular work-from-home phenomena or simply the trend toward more casual dressing. But, that trend can create a gold mine, as suit jackets are relegated to the back of the closet, or shipped off to the local thrift store for retrieval by savvy sewers.

men's suits

Why, you might say? Suit jackets offer a lot of quality fabric that can be repurposed for other projects. In particular, some ready-made construction details that you may think are beyond your skill level to create, like welt pockets and keyhole buttonholes are already done. So why not “harvest” those niceties for another project or two, or three, or four, depending on the size of the jacket.

What to look for

If you’re shopping thrift stores for men’s suit jackets, look for the largest size to garner more fabric. Choose a worsted weight, as it’s not as bulky as the woolen cousins. Be sure to inspect the item for any stains, moth holes or other damage and look for name brand labels and quality fabrics. In many cases, the suit coat may be almost new and worn only on one or two occasions before discard.

Thrift stores often have sales, so shop smartly. If you qualify, check for senior discount day with savings up to 50%. Or for similar discounts, check the tag color of the day. If you’re shopping for suit coats at rummage sales, ask if there’s a half-off-the-tag-price day or a sale where everything you can fit into a bag is only $1. These usually happen on the last day of the sale and it’s a great time to go crazy for suits and sport jackets.

Deconstruction

Watching the news or listening to podcasts is a great time to disassemble a suit jacket. First, decide which parts you might like to keep for other projects—patch pockets, welt pockets, front buttons/buttonholes, lapels, sleeve plackets, labels, etc.–and take apart the seams leaving those areas intact. Lining can be separated or left with its original construction detail, depending on how the area will be reused. While you’re taking apart the suit, note the inner construction details—the process can be a major tailoring learning experience, especially on high-end jackets. If you’re into tailoring, you may even be able to harvest some of the jacket’s structural materials like sleeve heads, hair canvas chest pieces, shoulder pads, etc. for reuse.

Don’t forget that the inside of the suit jacket can offer some fun details, like bold labels, lining welt pockets and tabs, and accent stitching, so put those to work on the outside of your project.

Small projects, like bags, allow for utilizing many details from one jacket and it’s fun to figure out how to make them work to maximize the fun. Check out our featured bags using several different suit details.

Herringbone Lapel
Herringbone Patch Pocket
Jacket Closure
Lapel
Lining
Pieced Wools
Welt Pocket
Welt Pocket with Flap

Tie Tactics

Not far from suit jackets, you may also find some wonderful ties being discarded. Whether they’re silk, polyester or wool, there’s yardage to be garnered. If you’re thrifting or repurposing ties from a loved one, creative options abound.

One idea—this pieced tote made is not only a great project to reuse old or discarded ties, but also can be a wonderful way to remember a special person whose ties you may have inherited. Get the instructions and free pattern from Yarspirations.

Make a tote with ties
Image compliments of Coats & Clark

~Linda Griepentrog Linda is the owner of G Wiz Creative Services and she does writing, editing and designing for companies in the sewing, crafting and quilting industries. In addition, she escorts fabric shopping tours to Hong Kong. She lives at the Oregon Coast with her husband Keith, and two dogs, Yohnuh and Abby. Contact her at gwizdesigns@aol.com.
This field is for validation purposes and should be left unchanged.
Did you enjoy this article?
Are you an ASG member?

Tagged With: fabric, recycle, remake, reuse, sewing, textiles, thrift store sewing

August 5, 2022

Project: A Summer Hammock (preview)

Relax in your backyard with a book, enjoy a cup of coffee on the porch, or swing peacefully as you bond with nature at your favorite campsite in a colorful, decorative hammock. It’s said that hammocks guarantee an amazing sleep experience, whether it’s an afternoon nap, or a full night’s rest. Simple to sew, this hammock is made using decorator fabric for the hammock front and is lined with sturdy canvas. Closet-pole rods and nylon rope support the hammock.

Making the Hammock


The complete version of this article is available on the ASG Members Only blog and requires member login.
CLICK HERE to read the full article. Not a member? Join online!

Tagged With: canvas, hammock, sewing project

August 6, 2021

Hot Pad Helpers

Whether you call them hot pads or potholders, the purpose is the same—to protect hands and table surfaces from the heat of a pan just removed from the stove or oven.

Hot pads are an ideal beginner sewing project (perfect for kids), and they’re a fun way to use up scraps since they don’t take much fabric. Because of their size, they’re also ideal to experiment with new sewing techniques you may want to try out before using on a larger project.

Hot pads are so much fun, we bet you can’t make just one!

Photo courtesy of Bernina

Size-wise

Hot pads can be made in many sizes and shapes, but one thing’s for certain, whatever shape you choose, be sure they’re large enough to keep your hands from getting burned when in use.

Many potholders are simple squares—from 5” to 10”, though the larger sizes offer better protection. Some are circular and of similar sizes, while others are rectangular and designed to be folded over a warm pot handle. There are also patterns for holiday themed shapes, like Easter eggs, Valentine hearts or Christmas trees.

Potholder shape ideas

In addition to their padded selves, most potholders offer an extended loop for hanging. The loop can be made of the same fabric as the holder or from the binding used around the shape’s edge. Loops can be along one side, or at a corner.

Layer Up

The anatomy of a potholder is simple—two layers of fabric with heat-resistant protective layers between. It’s important that the outer fabric layers are not synthetic, as they should be able to withstand heat up to 400° Fahrenheit. Cotton is a good choice for the outer layers as it’s heat resistant and readily washable.

Between the outer layers is the main source of heat protection. Some sewers like to use multiple layers of preshrunk wool for its insulative qualities, others use layers of cotton batting, and perhaps most effective is a batting with an insulative layer, like Insul-Bright®, made by the Warm Company or Pellon Insul-Fleece™. (Product links lead to Amazon and any purchases you make may make us a small commission at no additional cost to you). This specialized product has a metallicized polyester film needle-punched into batting. This heat-protective layer should then be sandwiched between two layers of cotton batting.

Artful Additions

Because of their small size, potholders are the perfect canvas to try a new sewing technique like appliqué, machine embroidery or decorative stitching (with cotton threads), strip piecing, scrappy piecing, etc.

Simply draw the shape of your potholder onto the right side of one fabric layer, do your embellishing and trim the piece to size. If you’re piecing the potholder front and/or back, do that sewing before cutting the shapes.

Back to Basics

To make a hot pad, layer the back and front pieces wrong sides together with your choice of the inside insulative layer(s). Pin the layers and quilt them together. Quilting can be done in straight lines, free-motion designs, or using an embroidery machine. If you choose not to quilt the layers together, baste around the perimeter about 1/8” from the cut edges.

Cut a 2 ¼”-wide strip of binding fabric to go around the potholder. Depending on the size, it may be necessary to piece together two width-of-fabric strips. Note: If your potholder has curved corners, cut the binding on the bias. Fold the binding in half wrong sides together and press.

Bind the potholder, mitering the binding at any corners. When you come back to the starting point, stop just before the original stitching, but do not trim of the extra binding length.

Turn the binding to the underside and hand- or machine-stitch the folded edge in place. At the original start point, fold the binding and extend it to form a hanging loop and stitch the edges together, tucking the raw end under the end of the binding portion. Finish the stitching to anchor the loop base.

Once you’ve mastered the basics of potholder making, consider adding a pocket to one side. Slide your hand inside for easier gripping with the padded portion of the hot pad.


~Linda Griepentrog
Linda is the owner of G Wiz Creative Services and she does writing, editing and designing for companies in the sewing, crafting and quilting industries. In addition, she escorts fabric shopping tours to Hong Kong. She lives at the Oregon Coast with her husband Keith, and two dogs, Yohnuh and Abby. Contact her at gwizdesigns@aol.com.

This field is for validation purposes and should be left unchanged.
Did you enjoy this article?
Are you an ASG member?

Tagged With: easy project, hot pads, insulated fabric

  • « Previous Page
  • 1
  • 2
  • 3
  • 4
  • 5
  • Next Page »

Become a Member

Join the only national organization dedicated to Advancing Sewing as an Art and Life Skill.

Join Now button

Blog Article Categories

  • ASG Conference
  • Chapter Stories
  • Embroidery
  • Fitting
  • Learn to Sew
  • National Sewing Month
  • Products, Books, & Patterns
  • Projects
  • Quilting
  • Sewing
  • Sewing Techniques
  • Sewing Tips
  • Sewing Tours
  • Videos
  • Disclaimer
  • Privacy Policy

American Sewing Guild
National Headquarters
9660 Hillcroft, Suite 230
Houston TX 77096
713-729-3000 | 713-721-9230 Fax
www.ASG.org

ASG wordcloud - education, conference, discounts, videos, special offers, tours and more

Copyright © 1998–2026 · American Sewing Guild · All Rights Reserved