American Sewing Guild (ASG)

Visit our blog Visit the ASG Facebook page Visit ASG on Pinterest Visit ASG's YouTube channel Visit ASG on Instagram
  • Home
  • Join ASG
    • Join Online
    • Chapter Locations
    • Member Benefits
    • Member Brochure
    • Join by Mail
  • Conference & Education
  • Resources
    • Contests & Awards
    • Giving Back
    • Hall of Fame
    • Links
    • Travel and Tours
    • Measurement Chart
  • Shop
    • ASG Store
    • Chapter Products
    • Video Resources
  • Blog
  • About
    • About Us
    • Donate to ASG
    • ASG Sensitivity Statement
    • FAQ’s
    • Start a Chapter
  • Contact
  • Member Login
    • Login First!
    • Members Only
    • Leadership Only
    • Website FAQ’s
    • Logout
  •  

January 21, 2022

Breaking Down the Roadblocks to Creativity

The path to sewing creativity is full of roadblocks—all of our own making. As sewers, we need to learn to let go, to trust ourselves, and just allow the creative process to happen.

Sewing educator, Londa Rohlfing, developed a list of things sewers unwittingly do to kill their creativity. This is a look at those roadblocks—and how to easily overcome them. Don’t let a creative block stop you from completing a project!

We are way too hard on ourselves, underestimating our capabilities. Sewists forget that the sewing process is wonderfully forgiving. Most sewing situations or “mistakes” can be turned into a success in some way, shape, or form. Really! It’s not like in cooking when you crack what you thought was the second egg, put it into the pot, and mix it up—only to turn around and see that there are already two sets of eggshells in the sink. In cooking, you can’t retrieve the extra egg from the liquid but, in sewing, you can always “un-sew.” Maybe you cut something off you shouldn’t have? Just sew it back on! Not enough fabric? Go get a coordinating fabric! The thing about sewing is that you are in control. Unlike so much of life, you decide what goes where, and how it goes there. You can make those decisions… you just need to let go and be your own boss.

Woman sewing

We feel that every idea has to be totally new. If you’ve ever watched Project Runway, you might recall that you didn’t see any fresh, new ideas. If you’ve been a student of fashion, you know that you routinely see styles resurrected… over and over and over again. Designers just put it all together in a new way and give it their own little twist. You can do the same thing. Go ahead—make use of those ideas in your personal sewing. Creativity is not always a natural, easy process. Have all the lessons you’ve learned in life been painless? For most of us, wisdom comes mostly from the school of (real) hard knocks. That is true both for life… and sewing.

We think we have to have precise directions on how to do anything and everything. How many patterns have you bought, trying to figure out how to master a technique that puzzles you? Become your own inner child and say, “Let me do it my way, Mommy.” Then just do it!

We think every project has to work out perfectly and that we should automatically love everything we create. Tell me now—really—do you just love and wear everything you buy? Why not? After all, you had the chance to try it on and evaluate it before you ever went home with it. Ease up on yourself and vow to enjoy the process, not just the outcome.

Woman giving thumbs down to sewing project

We feel it is wrong to un-sew, retry, and start over. You only learn by doing. The good news is that there is no Sewing Police ready to haul you off to Stitching Jail if you break a rule. Figure something out on your own. Do it differently. Try it your way. Remember… sewing is one place where you are in the driver’s seat. A wrong turn here or there is not going to kill anyone. Have fun! If you mess it up, go buy more fabric. Everything that happens is just another creative opportunity.

We limit our materials and equipment choices. Londa said that selling sewing machines taught her so much, especially about women. She sang praises whenever a woman brought her husband in with her to look at a new sewing machine. Most of the time, the woman would always want to settle for the lower model. (And, of course, they wanted to think about it!) But, in every case, the hubby encouraged them to get the better one—and to buy it that very day. Why do we not think we are worth the best we can afford? Besides that, at least 50% of the sewing we do is for others and not ourselves. Sewing equipment (and fabric, of course) are merely the tools that are necessary to create. Without the proper tools, you’ve stacked the deck against creativity and success. Ever see a builder build a house without an electric nail gun?

We feel compelled to use everything we’ve gathered for a project along with incorporating every technique we know—with no “editing as you go. To combat this, Linda has three mottos that she shares over and over and over: “Less is best.” “Stop before you think you’re done.” “If in doubt… leave it out!”

Happy sewist


~This article is adapted from an article in a previous issue of Notions
After owning her own fabric shop/machine dealership for 13 years, then traveling to teach at expos and events across the country, Londa Rohlfing now teaches in her Sunroom Sewing Studio in Jackson, TN.  Londa often prefers artsy, creative sewing, and loves teaching and sharing the designs and the techniques she’s developed. In addition, her website mission is to offer related and hard-to-find sewing products with exceptional personal service. (www.londas-sewing.com)

Did you enjoy this article?
Are you an ASG member?
This field is for validation purposes and should be left unchanged.

Tagged With: creativity

January 7, 2022

Horsehair Braid

What do horses and braids have to do with sewing?

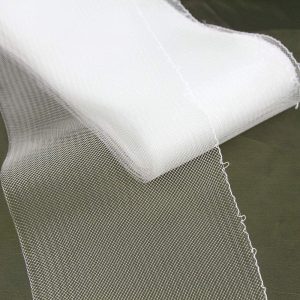
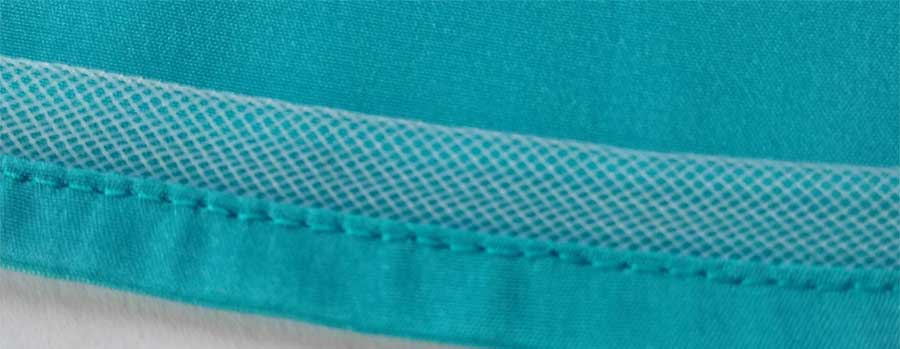
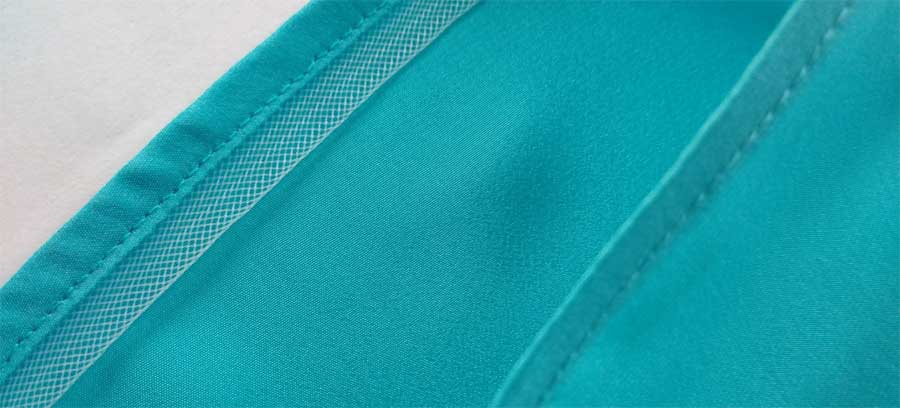
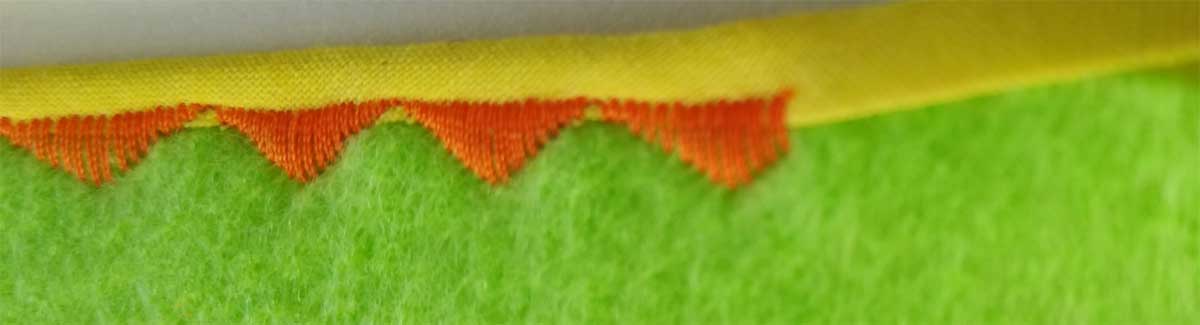
Now that we’ve got your attention, let’s talk about this uncommon notion called horsehair braid!

Historically, it was made from the stiff hair of a horse’s mane and tail, and then from cotton and linen, but today’s version is made from nylon or polyester fibers.

Horsehair braid is a stiff, bias woven mesh used to provide structure and body to special occasion and wedding dresses, as well as costumes. Available in multiple colors in widths ranging from ½” to 6”, it is sold either by the yard or packaged in pre-cut lengths on the notion wall. Colors and wide widths may be found at millinery supply companies or online.

You’ll find horsehair braid on hems to add flounce to a full or circular skirt, in puffed sleeves for a little oomph, and internally to maintain shape and structure in fitted evening gown bodices. In addition, you may see horsehair braid on wedding veils, as large bows either on hats and fascinators, or shaped into wedding pew bows. You may also see it on many kinds of ruffle edges.

Shop on Amazon
ASG may earn a small commission from your purchase, at no additional cost to you.

This crinoline-like trim comes in two weights—soft and heavy—and it is also available with a built-in gathering thread for shaping. The latter is sewn along one edge only and is pulled to ease the tape around curves, like on a circular skirt hem where the hem circumference edge is longer than the horsehair facing being turned inward.

Whether you put the horsehair braid on the inside or outside is a matter of preference and style—the choice is yours, either as a hidden structure or see-it trim. On sheer fabric, like netting, tulle and organza, the horsehair will show through if it’s on the inside, so some designers opt for placing it on the garment right side instead.

Handling

Because it’s a woven bias strip, horsehair braid should not be cut widthwise as it tends to disintegrate and unravel with even minimal handling, so choose the finished width you need.

Horsehair braid will stretch and if it’s distorted during the application, you can have some unsightly ripples and wrinkles, so be careful not to keep it flat, without stretching, during an application. It also narrows if stretched, further complicating the potential distortion.

The cut end of horsehair braid is quite prickly as all the fiber ends are exposed, so before using it, encase the cut exposed end in a scrap of fabric or bias tape to prevent the uncomfortable poking while wearing the garment. For hems, finish just the overlapping end, but for sleeves or other uses where both ends are exposed, encase both ends.

Hemmin’

There are two options for hemming with horsehair braid—use it as a facing or encase it in the garment fabric hem. Either way, the function is the same—to add body and structure to the edge.

To use narrow horsehair braid as a hem facing, place it along the cut hem edge right side and sew ¼” from the edge. Turn the braid and the seam allowance to the inside, then topstitch the braid in place.

Horsehair braid inside a hem (showing wrong side)

If the garment has a circular hemline, choose a wider braid with a built-in gathering thread at the upper edge. Follow the process above, but when you turn the braid to the inside, gently pull on the gathering thread to shape the braid’s upper edge to fit the skirt. Topstitch the braid lower edge in place, then invisibly hand-stitch the upper edge of the shaped braid in place around the skirt. Depending on the span, it may be sufficient to only tack the braid upper edge at the skirt seams.

To place the trim on the outside of a hem, repeat either of the above techniques, but place the braid on the garment wrong side and then turn it to the right side and secure.

To encase the braid, place it on the wrong side of the skirt hem, aligning the edge with the cut hem edge. Sew ¼” from the edge, then turn up a double hem, encasing the braid inside. Either topstitch or hand-stitch the hem in place.

Horsehair braid inside a hem, showing right and wrong sides.

Sleeves

Horsehair braid is often used on sleeve caps to add extra body and pouf to puffed sleeves. Insert the sleeve following the pattern directions before adding the braid. Cut a length 1 ½ times longer than the area where it will be applied (often notch to notch in the upper sleeve). If your braid does not have a built-in gathering thread, add one along one side. Pull up the gathering thread to the desired fullness and secure. Finish both ends of the braid to avoid discomfort. Place the gathered edge along the upper sleeve seam allowance and stitch in place through the seam allowance layer only.


~Linda Griepentrog
Linda is the owner of G Wiz Creative Services and she does writing, editing and designing for companies in the sewing, crafting and quilting industries. In addition, she escorts fabric shopping tours to Hong Kong. She lives at the Oregon Coast with her husband Keith, and two dogs, Yohnuh and Abby. Contact her at .

Did you enjoy this article?
Are you an ASG member?
This field is for validation purposes and should be left unchanged.

Tagged With: hem, horsehair braid, sewing, shoulder

December 31, 2021

Sewing Know-How: Fusing Facts

Perhaps that title should be con-fusing facts instead with so many different fusibles available on the market today, but there are some commonalities in the use of these labor-saving components. That said, the disclaimer is of course to always read and follow the specific directions that come with the product you’re using.

Whether you’re working with fusible interfacing, stabilizer or stiffener, one thing is for sure—if you don’t pay attention, the fusible portion can easily end up on your iron and/or the ironing board.

interfacing

Pre-treating

Some advocate for woven interfacings to be pre-shrunk before using. If you opt to do this, simply fill a basin with warm water and place the folded interfacing into the water so it’s covered. Let it sit until the water cools, then hang it to dry.

You can also steam-shrink woven and knit fusible interfacings by placing them adhesive side up on the ironing board, then hovering the iron over them with steam. Be careful to keep the iron about an inch above the interfacing surface to avoid activating the adhesive component.

Steam iron

Cutting Tips

  • If you need to cut several small pieces, like facings, collars, cuffs, etc., from interfacing, it’s easier to fuse the interfacing to an appropriately sized section of fabric prior to cutting out the pieces. If you cut the fabric and interfacing pieces separately, matching them up exactly can be a challenge.
  • When using heavy or stiff interfacings and stabilizers, it’s a good idea to cut those pieces separately without the seam allowance to reduce bulk in the seams.
  • The grainline on a woven interfacing should match the grainline on the fabric layer of a garment. Woven and knit interfacings have more stretch in the crosswise direction than lengthwise.
  • Be sure to test the chosen interfacing on a scrap of the fabric before committing to the entire project to be sure that you like the hand of the interfaced fabric, and that there’s no damage in the fusing process. On some fabrics, a sew-in interfacing is a better choice so as not to damage the fabric texture.

Proper Fusing

Pellon
Purchase this item on Amazon. ASG may earn a small commission when you purchase. This commission does not affect the price you pay for the product.

As noted, manufacturer’s instructions differ by product, so be sure to read them before you begin the fusing process. You may want to have a non-stick pressing sheet and some iron cleaner on hand in case you need them for any oops.

The fusible side of the interfacing has randomly placed dots of adhesive and the texture feels a little rough compared to the non-adhesive side. When properly fused, these adhesive dots meld into the fabric and are no longer visible as dots.

Place your fabric wrong side up on the ironing board, then position the fusible with the adhesive side down on top of the fabric, matching edges as needed. If there is any overhang, the adhesive will meld to your ironing board cover, so be sure the edges match, or trim as needed.

Fusing is a process, it’s not just a once-over pressing, and it’s important not to slide the iron during fusing. After you’ve pressed for the recommended amount of time, pick up the iron and move it to the next location, slightly overlapping the first area. Repeat the process to cover the entire surface.

Depending on the product, the fusing process may simply involve steam from your iron, or it could also require a damp press cloth used with a dry iron.

A good fuse requires applying heat and moisture (if applicable) to both sides of the fabric, so fuse the interfacing side first, then flip the fabric over and repeat the process from the right side. Let the fused piece cool thoroughly before moving it, and be sure it’s flat, not hanging over the ironing board edges.

If you’re fusing an area larger than your ironing board surface, fuse it and then let it thoroughly cool before moving it to access the next area.

When fusing is complete, double check that the interfacing is firmly adhered to the entire fabric surface. If you see ripples, that indicates areas that are not properly fused, so go back to that area and repeat the fusing process.

Fused interfacing with bubbles


~Linda Griepentrog
Linda is the owner of G Wiz Creative Services and she does writing, editing and designing for companies in the sewing, crafting and quilting industries. In addition, she escorts fabric shopping tours to Hong Kong. She lives at the Oregon Coast with her husband Keith, and two dogs, Yohnuh and Abby. Contact her at .

Did you enjoy this article?
Are you an ASG member?
This field is for validation purposes and should be left unchanged.

Tagged With: fusing, interfacing

December 17, 2021

Bias Tape Basics

Bias Tape – What is it?

You may know that bias is the direction of a fabric at a 45° angle to the selvage edge. Bias edges are ravel-free, stretchable and flexible and a bias strip can be curved without puckering, whereas a straight-grain cut can’t go smoothly around curves.

Bias Tapes (left to right): double-fold, extra-wide double-fold, single-fold, extra-wide single-fold (aka hem facing)

Pre-made bias tape is available in several varieties—single fold, double fold, wide versions of each of those, and also in a quilt binding width. Look for it in myriad solid colors, but also prints, plaids, stripes, metallics and satins. Some brands also make seasonal bias tape offerings, like holiday prints. Bias tape can be purchased pre-packaged or by the yard.

Single-fold bias is a fabric strip with each long edge pressed under once. Standard width single-fold bias tape is ½” wide. A wider width is also available measuring 7/8”-1” depending on the brand.

Double-wide bias is a fabric strip with each long edge pressed under and then the strip is folded in half with wrong sides together and pressed agsin. Standard double-fold bias tape is ¼” wide, while extra-wide measures ½”. Quilt binding is a variation of double-wide bias tape and it measures 7/8” wide. All double-fold bias tapes have one side slightly longer than the other and that goes on the underside during application to help accommodate the thickness to the fabric and still ensure catching both layers with the stitching.

What’s it used for?

Single-fold bias tape is often used as a flat trim band. Both sides can be sewn down with a straight or decorative stitch. It’s also great for making casings for elastic or a drawstring, and its wider varieties can be used as a hem, armhole or neckline facing.

Double-fold bias tape is used most commonly as an edge finish and to add a pop of color to a project. Double-fold bias is great for encasing a raw edge, such as a seam allowance in an unlined garment, around an apron or as a tie. The extra-wide version is ideal for binding thicker projects like pot holders and the very wide is most often used to finish the edges of quilts or fleece blankets.

How is bias tape applied?

Stitch & Flip

On double-fold bias tape, open out the pressed folds and place the narrowest portion right sides together with the edge to be bound. Stitch along the crease line, turn the bias over the edge and hand-stitch in place. This creates an application with no visible stitching. If there’s enough space on the underside to ensure catching the fold, you can also machine stitch in the ditch of the seam from the right side.

Bias tape - stitch and flip
Stitch and flip application: Step 1 – sew along the open creaseline
Stitch and flip application: Step 2 – fold over and stitch in the ditch

Encase

The easiest way to apply double-fold bias tape is to simply encase the raw edge to be finished and machine stitch the tape in place from the right side. Be sure that the wider portion is on the underside to ensure the stitching catches it. The stitching can be a simple straight stitch or a decorative stitch along the edge or over it.

Bias tape - encased

Fuse

Some brands offer fusible bias tape, both double- and single-fold. To apply this, simply encase the edge and fuse according to the manufacturer’s instructions. Note that the fusing is a temporary hold, so stitching also needs to be done for security. Single-fold fusible bias tape is used for stained glass and Celtic appliqué techniques to cover raw edges.

If you want to make your own fusible application, simply tuck a strip of ¼” wide fusible web tape under the bias tape on both sides and fuse in place.

How do I finish the end of bias binding?

Anytime you can bring the bias tape ends into a crossing seam line, that is ideal. If that’s not possible, simply turn under the starting end of the binding and start stitching 1” in, then as you return to the starting point, tuck in the finishing end under the beginning point and continue stitching. If the bias tape end is free, like on apron ties, simply tie a knot in the bias tape, as the ends won’t ravel. Another option is to hand-stitch the ends in place for an invisible finish.

Can I make my own?

Clover bias tape maker

Absolutely, and there’s a bias tape maker to make the process even easier. Bias tape makers are available in multiple sizes and some offer the option of adding a fusible tape in at the same time as the folding and pressing operation. Using one of these devices makes bias tape a consistent width, which is tricky to do when you just try to fold and press it yourself without the tool. Custom bias tape allows you to use whatever fabric you prefer, instead of being limited by available ready-made colors.

Tip: See our video on how to use this tool at https://www.asg.org/how-to-make-your-own-bias-tape/

Clover Bias Tape Makers

~Linda Griepentrog
Linda is the owner of G Wiz Creative Services and she does writing, editing and designing for companies in the sewing, crafting and quilting industries. In addition, she escorts fabric shopping tours to Hong Kong. She lives at the Oregon Coast with her husband Keith, and two dogs, Yohnuh and Abby. Contact her at .

Did you enjoy this article?
Are you an ASG member?
This field is for validation purposes and should be left unchanged.

Tagged With: bias tape

December 10, 2021

Specialty Scissors

Chances are good that you’ve got more than one pair of shears and/or scissors in your sewing room. The old standby is a good pair of dressmaker shears, but there are a few other lesser-known varieties that you may want to add to your tool arsenal. These novelties often have a single function, but sometimes they’re the best tool for the job.

Havels Duckbill Applique Scissors.Cut Ups

Appliqué (duckbill) scissors are perhaps the funniest looking of our scissor choices. They have one large D-shaped blade and one regular blade and are designed to trim close to an appliqué without cutting the fabric base. These scissors are available with either sharp points or rounded points, depending of your cutting confidence.

Pictured: Havels Duckbill Appliqué Scissors


Tooltron-Buttonhole-ScissorsButtonhole scissors have a screw adjustment that can set the cutting size so that multiple buttonholes are all cut the same length. These replace seam rippers for opening buttonholes and offer a bit more safety than trying to use larger scissors for the opening task.

Pictured: Tooltron Buttonhole Scissors


Mundial Embroidery ScissorsEmbroidery scissors are small (3”-5” blades) with very sharp points for cutting threads very closely. Available with straight or curved blades, some embroidery scissors have an antique look with filigree designs or animal shapes, like the heirloom stork scissors.

Pictured: Mundial Embroidery Scissors


Havel's Ultimate Curved Machine Embroidery ScissorsMachine embroidery scissors have curved blades/handles so that you can trim threads closely while the work is still in the embroidery hoop at the machine. Depending on the brand, the handles can be at a right angle to the blades. They’re not limited to machine embroidery and can be used anytime you need to trim something close to a surface, like quilting or free-motion stitchery.

Pictured: Havel’s Ultimate Curved Machine Embroidery Scissors


Fiskars Non-stick Detail ScissorsNon-stick scissors have coated blades specifically designed for working with fabrics that tend to stick, like vinyl, laminated cottons, oilcloth and some faux leathers.

Pictured: Fiskars Non-stick Detail Scissors


Tooltron Open Ring ScissorsOpen-ring scissors have open curved handles (instead of rings), so that they can be used by either right- or left-handed sewers, or anyone with finger or hand issues, as there’s extra space for access.

Pictured: Tooltron Open Ring Scissors


Famore Rag ClipsRag scissors are workhorses designed specifically to cut through multiple layers of fabric at one time, like for rag-edge quilts. Not your typical scissor look, they take on a plier look for more cutting power.

Pictured: Famore Rag Clips


Havels Stitch Cutting ScissorsStitch-cutting scissors have a small hook at one end of a blade to slide under a single stitch and they’re ideal for ripping out stitches without damaging the fabric below.

Pictured: Havels Stitch Cutting Scissors


Tacony Undertrimmer ScissorsUnder-trimmers, like their cousins the machine embroidery scissor, these quirky looking scissors allow for trimming in an embroidery hoop while it’s on the machine, but also have the ability and shape to reach under the hoop as well to trim bobbin threads during the embroidery or stitching process.

Pictured: Tacony Undertrimmer Scissors


Close encounters

Gingher Featherweight Thread SnipsSnips: In addition to this grouping of novelty scissors, don’t forget the ever-handy nippers, snippers, thread clips—the names differ, but the function is the same. Their small, spring-action blades make trimming threads easier than ever.

Pictured: Gingher Featherweight Thread Snips


Famore Blunt Tip ScissorsKids: If you’re teaching sewing to kids, look for blunt-tip safety scissors to prevent major accidents with sharper pointed scissors.

Pictured: Famore Blunt Tip Scissors


~Linda Griepentrog
Linda is the owner of G Wiz Creative Services and she does writing, editing and designing for companies in the sewing, crafting and quilting industries. In addition, she escorts fabric shopping tours to Hong Kong. She lives at the Oregon Coast with her husband Keith, and two dogs, Yohnuh and Abby. Contact her at .

Did you enjoy this article?
Are you an ASG member?
This field is for validation purposes and should be left unchanged.

Tagged With: scissors, snips

  • « Previous Page
  • 1
  • …
  • 31
  • 32
  • 33
  • 34
  • 35
  • …
  • 63
  • Next Page »

Become a Member

Join the only national organization dedicated to Advancing Sewing as an Art and Life Skill.

Join Now button

Blog Article Categories

  • ASG Conference
  • Chapter Stories
  • Embroidery
  • Fitting
  • Learn to Sew
  • National Sewing Month
  • Products, Books, & Patterns
  • Projects
  • Quilting
  • Sewing
  • Sewing Techniques
  • Sewing Tips
  • Sewing Tours
  • Videos
  • Disclaimer
  • Privacy Policy

American Sewing Guild
National Headquarters
9660 Hillcroft, Suite 230
Houston TX 77096
713-729-3000 | 713-721-9230 Fax
www.ASG.org

ASG wordcloud - education, conference, discounts, videos, special offers, tours and more

Copyright © 1998–2025 · American Sewing Guild · All Rights Reserved