American Sewing Guild (ASG)

Visit our blog Visit the ASG Facebook page Visit ASG on Pinterest Visit ASG's YouTube channel Visit ASG on Instagram
  • Home
  • Join ASG
    • Join Online
    • Chapter Locations
    • Member Benefits
    • Member Brochure
    • Join by Mail
  • Conference & Education
  • Resources
    • Contests & Awards
    • Giving Back
    • Hall of Fame
    • Links
    • Travel and Tours
    • Measurement Chart
  • Shop
    • ASG Store
    • Chapter Products
    • Video Resources
  • Blog
  • About
    • About Us
    • Donate to ASG
    • ASG Sensitivity Statement
    • FAQ’s
    • Start a Chapter
  • Contact
  • Member Login
    • Login First!
    • Members Only
    • Leadership Only
    • Website FAQ’s
    • Logout
  •  

February 14, 2018

ASG Fabric Design Contest, part 2 Q&A

Wow!  Part 2 of the Fabric Design contest has generated so much excitement and interest that it has exceeded our expectations. We have received multiple questions, and I love the way we as sewers think… out of the box. So this update will serve as a reminder of the contest and address some of those questions again.

Entries have already started coming in. I know that there will be many others as the deadline approaches. To comply with the many requests we have received, the deadline for submissions has been extended to May 31, 2018. Yes, you now have an additional two months to work on your fabulous entries.

  • Can one member submit more than one item?
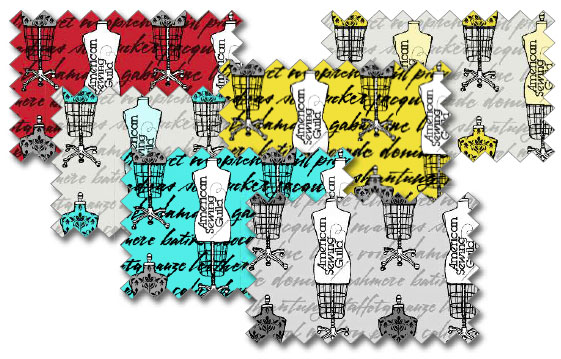
    Yes, as long as the items are different in terms of patterns. For example: one member can submit a handbag, a dress and a wall hanging. As a result, the chapter will be credited three entries.
  • Do I have to use the gray and white version of the design?
    No, you can use any of the color palettes offered and in any size on any fabric.
  • I can’t seem to find a place to enter the discount code, ASG20.
    To find the space to enter ASG20, first pick the fabric and put it in your cart. Scroll down, just below the listing of fabrics look on the left to enter the discount code
  • Can I use more of the coordinating fabric design than the winning design?
    Yes. The rule is that the winning design made with the dress form and the ASG logo (in any color palette and size) must be featured in the project.
  • Can I use the winning design solely as a lining in a project?
    No, using it this way does not feature the design. It must be visible from the exterior of the item.
  • How will you know how to credit my chapter for my entry?
    After your creation is completed, you will need to submit your name, your chapter name, and a photo of your creation making sure that the winning design is clearly displayed and send it to the ASG Fabric Design Contest no later than May 31, 2018.

Now with this information, I just know that your scissors will be clipping and your machines humming to make wonderful creations as contest entries.  We can’t wait to see what you create!


Joi Bostic

January 2, 2018

Learn to Sew: Intersecting Seams

When reading sewing pattern instructions, it will say to “intersect” or “cross” seams. This short video shows you how to intersect seams.

December 29, 2017

Sewing a Collar Band/Stand and Cuff

Sewing a collar stand/band and cuff
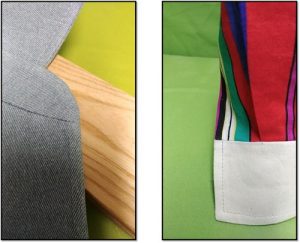
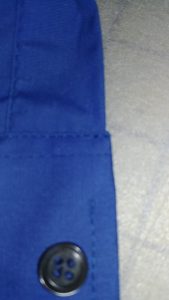
Last week I told you I’d share my final blog of the year with another new sewing technique I’ll be sharing with members.

I have been frustrated all my sewing life with the way cuffs are done. The intersection between the placket and cuff are not smooth and even. This, and the collar stand, had been my sewing nemesis for many years. Sometimes patterns would come out with new techniques which would be better—like the “burrito” technique—but I still wasn’t happy with the results. Have you been happy with your results? Was the transition smooth with the way you’ve been doing them?

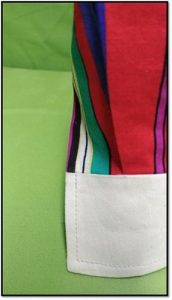
It took a lot of trial and error many years ago, long before I came on board with ASG, but I came up with a method of sewing these garment areas that finally made me happy. I’ve never put either into writing until now.

I’m working on finalizing the instruction and in the beginning of 2018 ASG members will get my full instructions. I’m hoping this will be a game-changer for beginning and advanced sewers alike. I think part of our problem with sewing is not getting really pretty results which scream homemade. Why, even ready-to-wear garments don’t have a smooth transition though better quality and custom ones are much, much better but they still don’t use the technique I developed.

Sewing a collar stand/band and cuff

I’ve not seen the way I do a collar band/stand and cuff written anywhere. I’m hoping by putting these in writing for our members it will be my little way of changing the sewing world and the way sewing is done in these areas giving sewers better outcomes in their construction.

If you would like these instructions, please join ASG and you can get them online in our educational videos.

Here’s to a happy journey of sewing in 2018!
~Ramona

Tagged With: collar band, collar stand, garment sewing

December 22, 2017

The Plight of (sewing) Intersections

Do you read pattern sewing instructions and wonder why someone hasn’t come up with a better system of sewing some areas of garments? I often do that. Specifically right now I’m talking about the intersection of the collar stand and cuff on a sleeve.

Example 1

Here the front of the shirt front is folded back twice and stitched down. The collar stand is attached, with the collar, and at the center front it is anything but pretty and as near perfect as we can get it. I see this in not only home sewn garments but also in ready-to-wear like this shirt. When fabrics are thin, it is easier to get a somewhat smooth transition from the front band into the collar stand, but on heavier fabrics like denim it is much harder because of the bulk of the fabric and all the layers that come together at that point.

Example 2

The same with a cuff with a placket. Again, with a lighter weight fabric like a shirting, the layers that come together aren’t as bulky as a heavier fabric, yet—there is still an anything but smooth transition.

In better ready-to-wear greater care is taken in these two areas making them smoother but still, it is not as perfect as I’d like.

After considerable thought and a lot of experimentation, I believe I’ve come up with what I think is a good way to transition these areas. Will it change the world of sewing? I’d like to think so! Honestly, all it takes is a little re-designing of the pattern and different steps in construction but truly it is no harder than matching seamlines at a center back waist.

I’m finishing up a garment now that will have these two new techniques in it. They will be in the video sew-along series and posted on the ASG website in the members only area. The video will show step by step how each is accomplished.

Watch for the last blog of the year next week and I’ll show you the final garment areas and you can judge for yourself.

Sew ‘til next time….enjoy the journey of sewing!

~Ramona

Tagged With: collar band, collar stand, garment sewing

December 18, 2017

Permission to Fit!

Garment Fitting

Home sewers and most educators approach fitting so differently it is no wonder it is so confusing. I like a combo of flat pattern alteration with the tweaking done in draping on the body. There is so much that plays into fitting from body structure, weight distribution, physical attributions and limitations, fabric type, the fabric weave, the fabric’s weight, and it’s stretch or lack of, and just how the wearer just personally likes a garment to “fit” them. And then of course, there is the pattern–how much is fit, how much is “design ease” or the silhouette of the garment (think mermaid skirt to a full-flowing ball gown skirt). Unfortunately, fitting is not a one-solution method, but what I will tell you is that most of us “over-think” it and make it much harder than it is.

Garment Structure and Undergarments

Remember the corsets and girdles of the last two centuries and more? Body parts were held firmly in place and supported. Fleshy portions of the waist and hip were smoothed out. Undergarments need to support areas of the body and most of us today want comfort over support. Wear a sports bra under a business jacket and guess what? The bust darts won’t shape as they should, there most likely will be wrinkles in the garment under the bust down to the waistline–the fabric will puddle like a drapery on the floor. Bust darts won’t point to the bust apex, and the garment generally just won’t fit right. Want a great fitting garment? Start with proper foundation garments.

Padding

In teaching classes on fit I always get push-back on “padding” out areas − like using shoulder pads. A dress or blouse “hangs” from the shoulders. If the shoulders aren’t supported, the garment isn’t supported. Padding also “evens out” uneven areas–and our goal is to make the garments we make look “balanced” (pad out a lower shoulder to equal the other). I think most envision “Linda Evans” ’80’s shoulder pads. That is a style. What I’m talking about are at least 1/4″ – 3/8″ shoulder pads that help support the garment from the shoulders and giving a smooth look. Take shoulder pads out of the equation on a garment requiring one, guess what? You’ll have drag wrinkles, a wimpy upper chest on the garment, sleeves that may twist at the cap, and just an ill-fitting garment.

Confidence

I’ve discovered people basically know what they like in fit, but they are not confident they are “right.” Home sewers are so concerned about doing things the “right” way. Well, I’m here to tell you, that the “right” way often boxes us into a corner and the project then becomes a UFO. Feel free to give yourself permission to do what YOU think is right—because guess what, it probably is! Body measurements to the flat pattern translate into a 3-D fabric garment. Add length and width where it is needed, not just at the seams. There might be more width in the bust area from the apex to the side seam, but not from the apex to the center front, or vice versa. Add more fabric where needed, and take it out where it is not needed, being mindful of the fabric grainline.

That’s how I’ve developed some of the things I do that are out of the norm or not considered the “right” way to do things. Those are my “AH HA!” moments. For a long while I’ve been contemplating something about pattern alteration and fitting and hopefully sometime soon I’ll start experimenting. Who knows, maybe it will lead to a whole new way to think about flat pattern alteration and fitting.

Sew until next time… enjoy the journey of sewing!

~Ramona

Tagged With: garment fitting, garment sewing

  • « Previous Page
  • 1
  • …
  • 58
  • 59
  • 60
  • 61
  • 62
  • 63
  • Next Page »

Become a Member

Join the only national organization dedicated to Advancing Sewing as an Art and Life Skill.

Join Now button

Blog Article Categories

  • ASG Conference
  • Chapter Stories
  • Embroidery
  • Fitting
  • Learn to Sew
  • National Sewing Month
  • Products, Books, & Patterns
  • Projects
  • Quilting
  • Sewing
  • Sewing Techniques
  • Sewing Tips
  • Sewing Tours
  • Videos
  • Disclaimer
  • Privacy Policy

American Sewing Guild
National Headquarters
9660 Hillcroft, Suite 230
Houston TX 77096
713-729-3000 | 713-721-9230 Fax
www.ASG.org

ASG wordcloud - education, conference, discounts, videos, special offers, tours and more

Copyright © 1998–2025 · American Sewing Guild · All Rights Reserved