American Sewing Guild (ASG)

Visit our blog Visit the ASG Facebook page Visit ASG on Pinterest Visit ASG's YouTube channel Visit ASG on Instagram
  • Home
  • Join ASG
    • Join Online
    • Chapter Locations
    • Member Benefits
    • Member Brochure
    • Join by Mail
  • Education & Classes
  • Resources
    • Contests & Awards
    • Giving Back
    • Hall of Fame
    • Travel and Tours
    • Measurement Chart
  • Shop
    • ASG Store
    • Chapter Products
    • Video Resources
  • Blog
  • About
    • About Us
    • Donate to ASG
    • ASG Sensitivity Statement
    • FAQ’s
    • Start a Chapter
  • Contact
  • Member Login
    • Login First!
    • Members Only
    • Leadership Only
    • Website FAQ’s
    • Logout
  •  

August 14, 2026

Sleeve Setting

Whether you’re a beginner or an experienced sewer, sleeves can be a little intimidating—whose idea was it to try and fit a rounded curve into an armhole anyway?
Sleeve image

No matter what type of garment you’re creating—from coat to T-shirt—you’ll likely be facing one of two types of sleeves: either one with a rounded cap or one with a flat cap. (Raglan is another type of sleeve, but requires a different insertion method.)

Rounded caps are found in more tailored and fitted garments and are commonly called set-in sleeves, while flat caps (aka shirt sleeves) are found in more sporty garments, menswear and kids’ clothes, and getting them into your garment requires different strategies.
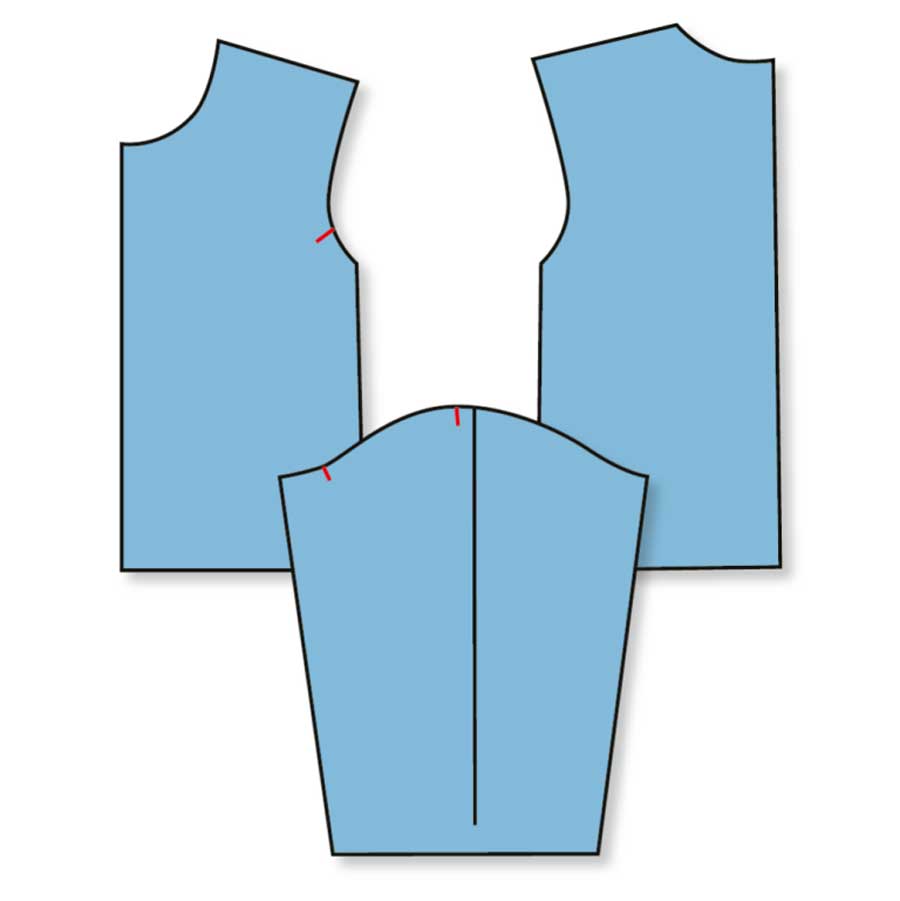
Flat cap sleeve

Set-in Sleeves

The shape of a rounded sleeve cap allows for ease to fit over the shoulder curve and upper arm area. If you measure the seamline of the garment and you measure the seamline of the upper sleeve, you’ll find that the sleeve is longer. That means you’ll need to ease the fullness into the smaller garment opening.

A rounded sleeve cap has important pattern markings—at the shoulder and part way along the sleeve cap both front and back, including placement notches. These are key for distributing the ease.
Rounded cap sleeve with markings

The area below the armhole notches on the sleeve should fit the armhole itself with no ease, as the ease area is concentrated at the top portion of the sleeve, above the notches.

To evenly distribute the sleeve cap ease, stitch a line of basting length stitches 1/8” inside and outside the seamline from notch to notch—do not backstitch, but instead leave the thread tails long enough to pull.
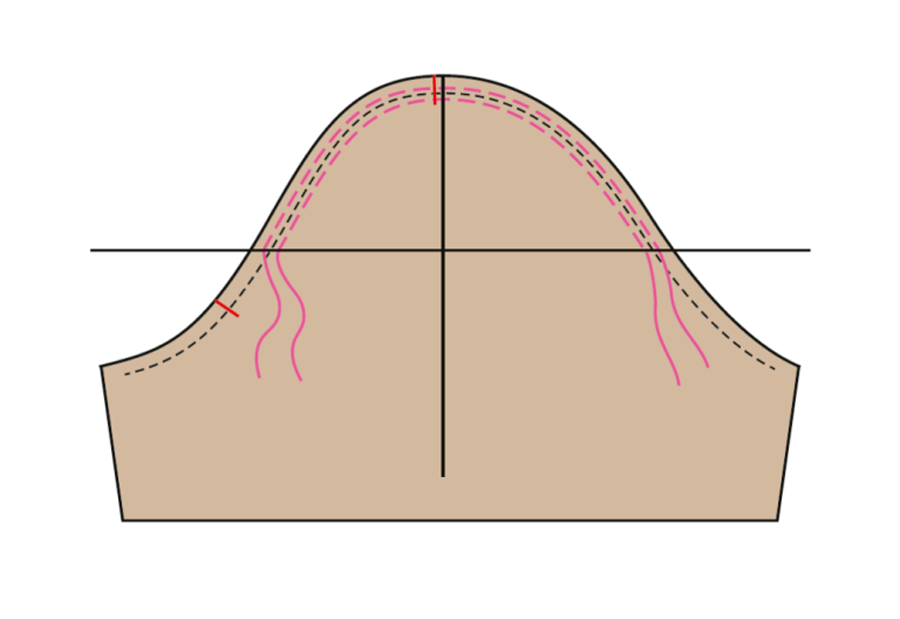
Ease lines

The first step in insertion is to sew the underarm sleeve seam and the corresponding garment shoulder and underarm seam, and press both open. With right sides together, place the sleeve inside the armhole opening and pin at the notches, seamline, shoulder point and corresponding markings on the cap. Gently pull on the bobbin threads of the ease line to fit the sleeve to the armhole size, working from the notch area to the shoulder.
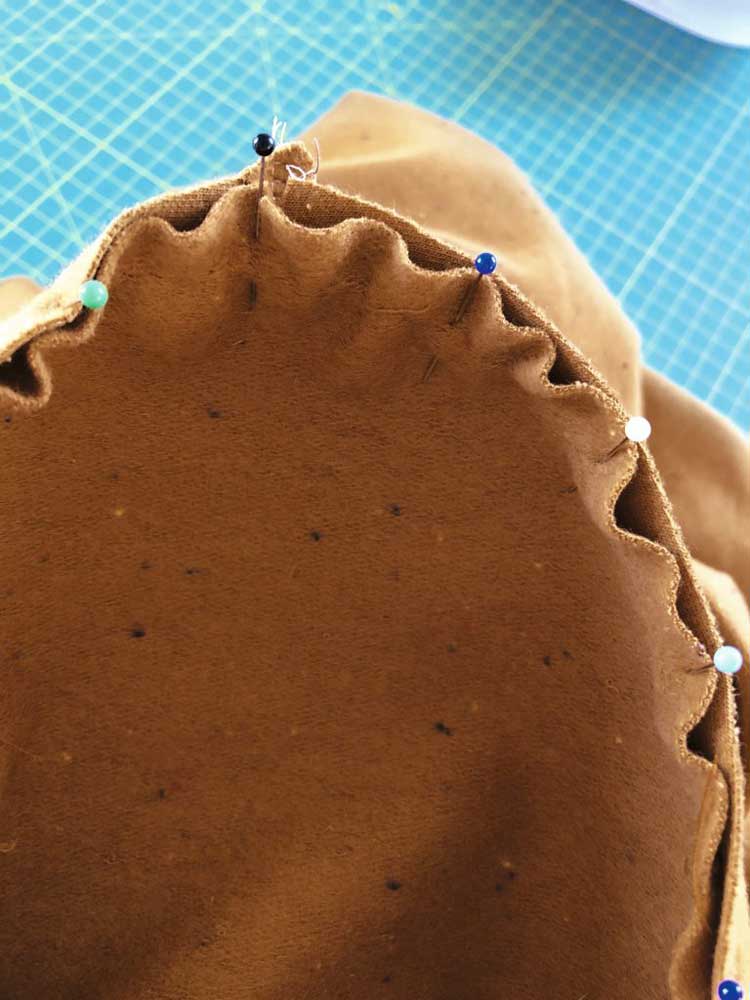
If your machine has a free-arm, this is the place to use it, as the sleeve opening can fit over it for easier access.

Beginning at the underarm seam, stitch the sleeve in place adjusting the ease as needed to fit and being careful to avoid any puckers. Sew with the sleeve side up to control the ease.

Reinforce the lower armhole with a second line of stitching ¼” inside the seamline. Trim the seam allowances below the notches, but leave the seam allowances intact in the cap area to fill out the sleeve head. Push the upper sleeve seam allowances toward the sleeve, but don’t press this area as it will flatten, eliminating the ease you just carefully created. Remove any visible basting.

If you’re working on a tailored garment with a two-piece sleeve, follow the pattern guidesheet to sew the undersleeve to the top sleeve before inserting it into the garment.

Flat Sleeve Insertion

Shirt sleeves have the same markings as their set-in cousins—notches front and back, a shoulder marking and often some intermediate marks as well. This type of sleeve is put in prior to sewing the garment side seams and sleeve underarm seam. No ease line is necessary for this type of sleeve—simply match the notches and other marks, right sides together, and stitch with the sleeve side up.
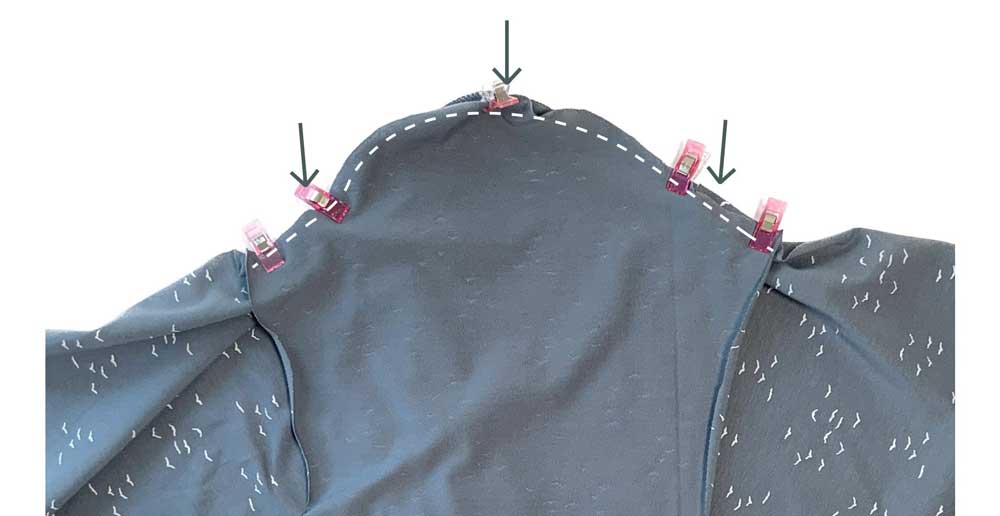
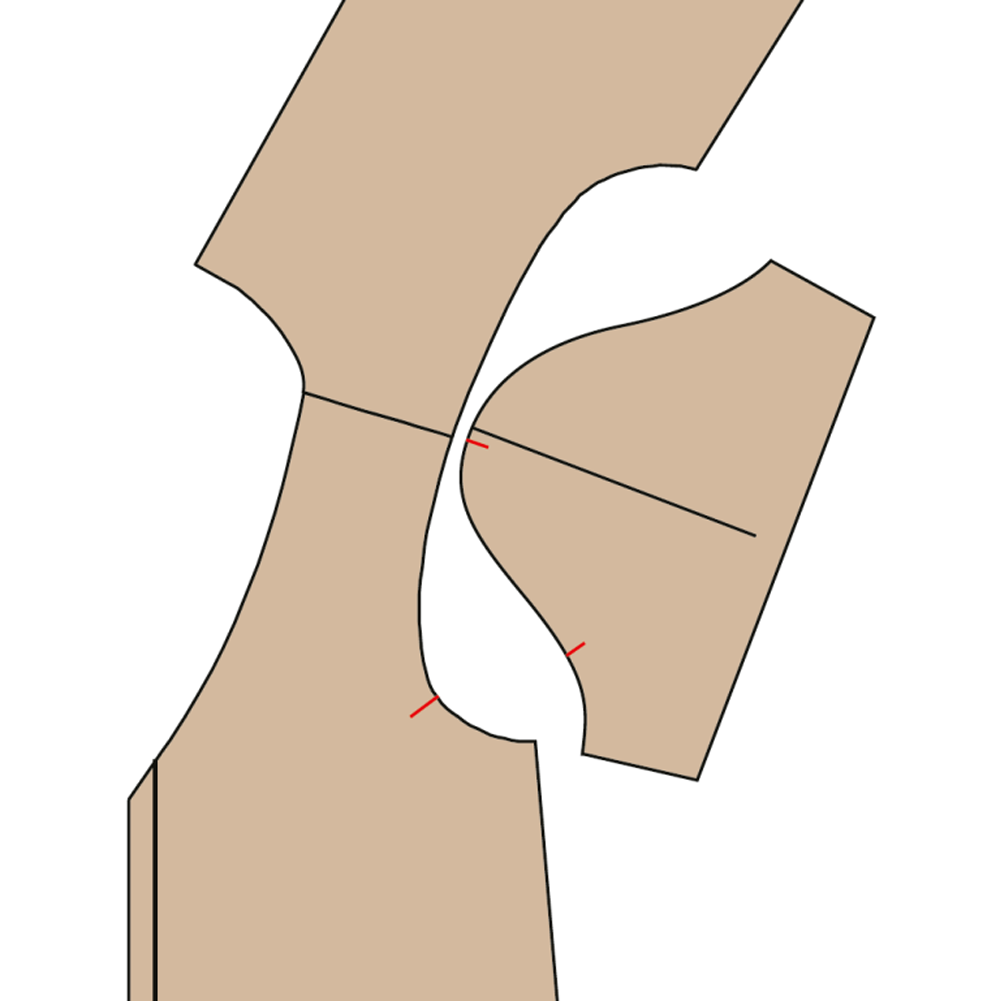
Flat cap sleeve, ready to sew

Shirt sleeves can easily be inserted with a serger or conventional machine. If you choose the latter, sew a second line of stitching, either zigzag or straight just inside the seamline and trim off the extra seam allowance.

With right sides together, match the garment underarm seams, hemline and sleeve hem, then sew the seam continuously. Finish and trim as for the sleeve cap area.
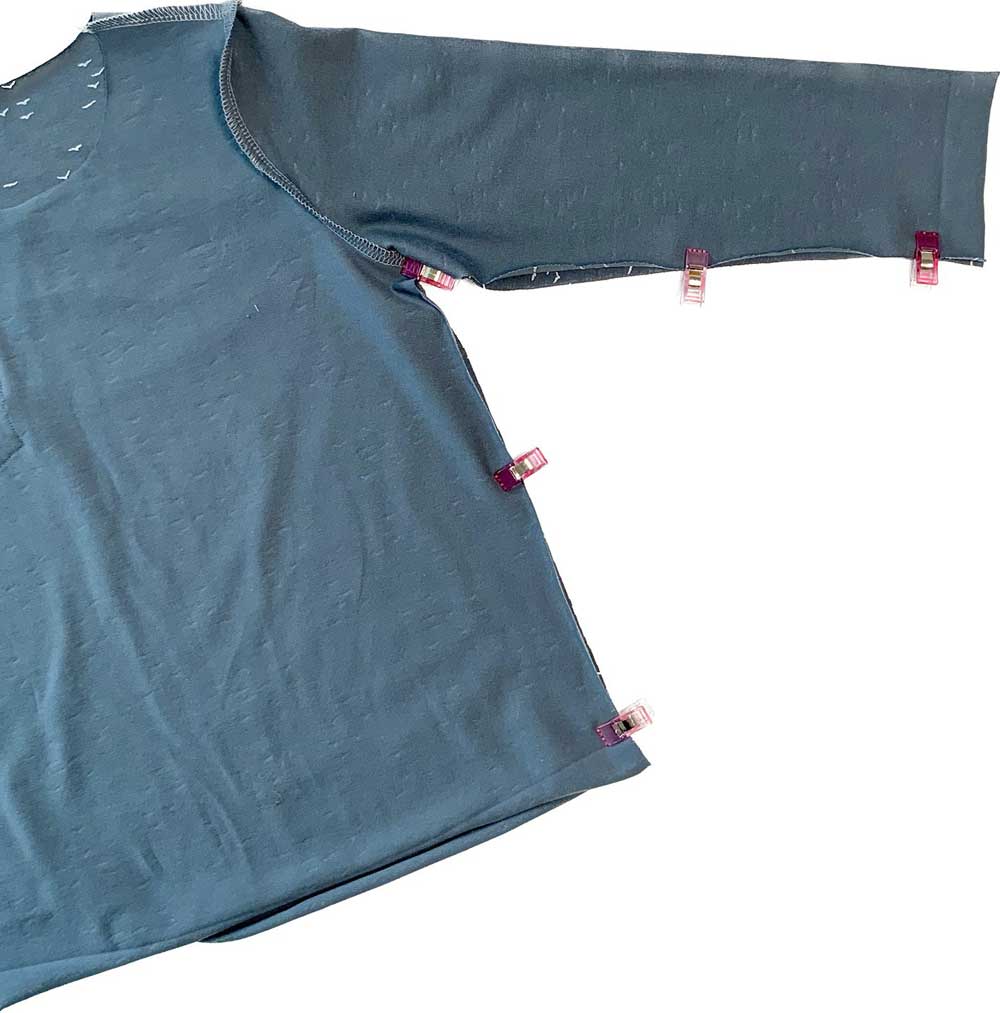
Flat cap sleeve side seam

All images provided courtesy of Bernina


~Linda Griepentrog is the owner of G Wiz Creative Services and she does writing, editing and designing for companies in the sewing, crafting and quilting industries. In addition, she escorts fabric shopping tours to Hong Kong. She lives at the Oregon Coast with her husband Keith, and three dogs, Yohnuh, Abby, and Lizzie. Contact her at gwizdesigns@aol.com.
Tagged With: garment sewing, sewing tips, sleeves

August 7, 2026

Mixing Knits and Wovens Successfully

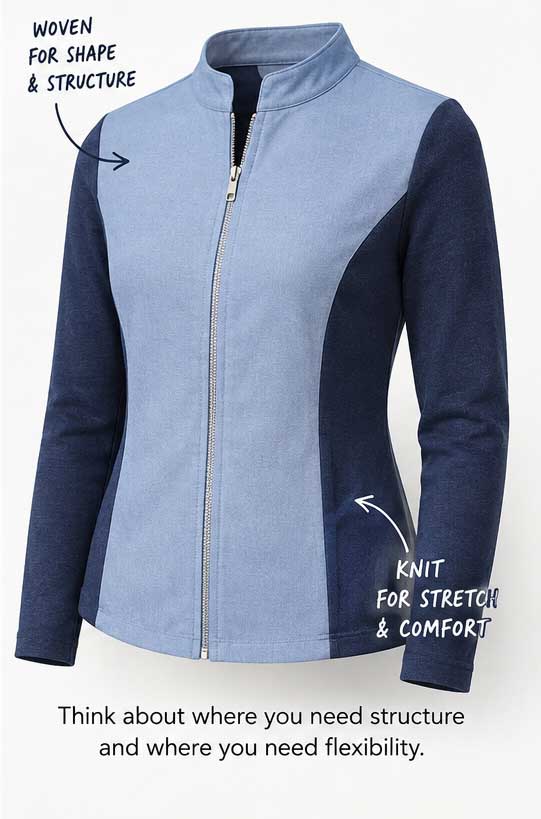
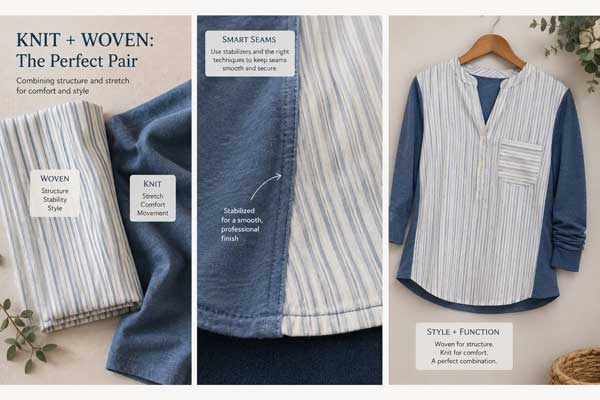
Walk through any clothing store, and you’ll notice that many of today’s garments combine knit and woven fabrics. A jacket may feature knit side panels for comfort, a blouse might pair a woven front with a knit back, or a dress could use stretch knit sleeves with a woven bodice. These thoughtful combinations offer the best of both worlds—structure where you want it and flexibility where you need it.

Using knit and woven fabric

For home garment sewers, however, combining fabrics with different characteristics can sometimes be intimidating especially when one fabric stretches while the other doesn’t. One may drape fluidly while the other holds its shape. The secret to success isn’t avoiding these pairings—it’s understanding how each fabric behaves and designing your project so they work together rather than against each other.

Start with Compatible Fabrics

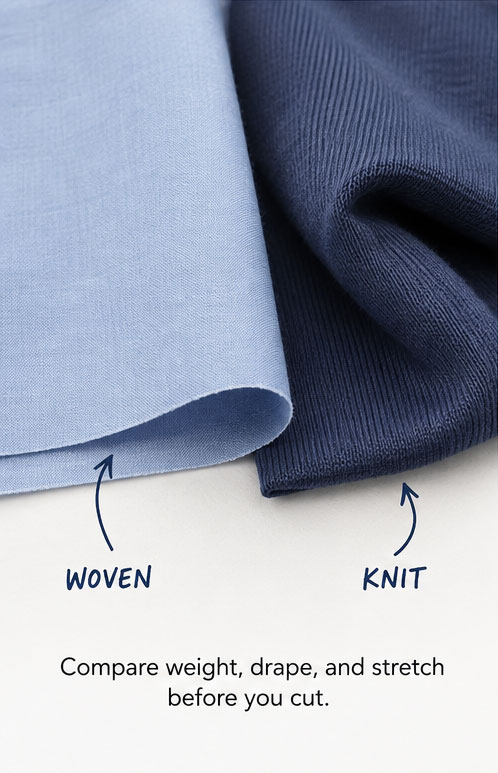
Knit and woven fabric side by side

The biggest mistake you can make is choosing fabrics based solely on color or print. Instead, evaluate how the fabrics behave.

  • Begin by comparing their weight. A lightweight rayon challis paired with a heavyweight ponte knit will likely pull out of balance, while a cotton lawn and a lightweight jersey may complement each other beautifully.
  • Next, consider drape. Fabrics should move in a similar way. If one fabric flows softly while the other stands away from the body, the garment may twist, sag, or feel awkward when worn.
  • Finally, pay attention to texture. A smooth woven linen and a textured sweater knit may technically work together, but the contrast should be intentional rather than accidental.

Before cutting your project, hold both fabrics together, let them hang over your hand, and observe how they move. If they seem comfortable together, chances are they’ll sew together well, too.

Let Each Fabric Do What It Does Best

Successful mixed-fabric garments take advantage of each material’s strengths. Use woven fabrics where structure matters. Shirt collars, cuffs, waistbands, button plackets, and tailored bodices all benefit from the stability of woven fabric. Reserve knits for areas where comfort and movement are important. Side panels, sleeves, backs, neckbands, and fitted waist sections can all benefit from the stretch that knit fabrics provide.

Think about how your body moves throughout the day. Placing knit panels where you bend, reach, or sit can make a garment noticeably more comfortable without sacrificing the crisp appearance of woven fabric.

Stabilize Seams Between Fabric Types

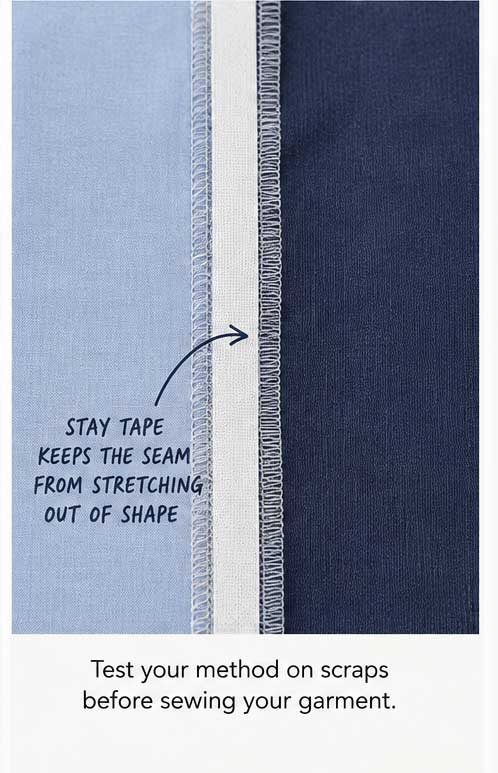
Stabilizing seams

Joining a knit to a woven is where many projects begin to misbehave. Because the knit naturally stretches while the woven does not, the seam can become wavy or distorted during construction. The solution is stabilization.

A strip of lightweight fusible stay tape, clear elastic, twill tape, or even a narrow strip of lightweight interfacing can help keep the seam from stretching out of shape. The appropriate stabilizer depends on the garment and fabric, but the goal is always the same: preserve the intended shape while allowing the garment to remain comfortable.

As always, test your chosen stabilizer on fabric scraps before using it on your garment.

Choose the Right Needle and Stitch

One garment may require more than one sewing setup.

  • For sections sewn entirely in woven fabric, a universal or sharp needle and a standard straight stitch often work perfectly.
  • When sewing knit sections, switch to a ballpoint or stretch needle to prevent skipped stitches and fabric damage. Depending on your machine and fabric, a narrow zigzag or stretch stitch may produce seams that retain flexibility.
  • If you’re sewing across a seam that joins both fabric types, test your stitch settings first. A small sample can reveal puckering, tunneling, or skipped stitches before they become part of your project.

Consider the Direction of Stretch

Whenever knit fabric is part of a design, think carefully about where the stretch belongs. A knit side panel should stretch around the body, while a knit waistband may need more recovery than a knit sleeve. Pay attention to the greatest direction of stretch as you lay out your pattern pieces.

Likewise, remember that woven fabrics generally control the fit of the garment. If a woven front is paired with a knit back, the woven piece usually determines the finished size. Simply adding a stretchy panel won’t automatically create a looser fit if the woven sections remain restrictive.

Press with Care

Pressing becomes even more important when different fabric types meet.

  • Use the temperature appropriate for the most delicate fabric, and always test first. Excessive heat can flatten textured knits, create shine on synthetic fibers, or distort stretch fabrics.
  • A press cloth is particularly helpful when working with mixed fabrics, allowing you to press seams thoroughly without damaging the surface.
  • Take your time pressing seam allowances so they lie flat before moving on to the next construction step. This small habit helps different fabrics blend together visually.

Sample Before You Commit

Perhaps the best habit when mixing knits and wovens is making a test sample. Sew several inches of the actual seam using the same fabrics, thread, stabilizer, needle, stitch length, and pressing method you intend to use on the garment. Stretch it gently, press it, and evaluate how it behaves.

A five-minute sample can answer questions that might otherwise lead to frustration halfway through a project.

A Creative Way to Expand Your Sewing

Combining knit and woven fabrics opens the door to endless design possibilities. It allows you to add comfort to tailored garments, introduce structure to relaxed styles, and make creative use of fabric already in your stash.

With thoughtful fabric selection, careful stabilization, and a willingness to test before sewing, you’ll discover that mixing fabric types isn’t something to avoid—it’s another skill that expands your creative toolbox. Once you become comfortable pairing the strengths of both knits and wovens, you’ll start seeing opportunities for custom details and designer-inspired garments everywhere.


~ American Sewing Guild

Tagged With: fabric, garment sewing, knit, woven

April 24, 2026

The Zipper Files: Holding It All Together

When purchasing a zipper, you may notice several different types of these handy sliders. We don’t think much about them, but zippers are more complex than we know.

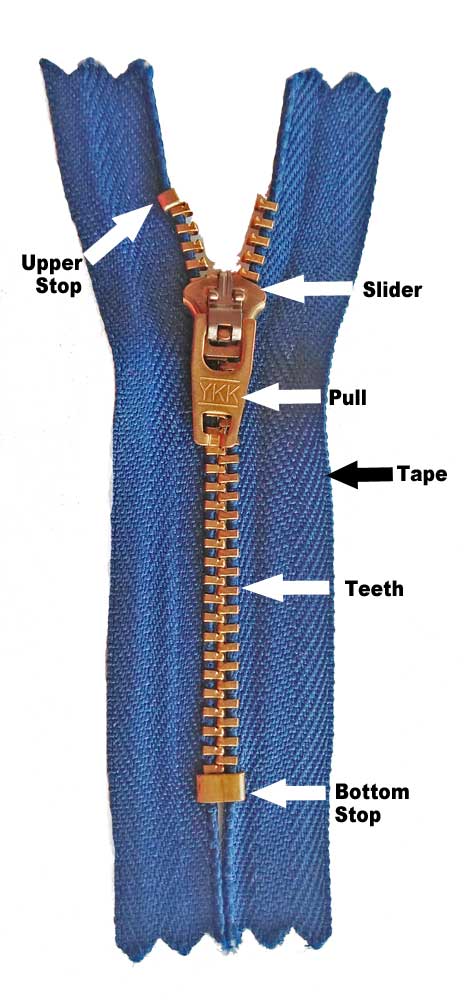
Zipper Parts

Zipper Types

  • All-purpose zippers are closed at the bottom and open at the top, making them useful for plackets openings.
  • Invisible zippers are specially made so that the coils roll under the zipper tape hiding them when inserted into a seam. Only the pull shows with proper application.
  • Jacket zippers are heavier and they separate at the bottom so you can put on the garment.
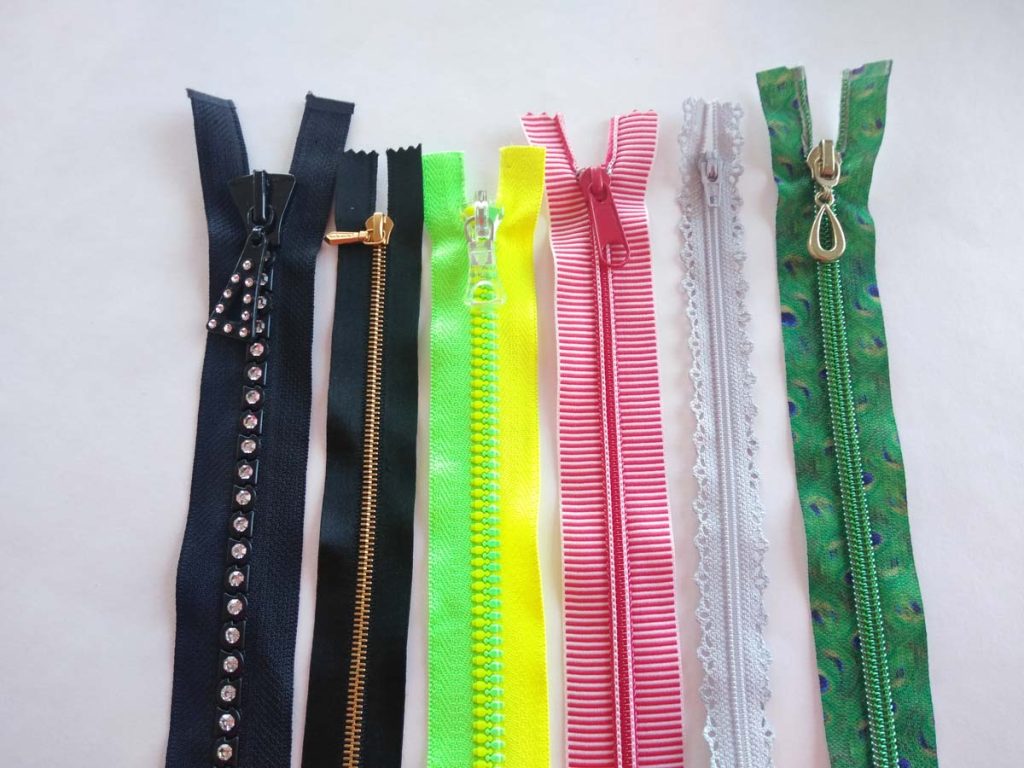
  • Novelty zippers include those with die-cut tape edges like lace, novelty zipper tapes like stripes, prints, vinyl or satin; multi-color teeth, and even rhinestone teeth (2).
  • Purse zippers can have one or two pulls, but are heavier weight than all-purpose ones. If the zipper has two pulls, they meet in the middle to allow for more convenient bag opening.
  • Specialty zippers include those that may have waterproof coverings (for tents and outdoor gear), extra-long zippers for sleeping bags, tents, etc.; and upholstery zippers.
  • Sport-weight zippers may or may not separate but are heavier than regular zippers, but not as heavy as jacket styles.
  • Two-way zippers are also suitable for jackets, but they have two pulls—one opening from the top, and the other from the bottom.
Novelty zippers

Zipper Coils

  • The teeth of the zipper can be metal, plastic, nylon or polyester, depending on the brand or the type of slider you’re purchasing.
  • Metal zippers, often used in workwear and jeans, are difficult to shorten so be sure to purchase the proper length needed for your project.
  • Molded plastic teeth are applied to the zipper tape individually, while softer nylon or polyester zipper teeth are often made from a continuous coil. The latter two can be sewn across for easy length adjustments, and they’re flexible for curved areas.

Size Matters

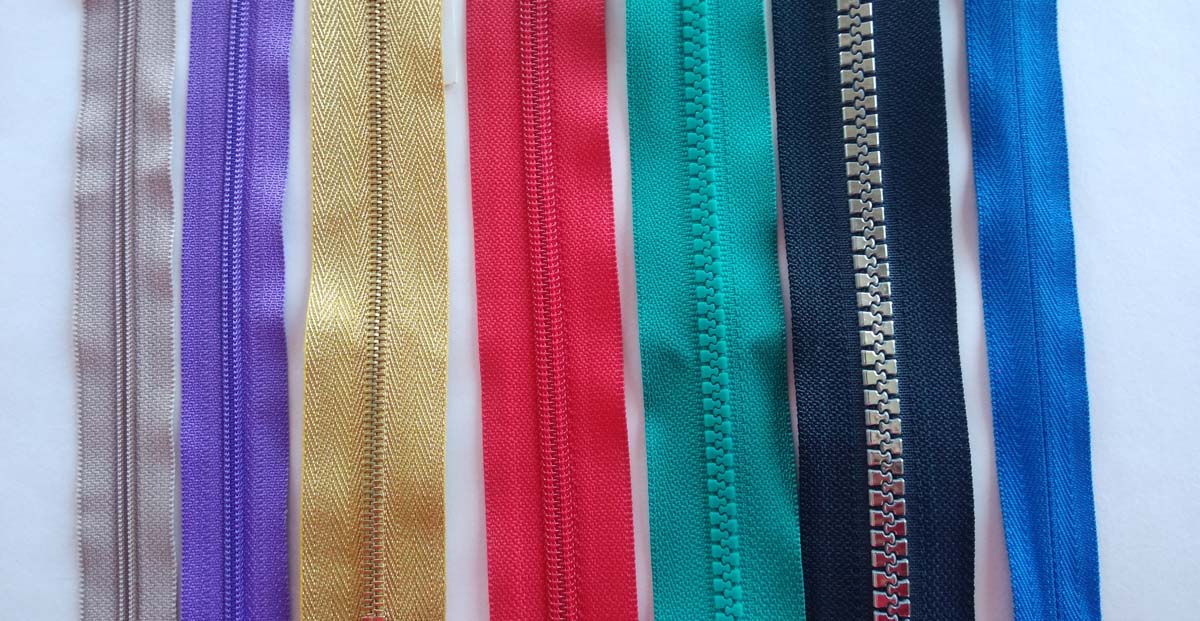
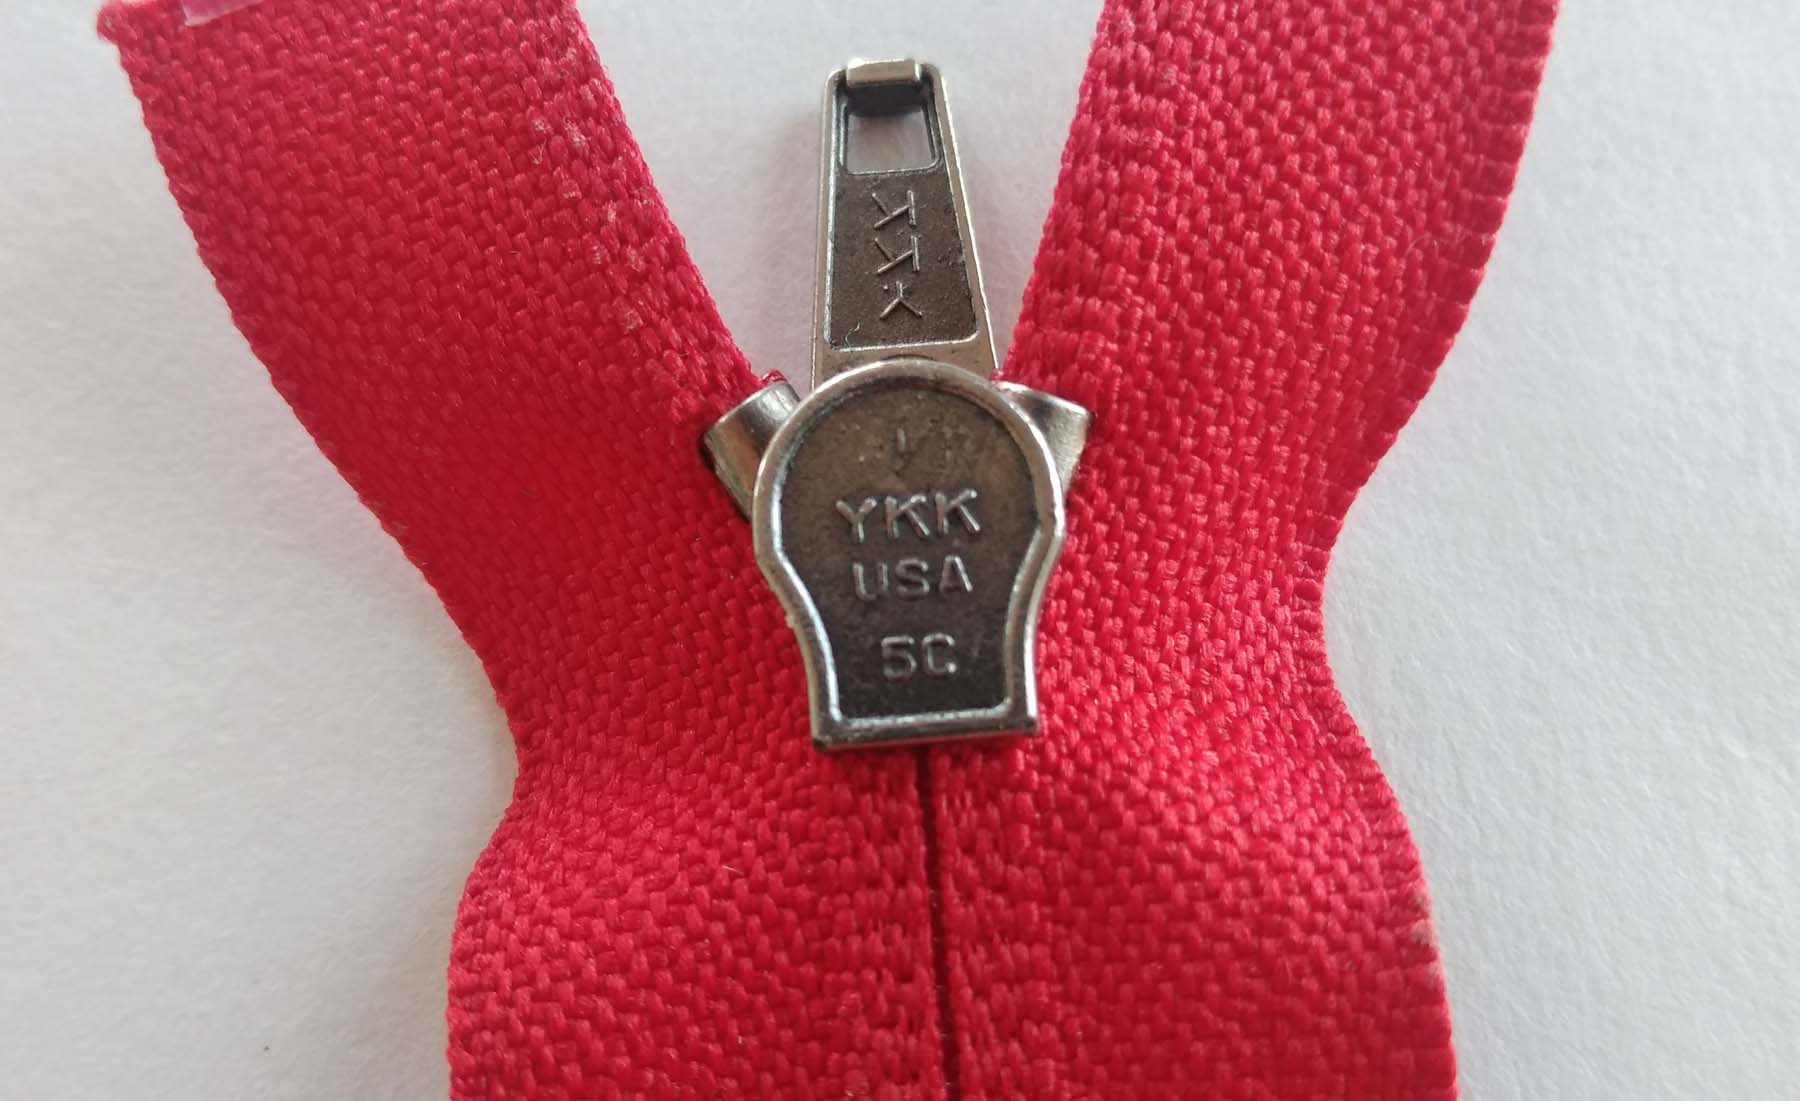
Zipper teeth come in various sizes and those sizes aren’t necessarily related to the width of the zipper tape to which they’re applied. The coil sizes are as expressed at numbers—#3, #5, etc. That number refers to the approximate width of the closed zipper teeth in millimeters (3).

(Left to right) Sizes 2.5, 3, 4.5, 5 coil, 5 molded, 8 and invisible
  • Sizes #3-#5 are most commonly used for garment sewing, while sizes #7-#10 find their home in bags, luggage and outdoor gear.
  • How do you know the zipper size? Depending on the brand, there may be a number on the underside of the zipper slider; others aren’t marked and you simply need to measure the closed coil width.
  • If you’re ordering zippers online, many sellers indicate the teeth size so you have an idea of the proportion and strength to match with the intended use. Some vendors also offer a zipper color chart for specific brands.
  • The length of a pre-made zipper is measured from the top stop to the bottom stop, not the tape length.
  • Zippering can also be purchased by the yard to allow for customization—simply measure the length you need, and add the pull(s).

Zipper Applications

Depending on where you’re installing a zipper, the application and finished look can vary.

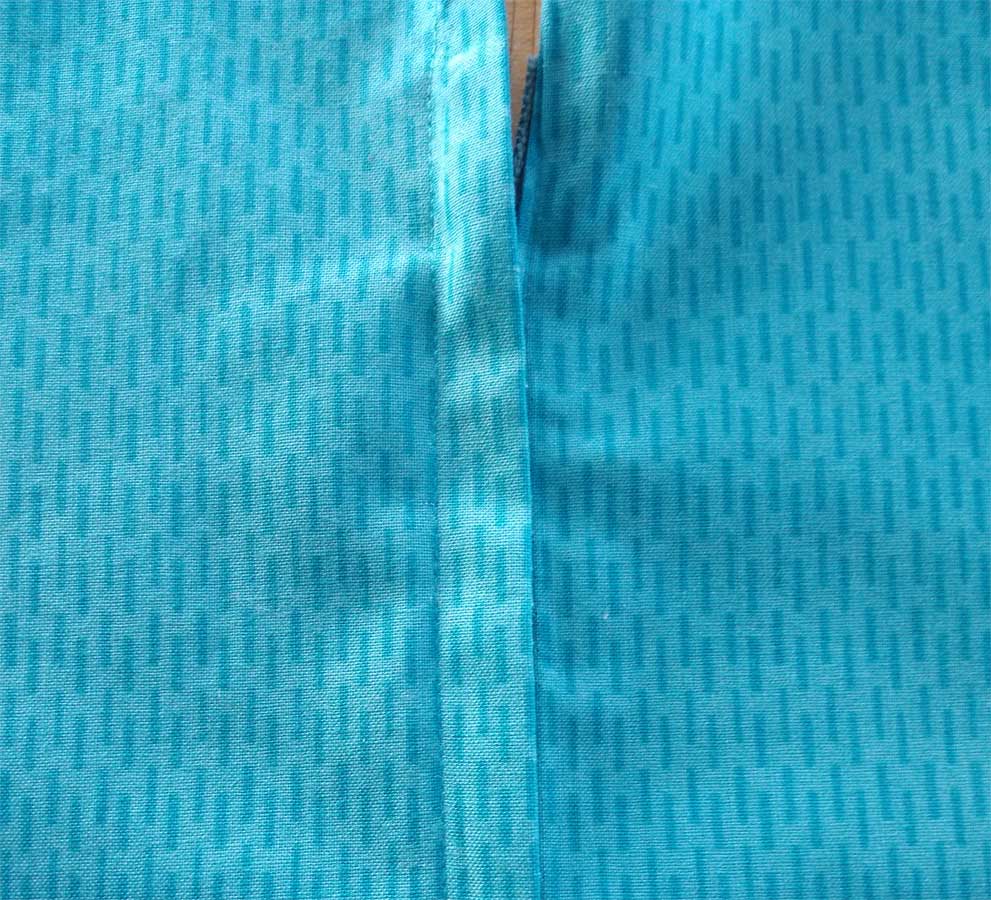
A centered application, as its name suggests, has fabric folds meeting in the center over the teeth.

Centered zippers

A lapped application features one side of the placket overlapping the other side to hide the zipper teeth.

Lapped zipper

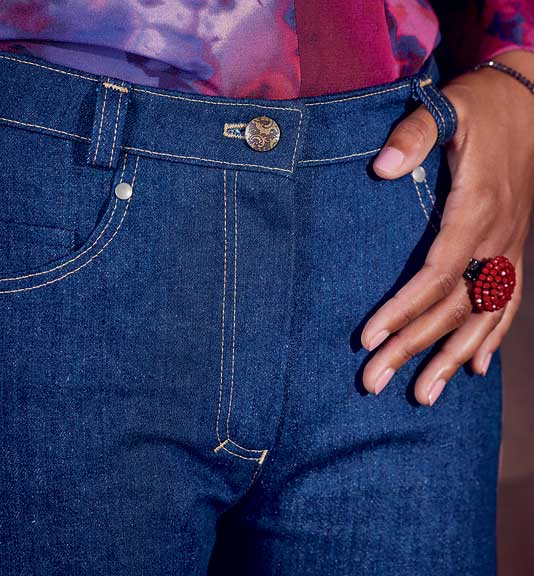
A fly-front application covers the entire zipper with a flap of fabric.

Fly-front zipper

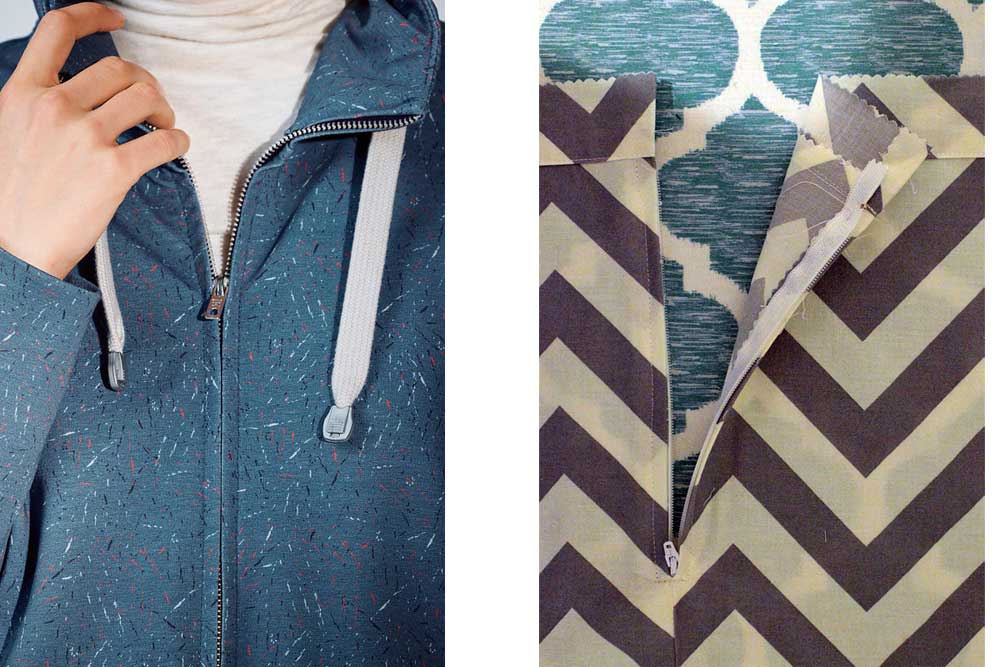
An exposed zipper showcases the zipper teeth and pull, or the entire zipper tape.

Exposed zipper

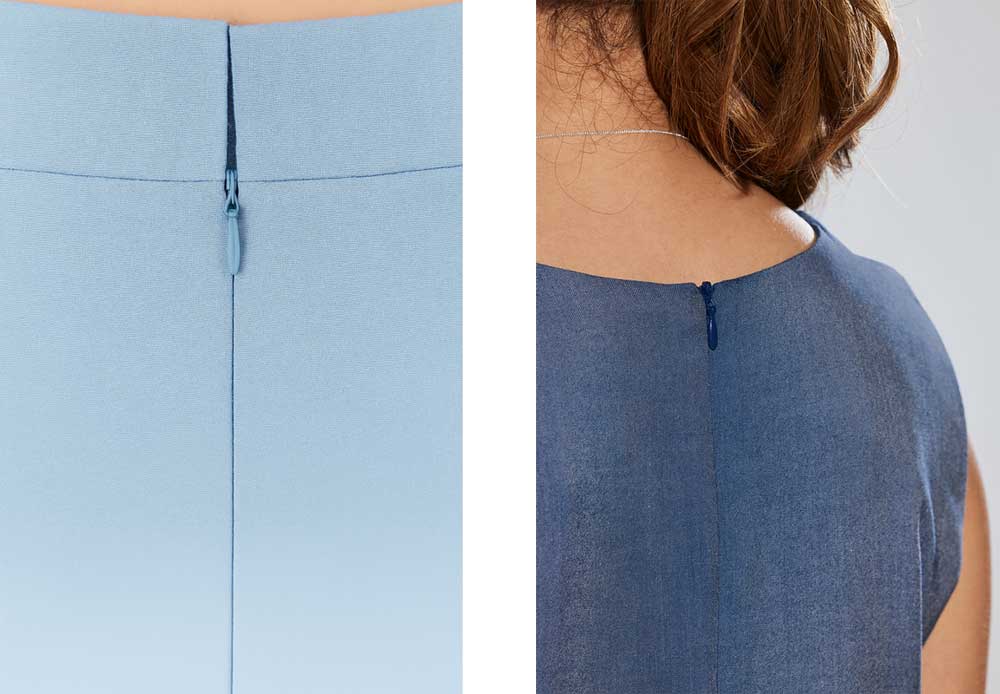
An invisible zipper application hides the entire zipper and only the pull is visible. A specific zipper is required for this look.

Invisible zipper

Note: select images provided by Bernina


~Linda Griepentrog is the owner of G Wiz Creative Services and she does writing, editing and designing for companies in the sewing, crafting and quilting industries. In addition, she escorts fabric shopping tours to Hong Kong. She lives at the Oregon Coast with her husband Keith, and three dogs, Yohnuh, Abby, and Lizzie. Contact her at gwizdesigns@aol.com.
Tagged With: garment sewing, zippers

March 31, 2023

Designer Bias Trim (preview)

I occasionally head out to shop on what I call  “snoop day.” Armed with a small tablet and pencil to be able to copy down ideas. I shop in the better departments of boutique and major stores (i.e. Ellen Tracy, Escada, Dana Buchman, Chanel, and Armani) and I’m usually looking for pocket, collar, trim and seaming details. I might be seeking out an entire outfit, or just details like embroidery and trims.

Shopping

Editor’s Note: Planning your own snoop days?  While a pencil and tablet will be helpful, plan to snap pictures on your phone. You can also download tape measure apps on your phone if you need to take any measurements.


CLICK HERE to read the full article. Not a member? Join online!


Tagged With: bias binding, designer details, garment sewing

April 30, 2021

Exposed Zippers

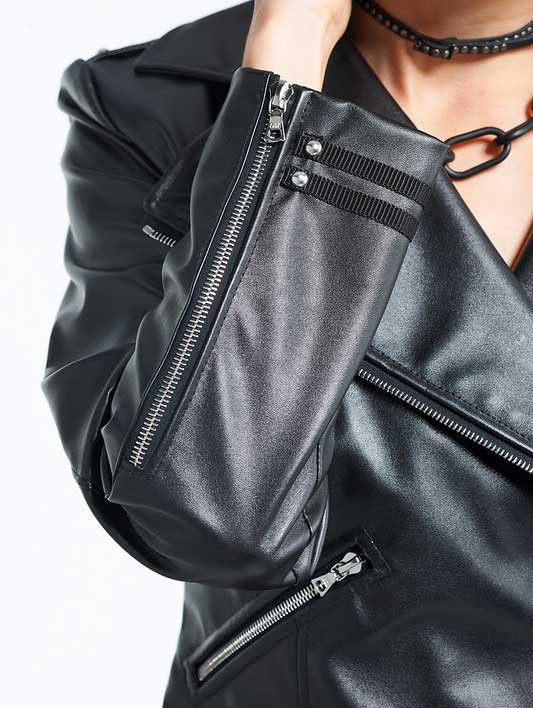
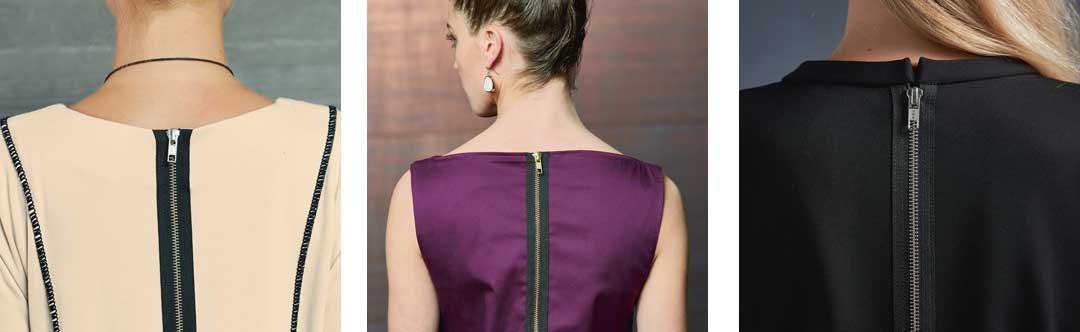
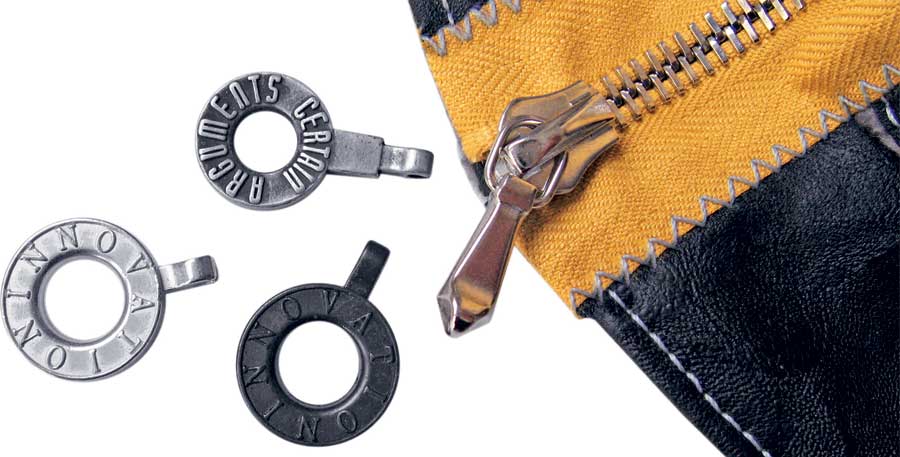
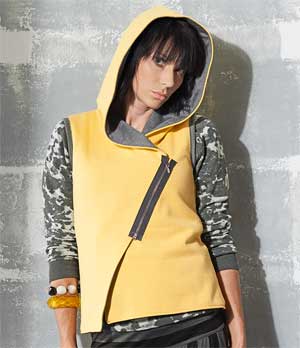
Most frequently we as sewers take pains to try and dutifully hide our zippers under flaps, flies, or laps but fashion has recently said it’s OK to see the zipper. In fact, it’s become a prominent stand-out, in-your-face detail both front and back. But how do you put a zipper on the outside and make it look cool? Read on for details.

Images courtesy of Bernina

Exposed zippers can be tone on tone to match the garment, or a bold contrast for emphasis. Look for zippers with wider than normal tape widths for added punch, and don’t forget that some zipper companies offer decorative zipper tapes like polka dots, stripes, camouflage, animal prints and other patterns. And for evening, there’s always a gold and silver tape. Zipper teeth can also be holographic and contrasting metal for notoriety.

If you want a longer than normal zipper, consider purchasing zipper by the yard, trim to length and add your own fun pull. If you’re putting an exposed zipper all the way up the back of a dress from the hem to neckline, remember you’ll be sitting on it at some point, so best to avoid those with large sport-like teeth.

Back/Front Installation

Before you insert an exposed zipper, it’s a good idea to reinforce the opening area with narrow strips of fusible interfacing applied to the seam allowance on the right side (yes, the right side) of the zipper opening area. This helps prevent any stretching (especially on knits) or rippling.

Image courtesy of Bernina
  • If there is a center seam, sew it up to the zipper opening lower edge and press it open. Leave the area open where the zipper will be applied. If there’s no seam, sew a line of stitching ½” from each side of the center marking where the zipper will be applied. At the lower opening, clip diagonally into the seam allowances, but not beyond.
  • Press the opening seam allowances to the garment outside and the lower triangular point as well.
  • Place narrow water-soluble basting tape on the underside of the zipper tape edges and finger-press the zipper into place over the opening. If any seam allowances poke out from under the zipper tape, trim so that all edges are hidden under the finished tape edges. On the underside, the folded back edges should clear the actual zipper teeth. Turn under the lower ends of the zipper tape and pin in place over the triangle.
  • Using a zipper foot, sew along the outer edges of the zipper tape on both sides, and across the bottom. Stitch again closer to the teeth if needed, catching the folded edges on the underside. Either or both stitching lines can be done with a straight or zigzag stitch, and with matching or contrasting thread. {photo: exposed zipper with zigzag stitching (crop off extra pulls); credit line: Photo courtesy of Bernina}. If you’re using a gold or silver zipper tape, choose either matching metallic thread, or invisible thread for no-show stitching.
  • Once the zipper is applied, finish off the upper neckline edge according to the pattern instructions, applying a binding or facing.

Separated Exposure

Photo courtesy of Bernina

Occasionally you may choose to use a separating zipper as a closure, but with the entire zipper tape on the garment outside.

In this instance it’s best to follow the pattern instructions, but the upper garment edge is totally finished prior to the zipper application, so the tape is lapped over the finished edge before stitching. The opposite half of the zipper is applied to the other half of the garment in alignment for closing. On both sides of the zipper, turn under any unfinished tape ends before stitching.

Creative Idea

What doubles the fun of an exposed zipper? Use decorative stitches to sew along the zipper tape edges.

Image courtesy of Coats & Clark

All photos used with permission.


~Linda Griepentrog
Linda is the owner of G Wiz Creative Services and she does writing, editing and designing for companies in the sewing, crafting and quilting industries. In addition, she escorts fabric shopping tours to Hong Kong. She lives at the Oregon Coast with her husband Keith, and two dogs, Yohnuh and Abby. Contact her at gwizdesigns@aol.com.
This field is for validation purposes and should be left unchanged.
Did you enjoy this article?
Are you an ASG member?

Tagged With: garment sewing, zippers

  • 1
  • 2
  • 3
  • 4
  • Next Page »

Become a Member

Join the only national organization dedicated to Advancing Sewing as an Art and Life Skill.

Join Now button

Blog Article Categories

  • ASG Conference
  • Chapter Stories
  • Embroidery
  • Fitting
  • Learn to Sew
  • National Sewing Month
  • Products, Books, & Patterns
  • Projects
  • Quilting
  • Sewing
  • Sewing Techniques
  • Sewing Tips
  • Sewing Tours
  • Videos
  • Disclaimer
  • Privacy Policy

American Sewing Guild
National Headquarters
9660 Hillcroft, Suite 230
Houston TX 77096
713-729-3000 | 713-721-9230 Fax
www.ASG.org

ASG wordcloud - education, conference, discounts, videos, special offers, tours and more

Copyright © 1998–2026 · American Sewing Guild · All Rights Reserved