American Sewing Guild (ASG)

Visit our blog Visit the ASG Facebook page Visit ASG on Pinterest Visit ASG's YouTube channel Visit ASG on Instagram
  • Home
  • Join ASG
    • Join Online
    • Chapter Locations
    • Member Benefits
    • Member Brochure
    • Join by Mail
  • Conference & Education
  • Resources
    • Contests & Awards
    • Giving Back
    • Hall of Fame
    • Links
    • Travel and Tours
    • Measurement Chart
  • Shop
    • ASG Store
    • Chapter Products
    • Video Resources
  • Blog
  • About
    • About Us
    • Donate to ASG
    • ASG Sensitivity Statement
    • FAQ’s
    • Start a Chapter
  • Contact
  • Member Login
    • Login First!
    • Members Only
    • Leadership Only
    • Website FAQ’s
    • Logout
  •  

November 26, 2021

Covering Your Own Buttons

Are there times when you just can’t find the right buttons to accent your project, and you long for something really unique? Well, never fear, you can make buttons look like anything your heart desires by covering your own.

Forms

Button covering forms come is sizes from 7/16” to 2 ½”, depending on where you’re going to use them. The smaller ones are ideal for cuffs or down the back of a wedding dress, while the larger sizes are great for home décor uses and jewelry. Yes, jewelry (see below).

Metal button forms come in both flat and domed shapes, depending on the look you like and the size needed.

Flat
Domed

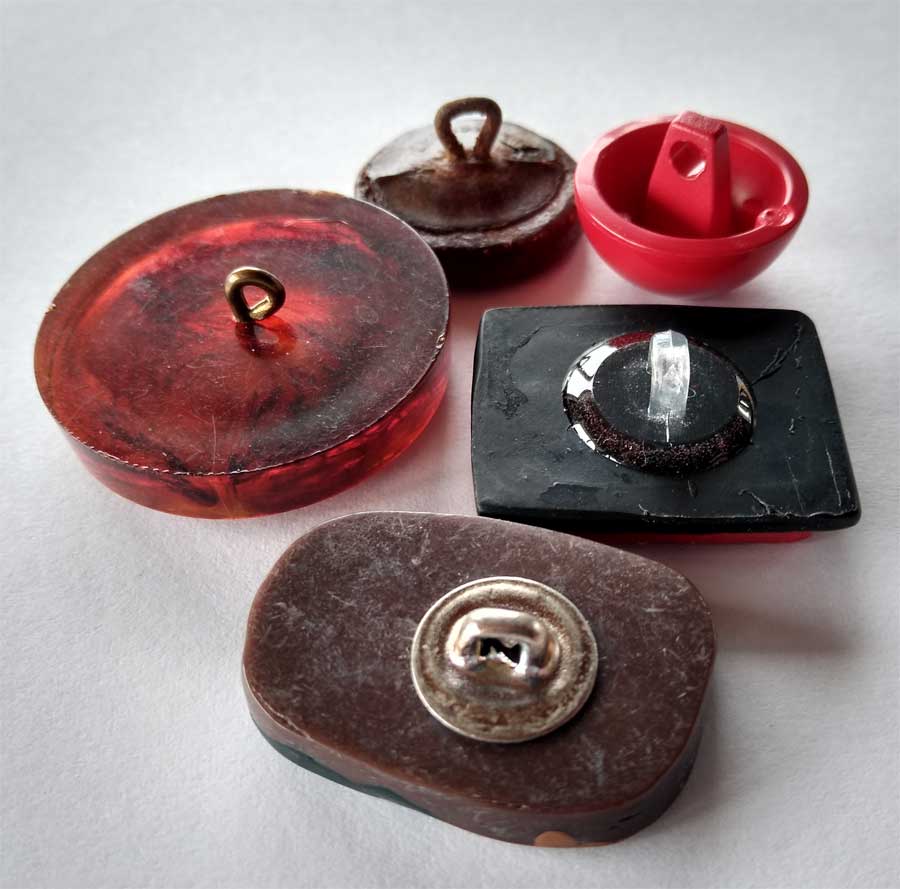
There are two components to each button form—the top portion which has sharp teeth around the underside to grip the fabric, and the bottom portion which snaps into the top to hold the fabric in place. The top portion of the button form also includes a wire shank which goes through the bottom section when the button components are snapped together.

The packaging on the button forms contains a pattern to use for cutting the covering circles, so carefully trim around it when opening the pack of forms.

Covering Up

Buttons with embroidery, decorative stitching, and computer printing

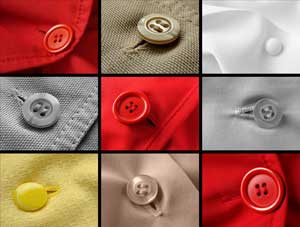
Almost any fabric can be used to cover buttons—some easier than others. If your fabric has a loose weave or is not opaque, the shiny metal form may show through, so back the fabric with a lightweight interfacing or underlining.

If your covering fabric is very bulky, like some home décor fabrics or faux furs, cut the circle slightly smaller than the template and/or trim any pile from the underside edges to reduce bulk.

Keep in mind that the covering fabric can be fussy-cut to showcase a particular area on the button circle, so plan ahead for repeat buttons.

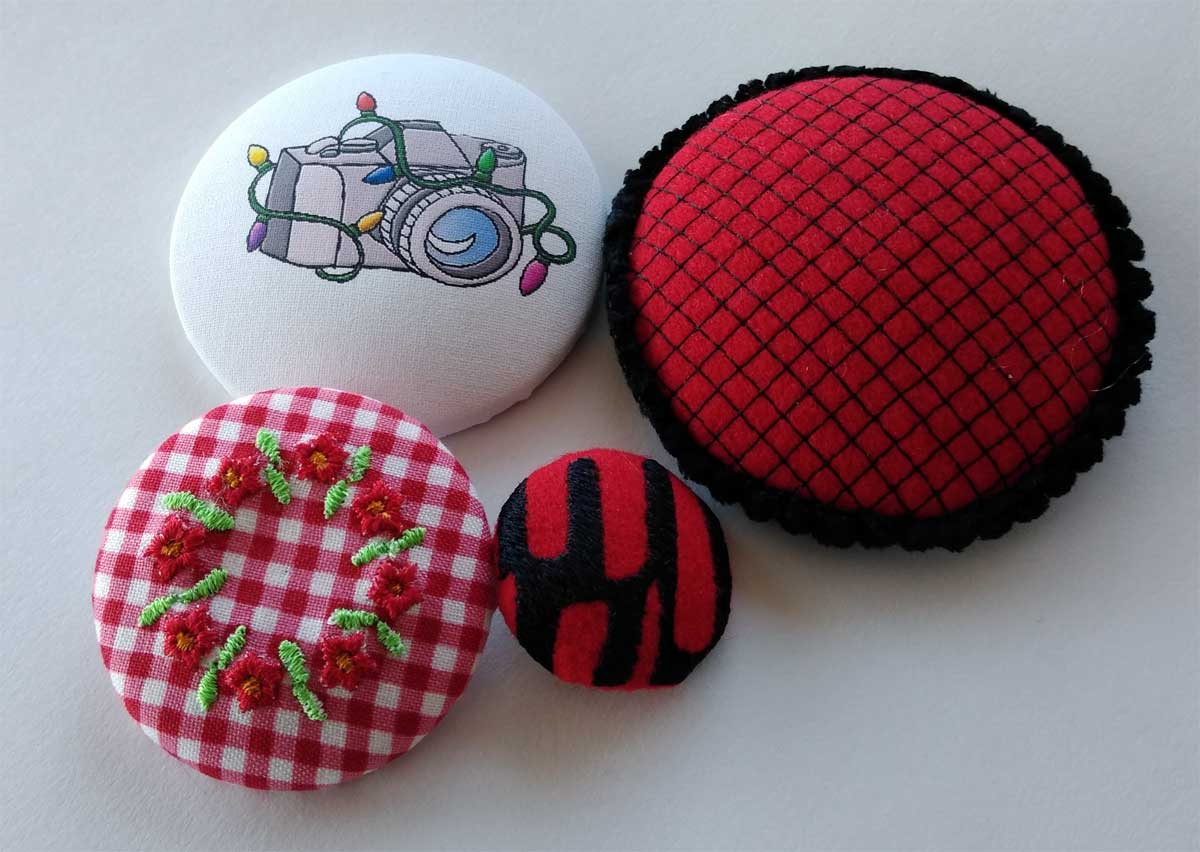
The covering fabric can also have numerous other decorative techniques applied to it before use—stenciling, painting, dyeing, hand stitchery, needle felting, machine embroidery, texturizing, etc. Just keep in mind the button size to showcase the embellishments. A Bit of Stitch offers two design packs made specifically for machine embroidered covered buttons.

A Bit of Stitch, Oriental Button Cover

Cut the covering fabric from the supplied template and cut as many as needed to cover all the buttons.

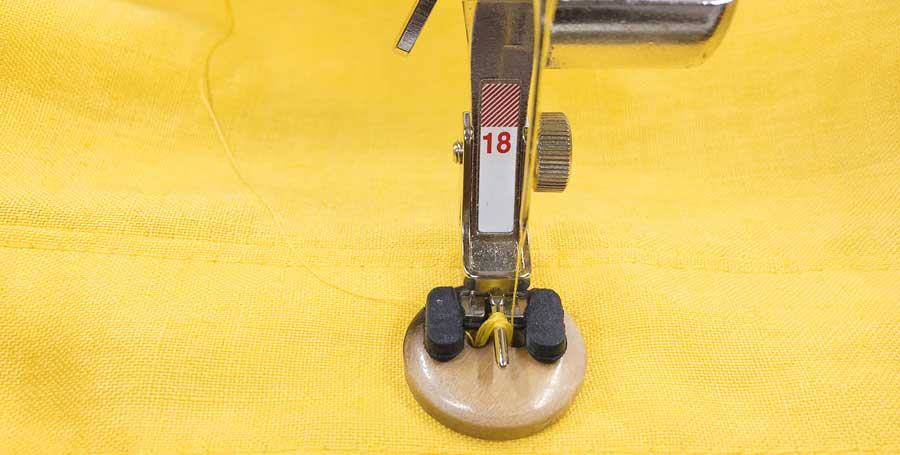
Lay the fabric circle face down on the table surface and center the button form top face down on it. Pull the fabric around the form and hook it over the teeth on the underside. Work from opposite sides of the button and pull the fabric taut over the form, so there are no wrinkles or pleats. Work your way around the button hooking the fabric securely to the teeth. If you get wrinkles, unhook and try again to smooth the fabric in place.

When the covering fabric is well anchored into the teeth all the way around, position the back section over the wire shank and snap it firmly into place covering the teeth. If your fabric is bulky, a light tap with a small hammer may be helpful to be sure the backing snaps in place.

Repeat to make as many buttons as needed.

Help, the button is winning! If things don’t go quite as smoothly as you’d like and it feels like the button form is winning the wrestling match, try using some temporary spray adhesive to hold the fabric in place while you pull it tautly over the form and anchor it to the hooks. Another option is to use a little fabric glue along the teeth to help hold wiry or otherwise testy fabrics in place.

Fun Options

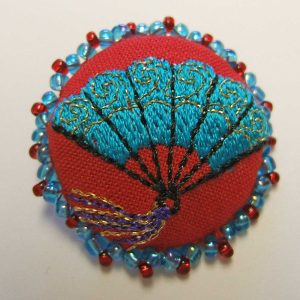
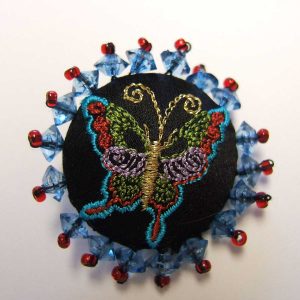
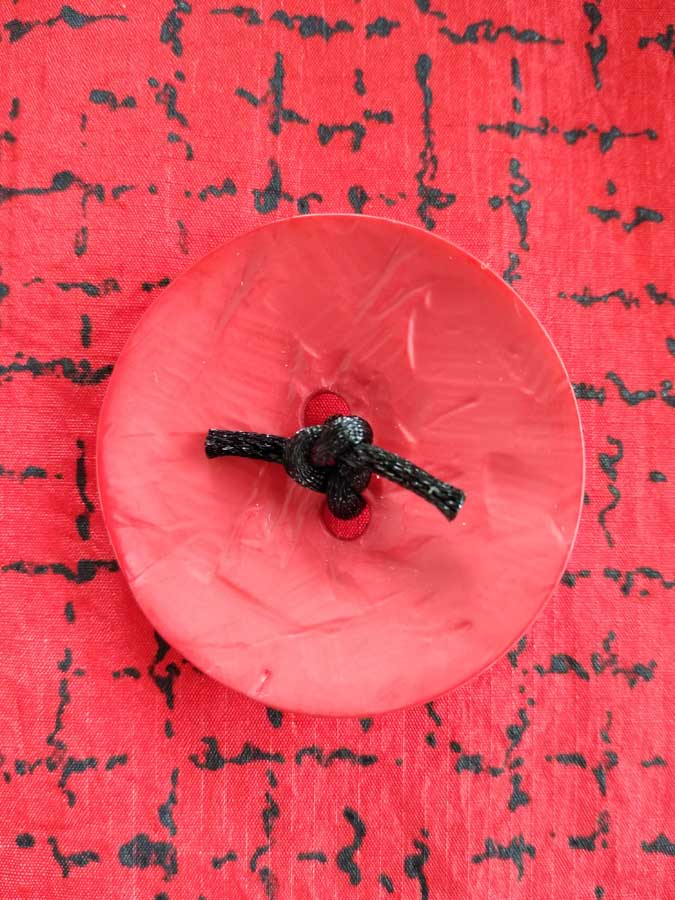
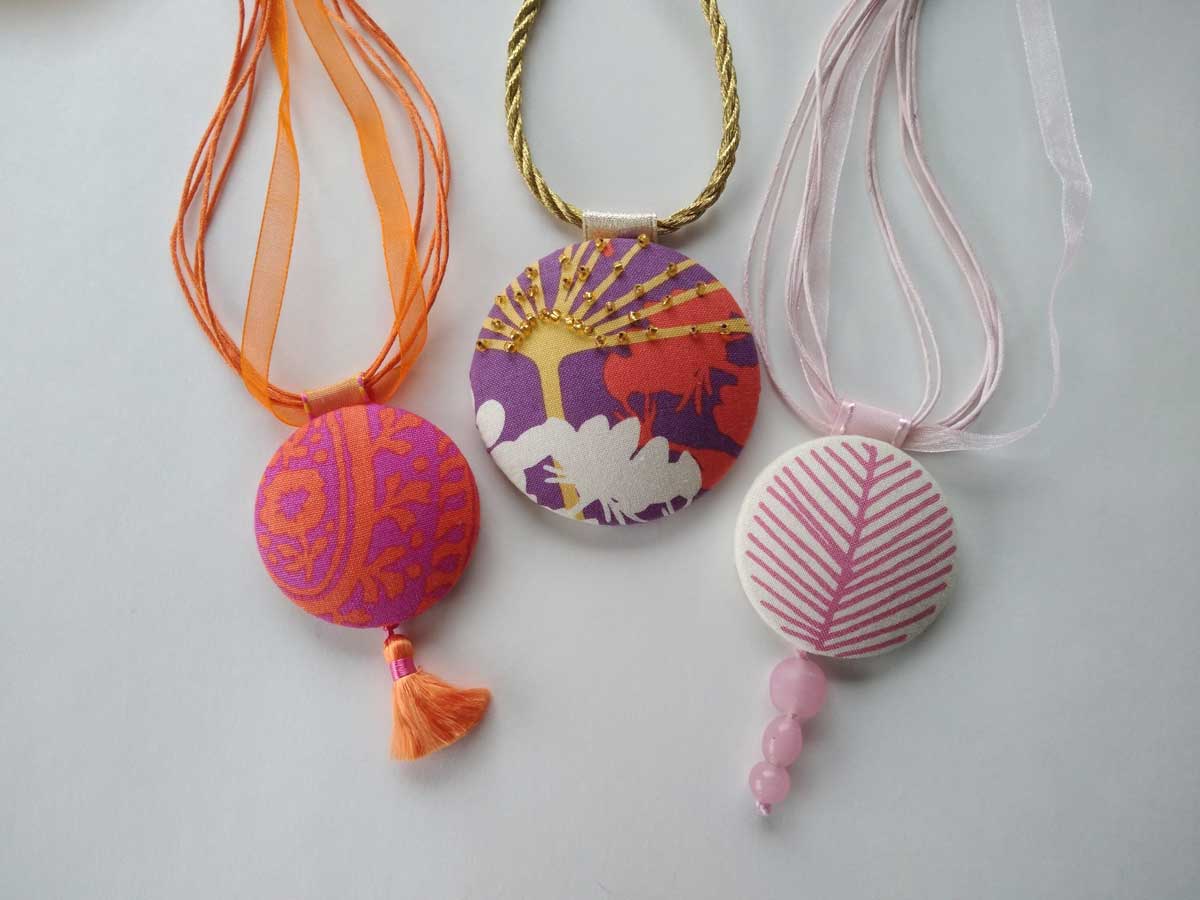
In addition to functional closures, fabric covered buttons are ideal for jewelry and craft projects, like holiday ornaments. Remove the wire shank before adding the button back if you need a flat back, and cover the button back with a felt circle to finish. If you’re making a brooch, just glue a pinback to the button flat underside.

Once the button is covered, you can add beads or other gemstones to it for embellishment, or even some iron-on crystals for a bit of bling.


~Linda Griepentrog
Linda is the owner of G Wiz Creative Services and she does writing, editing and designing for companies in the sewing, crafting and quilting industries. In addition, she escorts fabric shopping tours to Hong Kong. She lives at the Oregon Coast with her husband Keith, and two dogs, Yohnuh and Abby. Contact her at .

Did you enjoy this article?
Are you an ASG member?
This field is for validation purposes and should be left unchanged.

Tagged With: buttons

August 7, 2020

Buttons: Attachment Antics

Button, Button

Whether you use them functionally to close a garment, tote or other project, or you line them up as a border or trim or even string them together for a bracelet, buttons are definitely a fun sewing notion.

You can find buttons made from plastic, metal, bone, rhinestones, wood and a host of novelty materials. They can be machine made and mass produced in a variety of shapes and sizes, or carefully handmade one at a time. And you can even make your own buttons.

Sew-through or Shank?

buttons with holes
Buttons with holes

When you first look at the button rack in your sewing store, you will notice two types of buttons—those with visible holes and those without. The holed buttons may sport two, three, four or more holes, offering a wide range of options for attachment.

buttons with shanks
Buttons with shanks

Shank buttons don’t have a visible means of attachment on the button surface, and thus offer the opportunity for a more ornate design. The attachment loop is on the underside, either molded into the button backing, or as an attached plastic or wire loop.

While a sew-through button is flatter against the fabric surface, a shank allows the button to sit above the surface of the fabric and is ideal for thicker fabrics like coating and suiting.

Size Wise

Buttons can range from 1/8” to around 2 ½” diameter. Your project pattern should tell you what size is recommended and you can look for that measurement on the button card.

It’s a good idea not to vary the button size too much from the pattern’s suggestion, as the closure needs to fit within the allotted space on the garment. If you choose a different size, it may be necessary to re-space and/or resize buttonholes.

Attachment Antics

While you may have years of experience sewing on buttons, there are some tricks to make the process easier.

If you have a sew-though button and you’re putting it on a garment sewn from a thick fabric, consider making a thread shank to avoid having the button make an indentation in the overlapping layer. The easiest way to do this is to put a toothpick between the button holes while sewing it on. Then, pull out the toothpick when the attachment is done, leaving you extra thread length to accommodate the fabric thickness.

A second way to make room for thick fabric involves leaving extra space below the button for a thread extension, then wrapping that extension to neaten the multiple thread strands of the shank. The length of the shank should accommodate the fabric thickness.

For a quick and easy button attachment for sew-through versions, use your sewing machine to secure the threads. Consult your owner’s manual for exact settings, but use an open-toe foot (some machines have special button sewing feet). Some button feet offer a metal projection to allow for making a thread shank on the button. If you need to secure the button before sewing, tape it in place, stitch through it, then peel off after sewing. Set the stitch length to zero and the adjust the stitch width to span the button holes. Then stitch back and forth between the holes about five times, and if it’s a four-hole button, move onto the next hole set and repeat. At the end of the process, lock or tie the threads on the underside.

Photo courtesy of Bernina

Button with a tied mountGot a novelty thread or ribbon you want to showcase, or a thin leather strip? Tie the sew-through button on. Put the strand through a large needle eye and stitch down through the hole from the right side, leaving an end long enough to tie. Bring the strand back up through the other hole(s) and tie off securely in a square knot. A bit of seam sealant can be used to secure the knot. Clip the strand ends shorter.

Fun or Funk

If you have an especially large or odd shaped button that you dearly love, but it would need a giant buttonhole to actually function, be clever and just sew it to the overlap side, either with or without an uncut buttonhole stitched under it. To make the functional closure, use snaps for an open-and-shut case without undo stress.


~Linda Griepentrog
Linda is the owner of G Wiz Creative Services and she does writing, editing and designing for companies in the sewing, crafting and quilting industries. In addition, she escorts fabric shopping tours to Hong Kong. She lives at the Oregon Coast with her husband Keith, and two dogs, Yohnuh and Abby. Contact her at .

Did you enjoy this article?
Are you an ASG member?
This field is for validation purposes and should be left unchanged.

Tagged With: buttons, sewing, shank buttons

November 8, 2019

Button and Buttonhole Positioning

Button & Buttonhole Placement on the ASG blog
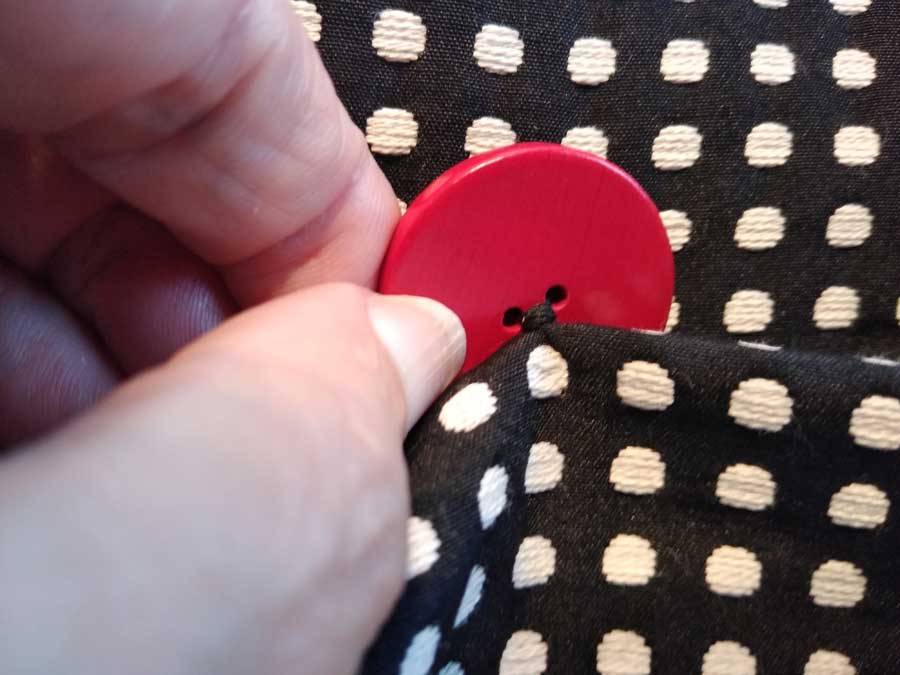
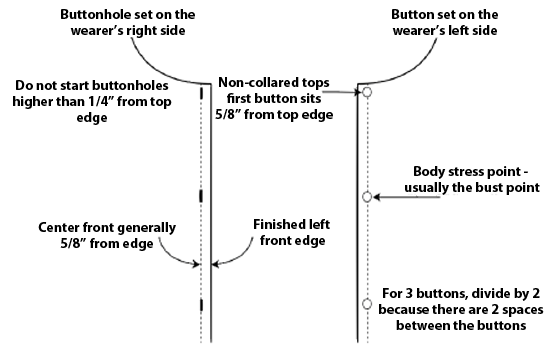
Button and buttonhole placements can sometimes be confusing. If the button and buttonhole are placed incorrectly, the garment may be too tight, too loose, or create gaping. The number of buttons on the garment is suggested on your pattern envelope, but it’s up to your personal preference or need. A good guide to start placing your buttons vertically is to keep in mind your body’s pressure points. Pressure points are where your body may put strain on the garment and may be your bust, belly, or even the hip if you are making a button front dress or skirt.

Button Placement

Once you have identified your pressure point(s), mark these on your muslin or sloper (block) pattern for future reference.

  • Decide how many buttons to use.
  • Lay your pattern or muslin flat, mark the center front and your pressure points.
  • Place your highest and lowest buttons on the muslin.
  • Measure the distance between your top and bottom buttons.
  • Divide this distance between the number of buttons you will use. If you use 5 buttons, divide by 4. You will always divide by one less button, because that is the number of actual spaces between your buttons.
  • Determine if the button placement falls on your pressure point(s). If not, you may want to adjust the position slightly to hit that sweet spot.

Buttonhole Position

Now that you have the button position, you need to determine if you want vertical or horizontal buttonholes. Horizontal buttonholes will need a facing deep enough to fit the entire length of the buttonhole. I have seen some patterns where the facing is too narrow for horizontal buttonholes. Vertical buttonholes allow for button play. This means if the button is not set exactly in the measured spot, there is room for the button to move up and down within the hole.

The distance between center front and the finished edge of your garment is generally 5/8”. This is okay if your button is 7/8” or smaller. If the button is larger, you will need to extend the distance from CF to the finished edge of your garment.

Buttonhole Size

To figure out what size buttonhole to use, some machines have a button hole foot that the button sits on the back carriage and the machine will make a buttonhole to that size. Or you have a machine that is computerized and you can adjust for your button size. The general rule of thumb is, the buttonhole needs to be 1/8” bigger than the button, for ease of going through the hole.

  • 1/2” button uses a 5/8” buttonhole
  • 5/8” button uses a 3/4” buttonhole
  • 3/4” button uses a 7/8” buttonhole

Good Buttonhole Practices

When making a vertical buttonhole, the button and buttonhole will be placed exactly at center front. In the case of horizontal buttonholes, the button is set at center front, but the hole is started 1/8” away from center, toward the finished edge. If your garment needs a button at the top edge, I start at 5/8” down for the button placement, but you can decide how far down, depending on the width of your button. But never start a buttonhole higher than ¼” below the neck edge.

  • Always make a test buttonhole with the same thickness as your garment, Top fabric, bottom fabric and interfacing. Make sure your button will pass through the hole easily.
  • Buttons are set on the left front and buttonholes on the right front for women’s garments

Something that I do for jackets, especially for horizontal buttonholes, is to set all the buttonholes along the edge of your fabric BEFORE cutting out the front body. This allows for checking the placement without chancing ruining the garment and works best for bound button holes because the inside opening is usually hand finished.


~© Annalisa T, Alameda County Chapter

Tagged With: buttonholes, buttons, sewing

March 22, 2019

Button, Button, I’ve Got the Buttons

It's National Button WeekThis is my week! It’s National Button Week and I love buttons. I REALLY love buttons. In honor of this auspicious week, I want to tell you a story about the buttons I have loved. Then I get to reveal an exciting new members-only discount. No peeking! You’ll have to wait until the end of the article!

My fascination with buttons began when I was a child. My mother’s button box served as one of my favorite toys, second only to my Barbie doll. I remember sitting for hours sorting and exploring the beautiful buttons the large tin contained.

Button Bling

One of my favorites was a blue and green button that sparkled in the sunlight on a wool jacket she had made. Her philosophy was that the buttons made the garment, and today would be called the “bling” that made it special. I remember the “Life Saver” buttons that were the focus of my brown calico dress. No one noticed the dress, or the beautiful white Peter Pan collar. Instead everyone commented on the buttons, proving her point.

Playing with those buttons is one of my favorite childhood memories, so I was devastated when I returned home from college and found that the entire collection was gone. She had downsized. How could she just throw away all those beautiful buttons? What had become of them? These questions plagued me until I decided to do what any practical person who wanted to preserve her sanity would do. I started my own collection!

Having little money in those early days, I started out cutting buttons off old garments. Then gradually, I added to the collection by buying them. First it was just the ones on sale. Then it was any that attracted my attention.

Specialty Buttons

Now I have quite a collection. I have large buttons, and teeny, tiny buttons. I have completely round buttons, and flat buttons. I have some that say, “I love grandma” and others that say “Mood.” I have buttons that are pumpkins, skulls, snowmen, snowflakes, Christmas bulbs, cats, dogs, rabbits, cars, dice, gingerbread boys, fish, etc. I even have buttons that look like Olympic medals and police badges.

Benno's Buttons
Benno's Buttons
Benno's Buttons
Benno's Buttons
Benno's Buttons
Benno's Buttons
Benno's Buttons
Benno's Buttons
Benno's Buttons


You may ask yourself, “Does she ever use these buttons?” The answer is yes—sometimes. I put the seashell buttons on a jacket. Some of the snowflakes reside on a sweatshirt along with snowmen that form a tic tac toe pattern with trims. And the pumpkins can be seen on one of my fall purses. And if you look closely, the next time we meet, you may just get a glimpse into part of my collection.

Special Offer for ASG Members

Now about that discount… We are excited to announce that Benno’s Buttons will offer all ASG members a 15% discount. You can find the discount code in the Member’s Only Special Offers section of our website. Benno’s Buttons has been a respected nationwide supplier of quality products and services to apparel designers and other industry professionals for many years. They offer so much more than just buttons! Check out their pin on buttons, lace, appliques, trim and more. You definitely want to check out the Benno’s Buttons website. And if you are shopping in the Dallas area, be sure to stop in to say hello and thank them for their generosity and support of American Sewing Guild.

ASG members receive a 15% discount at Benno's Buttons


~ Rosemary Fajgier; Individual button images from Benno’s Buttons

Tagged With: buttons

Become a Member

Join the only national organization dedicated to Advancing Sewing as an Art and Life Skill.

Join Now button

Blog Article Categories

  • ASG Conference
  • Chapter Stories
  • Embroidery
  • Fitting
  • Learn to Sew
  • National Sewing Month
  • Products, Books, & Patterns
  • Projects
  • Quilting
  • Sewing
  • Sewing Techniques
  • Sewing Tips
  • Sewing Tours
  • Videos
  • Disclaimer
  • Privacy Policy

American Sewing Guild
National Headquarters
9660 Hillcroft, Suite 230
Houston TX 77096
713-729-3000 | 713-721-9230 Fax
www.ASG.org

ASG wordcloud - education, conference, discounts, videos, special offers, tours and more

Copyright © 1998–2025 · American Sewing Guild · All Rights Reserved