American Sewing Guild (ASG)

Visit our blog Visit the ASG Facebook page Visit ASG on Pinterest Visit ASG's YouTube channel Visit ASG on Instagram
  • Home
  • Join ASG
    • Join Online
    • Chapter Locations
    • Member Benefits
    • Member Brochure
    • Join by Mail
  • Conference & Education
  • Resources
    • Contests & Awards
    • Giving Back
    • Hall of Fame
    • Links
    • Travel and Tours
    • Measurement Chart
  • Shop
    • ASG Store
    • Chapter Products
    • Video Resources
  • Blog
  • About
    • About Us
    • Donate to ASG
    • ASG Sensitivity Statement
    • FAQ’s
    • Start a Chapter
  • Contact
  • Member Login
    • Login First!
    • Members Only
    • Leadership Only
    • Website FAQ’s
    • Logout
  •  

July 31, 2020

Working with Snaps

Snap to it! Snaps, the handy two-part fasteners that we often don’t think much about, offer a multitude of options for garment closures.

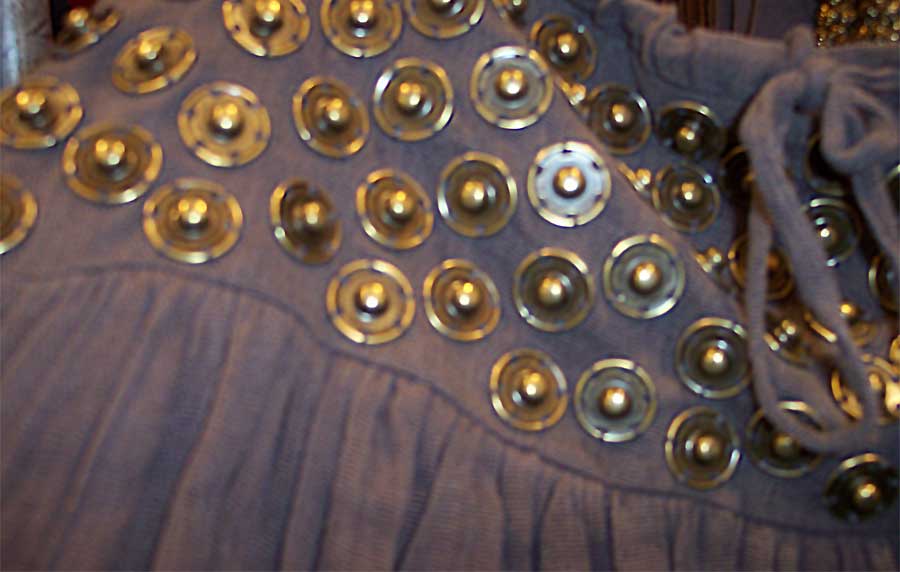
Look for them in metal finishes (silver, gold, black or some colors) and in a multitude of plastic hues. There are also clear snaps available for greater invisibility and they’re ideal for prints, where choosing the right color can be tricky. When choosing metal snaps, be sure they are rustproof for durability.

Whether you use them for their intended purely functional purpose of holding two fabric layers together without visibility, or you use them artfully for a collage of added texture or a blatant “accessory”, the humble snap deserves attention.

Sew-on snaps come with two parts—a ball or knob portion, and a socket portion that accommodates the depth of the ball section when the pieces are pushed together. These are sometimes referred to as the ball and socket, or the male and female portion of snaps.

Size Wise

Snaps come in a variety of sizes from 1/8” diameter up to about 1 1/4” diameter. Most snaps are round with multiple holes around the perimeter, but some snaps are square, hexagonal or novelty shape, like flowers, hearts, etc.

Looking to purchase snaps? Shop Ghees or the Sewing Place and don’t forget to check the Special Offers page for ASG member discounts.

Smaller snaps are thinner than their larger counterparts, and thus have less holding power, so match the snap size to the weight of the fabric and the durability needed for the closure.

Snaps utilize three different sizing systems, depending on the brand. Some are categorized by their fractional or metric size (i.e. 1/4” or 30mm), others utilize a ligne system where 40 lignes=1”, and still others are listed by a letter sizing system. It’s easiest to just look at the snap and decide its practicality for the intended use.

Attachment Options

Snaps go between two layers of a project opening and are normally concealed, though fashion trends vary and often snaps become a decorative feature. It’s a good idea to have interfacing in the area where the snap sections be applied for durability.
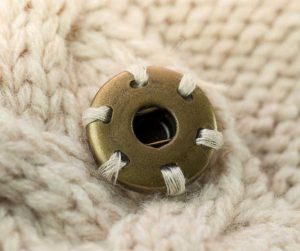
Stitching a snapMark the location of one half of the snap, noting that the ball portion usually is applied to the underlayer and the socket portion to the overlap, but some sewers prefer the opposite. For easier marking, attach the ball portion first, then chalk the extension and press in place over the underlayer to transfer the marking.

To attach the snap sections, sew in and out of the same hole three to five times, being sure that the stitching doesn’t go through to the outside of the garment. After one hole is secure, carry the thread through the fabric layers to the next hole and repeat the process for each subsequent hole before knotting the thread and burying the tails.

For a more couture finish, attach the snap sections using a blanket stitch to secure the holes.

Snap portions can also be attached by machine, much as you would sew on a button. To hold the snap in place for sewing, tape it in place, sew through the tape, then peel off when stitching is complete. Use an open-toe foot, set the machine for zero stitch length and a stitch width to span the hole opening and the edge of the snap. Stitch in place three to five times to secure, then move to the next hole. Note that with this method, stitching will show on the reverse side of the garment opening.

Covering Up
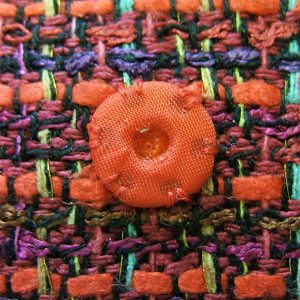
Covered snapIf you don’t like the look of a large metal snap, especially on a tailored garment, think about covering the parts. You can also purchase snaps in various colors that are pre-covered.

To cover a snap, cut a circle of tightly woven lining two and a half times the diameter of the snap for each section. Hand-sew a line of running stitches around the perimeter leaving long thread tails. Place the snap half right side down onto the circle and pull the threads to gather the fabric tightly around the snap section. Pull tightly and stitch the circle edges together. The gathered fabric portion edges are hidden under the snap when it’s sewn in place. Repeat for the second snap half. To expose the ball portion, push the snap halves together and separate the fabric threads. If your covering fabric is prone to fraying, use a toothpick and add a very thin line of seam sealant around the base of the extension.

Sew on the snap sections as you would an uncovered variety.


~Linda Griepentrog
Linda is the owner of G Wiz Creative Services and she does writing, editing and designing for companies in the sewing, crafting and quilting industries. In addition, she escorts fabric shopping tours to Hong Kong. She lives at the Oregon Coast with her husband Keith, and two dogs, Yohnuh and Abby. Contact her at .

Did you enjoy this article?
Are you an ASG member?
This field is for validation purposes and should be left unchanged.

Tagged With: closures, Fashion, sewing, snaps

February 21, 2020

Adding Ease to Your Garment

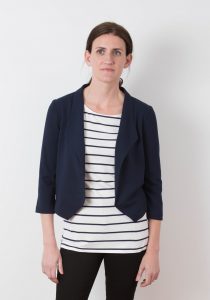
Grainline Studios “Morris” Blazer

A few years ago, I adapted my knit Grainline Studio Morris blazer pattern so I could make it with some luscious silk matka. I knew I had to adjust the pattern since my fabric of choice had absolutely no stretch in it. I decided to take a tried-and-true (TNT) pattern designed for a woven fabric and “frankenpattern” the knit blazer into a woven blazer. I took some of the pattern pieces from the Archer Buttonup pattern (also designed by Grainline) and came up with new cutting lines for the Morris. I used the Archer upper back, arm scythe, and upper sleeve to redraft the blazer pattern and was just sure I had made all the pattern adjustments to shift from a zero-ease design that works with the stretch of a knit to a design that would work with a non-stretch woven. I finished the blazer and couldn’t wait to put it on only to discover it was a bit too tight across the upper back. I hadn’t added enough EASE! I know I am not the only person who has experienced this.

Can We Put Your Mind at Ease?

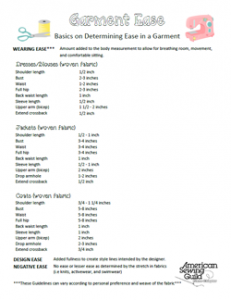
We’d like to put your mind at ease with some information and a free garment ease template created by members of the Plano, TX chapter that shows the minimum amount of ease you’ll need to add in your garment for a comfortable fit. Identifying the correct amount to include is vital to avoid an outcome like the one in my blazer story.  We hope this ease cheat-sheet helps you!

What is ease?

In its simplest form, ease is the additional room in a garment in excess of the actual body measurement. There is much more to ease than this simple definition though — there is wearing ease, design ease and negative ease. Each of these impacts the finished measurement of a garment in different ways.

  • Wearing ease provides ease of movement. It is the difference between the actual body measurement and the finished garment measurement. The template will help you understand this kind of ease. It gives you guidelines that will help you be sure you have at least enough room in your garment for comfortable movement as you wear it.
  • Design ease provides the style. It is also referred to as style ease or fashion ease. It is additional ease added beyond what is needed for movement to create specific styles ranging from close fitting to very loose-fitting garments. It also comes into play when the design of the garment includes things like pleats, gathers, or tucks.
  • Negative ease is associated with fabrics that stretch (such as knits or woven fabrics with lycra added) or are cut on the bias, producing a certain degree of stretch. In this case, the finished garment measures the same as the actual body measurements, or more often, even smaller. The degree of stretch produced in each fabric plays a big role in how much negative ease a garment will need for good fit. Negative ease is used in garments like activewear and swimwear.

How do I calculate the right amount of wearing ease?

When choosing the size you will make in a pattern, look not only at the body measurements, but also the finished garment measurements. Many patterns will include this information for at least the 3 primary measurements – bust, waist and hips. If your pattern does not include this information on the pattern, you can calculate it yourself by simply measuring the pattern pieces in those locations and removing the amount included for seam allowances. Compare the finished garment size to your personal body measurements to be sure you will have a comfortable fit before you start cutting.

More about Negative Ease

As already stated, negative ease simply means that your finished garment measurements will be the same or smaller than your actual body measurements. When sewing with knits or stretch woven fabrics, the same accommodation for wearing ease is not required since the fabric will stretch as the body moves. Just because your finished garment is smaller than your actual body measurement doesn’t mean you won’t be able to get it over your head. The more negative ease you incorporate just means you will get a more fitted look in the final garment. In most cases, you will probably target no more than 1”-3” negative ease in your design. More than that and you may wander into that “Incredible Hulk” look that has people wondering if you will burst through the seams at any moment.
Of course, the percentage of stretch in your fabric choice and whether it has 2-way or multi-directional stretch play a huge role in determining the right amount of negative ease. The higher the percentage of stretch built into the fabric you have chosen for your project, the higher the percentage of negative ease you are likely to need in your pattern.

There are lots of “rules” out there for how to calculate the right amount of negative ease for a given fabric, but here is a good starting point:

  • Cut a 6”x3” piece of fabric.
  • Stretch the fabric to its comfortable maximum length.
  • Calculate the percentage of stretch
    • Addition stretch length/original length = percentage of stretch
    • Examples:
      • If the 6” piece stretches to 9”, the fabric has 50% stretch.
      • If the 6” piece stretches to 7”, the fabric has 15% stretch
    • For a comfortable fit, try starting with the same amount of negative ease at the percentage of stretch in your fabric, up to but not exceeding that 1”-3” guideline mentioned earlier.
    • Thinner fabrics do best with less negative ease to avoid a see-through effect. Thicker fabrics can handle more negative ease and give a more acceptable form-fitting look.

Remember, these are starting point rules and you will develop your own that best fit your own personal taste and adapt with each fabric you choose to work with.

Don’t forget Design Ease

With all this talk about negative ease, let’s not leave this discussion without going back to the concept of design ease. Even with stretch fabrics, design ease has a role to play. It is perfectly acceptable to decide to add design ease into a garment made with a very stretchy fabric. It will take your garment from form-fitting to soft, graceful drape and still have a beautiful look. You are the designer and you are in charge!

Now it’s you turn!

We hope this gets you started on your journey of understanding ease and fit. This is a topic often discussed in ASG monthly group meetings around the country. Many groups focus on this kind of topic frequently and would love to meet you. Talk to someone in your local chapter to find out what is happening there. ASG loves to walk alongside fellow sewing friends in their sewing journey!


~Debby Bowles and Sheryl Belson, ASG Plano Chapter

Tagged With: Fashion, fitting, sewing

September 27, 2019

Video Interview with Kenneth D. King

Watch our exclusive video interview with Kenneth D. King, couture fashion designer, author and professor at The Fashion Institute of Technology. This lively and informative interview occurred at the American Sewing Guild National Conference 2019 in Boston.

Tagged With: ASG Conference, Fashion, Kenneth D. King

September 20, 2019

2019 Fashion Show

Enjoy the video from the One if by Land, Two if by Sea Fashion Show from the 2019 ASG Conference in Boston. The show was emceed by Nick Coman from Dragonfly Dyeworks.

Tagged With: ASG Conference, Fashion, fashion show, garments

August 16, 2019

An Interview with Kenneth D. King

ASG Conference 2019 is over but the memories live on. There are so many conference highlights, but the topic of this article is the pleasure I had of interviewing Kenneth D. King on Thursday evening. The room filled with anticipation as the interview began. I had been working with Kenneth for months to prepare and the time was finally here. As we sat in front of the audience in our easy chairs, what unfolded was a fun “living room chat” filled with interesting tidbits and lots of laughter. Video of this event will be shared in the future, but that will take a little longer so, in the meantime, I hope you will enjoy these highlights. If you missed the event, you can at least get a taste of the great time we had spending the evening with Kenneth D. King.

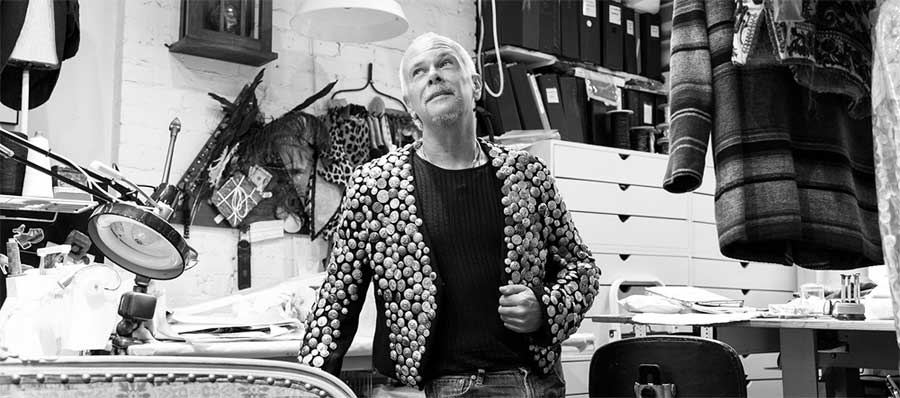
Kenneth D. King

Kenneth D. King

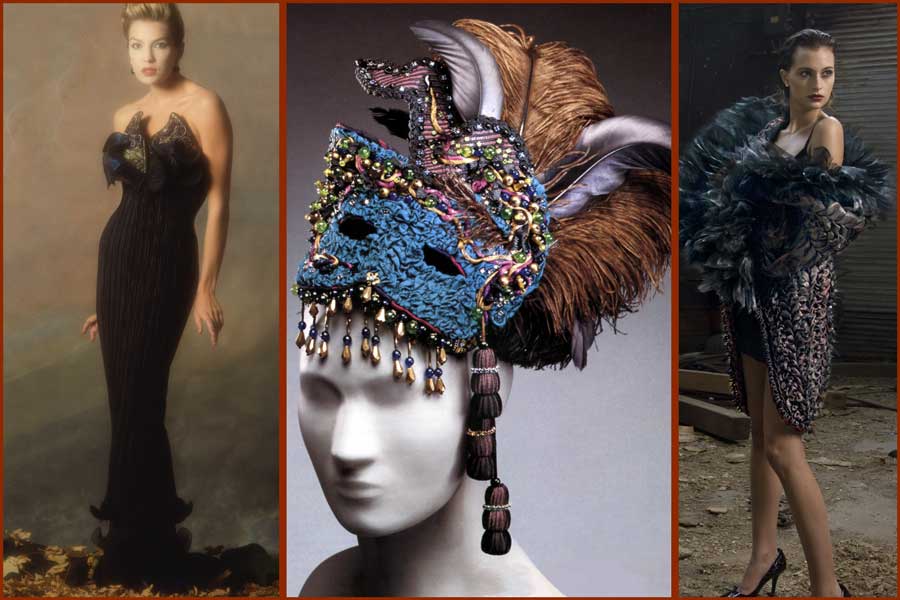
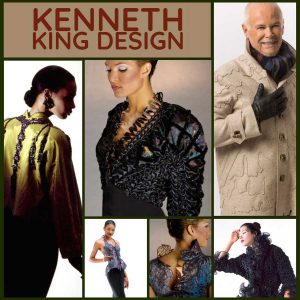
Kenneth D. King started his life journey in Salinas, KS. That journey has continued through OKC, San Francisco, and ultimately today, to NYC. He graduated Summa Cum Laude with a BS in Fashion Merchandising in OKC which launched his professional career. From there he moved to San Francisco to work in window display, but decided that he wanted his own business, which he started in 1986. His focus at that time was millinery.

After being in business for three years, he studied French Couture patternmaking for 9 months with Simmin (pronounced “Simone”) Sethna. His career began as a display manager in Oklahoma, but his true identity began to emerge and flourish after branching out on his own. Today we see him as an accomplished designer, adjunct professor, workshop teacher, author of 5 books and more articles and educational publications than I can count. He also has a novel, a podcast, and an audiobook to his credit. His work has been displayed in museums, seen on the red carpet, worn in concert tours, commercials, music videos, and highlighted in publications. His list of accomplishments is long and impressive. What a pleasure it is to spend time hearing from Kenneth D. King.


The Man Behind the Designs

How do you define yourself? Teacher, Designer, Author, or Other?

I’m a hybrid. I call myself a couture designer first, then a teacher, author, and storyteller. Over the years, I’ve realized that the central pivot of my career, has been—my craft. It’s been about making things, figuring out how to make things, writing about that, telling stories about that, teaching that, and entertaining myself and others with that.

More recently, as a writer, I’m embarking on another project—telling a particular story. I have the novel, which spawned the screenplay, and the podcast. Another project to add to my life.


Tell us about your latest book

And by the way, did you know we sold over 150 books for this event!

Why did you write it?

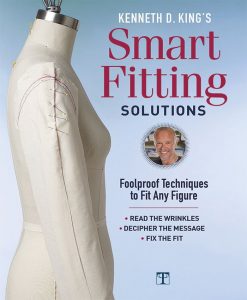
Smart Fitting Solutions by Kenneth D. King
Order Smart Fitting Solutions

I wrote it because Judy Neukam understood better what was in my head than I did. She intuitively knew the information was far more useful, and also knew how to format it in such a way to give value to as many as possible. Also, since I’m a little lazy, she insisted. She also championed the project to the good people at Taunton.

What was the favorite part of the process?

Working with Judy Neukam.

The hardest part?

The fittings and muslins. That was a heavy lift—I did the main part of the sewing, before we photographed, and during, as we were generating the second and third muslins.

How long was this book in the works?

As I remember, it was at least 18 months, but may have stretched a little longer. Books have a long lead time.

Someone asked why you didn’t address pants in this book? Can you talk about that?

Fitting trousers is a whole other topic. For women more than men. Men have two basic shapes and are easier. Since women are more genetically diverse (men have blank spaces on the Y chromosome which explains so much), there is an infinite variety of hip shapes. Hence another book.


Over the Years

How have you seen your style/techniques change over time?

My early work was more structured, with more interlinings and such. My first wave was what I called the “embellishment” work. It was a particular technique that answered a question. I did an evening vest with embellished lapels, and that was my breakout hit—it got me out of retail. But I’m dyslexic, and needed a method to make the embellishments appear symmetrical. I hit on using yardage trim, because of a regular unit of repeat. Answering that question of symmetry made a body of work.

I moved onto sheer fabrics, because the inside is visible from the outside. So there were different questions I had to ask—like how to smock organza without the thread showing, or how to make a complex garment without seams or apparent seams. It’s answering the questions that develops the techniques.

What has shaped those changes?

Simple avoidance of boredom, that’s the easy answer. On a more complex level, I wanted to develop something that wasn’t there already. It’s a response to an experience I had years ago, when I got the see the collection of John Galliano in Paris that got him the job with LVMH.


Those Fabulous Hats!

Tell us the story behind the Elton John hats you designed.

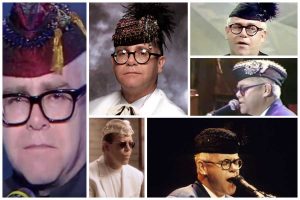
I adored Elton as a teenager. So, when I started in my business selling to a store in L.A. called Maxfield, it was his lyricist Bernie Taupin who bought a vest first. I guess he saw it on Bernie. He went into the store, bought a vest, ordered more, and we were off and running. He has the really good pieces—accessories, hats, vests, dinner jackets, the first footstool. Each hat has a story, but the Diet Coke hat was exciting. He ordered a specific red—lipstick red—so I thought it might be for a specific project. The concert tour in 1988 was wildly exciting and scary—I had to tame a monster (the owner of Maxfield) first, though.


The Barbie Project

You have been involved with so many various projects. This next one looks like it was a lot of fun.

Tell us the story behind your recent Barbie couture project.

I got my start sewing Barbie clothes when I was four. So in January, my sister-in-law gently suggested that her granddaughter was Barbie age and might like some Barbie clothes. I bought a reproduction of the old-school doll, and started making clothes, and posting on Instagram. The fashion editor for New York Magazine saw them, contacted me, and asked me to replicate some looks from the collections for an article they were doing on Barbie as Influencer. So I got paid a whopping amount to make some tiny couture. Then it turned into a rabbit hole—I don’t see an end in sight. But jumping scale, as my friend Marshall says, made me re-think how things go together, as tiny clothes don’t construct like real sized clothes. So little Charlie is getting collections, birthday and Christmas.

https://www.asg.org/wp-content/uploads/2019/08/KK5-BarbieVideo-1.mp4


On Display

You also have some of your work displayed in museums. Where are they? What are they?

I have work in four museums—an evening wrap at the Oakland Museum; three pieces at the DeYoung in San Francisco (hat, evening soufflé jacket, and black faille evening coat); The L.A. County Museum of Art (mermaid gown, couple of hats, couple of vests); and the V&A in London (an hat).

Kenneth D. King museum pieces

How did they end up being on display?

Some were gifted by me, some were gifted by clients, and some were gifted from estates of clients. A museum curator told me years ago that generally it was after 25 years in a client’s collection that they go into museums. That I have so many pieces there is good. I’ve been officially in business since 1987.


Strictly Entertainment

You also have another side to your creativity that veers into the entertainment business. I’m very interested to hear more about those creative avenues. You have a podcast, a novel and screenplay. How did you get involved in these?

I’m always looking to expand my horizons. Also, my second Saturn Return (age 60) was looming, and I was asking myself where to go next.

When I lived in San Francisco, I used to go to stand-up comedy, for enjoyment, as well as to observe and learn how they interact with an audience. After I moved to New York, I would go to what I call “Gay boy summer camp,” upstate. They always had a talent show, and a drag closet. So I decided for my talent to dress up and do some stand-up.

After one of these gigs, someone in the audience came up and told me I was good at it. He was a professional storyteller and said that I really knew how to tell a story. It occurred to me that I’ve been telling stories in class and to friends, so this seemed to be an avenue to follow.

Kenneth King: All Grown Up Now on Amazon

Listen to a personal reading from Kenneth D. King

The novel came about as a talking cure. In the mid-90’s, I had to help a friend out of an abusive relationship. It didn’t turn out like I had planned—it turned my life into a Fellini film for three years. Afterwards, I started writing to make sense of it. That turned into the novel, All Grown Up Now, a friendship in three acts. I self-published it after a frustrating round of talking to agents, them weighing in on what it should be, then saying they weren’t interested even if I changed it.

The novel brought forth the screenplay—it is act three in the novel. It was the story of going to Los Angeles to snatch my friend away, and what happened after. I’ve worked with a writing coach to refine it, and he has said it’s ready to shop around. I’m working with a woman who finds financing for films as well.

The podcast started as a way to get the novel in front of people—it’s the novel in installments. Episodes 1-29 are the novel, which I then turned into an audiobook. Starting with episode 30, people said I should continue, so I call it Season 2: Tales of a Checkered Past. This will one day morph into another audiobook.

I am enjoying the technique of telling a story with sound effects. I find the right sound effect can nail a pint or make a joke. This is an extension of studying stand-up; I listen to talk radio and observe how they use sound effects in addition to talk.

The podcast is also there to promote the film, to anyone who might be interested. It’s my way of telling this particular story to the world. That time in my life was huge—it really was a time where I learned a lot and stretched into a new area of life.


From Here to Where?

Where do you see these creative adventures going in the future?

Time will tell, but my aim is to have the film made, to tell this story. It’s about domestic violence in the gay community—something that isn’t talked about much. But domestic violence doesn’t have a gender, a social class, sexual preference—it’s just violence. It’s a universal story that just happens to be about two men. It’s also a tale of friendship—my friend Mark who got me out of Oklahoma, and how years later I got him out of that hellish relationship.

What should we be watching for next from Kenneth King? Anything new on the horizon you can tell us about?

Aside from pushing my projects forward, I have some articles for Threads Magazine coming out. This time seems to be one of gestation.


The Wisdom of Kenneth D. King

If you could leave us with 3 pearls of sewing wisdom, what would they be?

First—perfectionism is a disease. One can create the illusion of perfection, that’s the best one can do. It will never be perfect. Perfectionism is a form of fear—you can’t really learn anything from mistakes if you are obsessed with being perfect. Also, in my experience, perfectionists seem not to get anything finished.

This leads to the next bit—don’t be afraid of ruining a quantity of fabric, some good. It is the dues you will pay to be proficient. I had a student once who took 18 months to make a tailored jacket—as her first project. She was also a perfectionist. When she was finished (at my insistence), she was disappointed. She asked me how I got so good—my reply was that it wasn’t by taking 18 months on one piece.

Lastly, you don’t have to be good at everything. You just need to be good at what you want to make. That said, try new things, and try to be at least passable in other things.

A smart woman said to me years ago that if one is always at one’s best, one is, at best, mediocre. You don’t have to be brilliant at everything.

Oh. And make muslins!


~Sheryl Belson

Note: All images shared with permission

Tagged With: ASG Conference, Fashion, fitting, garment sewing, Kenneth D. King, sewing books

  • 1
  • 2
  • Next Page »

Become a Member

Join the only national organization dedicated to Advancing Sewing as an Art and Life Skill.

Join Now button

Blog Article Categories

  • ASG Conference
  • Chapter Stories
  • Embroidery
  • Fitting
  • Learn to Sew
  • National Sewing Month
  • Products, Books, & Patterns
  • Projects
  • Quilting
  • Sewing
  • Sewing Techniques
  • Sewing Tips
  • Sewing Tours
  • Videos
  • Disclaimer
  • Privacy Policy

American Sewing Guild
National Headquarters
9660 Hillcroft, Suite 230
Houston TX 77096
713-729-3000 | 713-721-9230 Fax
www.ASG.org

ASG wordcloud - education, conference, discounts, videos, special offers, tours and more

Copyright © 1998–2025 · American Sewing Guild · All Rights Reserved