American Sewing Guild (ASG)

Visit our blog Visit the ASG Facebook page Visit ASG on Pinterest Visit ASG's YouTube channel Visit ASG on Instagram
  • Home
  • Join ASG
    • Join Online
    • Chapter Locations
    • Member Benefits
    • Member Brochure
    • Join by Mail
  • Education & Classes
    • Virtual Conference: Member Registration
    • Virtual Conference: Non-Member Registration
  • Resources
    • Contests & Awards
    • Giving Back
    • Hall of Fame
    • Travel and Tours
    • Measurement Chart
  • Shop
    • ASG Store
    • Chapter Products
    • Video Resources
  • Blog
  • About
    • About Us
    • Donate to ASG
    • ASG Sensitivity Statement
    • FAQ’s
    • Start a Chapter
  • Contact
  • Member Login
    • Login First!
    • Members Only
    • Leadership Only
    • Website FAQ’s
    • Logout
  •  

October 16, 2026

Why Isn’t Recycled-Cotton Fabric 100% Recycled?

Cotton recycling logo

Recycled cotton sounds straightforward: old cotton textiles are collected, broken down and transformed into new fabric. Yet when shoppers examine a fabric label, they may discover that the material contains only a small percentage of recycled cotton blended with virgin cotton or another fiber. While the majority of recycled cotton is made from pre-consumer waste, it currently only represents a small portion of global cotton production. So why isn’t more of the fabric recycled?

The answer begins with the way cotton is mechanically recycled. Fabric scraps and discarded garments are sorted, shredded and pulled apart until they return to a loose, fibrous state. Unfortunately, this process shortens and weakens the cotton fibers. According to Fashion for Good, only about 45–50% of the original material may remain usable after mechanical recycling. The surviving fibers are generally much shorter than newly harvested cotton fibers, making them more difficult to spin into a strong, smooth yarn.
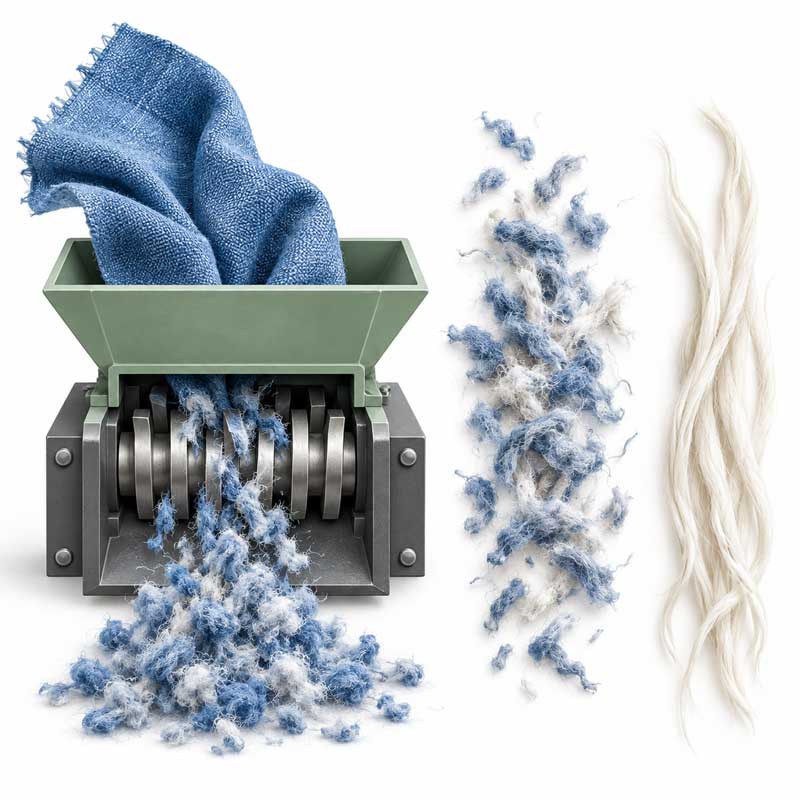
This illustration is a visual representation intended to explain the recycling process and is not an exact depiction of commercial textile-recycling.

To compensate, manufacturers often combine the recycled fibers with longer virgin fibers. The virgin cotton helps the yarn withstand spinning, weaving or knitting, dyeing, sewing, wearing and repeated laundering. Without that support, a fabric containing a very high percentage of mechanically recycled cotton may pill excessively, feel rough, lose its shape or wear out sooner than expected.

Manufacturers may also blend recycled cotton with synthetic fibers such as recycled polyester (rPET) to make the yarn strong enough for items such as T-shirts, hoodies, and denim.

As a result, many commercially available yarns contain approximately 10% recycled cotton. Higher percentages are possible, but the right amount depends on the garment, fabric structure and expected performance. A lightweight blouse, sturdy pair of jeans and casual sweatshirt do not place the same demands on their fabric.

Certifications

Standards like the Recycled Claim Standard (RCS) or Global Recycle Standard (GRS) certify products with variable amounts of recycled content:

  • GRS is for products containing at least 20% recycled materials. GRS certification requires compliance with both social and environmental criteria, with a third-party verification in place.
  • RCS is for products containing at least 5% recycled material. You can come across two different logos of RCS:
    • RCS 100 is used for products that contain 95-100% recycled material and do not contain any virgin material of the same type,
    • RCS Blended is used for products containing 5-95% recycled material, with no restrictions on the remaining composition
  • Note: RCS only tracks the presence and percentage of recycled material; it does not verify organic status, fair labor/social conditions, or chemical safety restrictions in production.

A New Effort to Improve Recycled Cotton
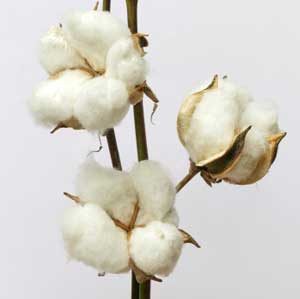
Cotton boll image

In October 2026, Fashion for Good launched the Cotton Reloop Matrix Project to address these challenges. The project brings together textile manufacturers, clothing companies and yarn-testing specialists to evaluate commercially available recycled-cotton yarns against the actual requirements for knitted and woven fabrics.

Rather than expecting recycled cotton to perform exactly like 100% virgin cotton in every situation, the project will investigate where recycled fibers already work well and where further development is needed. Participants plan to produce 10 demonstration fabrics and conduct five manufacturing trials under real production conditions. They will compare recycled content, quality, performance and price.

The group also intends to publish an open-source spinning procedure so manufacturers can apply the findings more consistently. Eventually, the project will produce a roadmap describing what the textile industry needs to increase recycled-cotton use.

This does not mean that 100% recycled-cotton yardage will suddenly appear in fabric stores. The project is an important research and manufacturing initiative, but commercial changes will take time. Its findings may, however, help mills produce more dependable recycled-cotton fabrics.

What This Means for Sewing Enthusiasts

For sewists, the recycled percentage is only one part of a fabric’s environmental story. A fabric containing more recycled fiber is not automatically the better choice if it lacks the durability needed for the intended garment. Fabric that quickly pills, stretches out or wears through may be less sustainable than a lower-percentage recycled blend that remains wearable for years.

When considering recycled-cotton yardage, examine it as carefully as you would with any other fabric. Check the fiber-content label, but also consider the fabric’s weight, recovery, hand, opacity and stability. If possible, wash a sample before cutting your garment. Notice whether it shrinks, twists, pills or changes texture. Choose a pattern suited to the fabric’s actual behavior rather than relying only on its environmental claims.
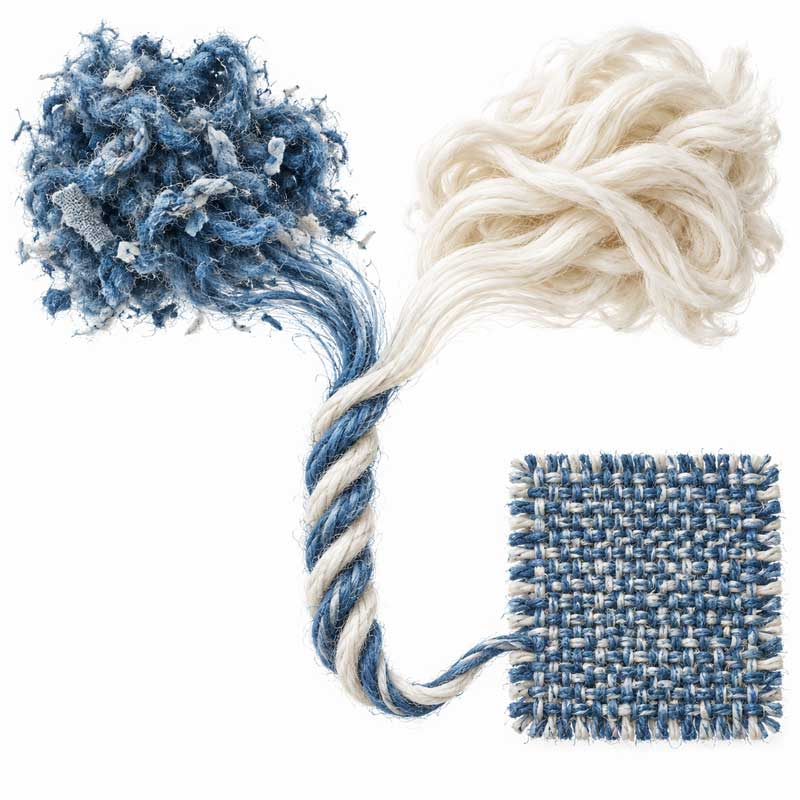
This illustration is a visual representation intended to explain the recycling process and is not an exact depiction of commercial textile-recycling.

Thread, elastic, interfacing, labels and trims also affect a garment’s eventual recyclability. A cotton garment sewn with polyester thread is technically no longer a single-fiber item. Home sewists may not currently have access to a convenient system that accepts handmade garments for fiber-to-fiber recycling, but the principle is still useful: every material added to a garment affects what can happen to it at the end of its life.

You can support sustainability by making garments that fit well, choosing durable construction methods, saving usable scraps, and repairing clothing before replacing it. Selecting a recycled fabric is valuable, but extending the useful life of the finished garment may be even more important.

The Cotton Reloop Matrix Project highlights an essential lesson: textile sustainability is rarely as simple as a percentage printed on a label. Recycled cotton involves real compromises among fiber content, strength, comfort, appearance and cost. Better testing and shared standards could help manufacturers find the right balance—and eventually give home sewists access to recycled fabrics they can select with greater confidence.
 

October 9, 2026

Appliqué Hurray: The Framing Method

If you love the look of appliqué, but you’ve noticed that sometimes the designs look a little stiff, especially on lightweight backgrounds, there is a solution.

Applique

Traditionally, fusible appliqué methods involve cutting the fusible web the exact same size and shape as the fabric portion of the appliqué so that it’s adhered solidly to the background fabric. But this innovative framing method uses the fusible web only on the outer edges, not under the entire piece. It leaves the center portion free of adhesive and floating over the fabric background.

Be sure to choose a lightweight, sew-able fusible product. Note that some fusibles are designed for more crafty uses and can be used on bases other than fabric (like wood, paper, etc.)—avoid those as they’re generally heavier than needed for this method. Look for webs with a lighter hand.

To use the framing method:

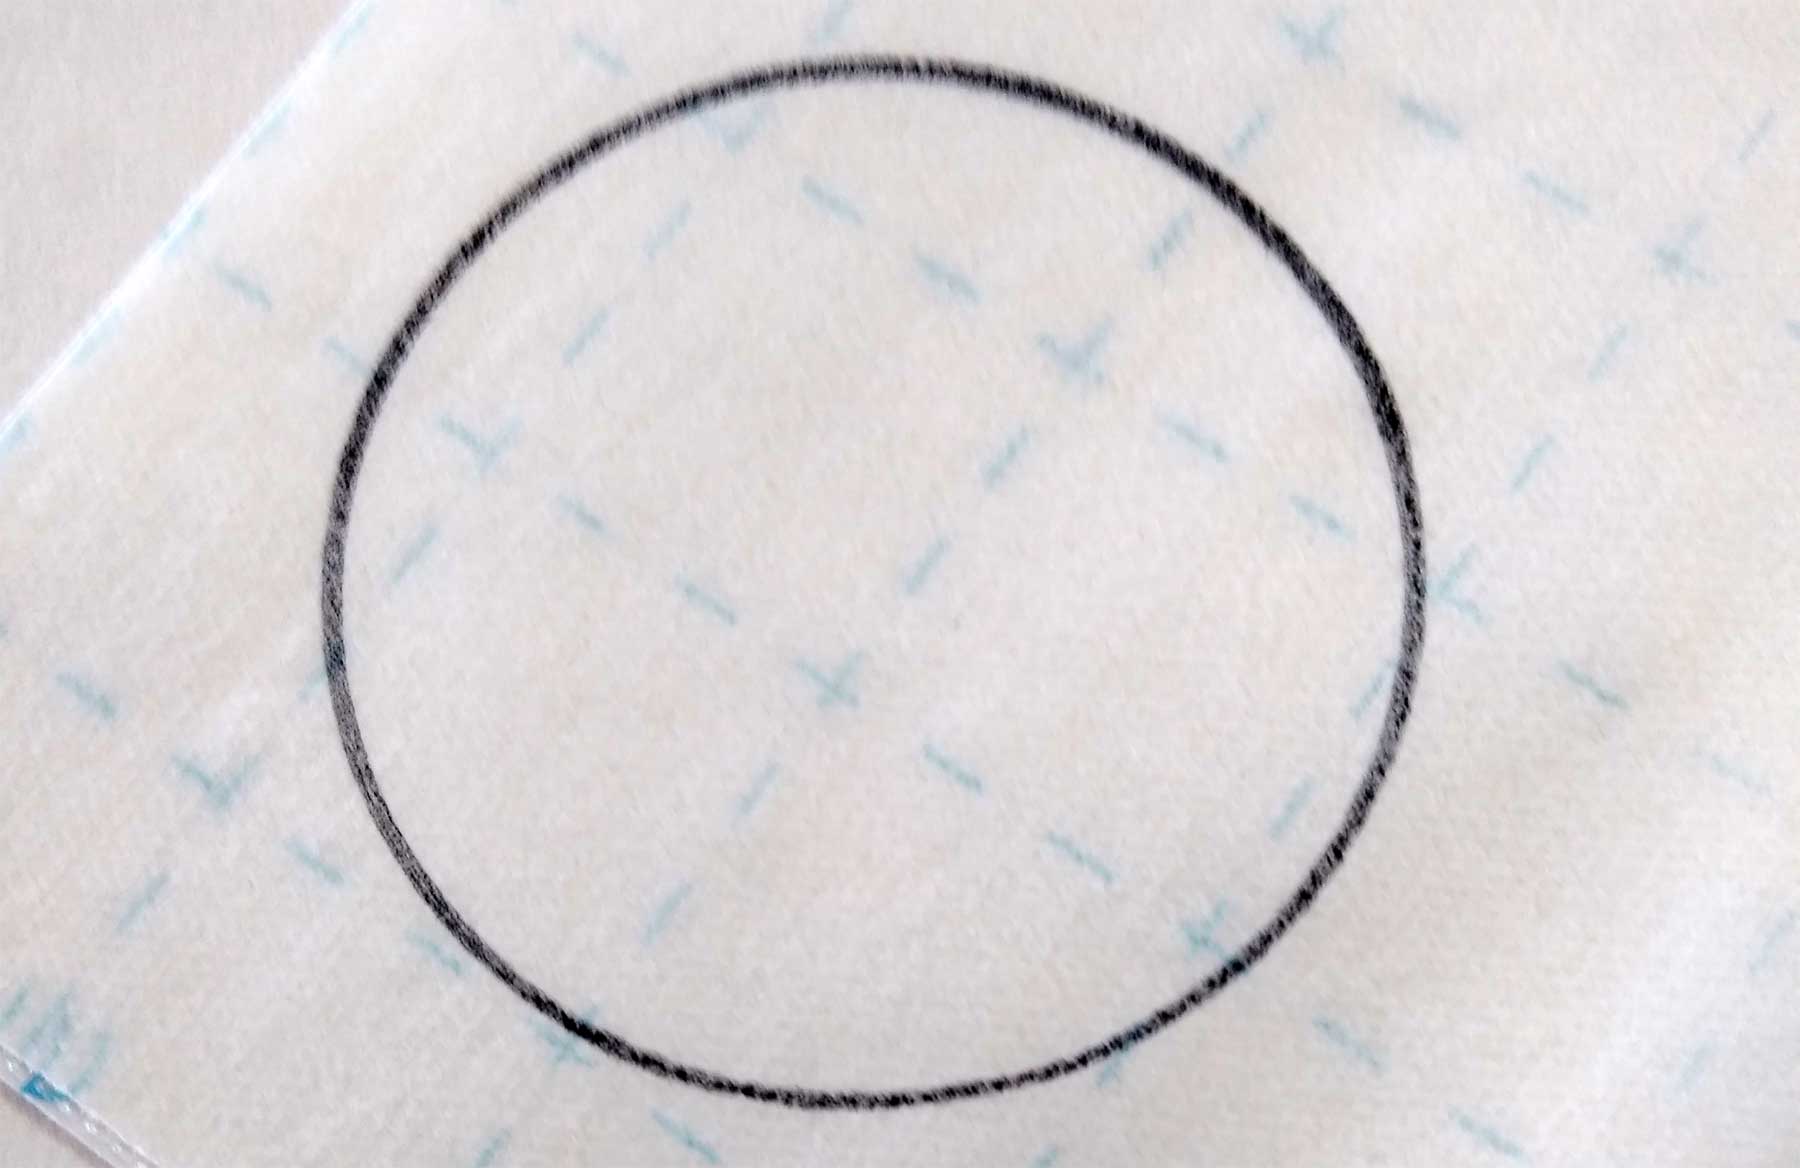
Trace the appliqué shape onto the fusible web’s paper backing, leaving about 1” between pieces if your design is composed of multiple pieces (1). It’s important to note that what you’re tracing will be the reverse of the finished design, so if the direction matters, you’ll need to reverse the tracing direction. Examples of where this might be important is if your appliqué is lettering, or if it’s a dog and the direction it faces is important to the finished design.

1

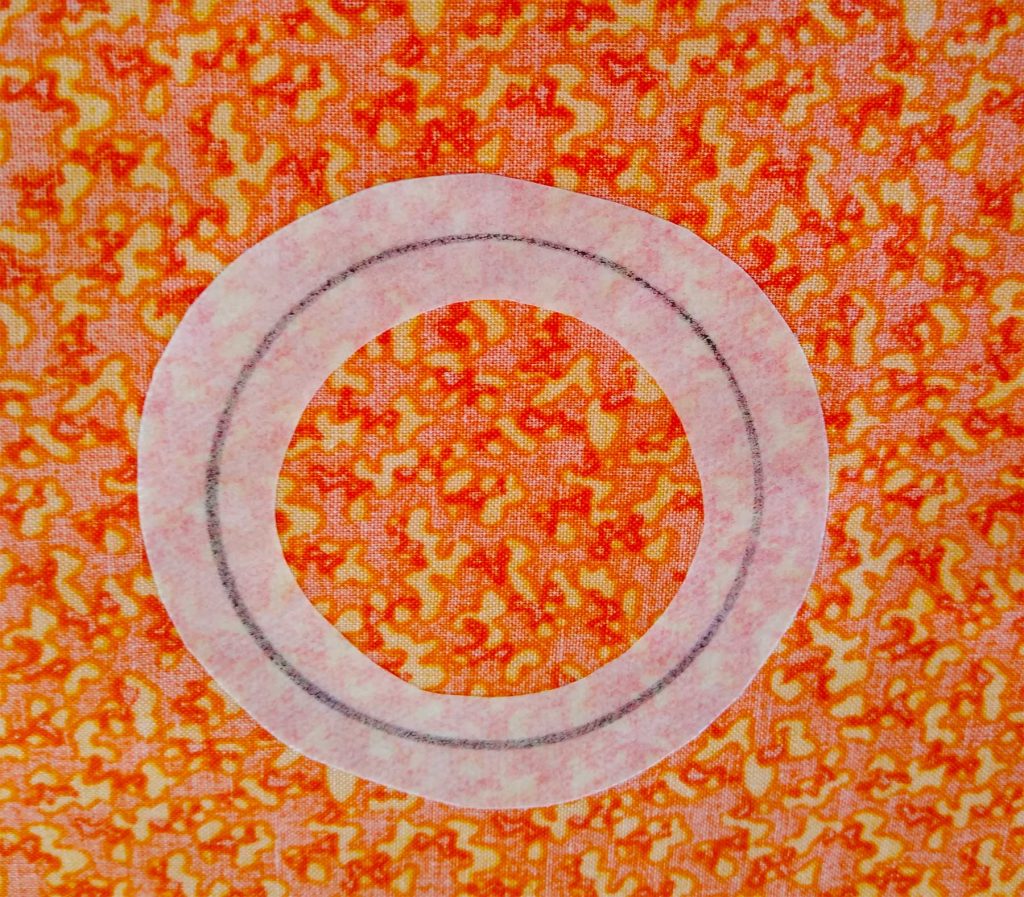
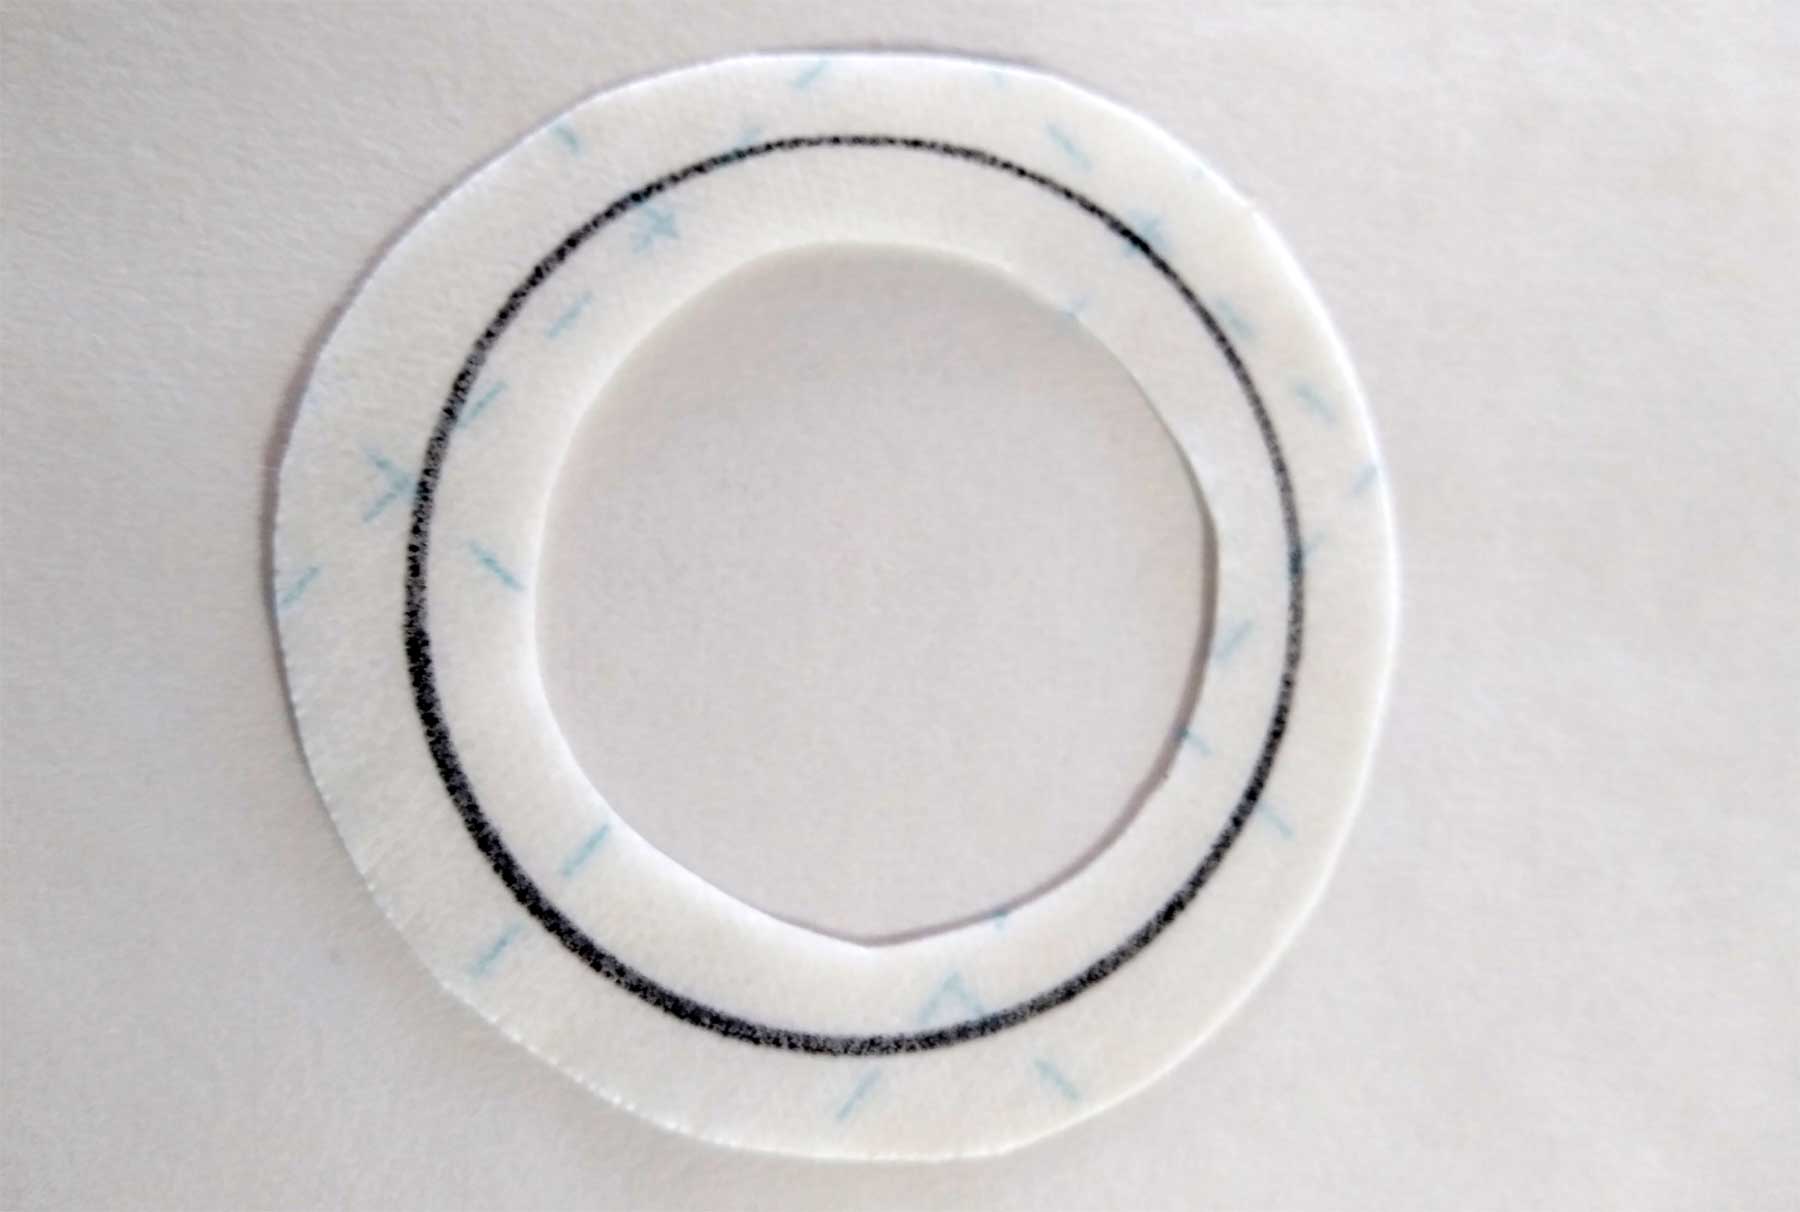
Rough-cut the traced shapes about ¼” outside the drawn lines (2).

2

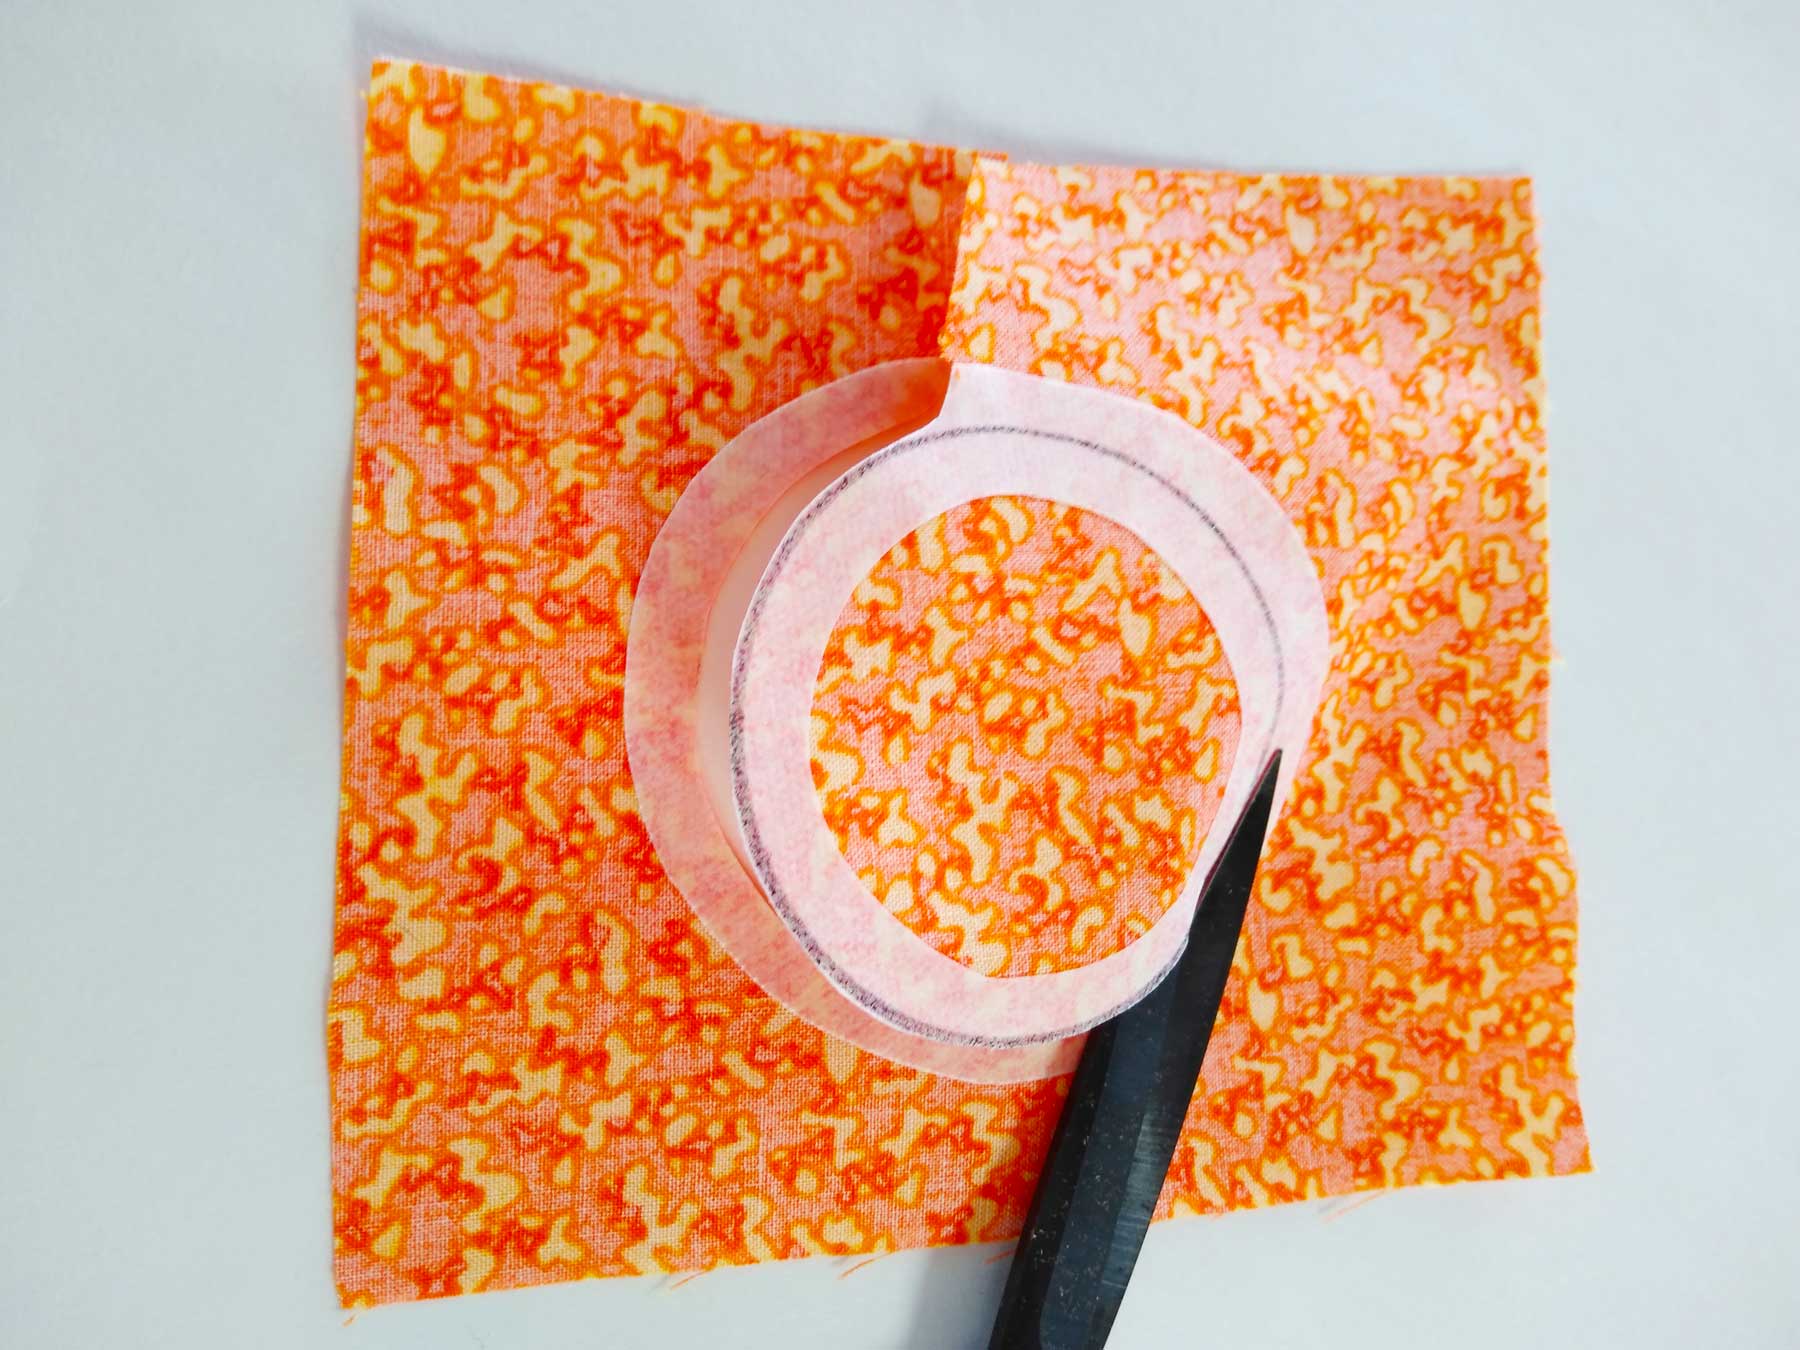
Carefully trim out the center of the shapes, leaving only ¼” inside the lines (3). Keep the fusible scraps for another project.

3

Follow the manufacturer’s instructions to fuse the web side of each shape to the back of the appliqué fabric (4). On some fusible brands, you will need to remove the unmarked side of the protective paper before fusing.

4

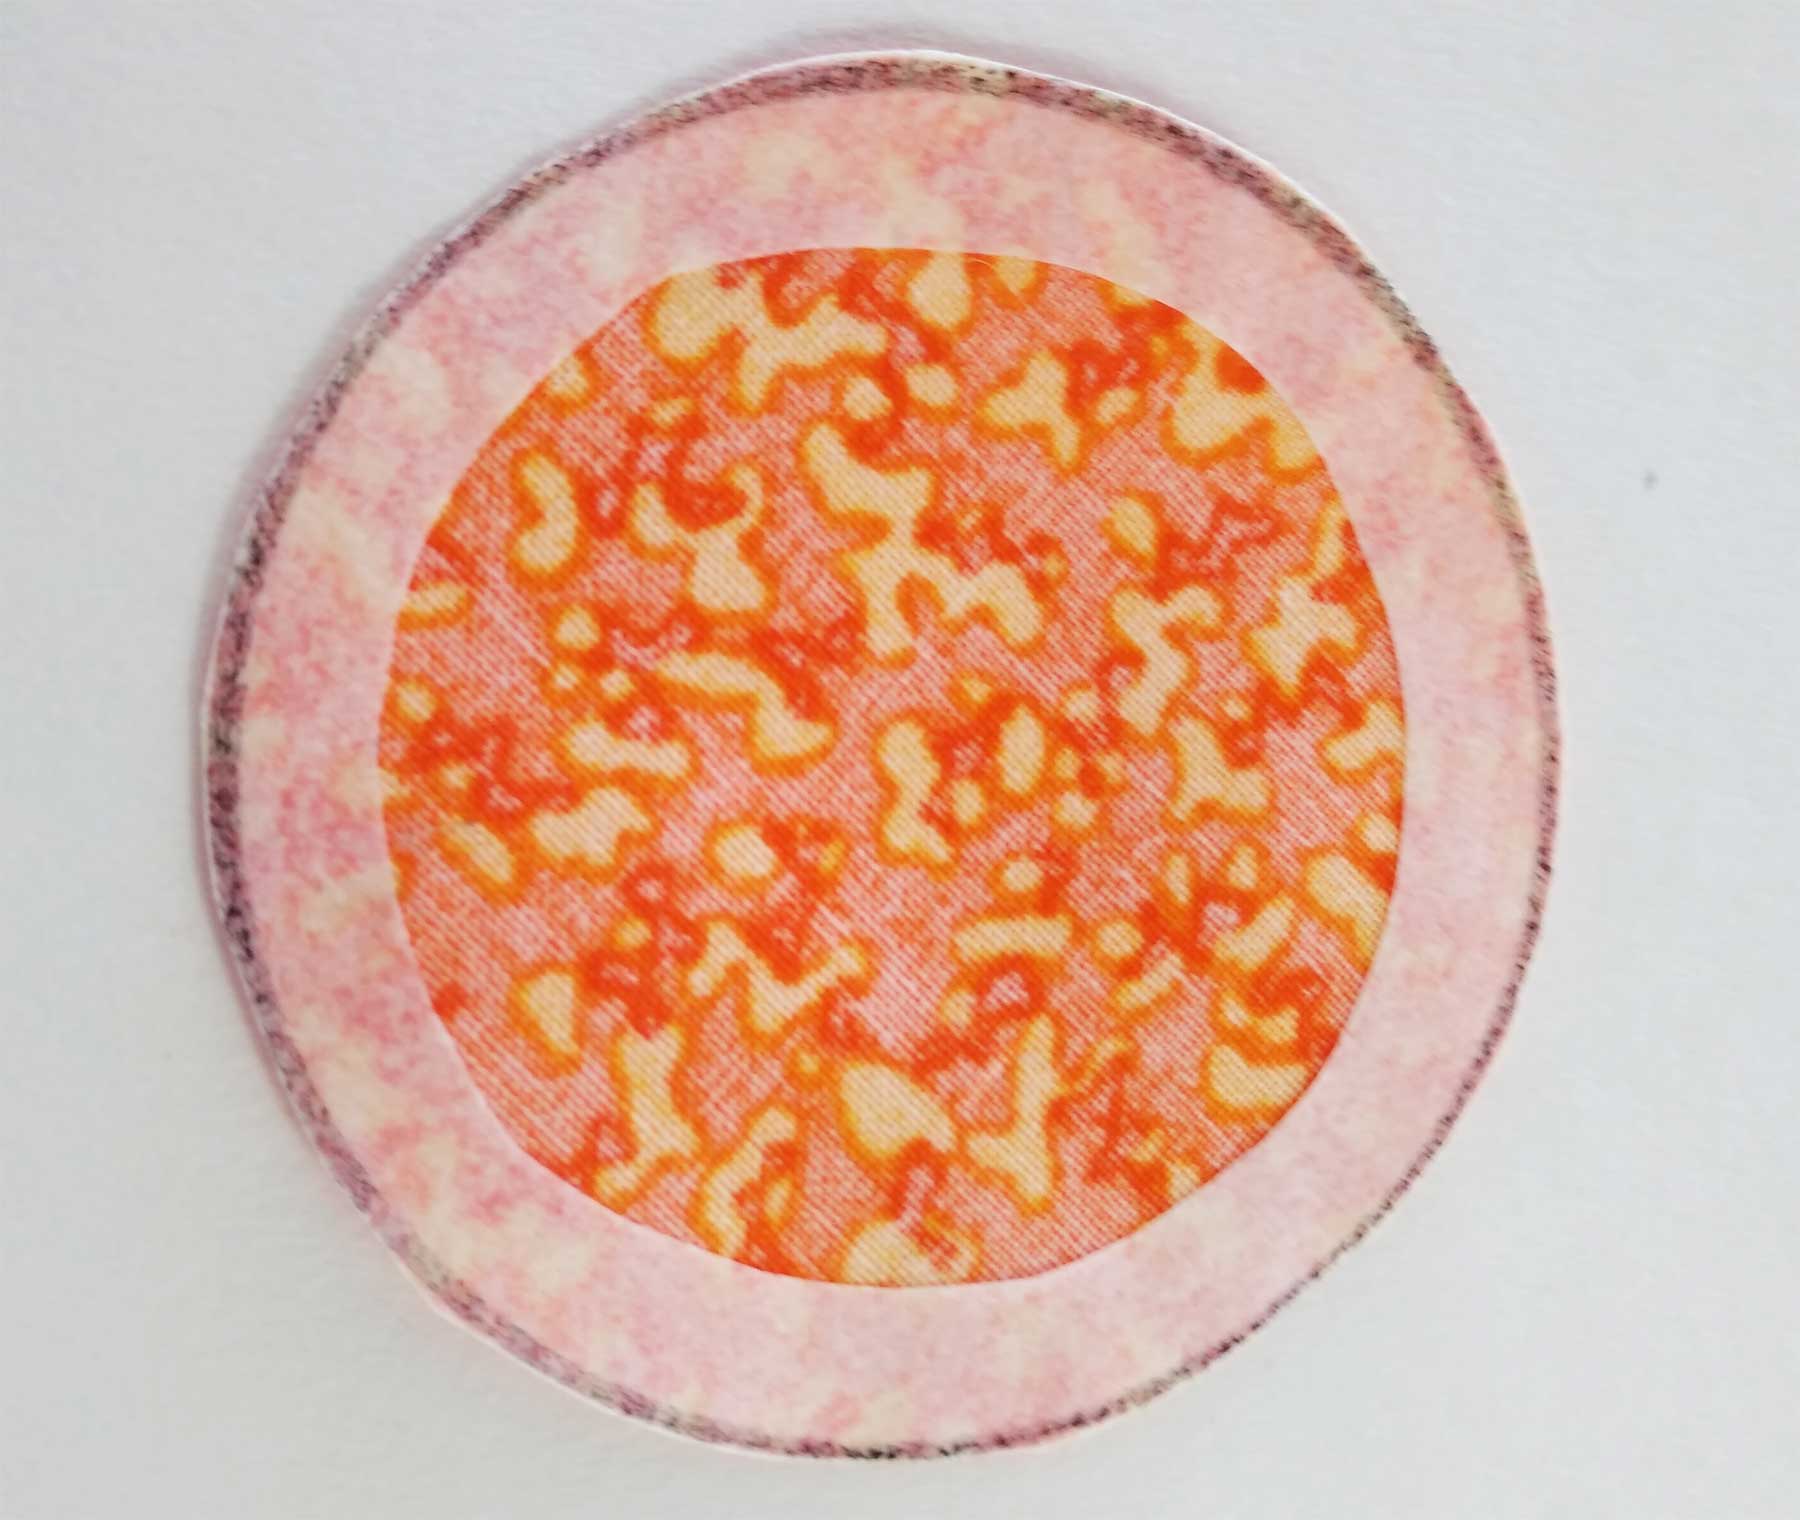
Let the appliqué fabric sit until it is cool. Then, cut out the shape along the outer drawn line (5).

5

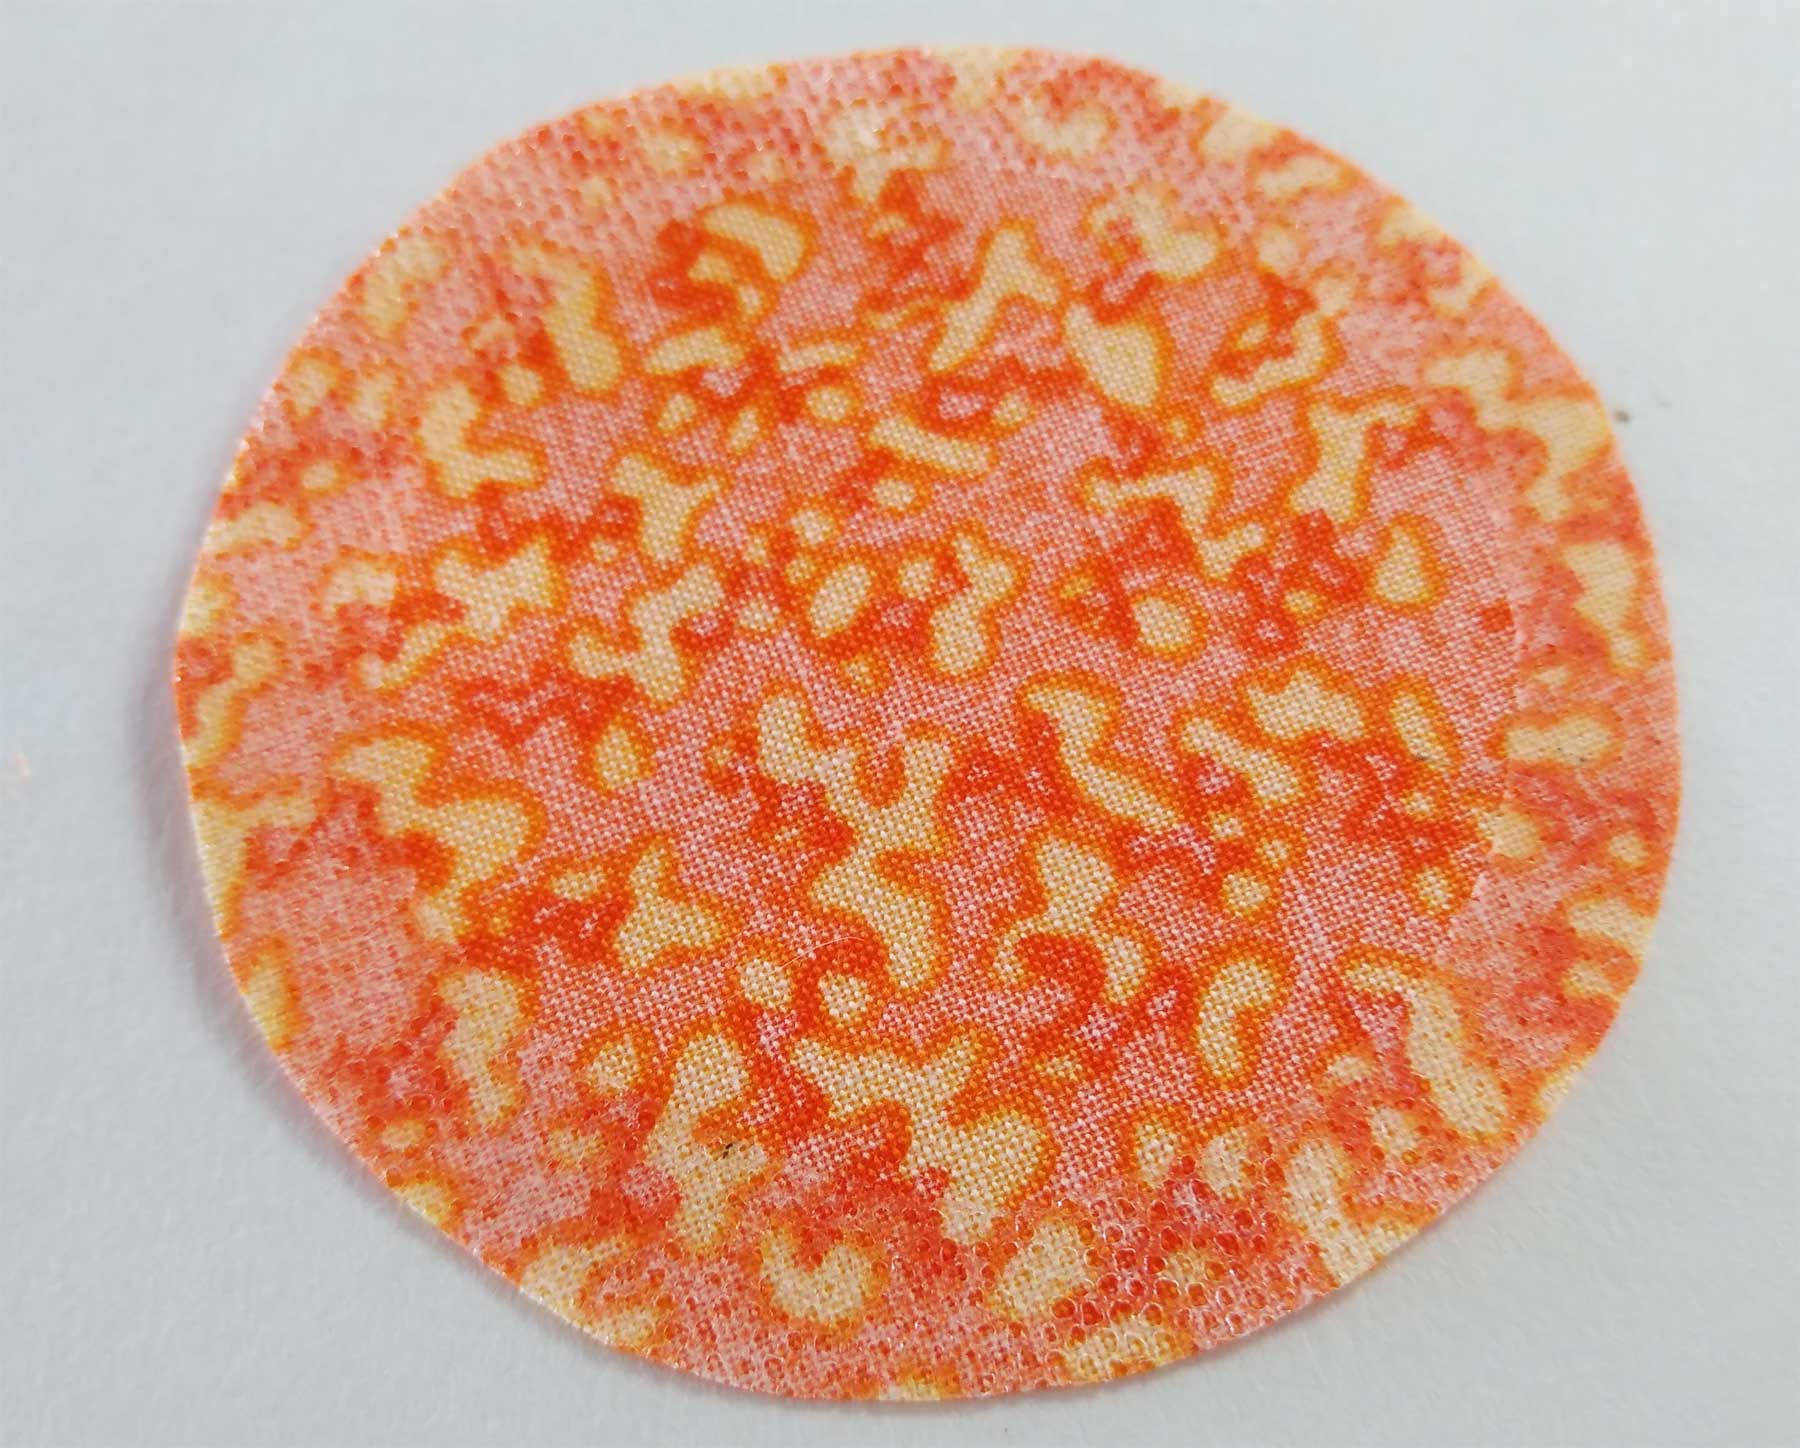
Peel off the marked paper (6) and place the web-backed appliqué on the base fabric right side in the desired position. If your design has multiple layers, always begin with the base (lowest) layer. Follow the manufacturer’s instructions to fuse the appliqué shape in place. A non-stick pressing sheet or press cloth is helpful to protect your iron during the fusing process.

6

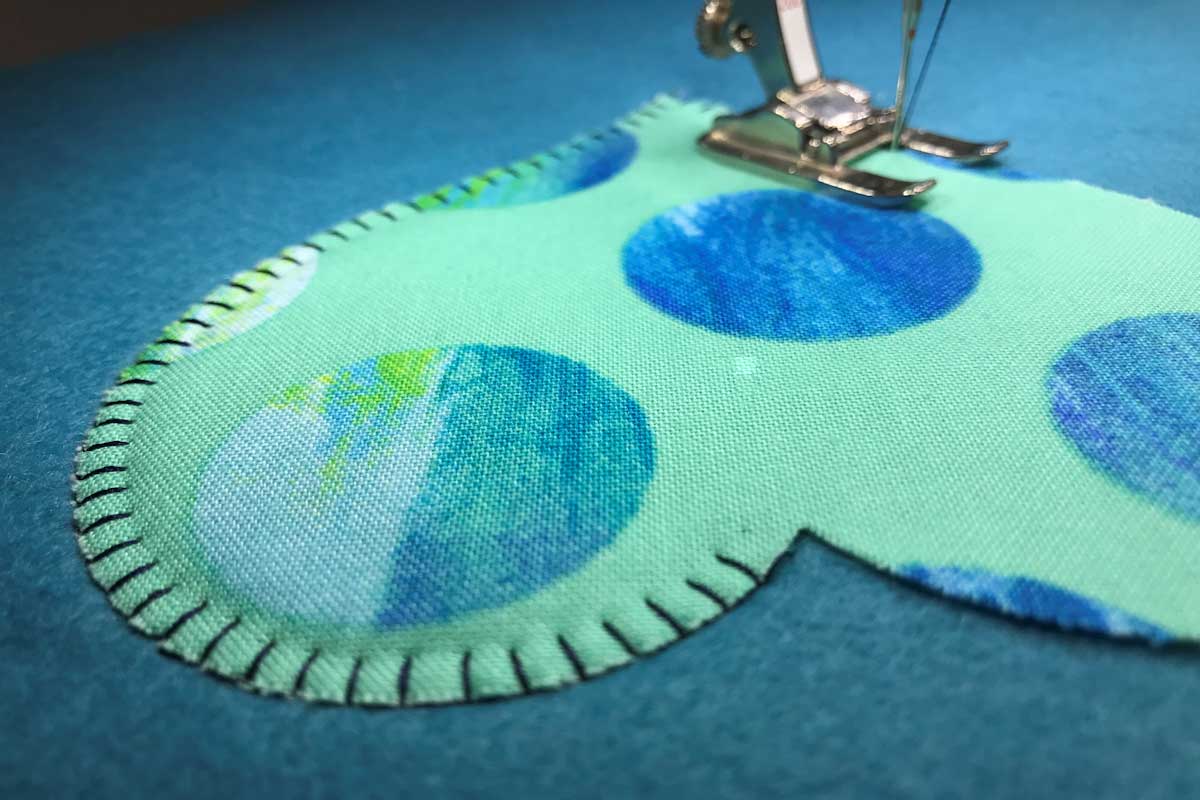
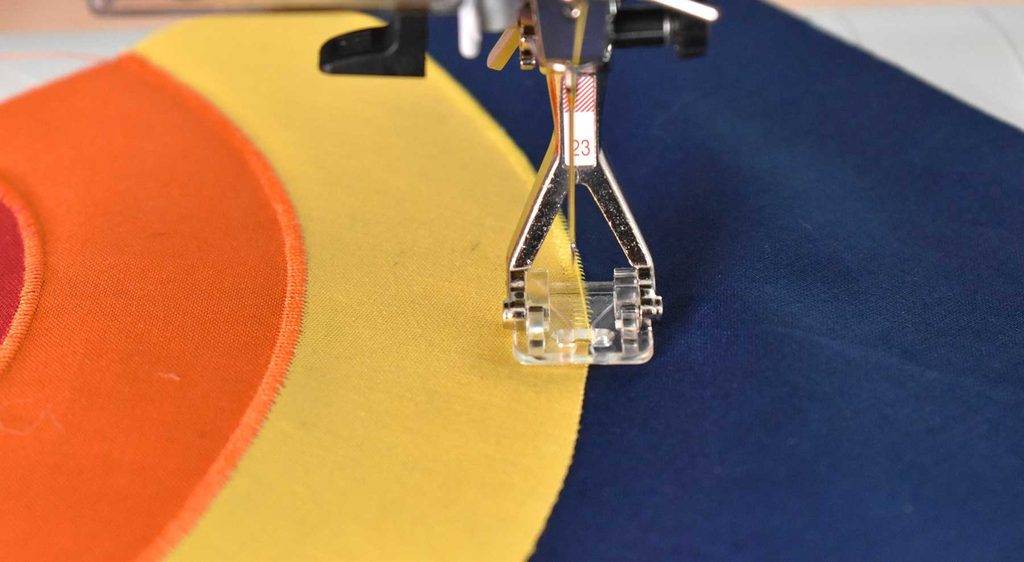
Some designs will require edge stitching to be completed before fusing any subsequent layers; on other designs, all layers can be fused before edge stitching. Use a zigzag, satin stitch, blanket stitch (Bernina photo) or decorative stitch to finish the appliqué edges.

Blanket Stitch

Note: Before stitching on the actual project, make a test appliqué using the same fabrics/web to determine the best stitch settings (length, width and tension).

Which foot?

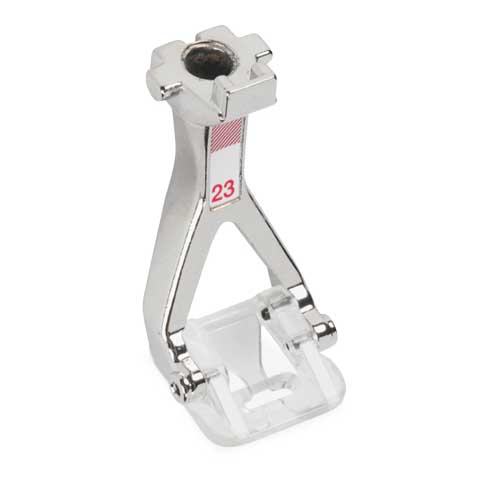
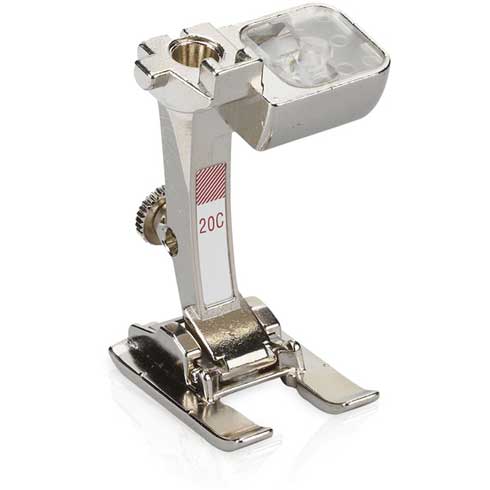
Check your machine owner’s manual for recommendations of which foot to use for appliqué. It’s easier to place stitches precisely using an open-toe foot, but other feet can work as well. Just be sure that if you’re using a satin stitched edge on the appliqué, the foot has a recessed space on the underside to allow the stitch build-up to pass through smoothly.

Bernina Appliqué Foot
Bernina Open Toe Foot

~Linda Griepentrog is the owner of G Wiz Creative Services and she does writing, editing and designing for companies in the sewing, crafting and quilting industries. In addition, she escorts fabric shopping tours to Hong Kong. She lives at the Oregon Coast with her husband Keith, and three dogs, Yohnuh, Abby, and Lizzie. Contact her at gwizdesigns@aol.com.

September 25, 2026

Turn the Corner on Your Tote

Some design details can make or break the look of a handmade tote, and corners are key to a professional look.

Boxed corners add depth to an otherwise flat bag, allowing it to hold more “stuff” and maintain its shape while being carried or stored. Most boxed corners feature only an inverted T appearance with the side seam artfully intersecting a horizontal seam at the base.

To create a traditional boxed corner:

  • Stitch the side and bottom seam of the tote, then fold the side seam directly on top of the bottom seam. To create a 4” deep tote base, draw a 2” line on each side of the stitched seam forming a triangle, then sew across the drawn line.
  • Trim the excess fabric triangle, leaving a 1/4” seam.
  • Turn the bag right side out and press.

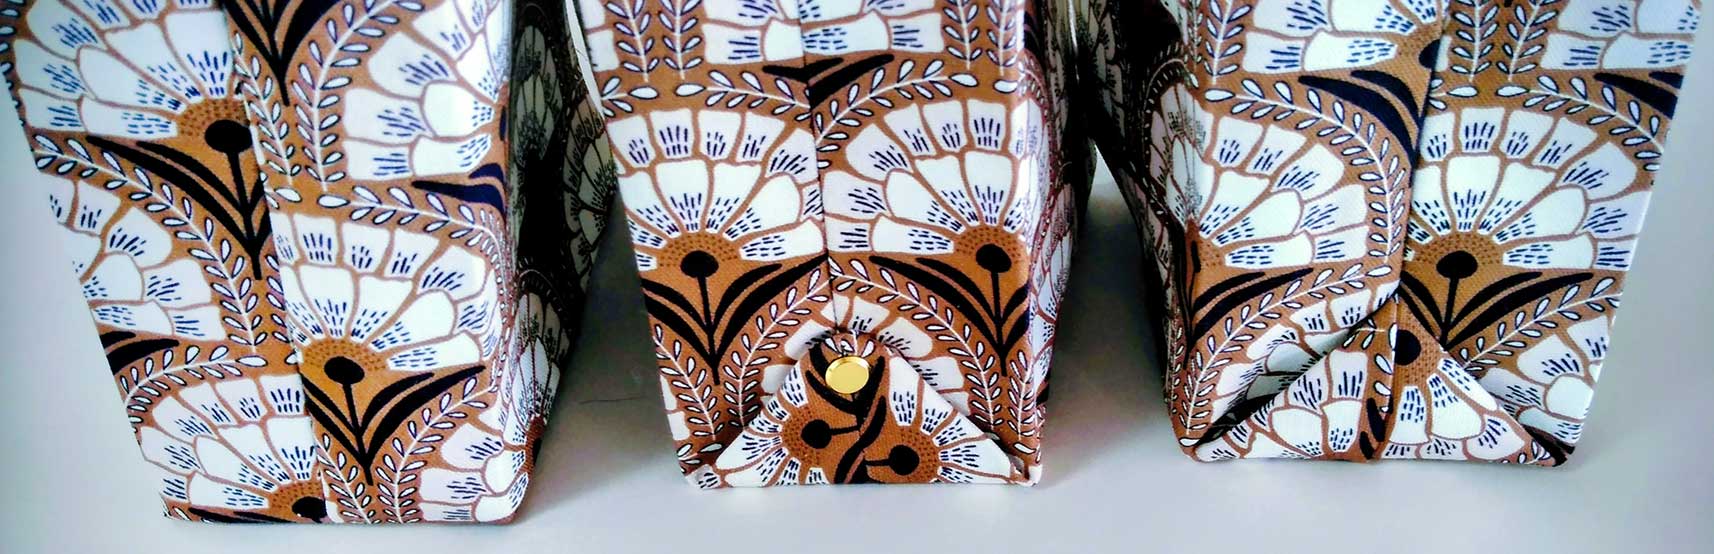
A traditional boxed corner is functional, but why not add a bit more interest and put the corner structure on the outside of the bag? There are two ways to create visible corners.

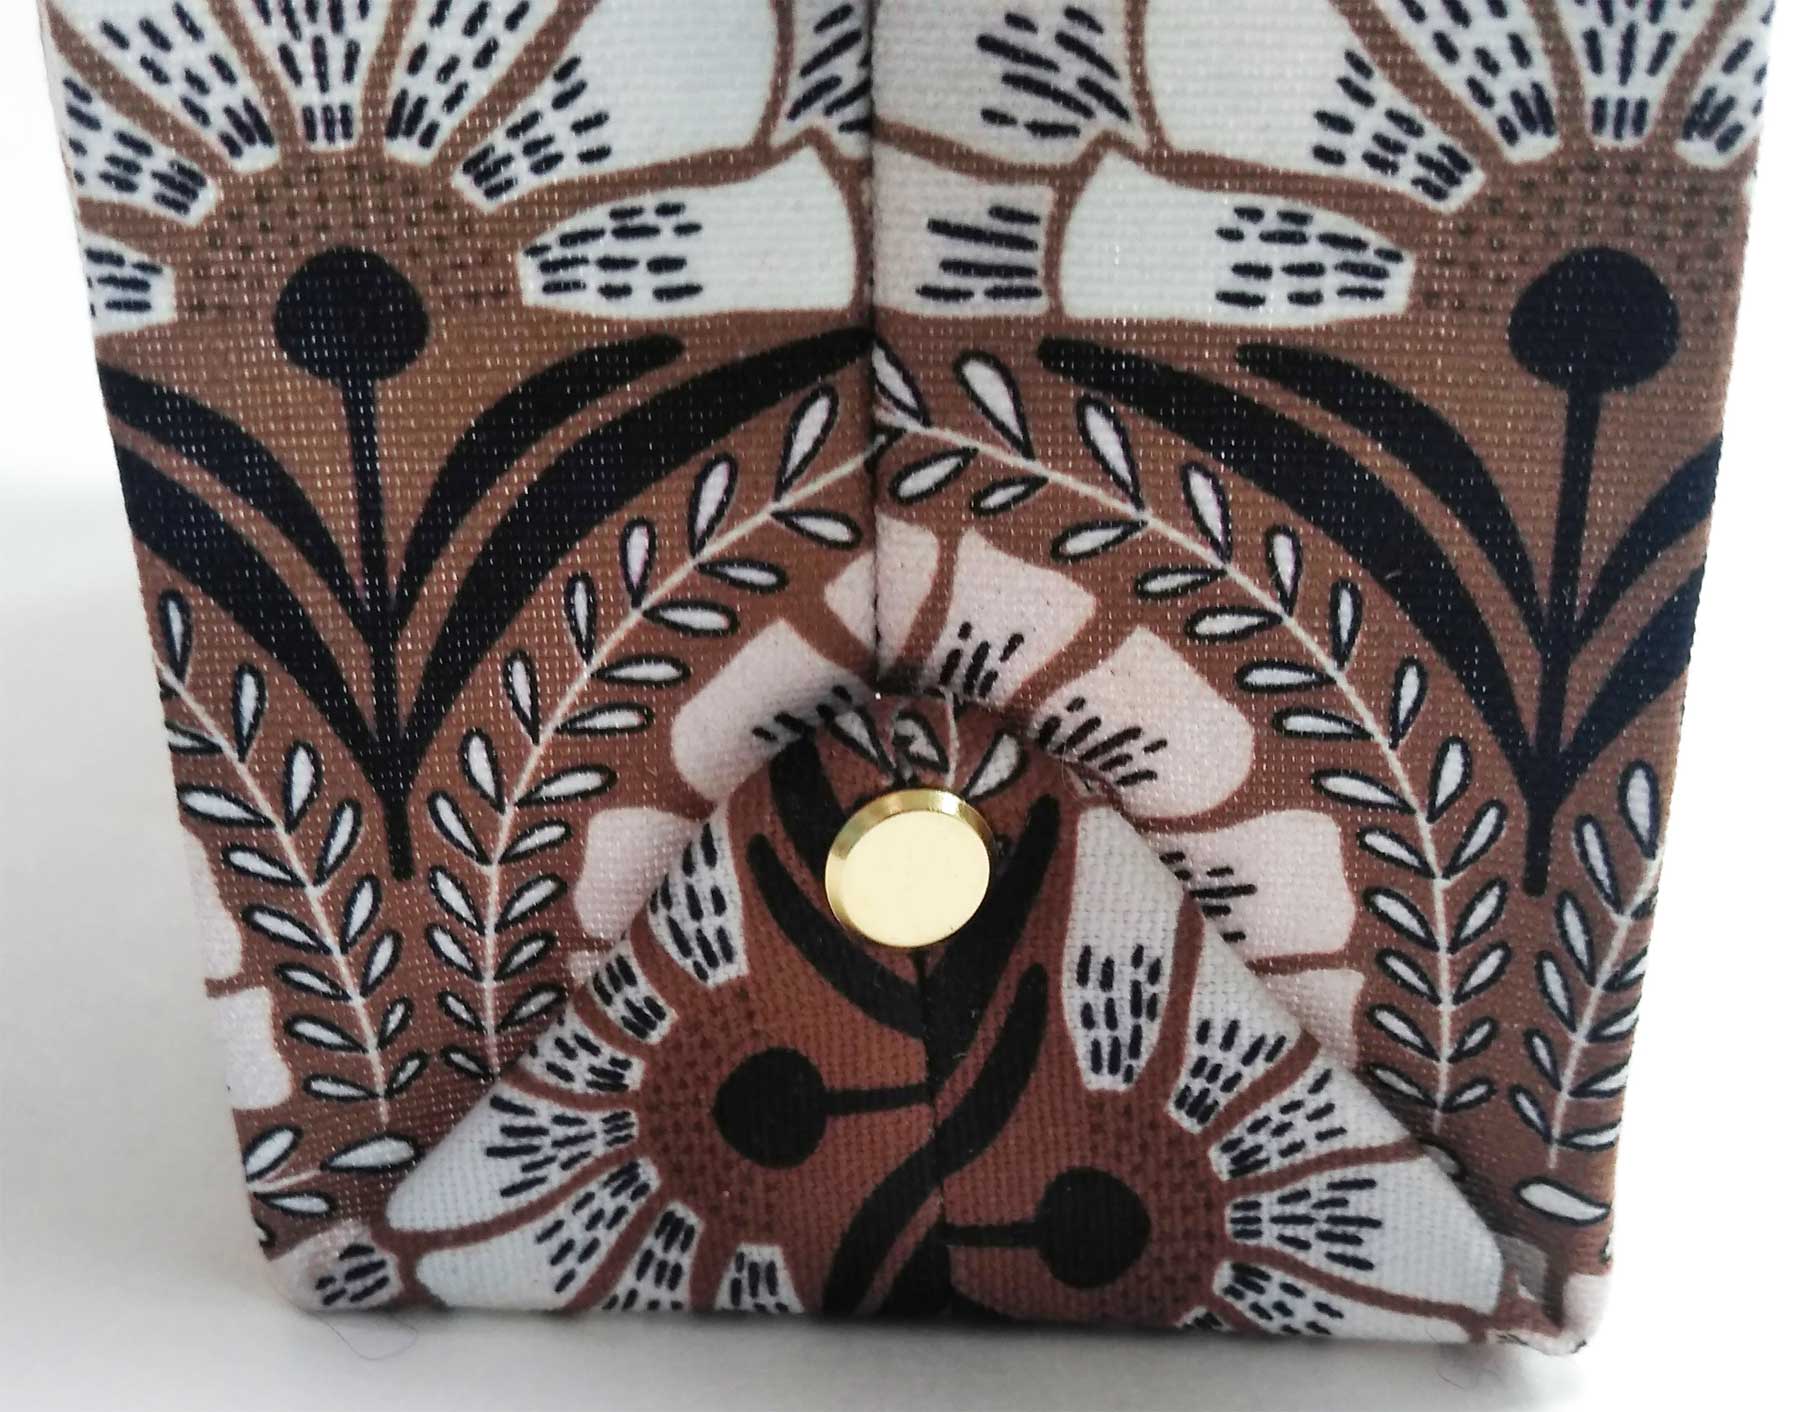
Outside point

Outside corner with screw
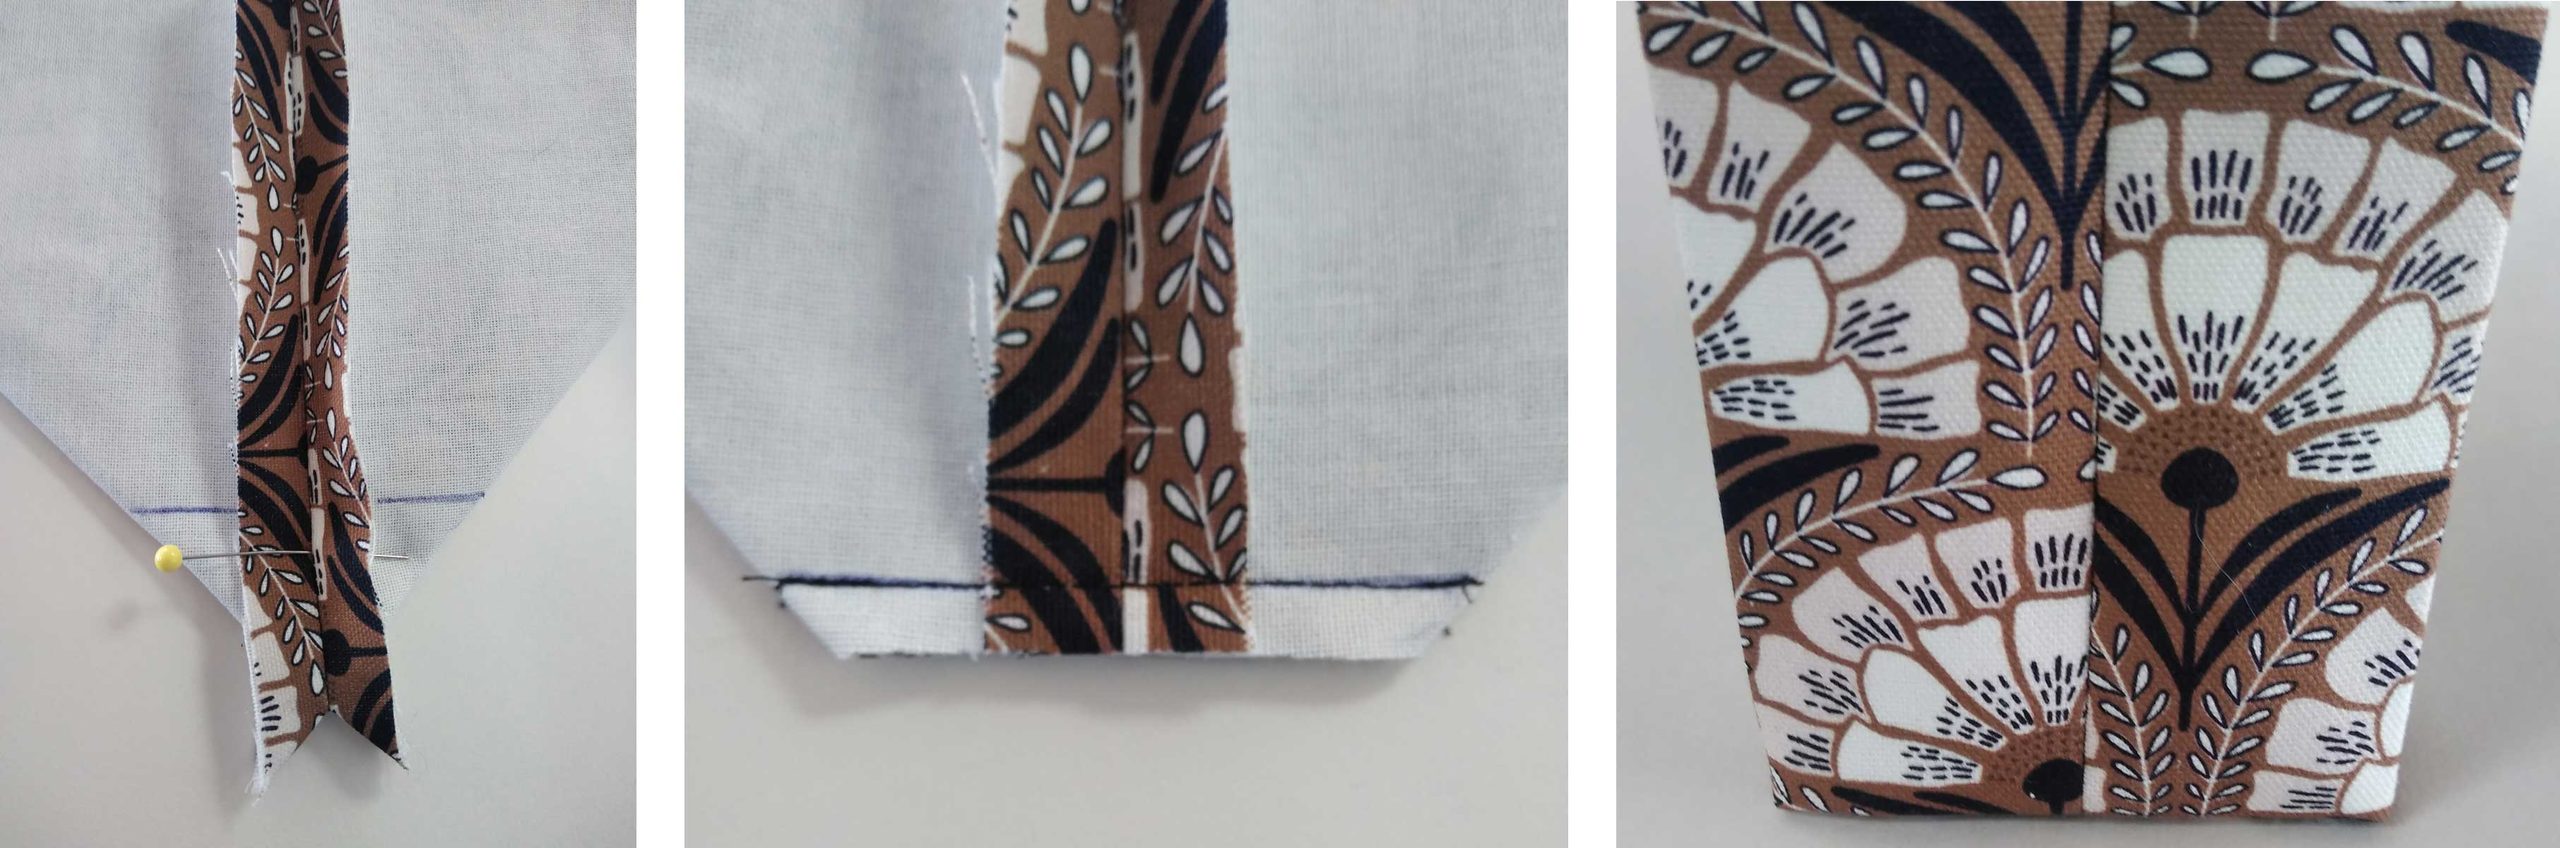
  • To create an outside point, place the bag front and back right sides together and stitch the side and lower edge seams, forming a right angle. (Depending on the pattern, there may not be a lower edge seam, but a fold instead.)
  • Fold the bag with wrong sides together and lay the side seam directly over the center bottom seam, forming a triangle on the outside.
  • Fold the point up to meet the side seamline forming a box shape of the desired width—usually 2”-4” wide, depending on the tote size.
  • Now comes the fun—anchor the point in place by sewing on a decorative button or inserting a Chicago screw near the triangle point.

What’s a Chicago screw?

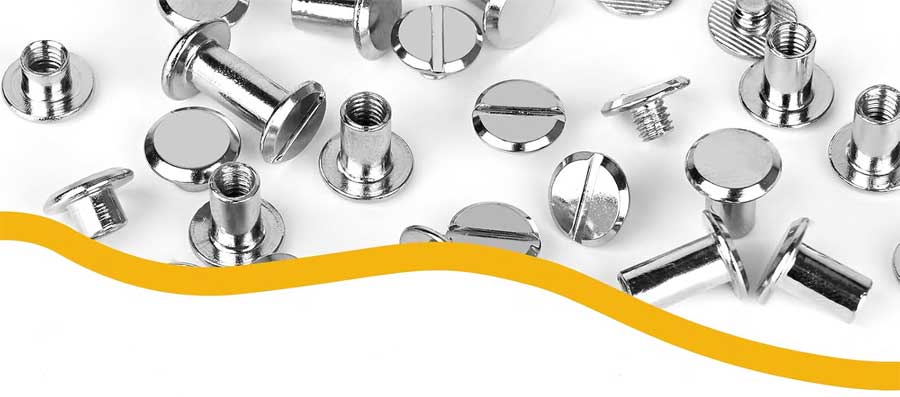
A Chicago screw is a threaded barrel-and-screw fastener used when you want a secure hold. There is a male screw portion and it’s inserted into the female threaded portion. One or both ends have a screw-like head on them and the outer shaft is smooth for easy insertion through multiple fabric layers.

Chicago Screw available on Amazon
As an Amazon Associate, we earn from qualifying purchases.

The fasteners come in different colors, diameters and lengths. For most tote-weight fabrics, a 1/4” – 3/8” shaft is ideal.

Use an awl to punch a small hole in the multiple fabric layers before inserting the screw shaft. Add the backing portion and tighten in place.

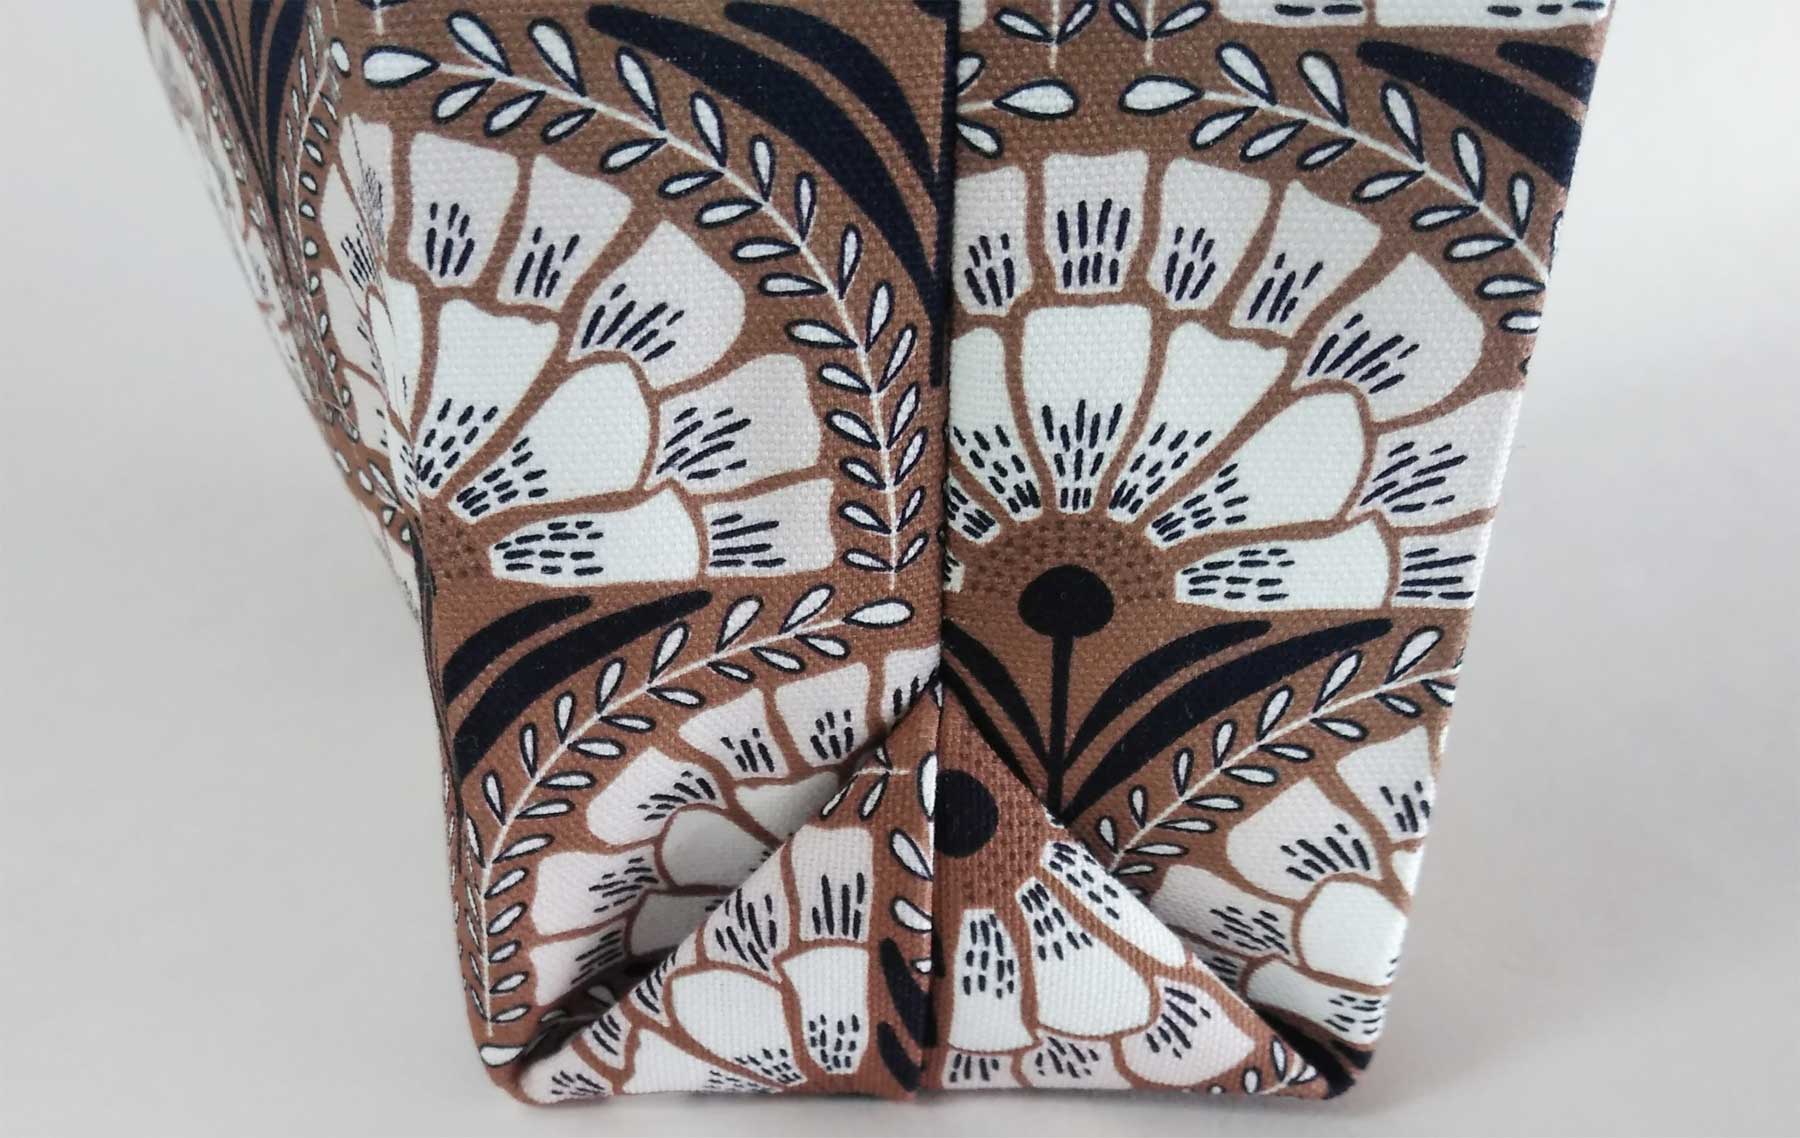
Pleated Outside Corner

Pleated outside corner

This technique creates an outside point, much like the freestanding one noted above, but this method encases the triangle point in the side seam, forming a pleat on each side.

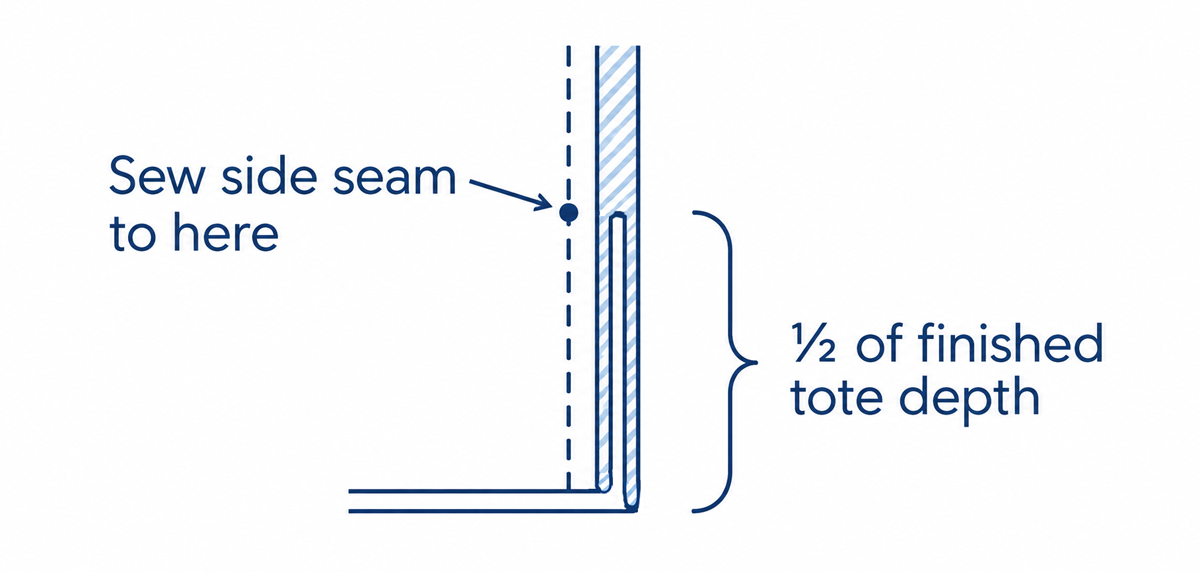
  • To create this point, sew the side seam of the project stopping at the desired tote depth from the bottom seam allowance or fold. For example, if the finished tote is 4” deep, leave open approximately 4” along the bottom portion of the side seam.
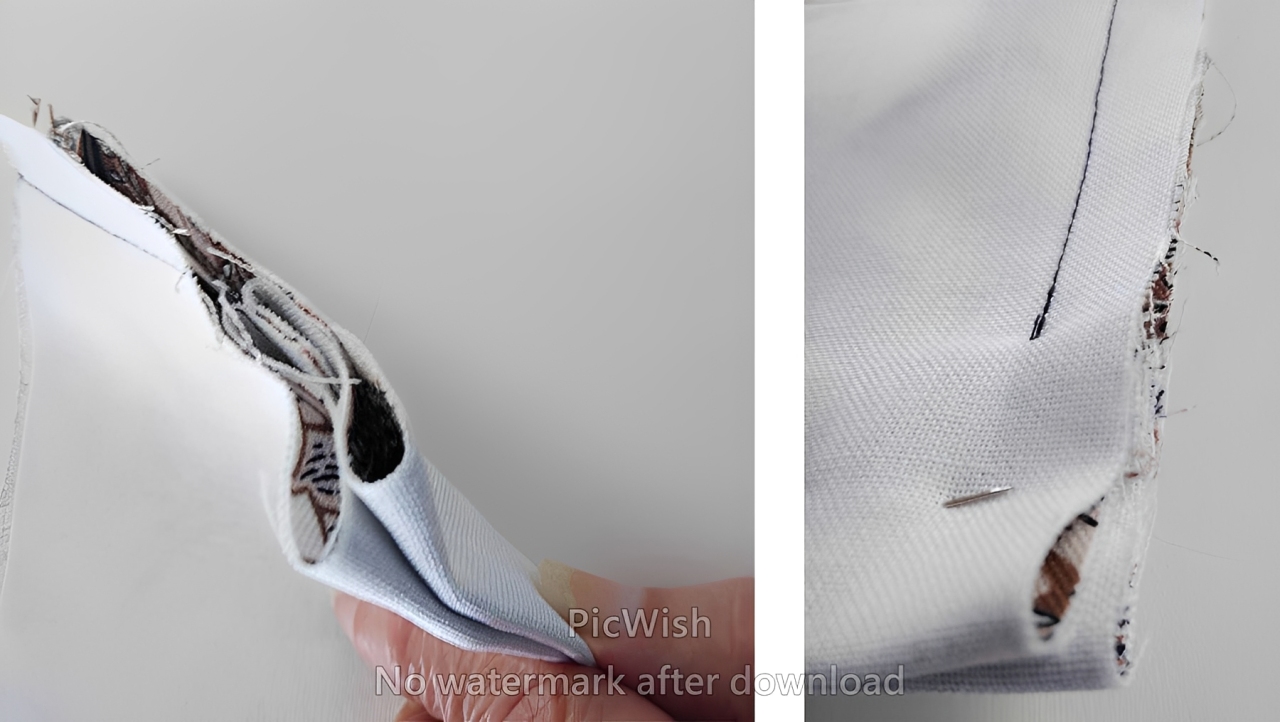
  • Pinch the lower corner of the bottom and bring it to the top of the opening. Depending on your pattern, there may or may not be a seam at the lower tote edge.
  • {pleated tote folding photos 1 and 2 and/or illustration}
  • Align the edges of all the layers and finish sewing the side seam starting at the upper opening point.
  • Turn the tote right side out, shape and press the lower corners.
Pleated outside corner instructions

~Linda Griepentrog is the owner of G Wiz Creative Services and she does writing, editing and designing for companies in the sewing, crafting and quilting industries. In addition, she escorts fabric shopping tours to Hong Kong. She lives at the Oregon Coast with her husband Keith, and three dogs, Yohnuh, Abby, and Lizzie. Contact her at gwizdesigns@aol.com.

September 18, 2026

Drawstrings in Children’s Clothing: What Sewists Should Know

A drawstring can make a child’s garment easy to adjust. But it can also create a hazard if a loose end catches on playground equipment, furniture, or another object.

Young children can be seriously injured—or even killed—when drawstrings on their outerwear become caught on nearby objects. Playground slides, handrails, school bus doors, and other moving equipment are among the places where these dangerous entanglements can occur.

Federal Rules on Drawstrings in Children’s Clothing

Anyone who sews clothing for children should understand the Consumer Product Safety Commission’s (CPSC) safety requirements for drawstrings on children’s upper outerwear. More specifically, those garments generally intended to be worn over other clothing.

CPSC defines “upper outerwear” as clothing such as jackets, ski vests, anoraks, and sweatshirts that generally are intended to be worn on the exterior of other garments, including lightweight outerwear that is appropriate for use in warmer climates.

  • Underwear, inner clothing layers, pants, shorts, swimwear, dresses and skirts are not considered upper outerwear.
  • Belts are not considered drawstrings and are not subject to the requirements.
  • Ties are considered drawstrings and are subject to the requirements.
  • Underwear and inner layers are excluded.

Children’s upper outerwear sold in the United States should comply with the voluntary safety standard, ASTM F-1816 Standard Consumer Safety Specification for Drawstrings on Children’s Upper Outerwear.

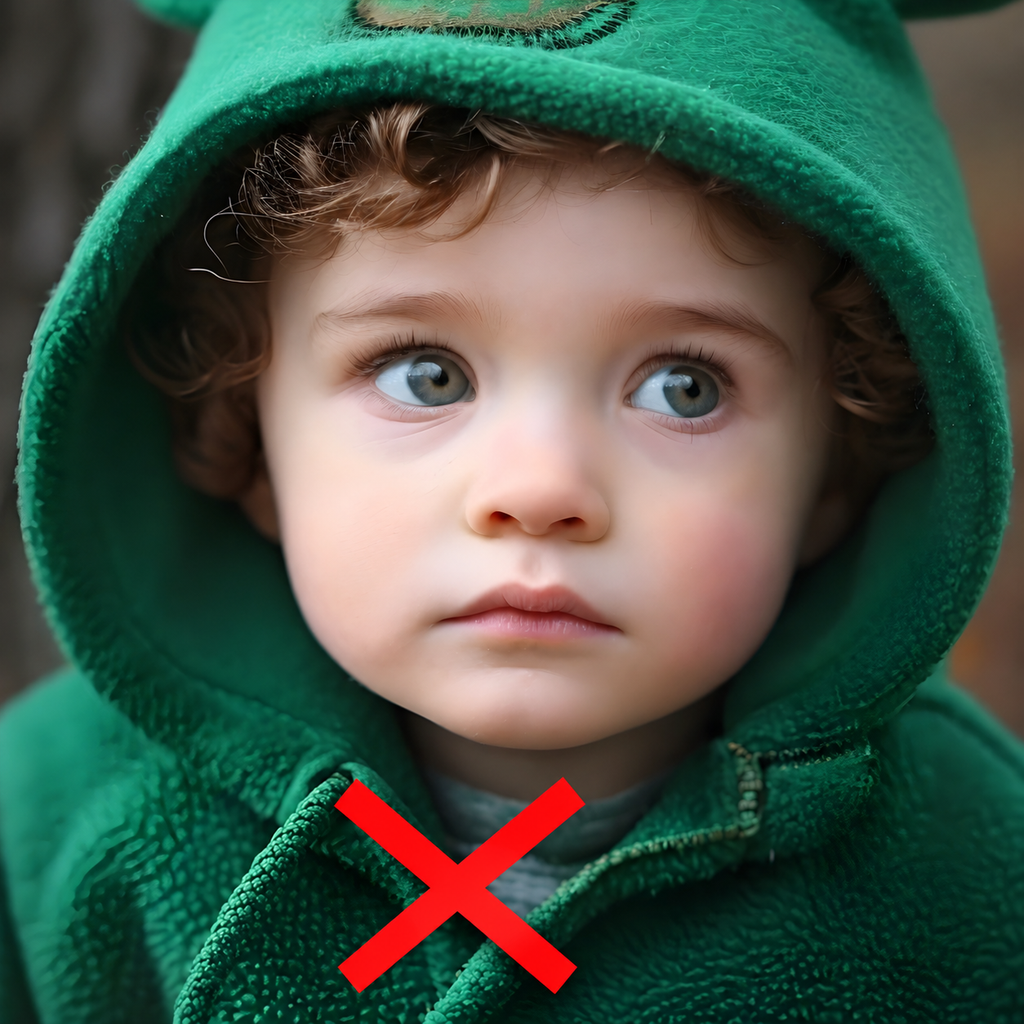
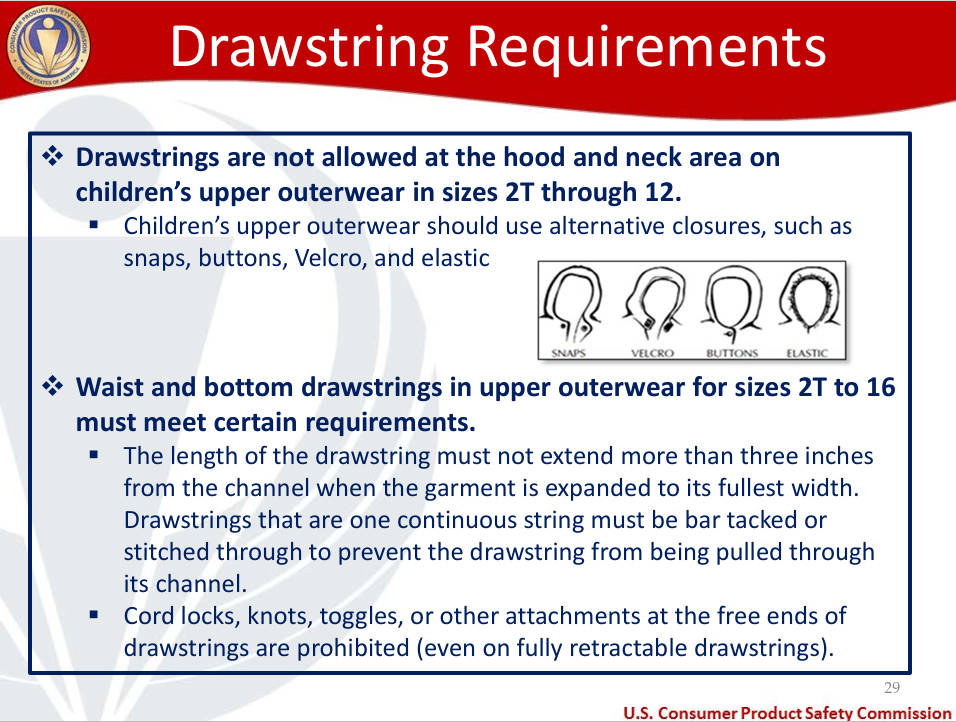
For upper outerwear in sizes 2T through 12, hood and neck drawstrings are completely prohibited. A child’s hoodie, for example, should not have a cord that tightens its hood. Elastic, snaps, buttons, or other suitable closures can provide fit without a dangling string. Note that ties (a closure that can tie, snap or buckle and is attached to the garment through an eyelet, sewn into a seam or run through a casing) are also considered drawstrings and are subject to the regulation.

For outerwear in sizes 2T through 16, drawstrings at the waist or bottom edge are permitted only within specific limits. When the garment is opened to its fullest width, a drawstring must extend no more than three inches outside its channel. Free ends cannot have knots, toggles, cord locks, or other attachments. If one continuous string runs through the channel, it must be secured at the midpoint so it cannot be pulled through to one side. Garments featuring fully retractable drawstrings are exempt. These details matter: even a neatly finished knot or decorative bead can give a loose cord another way to snag.

What about dresses, pants, and shorts?

This is an important distinction for garment sewists. The upper outerwear rule does not classify dresses, skirts, pants, or shorts as upper outerwear. That means its specific size ranges and three-inch measurement should not be presented as a legal rule for every child’s dress or pair of pants. It does not, however, mean a drawstring on those garments is automatically safe.

If you are sewing a child’s dress, consider how it will be worn. A sash attached at the side seams, a short tie at the back, or a decorative bow can give the look of a drawstring without a long cord sliding freely around the garment. Keep ties short enough that they will not trail, loop around objects, or hang where a child might step on them. Check that any decoration is securely attached, especially on clothing for very young children.

For pants and shorts, an elastic waistband often supplies the adjustment a child needs without any exposed cord. If you choose a functional waist drawstring, keep the ends short and avoid knots, beads, toggles, and long loops. Secure the string so one end cannot be pulled much farther out than the other. Check the fit on the child: a cord that looks short on the sewing table may hang differently when the waistband is gathered or the child bends and plays. These are practical precautions, not a claim that the upper outerwear rule legally governs pants.

Give the finished garment a child’s-eye inspection

Before gifting or donating children’s clothing, look beyond the pattern photograph. Fully loosen and tighten every adjustable area. Are there long free ends? Could a loop catch on a slide, door handle, or chair? Could a cord slip through its casing and become much longer on one side? Repeat the inspection after laundering, when ties may shift.

Pay particular attention to garments intended for active play. The CPSC’s playground guidance advises against children wearing clothing with drawstrings, straps, or cords while using playground equipment. If a pattern includes a feature you are unsure about, changing the closure is often easier than trying to make a dangling cord work safely. Read the CPSC playground guidance.

Children’s clothing can be playful and beautifully made without relying on long, loose ties. Knowing where the federal upper outerwear rule applies—and checking drawstrings on other garments with the same care—can help you make thoughtful choices for the children who will wear the garments you create.


~American Sewing Guild

September 11, 2026

Quilting Your Own Fabric

How many times have you vowed to not acquire any more fabric until you use up (at least some) what you have in your stash? I’ve said it many times, and the commitment has lasted only until the next sale or caring friend who says, “Do you know anyone who would like…? (and the word fabric is in the same sentence).”

Grainline Studio Tamarack Jacket

Recently I was with a friend who was making Grainline Studio’s Tamarack Jacket, and it looked like a fun project. Something a bit different from my standard coastal attire sweatshirt dé jour. I searched the stash and realized I didn’t have enough of any single suitable fabric to make the entire jacket, but I did have one piece that would work for the lining. So pattern mixing to the rescue!

One of my favorite color combinations, and likely not shared by many, is orange and hot pink. I had a groovy knit dress back in the late ‘60s and that color combo always made me happy. So, lo and behold there were several related pieces in the stash to combine for the jacket—one enough for sleeves, another for the fronts and yet another for the back.

But I needed to quilt them. Easy-peazy! If you’ve never quilted your own fabric, let me just take you through the simple process.

  • Using a removable marker, trace the rough shape of your pattern piece onto the outer fabric layer. If there are multiple pieces to be cut from the same fabric, leave 2” between the traced pieces.
  • Choose your batting carefully—too thick of a batting and you’ll look like the Michelin Man. A thin cotton batting, or even flannel works best for garment sewing. Check the label of the filler as some battings and flannels can shrink up to 6% which wreaks havoc with garment fitting.
  • Be sure to preshrink—run flannel yardage through the washer and dryer; soak cotton batting in hot water, pat out excess moisture and roll in a towel, then hang to dry. If you prefer using a dryer, put it into a lingerie bag or pillowcase to avoid damage… and be sure to clean your lint filter!
  • Layer the backing fabric wrong side up, then the batting, then the outer fabric right side up. Generously pin the layers together. If you prefer, use a temporary spray adhesive to hold the backing and outer fabric flat against the batting. Be sure the fabric/batting layers are smooth and wrinkle free. If you’re using multiple fabrics in the project like I did, you’ll have separate pieces to layer and quilt.
layering fabric
  • Set the machine for a slightly longer than normal stitch length (3-3.5). Install a new needle and if you have one, use a walking foot. A quilting guide is helpful for spacing. The thread can be matching or contrasting depending on the desired finished look. The bobbin thread can match the top thread, or not.
  • Begin by marking a line down the center of your largest pattern piece then decide how far apart you want the quilting lines to be. I chose 1 1/2”, but you can go wider or narrower. Stitch on the initial line you drew extending the stitches about 1” outside the drawn perimeter. Continue drawing lines across the entire pattern piece or use your quilting guide to measure the distance from your needle and align the guide with the previous row of stitching. Always stitch in the same direction on the fabric (the quilting guide can extend to the left or right of the foot) and from the center of the piece outward.
  • Continue stitching across the entire pattern shape.
  • Lay the paper pattern back on the quilted section and cut out the piece. Note that you likely will not be cutting exactly on your original drawn lines as there is some “take up” when quilting and the joined fabric layers will pull up slightly.
  • Quilt and cut each garment section, remembering that you need both a right and left garment half so be sure to flop over the pattern piece.
  • If your fabric has a pattern to it, that could provide a fun quilting pattern, so you don’t have to simply use vertical or horizontal lines. I quilted along the fabric print waves on my jacket front.

Inside Scoop

If your mom told you that your sewn garments should look as nice on the inside as they do on the outside, consider binding the quilted seam edges—a nice finish to hide the multi-layer adventure.

Choose a fun print or solid and cut 2”-wide bias strips for binding. Press the strip in half, then press each raw edge to the center forming a double fold. Apply the binding to the seam edges, either totally by machine, or finish by hand.

Bound Edges
Bound Seam
Bound Slit Opening

~Linda Griepentrog is the owner of G Wiz Creative Services and she does writing, editing and designing for companies in the sewing, crafting and quilting industries. In addition, she escorts fabric shopping tours to Hong Kong. She lives at the Oregon Coast with her husband Keith, and three dogs, Yohnuh, Abby, and Lizzie. Contact her at gwizdesigns@aol.com.

  • 1
  • 2
  • 3
  • …
  • 94
  • Next Page »

Become a Member

Join the only national organization dedicated to Advancing Sewing as an Art and Life Skill.

Join Now button

Blog Article Categories

  • ASG Conference
  • Chapter Stories
  • Embroidery
  • Fitting
  • Learn to Sew
  • National Sewing Month
  • Products, Books, & Patterns
  • Projects
  • Quilting
  • Sewing
  • Sewing Techniques
  • Sewing Tips
  • Sewing Tours
  • Videos
  • Disclaimer
  • Privacy Policy

American Sewing Guild
National Headquarters
9660 Hillcroft, Suite 230
Houston TX 77096
713-729-3000 | 713-721-9230 Fax
www.ASG.org

ASG wordcloud - education, conference, discounts, videos, special offers, tours and more

Copyright © 1998–2026 · American Sewing Guild · All Rights Reserved