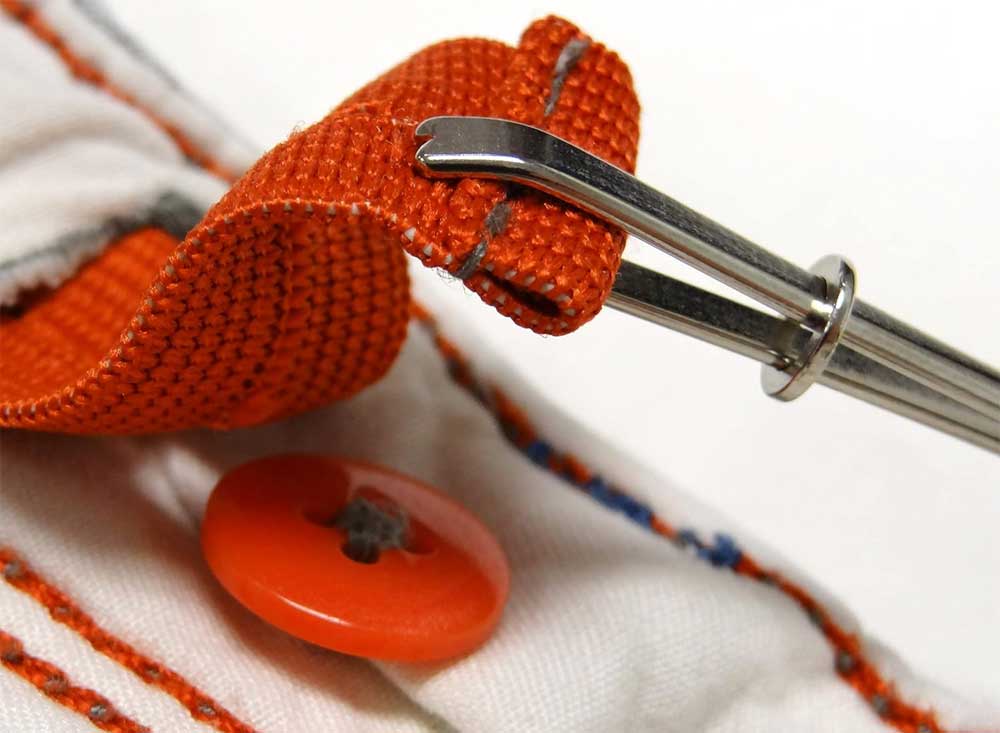
Buttonhole Knife
I was gifted a buttonhole knife set, but I don’t know how to use it. Can you help?
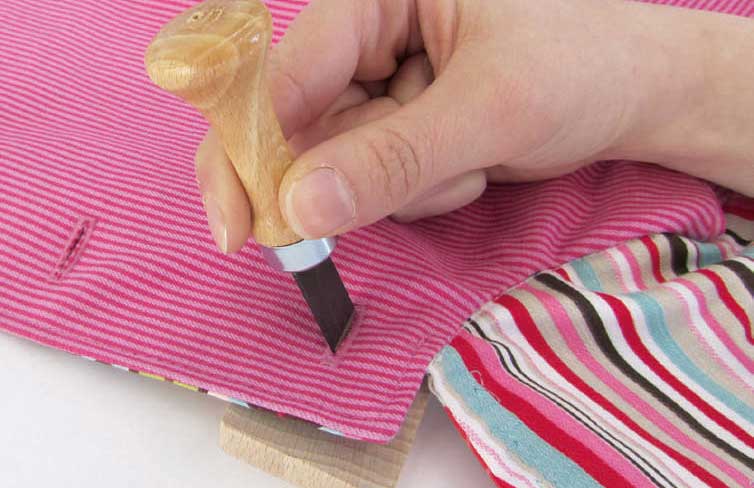
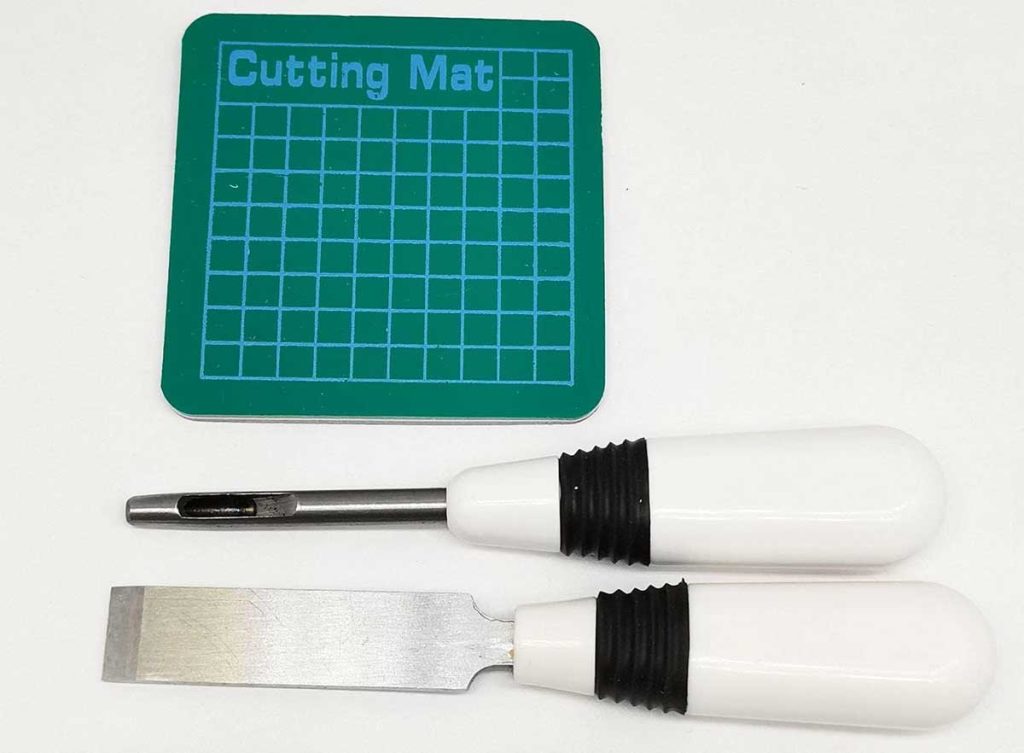
A buttonhole knife is like a small chisel, and it often comes with a small cutting board and sometimes a rubber mallet, though the chisel can be used without the two additional pieces. It is important to protect the surface when using a buttonhole knife as it is sharp and can easily damage a tabletop or regular cutting mat.
To use a buttonhole knife: If the buttonhole is larger than the chisel blade, place the buttonhole flat on the protected surface and position the blade between the buttonhole stitching lines, then push firmly to cut. If you have a rubber mallet, use it to hit the chisel handle. This effort will cut your buttonhole between the stitching lines. Cut from the end toward the center. Depending on the size of the buttonhole, you may need to reposition the chisel blade and repeat the process to cut the entire length. Be careful not to cut through the bartacked ends of the buttonhole.
If your chisel blade is bigger than the buttonhole size, position the buttonhole over the edge of the protective cutting block and cut from one end to the center, then reposition the buttonhole and cut the opposite side, again from end to the center. This two-step process ensures that the oversized blade doesn’t cut through the buttonhole end stitching.
Some buttonhole knife sets come with an eyelet cutter as well. This tool can be used to cut round eyelets or to cut the eyelet end of a tailored keyhole buttonhole.
Bodkin
A friend told me that I should buy a bodkin for my sewing room, but I don’t even know what that is. Can you enlighten me?
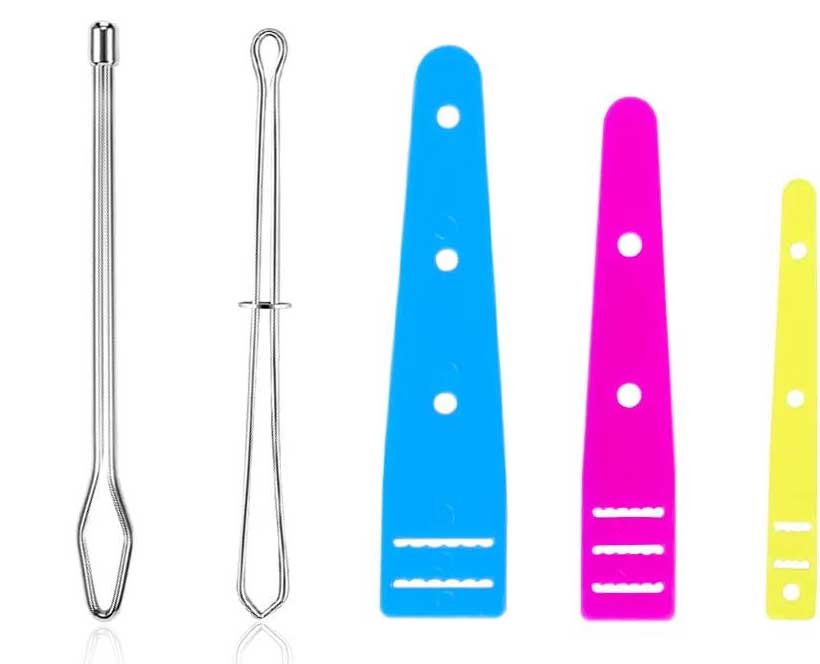
Bodkins, a tool used to help thread things through casings—like elastic, ribbon or drawstrings, come in various sizes and shapes. You may have used a safety pin for this same purpose, but a bodkin is larger and easier to use. Some bodkins look like very large needles with an extended eye, others are more of a tweezer-like tool with a gripping tip to hold the insertion tightly while pulling it through the casing. The latter usually has a device to tighten the tips for a secure hold during the operation.
Bodkins can also be flat plastic strips with slots that the elastic or ribbon is threaded through for insertion. These often come in a set with multiple sizes depending on the casing size.
Fusible Interfacing
When I use fusible interfacing should I trim off the seam allowances of the pieces or leave them on? I’ve seen information both ways.
There are multiple schools of thought on this topic. If your fabric and/or interfacing is mid-weight or heavier, it’s best to trim the interfacing seam allowances off before fusing as it cuts down on the bulk in the seam. If you’re using lightweight interfacing and/or fabric, it’s not as important to remove the seam allowances before fusing as the additional bulk is minimal.
When you use a sew-in interfacing of any weight, leave the seam allowances on so that they get caught in the seam and stay in place. After sewing the seam, trim the interfacing layer very close to the stitching to reduce bulk.
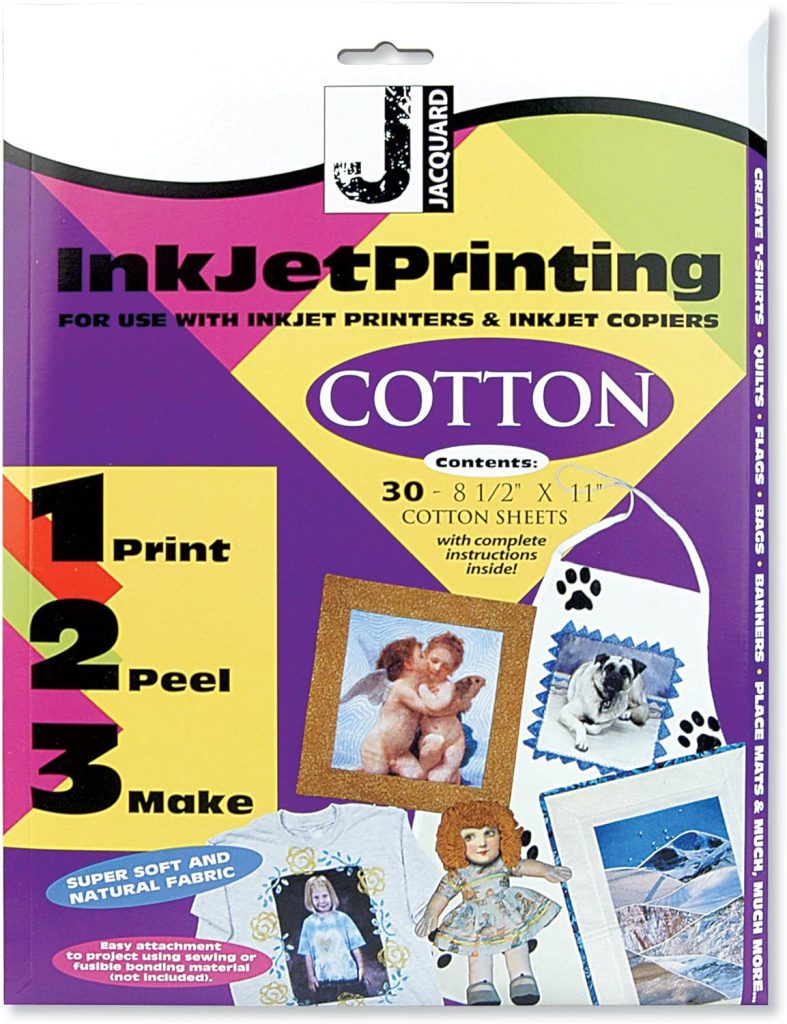
Printing on Fabric
I want to make a commemorative pillow using a friend’s wedding invitation. How do I print it on the fabric?
You’ll need to buy inkjet-ready fabric sheets at your local sewing or craft store. The fabric is chemically treated to retain the ink after printing and it’s backed with an adhesive stabilizer paper to allow it to feed through the printer. Be sure to read the instructions as directions differ depending on the fabric brand. The most commonly available sheets are 8 ½” x 11”, so you may want to add borders of another fabric to increase the size of the pillow. There are also online services that can print fabric for you in multiple sizes and on varying fabric types.
~Linda Griepentrog is the owner of G Wiz Creative Services and she does writing, editing and designing for companies in the sewing, crafting and quilting industries. In addition, she escorts fabric shopping tours to Hong Kong. She lives at the Oregon Coast with her husband Keith, and three dogs, Yohnuh, Abby, and Lizzie. Contact her at gwizdesigns@aol.com.