American Sewing Guild (ASG)

Visit our blog Visit the ASG Facebook page Visit ASG on Pinterest Visit ASG's YouTube channel Visit ASG on Instagram
  • Home
  • Join ASG
    • Join Online
    • Chapter Locations
    • Member Benefits
    • Member Brochure
    • Join by Mail
  • Conference & Education
  • Resources
    • Contests & Awards
    • Giving Back
    • Hall of Fame
    • Links
    • Travel and Tours
    • Measurement Chart
  • Shop
    • ASG Store
    • Chapter Products
    • Video Resources
  • Blog
  • About
    • About Us
    • Donate to ASG
    • ASG Sensitivity Statement
    • FAQ’s
    • Start a Chapter
  • Contact
  • Member Login
    • Login First!
    • Members Only
    • Leadership Only
    • Website FAQ’s
    • Logout
  •  

March 10, 2023

Sewing Q&A: Eyesight, Visibility, and Scissor Care

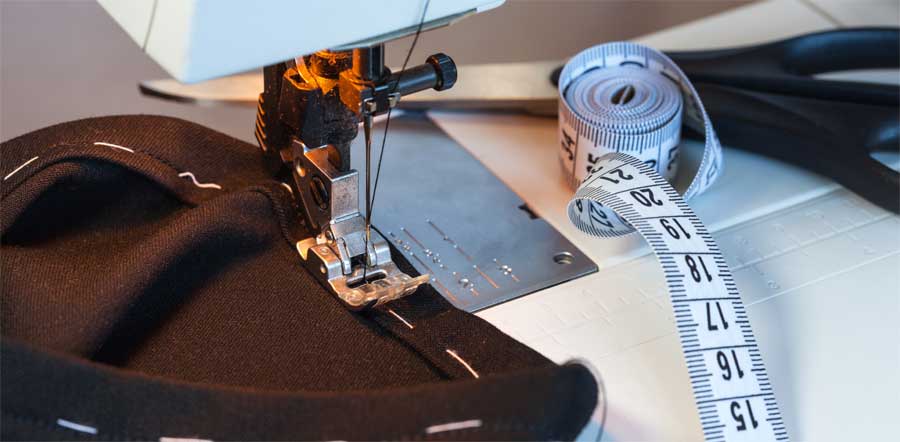
Q: As I get older, my eyesight is declining and I’m having more and more trouble threading my machine’s needle. Any ideas?

A: Most newer machines have built-in needle threaders, but if your machine doesn’t, there are other options. Try using a fine needle threader, like those used by hand sewers. Note the direction your machine threads, as it may be necessary to remove the presser foot for better access to the needle’s eye.

Klaer International Threader

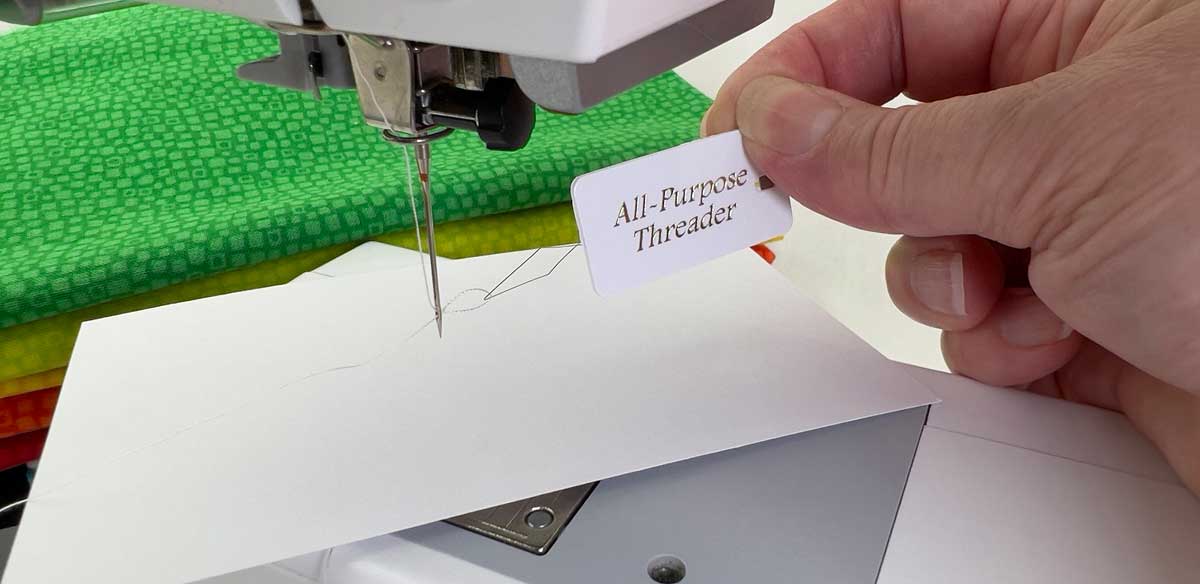
Anytime you thread a needle, have a contrasting color behind the needle eye can be helpful. For a dark thread, use a white or light-colored paper; for a light thread, use a dark background.

Schmetz Quick Threading Needle
Schmetz Quick Threading Needle. Photo courtesy of Euronotions.

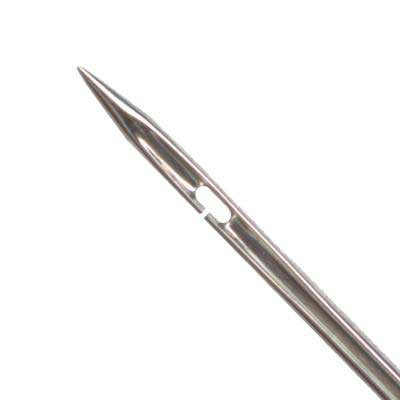
Another option is trying a Quick Threading Needle by Schmetz. This specialty needle has a slotted eye, so that you can draw the thread over the slotted area on the needle’s right side and it will slide right into the eye. The needle is compatible with many fabrics and comes in two sizes, 80/12 and 90/14, depending on your fabric weight. There are two cautions when using this special needle—the slot can snag delicate fabrics, and it shouldn’t be used for quilting as the slot edges can pull batting fibers to the quilt surface. As with all sewing, the needle size should be appropriate to the thread size—too fine of a thread can slip out of the slot, and too heavy of a thread may fray or break.


Q: I take very early morning walks with my dog, but would like to improve my visibility while walking along well-traveled roads. What can I do?

Available on Amazon.

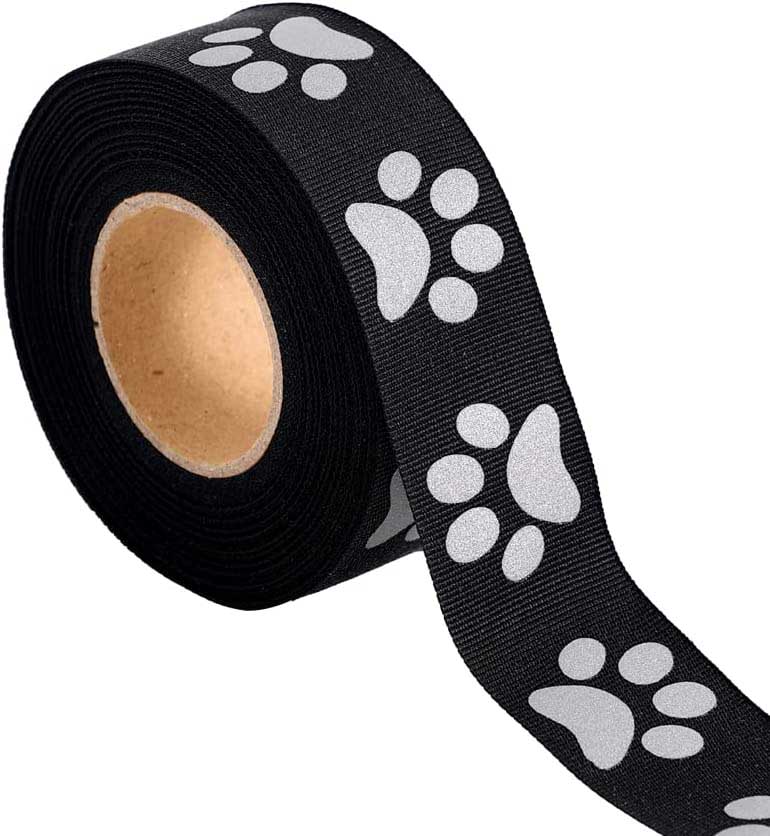
A: To become better noticed in trafficked areas, retroreflective trims are perhaps the best option. These trims glow when exposed to light, like car headlights and streetlights by actually reflecting the source light. The sew-on trims are available as bands, ribbons and a variety of shapes that you can appliqué onto your outerwear. Some trims are available with adhesive backing for easier attachment to an already finished garment.

If you’re making the outerwear, put the trim on during construction, but if your jacket is already made, you can still add it either by hand or machine. Critical areas include the chest and shoulder areas, front and back, as these offer the biggest expanse for reflection. Trim down the side of pant legs is another easy to create option.

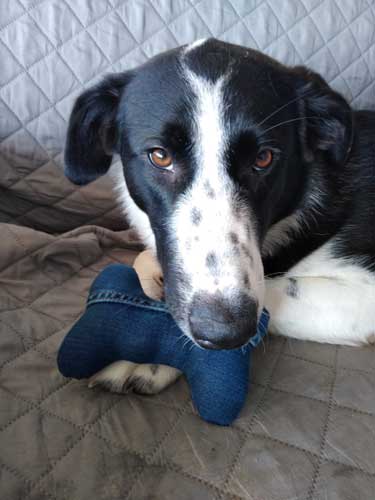
Don’t forget your pup when adding this safety feature—add reflection to collars, leashes and jackets/sweaters.


Q: I just treated myself to some new sewing scissors. They were kind of expensive, so I want to be sure I take care of them so they last a long time. How’s the best way to do that?

A: If your scissors came with a case, keep them stowed when not in use. If you don’t have a case, you can easily make one that covers just the blades or the entire scissor.

Keep the scissors in a clean, dry place. If you live in a humid climate, store with a small pack of silica gel to help prevent rust.

Use your good scissors to cut fabric only—not paper or other crafty materials. If you have other family members who might be tempted to misuse them, add a label to the scissor handle indicating their single use, or hide them when you’re not using them.

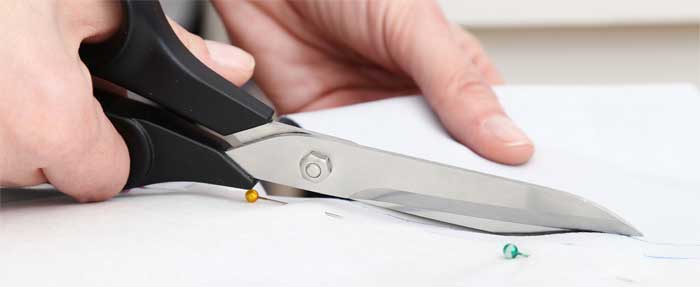
Never cut over pins—that mistake is a quick way to ruin their cutting finesse. Pins should always be placed inside (or outside) the cutting line.

Try not to ever drop your scissors. Not only can the cutting blades be damaged, but they can also be forced out of alignment. For extra safety, put them on a lanyard or neck ribbon.

Maintain your scissors regularly. Wipe the blades to remove lint, and if the manufacturer recommends it, add a small drop of light oil (like you use on your sewing machine) to the pivot point. Work it into the joint by opening and closing the blades several times and then wiping off any excess.

Not all types of scissors can be sharpened, so use them only for their intended use to extend their lifespan. If they no longer cut fabric well, and they’re not able to be sharpened, relegate them to craft use.


~Linda Griepentrog is the owner of G Wiz Creative Services and she does writing, editing and designing for companies in the sewing, crafting and quilting industries. In addition, she escorts fabric shopping tours to Hong Kong. She lives at the Oregon Coast with her husband Keith, and three dogs, Yohnuh, Abby, and Lizzie. Contact her at .

Did you enjoy this article?
Are you an ASG member?
This field is for validation purposes and should be left unchanged.

Tagged With: needle threader, scissor, Sewing Q & A

March 3, 2023

Special Help for Hems (preview)

Both fitting and sewing hems properly and professionally are the best ways to make clothes feel and look good. This applies whether you have made them from scratch or if you have purchased ready-to-wear. There is more to hemming than meets the eye though and as sewing enthusiasts, we have the advantage and skills to fine-tune our garments and look a cut above someone who doesn’t sew and isn’t able to make those adjustments.

Industry Standards

There are industry standards for determining hem length and I learned these standards while doing a two-year apprenticeship with a tailor from England. This article will detail those standards and explain the reasoning behind them so that you can better decide if you’d like to use them or not. After all, the first rule in fitting is always to defer to personal preference!

CLICK HERE to read the full article. Not a member? Join online!


February 24, 2023

Canine Capers: Sewing for Your Furry Friend

We all love to sew, whether it’s for ourselves, for friends, for gifts or for our homes, but sometimes our pets need a little sewing love as well. Both of these dog toys are great gift ideas for your own dog or grand-dog, and are also ideal for community service projects or donating to your local animal shelter. They’re easy-peasy so even beginners (and kids) can create them, making them ideal for scouting and other group projects.

Bone Appétit

Denim dog bone toy

This cute bone toy with a squeaker inside is easy enough for kids and other beginners to sew, and your favorite pooch will love to carry it around.

It can be made from fabric, but the featured toy is made from recycled jeans—you know, those denims that are too good to throw away, but for one reason or another you don’t want to wear them. The bone is a perfect place to showcase that contrast topstitching we all love, fun seaming locations, and even a mini-pocket or two, depending on the size of the jeans you’re starting with.

If you have an embroidery machine, this is an ideal project for personalizing. Do your embroidery work on a larger piece of fabric/jean prior to cutting the bone shape.

What you’ll need

  • One pair of jeans (or ¼ yard of sturdy fabric, which will make multiples)
  • Matching thread
  • One 1 1/8” squeaker
  • Polyester fiberfill
  • Hand-sewing needle
  • Bone Pattern

You can change the size of the bone to fit the dog—from smaller puppy size to giant doggo size. Add additional squeakers for larger sizes.

Squeaker on Amazon
Purchase this squeaker on Amazon.

Cutting & Assembling

  1. Trace the Bone Pattern onto paper or card stock. If you’re making a large quantity of bone toys, trace the pattern onto Mylar, then cut it out.
  2. Select a portion of the jeans you’d like to feature and position the bone pattern to showcase that feature. Trace the outer pattern edge onto the jean and cut out.
  3. Cut a second bone shape for the backing. This can use the plain jean fabric, or can also showcase seams, topstitching, etc.
  4. Place the bone front and back right sides together and sew around the perimeter using a ¼” seam allowance. Leave open a 2” space along the straight section of the bone. Clip the inside corner. Trim the seam allowances slightly in the curved areas.
  5. Turn the bone right side out through the opening and push out the curves to shape. Press.
  6. Stuff the bone shape firmly, leaving space in the center. Insert the squeaker and add more stuffing on each side of the squeaker so that the center is firm.
  7. Turn under the seam allowances in the open area. Using the hand needle and double thread, whipstitch the opening closed. It’s important that this is done securely so curious dogs aren’t able to tear open the seam and get to the squeaker.

WARNING: If your dog does tear open the toy, immediately discard it, so that the squeaker isn’t ingested. Save the squeaker for another toy.

Happy Dog Tip: If you used a portion of a jeans pocket to make your toy, tuck a small bone treat into the pocket to surprise your dog. This is also a great presentation for gift-giving!


Tug Toy

Simple braiding is the key to making this tug toy sturdy enough for even the strongest of dogs. Make it from denim or fleece for non-stop fun. No sewing involved, so it’s also ideal for young children to create for their pup.


What you need

  • 1/3 yard sturdy fabric, such as denim, fleece or canvas

Cutting & Assembling

  1. Drawing 
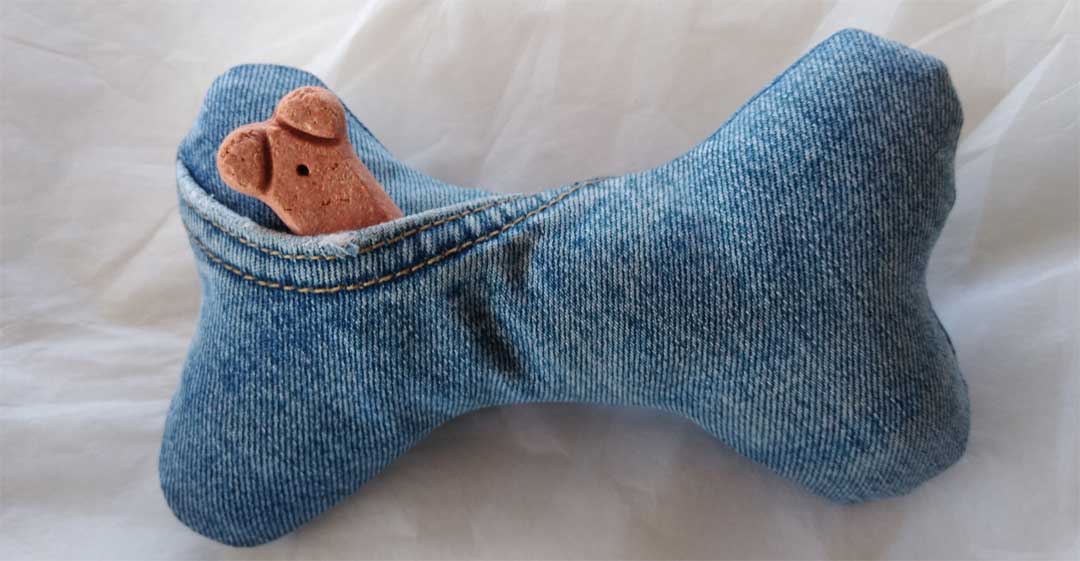
Cut three strips 3 ½” x width-of-fabric strips. Note: Fleece that’s 60” wide will braid up to about 40” of toy length.
  2. Lay the three strips together and tie a firm overhand knot about 2” from one end of the fabric strips. Pull the knot as tight as possible.
  3. Firmly braid the strips together until you get about 4” from the unknotted end. Pull the strips as tight as possible as you braid.
  4. Tie a firm overhand knot joining the strip ends. Trim the strips about 2” from the end.
  5. The length of the toy will depend on the original fabric width and how tightly you braid the strips. If it’s longer than needed, make one or more knots along the braided length to shorten it and add additional areas for the dog to grab at the knots, or stop braiding when you reach the desired length, tie the knot and trim the excess length.
  6. Grab one end and give your pup a tug-o-war!

~Linda Griepentrog is the owner of G Wiz Creative Services and she does writing, editing and designing for companies in the sewing, crafting and quilting industries. In addition, she escorts fabric shopping tours to Hong Kong. She lives at the Oregon Coast with her husband Keith, and three dogs, Yohnuh, Abby, and Lizzie. Contact her at .

Did you enjoy this article?
Are you an ASG member?
This field is for validation purposes and should be left unchanged.

Tagged With: bone, dog toys, pets

February 17, 2023

Are You Odd and Compulsive?

Flashback! Donna Salyers from Fabulous Furs shared these delightful observations about sewing enthusiasts during the 1995 Second Annual ASG Fashion Show where she remarked that the creativity in the room was positively electrifying. In addition, she commented that the evening was not only magical, she also believed it was the start of a grand and wonderful tradition. And how right she was!

Donna compiled a checklist of the top ten indicators that identify the odd and compulsive sewing enthusiast. We can certainly identify with some of these items. Can you?

  1. You’re compulsive if you are wearing something you sewed the night before you left for a trip.
  2. If you didn’t finish it and you’re wearing it anyway, knowing full well you’ll never finish it because you have so many other projects waiting, you’re compulsive.
  3. If you return from the fabric store with two new patterns, only to discover they’re the same patterns you purchased six months ago, you’re both weird and compulsive
  4. If you keep snacks in your sewing room so your don’t waste time going to the kitchen, you’re compulsive.
  5. If you’ve almost swallowed straight pins, confusing them with pretzel sticks, chances are you’re weird and compulsive.
  6. If your husband comments about a new fabric purchase mistakenly left on the kitchen counter and you answer, “Oh, I’ve had that for a long time,” but mutter under your breath, “An hour is a long time,” you’re a classic case.
  7. If you buy faux fur under the pretext of making your little girl a fur teddy bear and then make a full length sable coat for yourself from the scraps, it’s time to face the truth.
  8. If your cat has logged so many hours watching you sew that she can do buttonholes without supervision, you’re definitely compulsive.
  9. If you’re training your cat to clean up loose threads from your sewing room and the vet is puzzled by the thread hair balls, you may be weird and compulsive
  10. You’re probably compulsive if you’ve suffered the indignity of being discovered on your hands and knees copying a pattern on the floor of a clothing store dressing room.

As weird and compulsive as we all are, sewing is actually quite sane and healthy. By getting lost in creativity, we escape whatever stressful challenges life might bring and find a wonderful serenity and sense of productiveness in creating something beautiful. So let us all go forth and be weird and compulsive!


~Donna Salyers is President of Fabulous-Furs

February 10, 2023

Quilt Border Patrol

When you finish the center of your quilt, there’s always the last sprint to the finish to add the border. Borders add a frame to the quilt and make it larger than the perhaps intricately pieced center section. They also provide a wonderful place to showcase running quilt designs and fussy corner motifs.

Quilt borders can match the quilt center, pick up one of the piecing prints or they can be a coordinating print or solid color. And, of course you don’t have to stop with just a single border—use multiples of varying widths for added interest. Borders should be a proportionate width to the quilt size, so consult your quilt pattern for the recommended size(s).

Borders can be pieced or simply straight strips, depending on your preference. Or go for the gusto and make shaped borders with scallops or zigzags, or add in some leftover blocks from the center.

Poorhouse Quilt Designs | Summer Memories and Winter Memories feature pieced borders

Long Story Short

Unless you’re making small quilts for kiddos or to hang on the wall, chances are good that one width-of-fabric strip may not be long enough for a border without seaming it. No one wants a prominent seam in a quilt border, but there are ways to make them less obvious.

Diagonal Border Seam

If a single fabric width strip if too short to make a border for your quilt size, team it with a matching strip using a diagonal seam. Place the strips right sides together at a right angle matching the top and side edges. Draw a diagonal line from corner to corner. Sew on the line, trim the seam to ¼” and press it open. Pressing the seam open makes a flatter seam than pressing both seam allowances in a single direction.

This diagonal seaming can be used in prints or solids, and while you might think it’s too obvious, it practically disappears once the quilt it quilted. Some people like to position the seams to one side or the other, rather than showcasing it exactly at the quilt edge center.

Depending on the size of your quilt, you may need to seam multiple strips together to fit the quilt center.

Corner Cues

C&T Publishing | Quilter’s 2 1/2″ Strip Pre-Cut Companion, Black Tie Affair by Basic Grey for Moda
Cornerstones accent two borders on this quilt

If you’re making a small quilt and the border strips are just a bit too short and you’re hesitant about seaming, think about using cornerstones to lengthen the strips. A cornerstone is a contrasting block positioned in each corner of the quilt and it’s as wide as the border itself. Note that cornerstones can also be used on larger quilts with seamed borders as a design feature.

To use a cornerstone, measure the quilt top center. Cut and sew the quilt border to each side of the quilt center and press the seams toward the border. Cut four squares the same width as the cut borders—these can be all the same fabric or different if you prefer a scrappy look. Cut the top and bottom border the width of the unfinished quilt center measurement. Sew a cornerstone block to each end of the top and bottom borders, pressing the seams toward the border.

Matching the cornerstone seams to the side border seams, sew the top and bottom borders to the quilt. The addition of the cornerstone creates additional length for the upper and lower borders.

Note that cornerstones can also be pieced in the same or different pattern as the quilt top center. Just be sure the finished block is the same width as the border strips.

Symmetry Not Required

Traditional quilters tend to choose borders that are the same size all around, or at least on opposite sides of the quilt, but more modern quilters often opt for asymmetric borders of all ilks. Sometimes just a border on one edge, or sometimes just two, or even three. There’s no hard and fast rule regarding sizes, number or placements, as when you create, the choice is yours.


~Linda Griepentrog is the owner of G Wiz Creative Services and she does writing, editing and designing for companies in the sewing, crafting and quilting industries. In addition, she escorts fabric shopping tours to Hong Kong. She lives at the Oregon Coast with her husband Keith, and three dogs, Yohnuh, Abby, and Lizzie. Contact her at .

Did you enjoy this article?
Are you an ASG member?
This field is for validation purposes and should be left unchanged.


  • « Previous Page
  • 1
  • …
  • 21
  • 22
  • 23
  • 24
  • 25
  • …
  • 82
  • Next Page »

Become a Member

Join the only national organization dedicated to Advancing Sewing as an Art and Life Skill.

Join Now button

Blog Article Categories

  • ASG Conference
  • Chapter Stories
  • Embroidery
  • Fitting
  • Learn to Sew
  • National Sewing Month
  • Products, Books, & Patterns
  • Projects
  • Quilting
  • Sewing
  • Sewing Techniques
  • Sewing Tips
  • Sewing Tours
  • Videos
  • Disclaimer
  • Privacy Policy

American Sewing Guild
National Headquarters
9660 Hillcroft, Suite 230
Houston TX 77096
713-729-3000 | 713-721-9230 Fax
www.ASG.org

ASG wordcloud - education, conference, discounts, videos, special offers, tours and more

Copyright © 1998–2025 · American Sewing Guild · All Rights Reserved