American Sewing Guild (ASG)

Visit our blog Visit the ASG Facebook page Visit ASG on Pinterest Visit ASG's YouTube channel Visit ASG on Instagram
  • Home
  • Join ASG
    • Join Online
    • Chapter Locations
    • Member Benefits
    • Member Brochure
    • Join by Mail
  • Conference & Education
  • Resources
    • Contests & Awards
    • Giving Back
    • Hall of Fame
    • Links
    • Travel and Tours
    • Measurement Chart
  • Shop
    • ASG Store
    • Chapter Products
    • Video Resources
  • Blog
  • About
    • About Us
    • Donate to ASG
    • ASG Sensitivity Statement
    • FAQ’s
    • Start a Chapter
  • Contact
  • Member Login
    • Login First!
    • Members Only
    • Leadership Only
    • Website FAQ’s
    • Logout
  •  

November 18, 2022

Sewing in Circles

Image courtesy of Bernina

In everyday life, the phrase “going in circles” doesn’t necessarily have a positive connotation, but for creative sewers going in circles can be loads of fun! Those decorative and utility machine stitches are ideal for circular sewing, and there’s an attachment made just for that. But never fear, if your machine doesn’t have an available attachment, you can still do it.

Attachments

Many machine brands offer a circular sewing attachment—a calibrated slider with a vertical pin to mark the circle center.

Image courtesy of Bernina

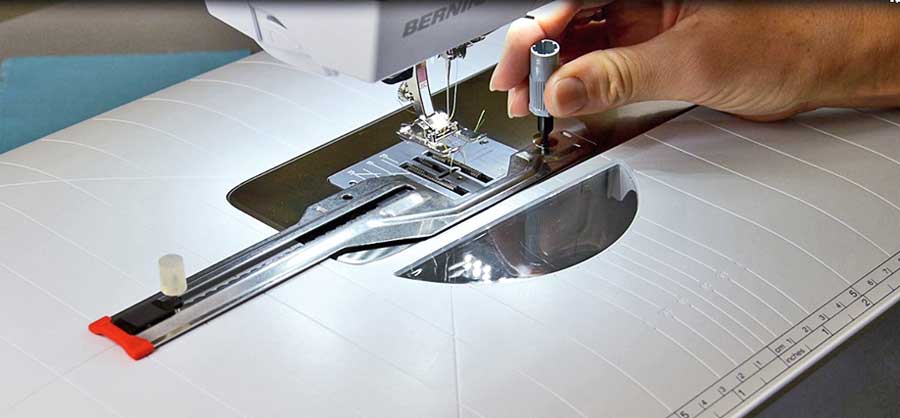
The attachment screws to the base of the machine and the sliding rule adjusts the circle radius to the size needed for circular sewing. Depending on the brand, you may be able to stitch up to a 15”-diameter circle.

Remember high school geometry? The radius of the circle is one-half its diameter (the distance across the widest point).

Stitching

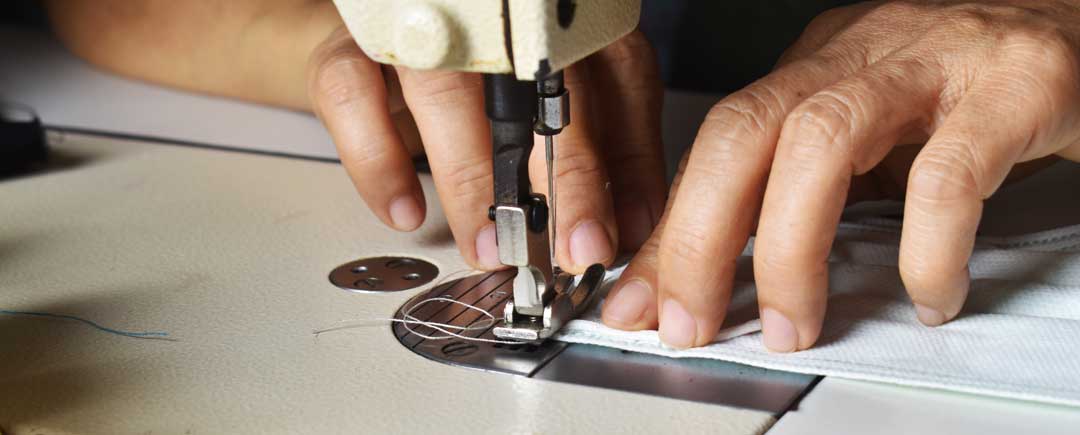
The fabric you’re embellishing needs to be stabilized for stitching, so choose a stabilizer that suits the fabric. Though a hoop isn’t required for circular stitching, it’s helpful and it can hold temporary stabilizer in place. Add an extra bit of stabilizer at the circle center as it will be secured to the center pin and no wobbling is a must.

Image courtesy of Bernina

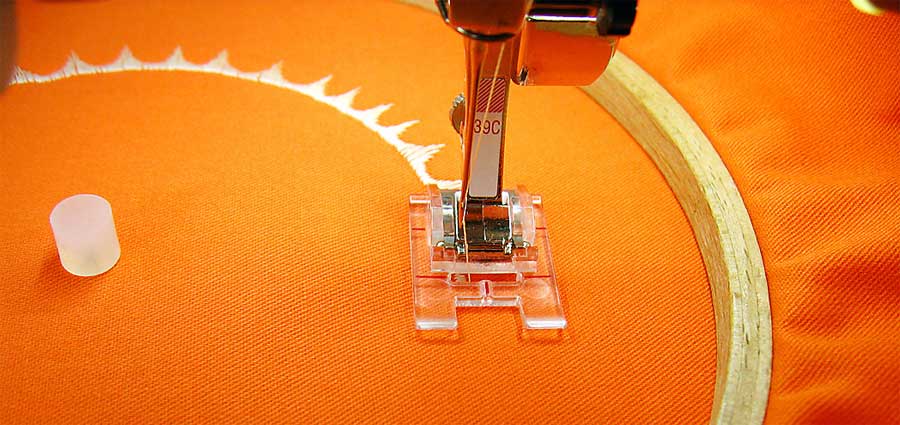
Select a stitch of choice—anything from straight to the wildest decorative varieties. One note of caution—because you’re stitching in a circle, the joining point stitches may not be exactly matching, so perhaps make a plan to cover them if needed with something like beads, buttons, tassels, etc.  Creating overlapping circles is one way to solve this. If you stitch partial circles, or arcs, this isn’t an issue as there are no joinings.

Image courtesy of Bernina

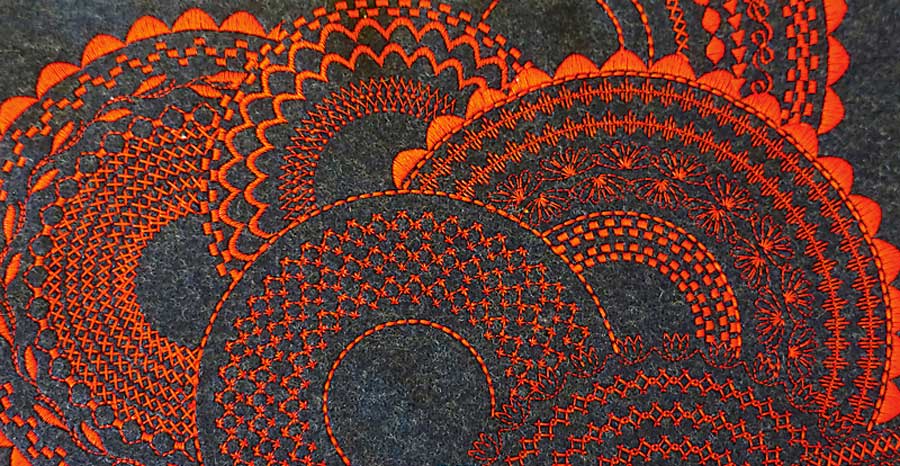
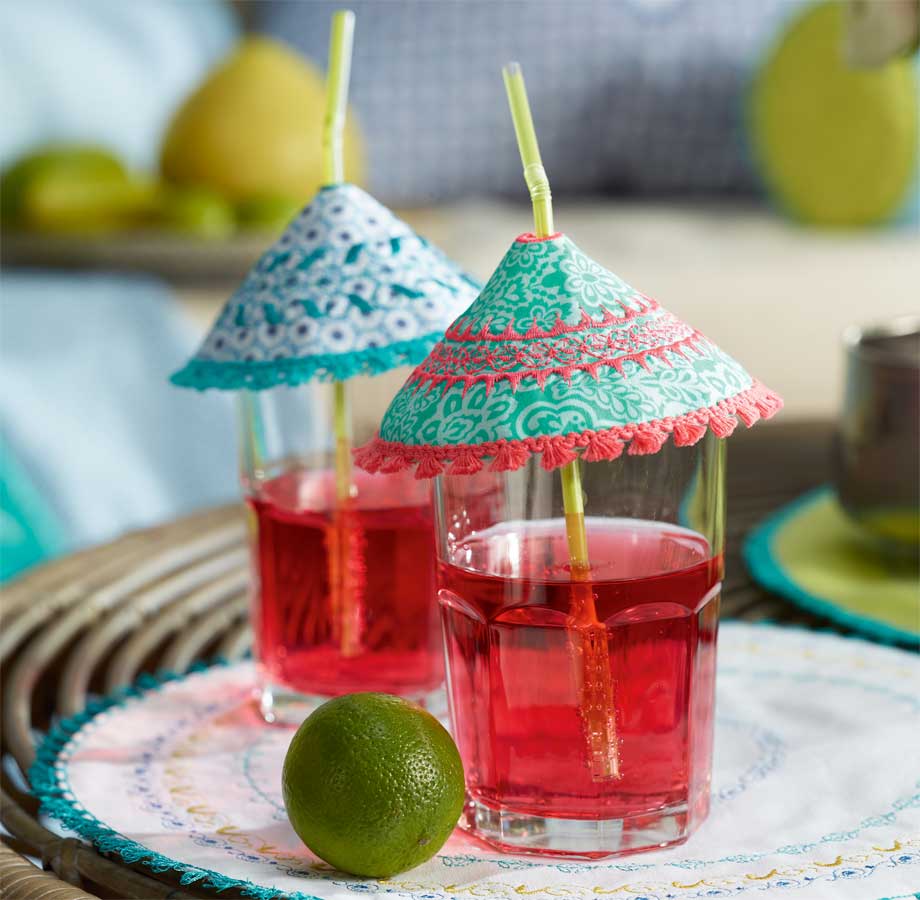
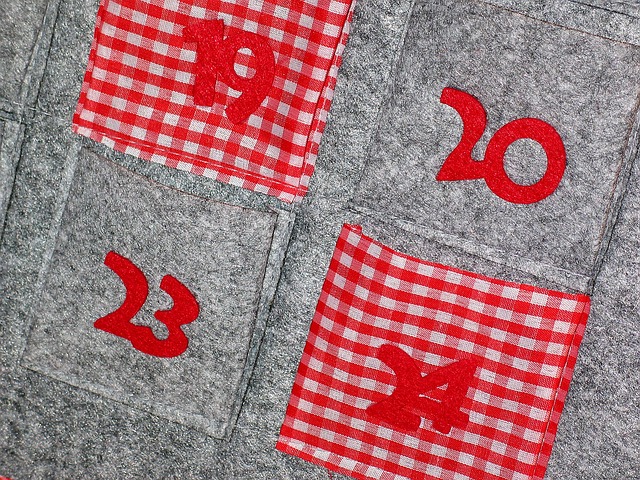
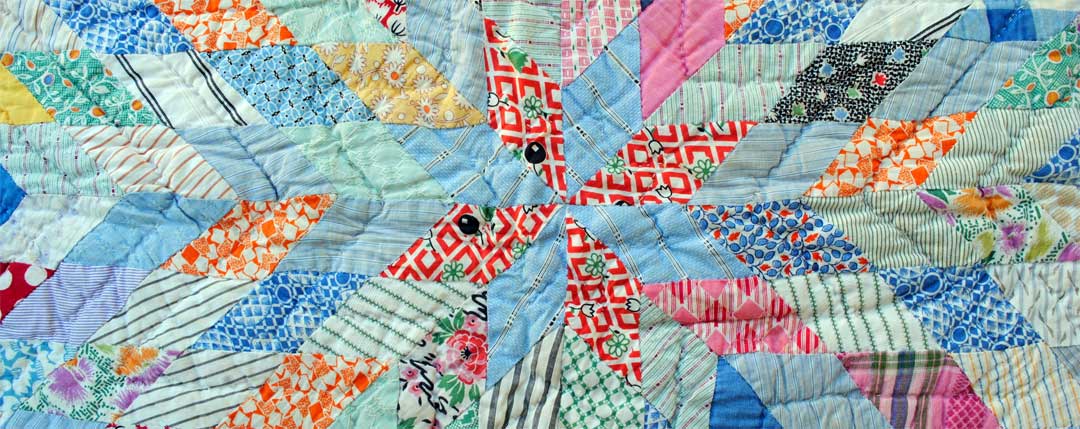
Sewn circles can be used to embellish all kinds of projects from totes to garment sections and also trimmed for craftier applications like coasters or mats. Circles can be used alone or combined with machine embroidery motifs to make beautiful medallions.

Image courtesy of Janome
Image courtesy of Bernina

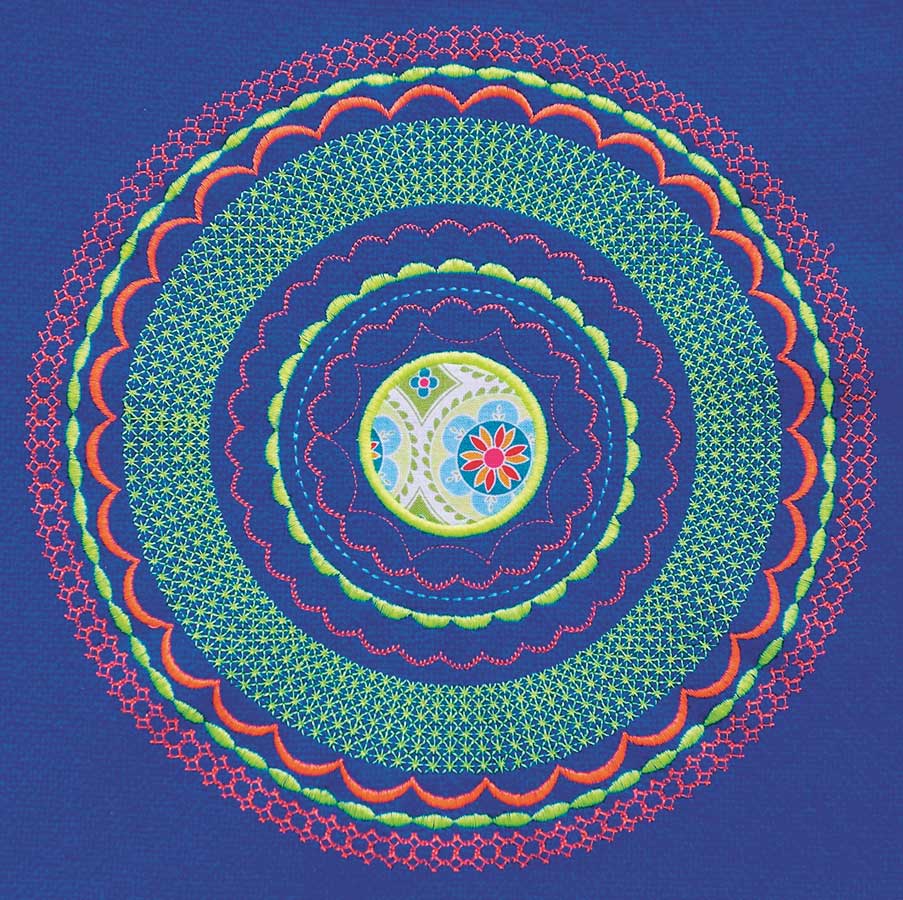
Circles can also be combined with appliqués.

If stitching arcs, the stitched rows can end in a seam for security, or all threads can be pulled to the back at the end of stitching line and tied off to anchor.

The circle attachment can be used with almost any foot you have for the machine, and with any needle type, including double and triple needles. Use it with regular, embroidery or novelty threads.

Making it Happen

It’s best to start your project with a full bobbin, as some attachments limit access to the bobbin area. And, for best visibility, use an open-toe or clear foot for stitching.

If your machine isn’t in a cabinet, use an extension table to create a large flat area so the fabric doesn’t drag while stitching.

Image courtesy of BabyLock

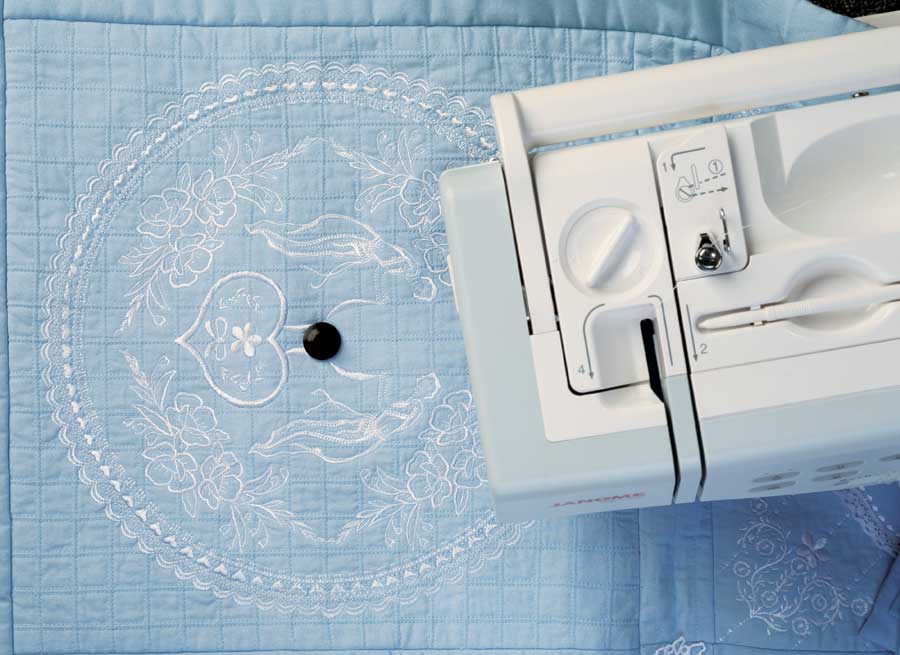
Follow the manufacturer’s instructions for attaching the circle stitcher to the machine. Adjust the slider so that the center pin is the desired radius distance from the needle and tighten in place as directed. With right sides up, push the fabric circle center down onto the pin, then place the safety top in place to hold the fabric firmly in place. The fabric should be able to pivot easily on the pin.

Leave a long thread tail to allow for tying and begin stitching. Keep the fabric flat while you sew the circle, and don’t push or pull—just let the machine feed the fabric to form the circle. Stop the stitching at the exact beginning point of the stitching, pull threads to the back and tie off to secure. To stitch concentric rows, begin in the middle and work outward. Move the slider to the desired spacing between rows and retighten. Do not take the fabric off the center pin until all concentric circles are complete.

DIY Circle Sewing

If you don’t have a circle stitcher attachment, use a thumbtack with a flat head and tape it securely to your machine base with the point up. The distance from the needle to the tack point will be the circle radius. Position the fabric as noted for the attachment and secure it in place with a firm pencil eraser placed over the tack to allow the fabric to pivot freely.

Image courtesy of Husqvarna Viking

~Linda Griepentrog is the owner of G Wiz Creative Services and she does writing, editing and designing for companies in the sewing, crafting and quilting industries. In addition, she escorts fabric shopping tours to Hong Kong. She lives at the Oregon Coast with her husband Keith, and three dogs, Yohnuh, Abby, and Lizzie. Contact her at .

Did you enjoy this article?
Are you an ASG member?
This field is for validation purposes and should be left unchanged.

Tagged With: circle stitcher, circles

November 11, 2022

Project: Advent Calendar

An Advent calendar with pockets that holds cards suggesting the day’s special activity or a special treat is a popular tradition with children of all ages. The first Advent calendars originated as early as the 19th century and was used to mark the countdown in December to Christmas. Advent calendars are 24 or 25 days beginning December 1 and ending December 24 or 25.  ASG member, Sara Scheil, shared the instructions for one she made one for her children.

Materials

  • 21″ x 36″ piece of sturdy fabric (quilted fabrics work well for this)
  • 6″ – 10″ of solid color coordinating fabric. A fabric with body will work best.
  • 21″ of 3/8″ wood doweling
  • Approximately 30″ of cord or fabric tube for a hanger
  • Card stock and fabric paint in contrasting color

Instructions

Edge finish the quilted fabric on all sides (serge with a overlock stitch or bind with a narrow bias tape).

Fold down the top edge 1″ and stitch along the edge to form a casing for the dowel rod. Include the cord or fabric tube used for the hanger in this stitching by positioning the ends at each outer edge on the underside of the calendar.

On the solid colored fabric, using a ruler and fabric marker or chalk pencil, draw lines to make the pocket rectangles 3″ high and 3 1/4″ wide. Edge finish with the serger using a narrow stitch such as a rolled hem. Pinking the edges could be a substitute. Make 25 rectangles for the pockets.

On each pocket, paint, embroider, or applique the numbers 1 through 25 for the days of the calendar.

Optional: You may wish to title your calendar. Consider painting the words “Advent Calendar” on a rectangle approximately 3″ high and at least 12″ long of the solid fabric. Edge finish and topstitch on the upper 4″ space of the calendar.

Layout the 25 pockets on the calendar using the suggested measurements as a guide. Secure with washable glue stick. Let dry. Top-stitch the 3 sides of each rectangle by stitching each row with a continuous vertical and horizontal stitching line. Day 25 will be done separately in a “U” shape, of course.

Cut card stock into pieces 2″ high and 2″ wide. On the cards, record activities that your family enjoys or that are important to you during this season. Alternatively, you can include small gifts or candies in each pocket.

Card/Pocket Ideas

  • Play Christmas music
  • Put up the Christmas tree
  • Drive around to see the lights and decorations
  • Make Christmas cookies
  • Read the Christmas story
  • Look at photos from previous Christmas seasons
  • Hang stockings
  • Visit Santa
  • Special treat
  • Craft supplies
  • Pieces of a larger toy set given in a few pieces each day (LEGO’s are great for this)
  • Chocolates
  • Small jewelry or accessory items

Sara shares that her children would race to the calendar each morning to read the card. The surprise of what the day’s activity would be was very exciting. Seeing what day of the month it was not only taught them about the calendar sequence but avoided repetitive questions about when Christmas would be here. The activities they chose encouraged family togetherness and reminders of the meaning of the holiday.


~ This project is adapted from an article by Sara Scheil published in a previous issue of Notions.

Did you enjoy this article?
Are you an ASG member?
This field is for validation purposes and should be left unchanged.


Tagged With: project, sewing

November 4, 2022

How Bad Is It To…

We all have our idiosyncrasies and shortcuts to help our sewing go faster and easier, but are some of those things harmful to the final product?

How bad is it to sew over pins?

Pretty Bad

sewing over pins

While technically you can sew over pins that are placed perpendicular to the seamline, it’s better not to as several bad things can happen. Firstly, the needle may hit the pin resulting in a broken needle. If not broken, damaged beyond use. Shards from a broken needle can fly and injure you, and bits can become lodged in the machine’s bobbin mechanism. Secondly, the pin may bend and become lodged in the bobbin mechanism causing damage. Hitting a pin can also hurt the timing on the machine, necessitating a service call. It’s fine to sew up to the pin, but remove the actual pin before crossing it.


How bad is it to mark my fabric with an ink pen?

Really Bad

Marking fabric with an ink pen can lead to some catastrophic results. Some inks are permanent and could show through the finished project, especially if used on light colors. But perhaps worse, during washing or dry cleaning, the ink can run, permanently discoloring the project fabric. There are many types of pens and pencils designed specifically for use on fabric, so they are much better choices. Many are easily removable so there’s no risk of damage. So, don’t grab the Sharpie® when you really want the FriXion®.


How bad is it to watch TV/listen to music, an audio book or podcast while I sew?

Not Bad at All

Sewist with headphones

As long as you can still concentrate on your project directions, it’s fine to zone out with another relaxing option. If you’re watching something compelling on TV, it may slow your sewing a bit as you don’t want to miss something captivating in the plot.


How bad is it not to preshrink my fabric?

Really Bad to Not So Bad

This topic is one of the most controversial in sewing, as there are die-hards on both sides of the arguments. Depending on the fiber content and how you plan to care for the project, the answer may swing to the other end of the pendulum. For garment sewers, preshrinking fabric is sometimes a rite of passage held over from school home economics classes. If you don’t preshrink, obviously fit is affected should the fabric shrink during care, so the “rule of thumb” is to pretreat the fabric as you plan to care for the garment. Some fabrics are fine with normal laundering, others, like wools, are best being steam pressed, either at home or by a drycleaner.

Some fabrics, like denim and handwovens, may experience residual shrinkage, meaning that they continue to shrink, so pretreating more than once is desirable.

Unless the label states that it’s washable, do not wash wool fabrics, as they can not only shrink a lot, but also felt, changing the original hand of the fabric irreversibly.

The subject of preshrinking divides the quilting community. Some like to ensure no later shrinkage, others like the feel of unwashed fabrics showcased in a quilt. If a quilt is washed, it tends to pucker up a bit anyway, depending on the fabric and batting used, and that look is not necessarily a negative. Long story short for quilters—it’s a matter of opinion, but be consistent throughout the project to avoid any surprised later.


How bad is it to not backstitch at the beginning and end of seams?

Kinda’ Bad

It’s ideal to cross a seam with another seam to secure it, but in many cases that’s not possible. If you don’t backstitch at the beginning and ending of a seam, it can begin to pull out. Some machines can be programmed to backstitch automatically, others offer a lockstitch that will simply stitch in place or greatly reduce the stitch length to anchor seam ends.

Some places, like the pointed end of a dart, are best not backstitched so as not to build up a heavier stitching line. At the end of a dart, simply shorten the stitch length starting about ½” before the end to secure the stitches. This technique works anywhere you don’t want the added bulk and/or visibility of backstitching—like on sheer fabrics.

If you’re topstitching, don’t backstitch, as the build-up of stitches will show. Instead, pull the top thread to the underside and tie off with the bobbin thread to secure.


~Linda Griepentrog is the owner of G Wiz Creative Services and she does writing, editing and designing for companies in the sewing, crafting and quilting industries. In addition, she escorts fabric shopping tours to Hong Kong. She lives at the Oregon Coast with her husband Keith, and three dogs, Yohnuh, Abby, and Lizzie. Contact her at .

Did you enjoy this article?
Are you an ASG member?
This field is for validation purposes and should be left unchanged.

November 3, 2022

Anyone Can Win Contest Entries 2022

View the entries from the 2022 Anyone Can Win contest.

First Place First Place Second Place Second Place First Place - JR First Place - JR Second Place - JR Second Place - JR

October 28, 2022

Would You Use Wood for Machine Embroidery?

Holiday embroidery on woodIf you are a machine embroiderer, you are probably familiar with embroidering on cottons, knits, quilted fabrics, and even cork and some leathers, but have you ever tried embroidering on wood? Yes, I said WOOD!

We’re not talking 2 x 4’s here, but a thin, relatively-soft balsa wood makes a great medium for machine embroidery. And, believe it or not, it can be used in a regular sewing machine for free-motion thread painting style embroidery, as well as with electronic embroidery machines. The trick is using the right kind and thickness of wood and setting up the machine properly.

What Kind of Wood?

So what is the best wood for the job? The balsa wood mentioned is a relatively soft wood that allows the needle to penetrate easily, almost like stitching through card stock. It can be found in craft and hobby stores, home improvement centers, and discount department stores, as well as online. Balsa wood comes in different thicknesses and in multiple widths and lengths. Recommendations for the best thickness vary, but three are preferred: 1/32”, 1/16”, and 3/32”.

Your inclination might be to try the thinnest 1/32” first, but this may not be the best choice. While the machine can easily handle this thickness, the wood itself is so thin that it tends to bend with the pressure of the threads and will most likely break along the grain lines. If the wood doesn’t split during the stitching process, even the pressure of tearing away a stabilizer can cause it to split and ruin the embroidery. My preference is the 1/16” thickness.  The machine had no trouble going through the wood, the stitches sat on top of the surface and showed up beautifully, and yet the wood was strong enough to allow handling after stitching without any adverse effects.

Embroidery on wood

Cutting to Size

Balsa Wood available on Amazon.

If your board of choice is too narrow for your design, two boards can be butted together and taped on the lower side to create a wider surface. Trim it down to the desired size using scissors or a craft knife; however, while scissors easily do the job, the two blades tend to put stress on the wood and can cause the thinner boards to “run” along the grain lines. For this reason, a craft knife is a better choice and can make a more accurate cut. Even a rotary cutter with an old blade will do the trick. The wood does not have to be cut completely through to the other side. It can be deeply scored with several passes of the knife and then snapped at the score line. A light sanding along the edge can smooth out any splintered pieces. If the purchased board is slightly cupped, it is a good idea to flatten the wood before stitching. Simply put it under a heavy book on a flat surface and allow the weight of the book to straighten out the warp for a few hours or overnight. This same technique can be used afterward if the wood cups during stitching.

If you are using a designated embroidery machine, a hoop will have to be used. The piece of wood selected should fit within the boundaries of the embroidery hoop so that it remains flat during the stitching process. Since the wood cannot be hooped like fabric, hoop a stabilizer that is appropriate for your project and attach the wood to the stabilizer. A self-adhesive stabilizer is fine if you do not intend to remove the stabilizer outside the design afterward. The process of pulling the stabilizer away from the wood puts additional stress on the wood and could cause it to break. The same holds true with trying to remove a tear-away product. Cutting away the excess stabilizer puts less stress on both the stitches and the wood. To secure the wood to a tear-away or cutaway stabilizer while stitching, either use a spray adhesive, or place a low tack tape along the edges to keep it from moving.

Set up Your Sewing Machine

Computer and sewing maching
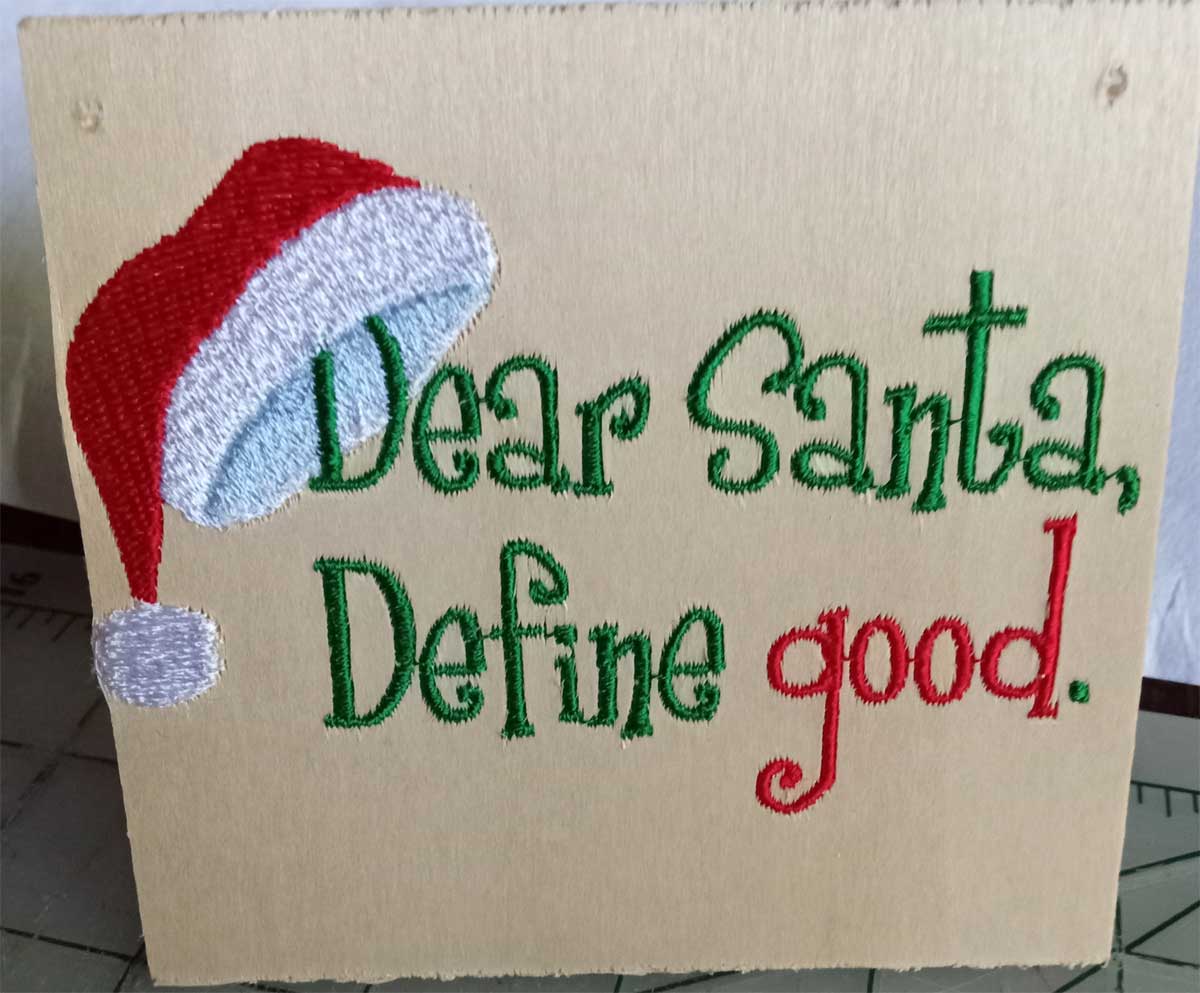
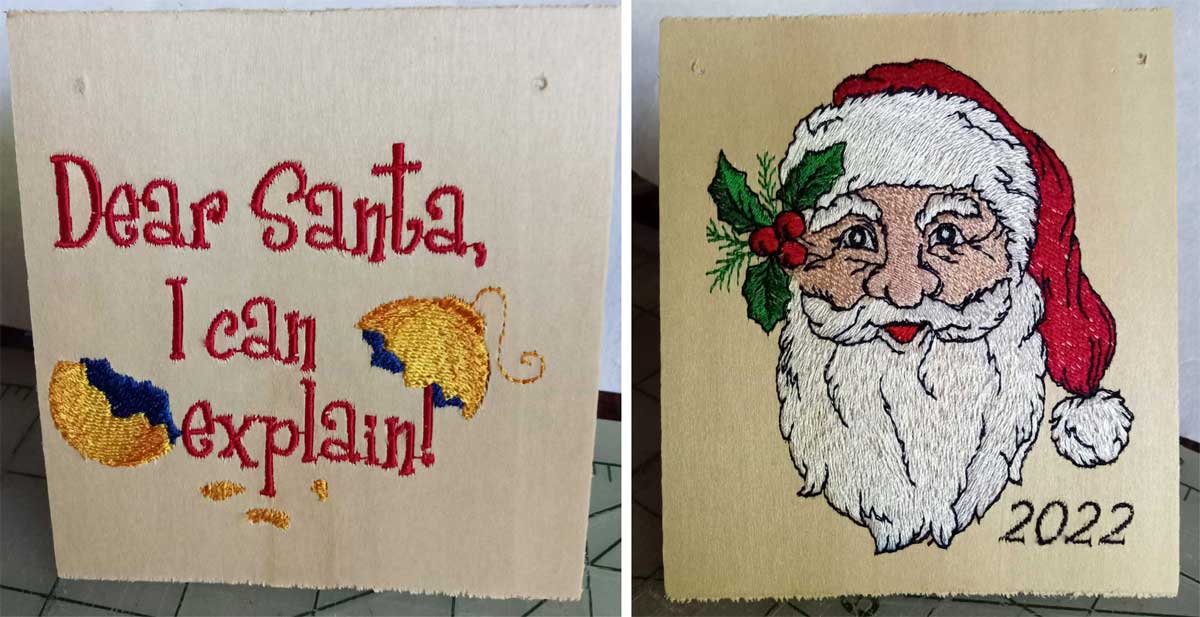
Each penetration of the needle creates a hole in the wood that does not heal so it is best to use the smallest needle that can get the job done. The samples shown here were all stitched with a 75/11 universal needle. The needle will dull more quickly than normal stitching through fabric, so be sure to change it frequently and make sure to keep any that you use designated for wood. My needle did over 100,000 stitches and was still going strong! It is also a good idea to stitch at a slower speed — setting the machine at 600 stitches per minute should be fine in most cases. Begin each design by lowering the needle into the wood, then starting the stitch out. This small trick seems to anchor the wood to the stabilizer and helps reduce the impact of that first stitch, thus avoiding broken needles.

Choosing Thread

A 40-weight polyester or rayon thread works well on most designs. Cotton and some novelty threads tend to shred more easily on the wood and produce more lint before shredding. Metallics can be difficult to work with in the best of circumstances, and the abrasive surface of the wood makes them even more temperamental. If you decide you just have to add that touch of bling with a metallic, do so sparingly and with caution. As for the bobbin, either an embroidery bobbin thread or a matching rayon or polyester work well.

Choosing a Design

There any several aspects to consider when selecting designs to embroider, although they may not be what you expect. The density of the design is especially important when dealing with wood. Because the surface is rigid, a particularly dense design will place too much thread into the inflexible wood which could cause the wood to separate. However, this doesn’t mean that you should only use only line drawings. In fact, Redwork and other running stitch designs may be even more difficult to achieve an attractive outcome. The problem with running stitches is that they often run with the grain lines of the wood. When perfectly on grain, the stitches penetrate the surface and are brought down into the slight openings of the grain, effectively losing the stitches within the wood and possibly even causing the wood to split. Small lettering is a good example of these lost stitches and should be avoided.

Although it seems contrary to most advice, a denser, well-digitized fill design that has stitches that run predominantly across the grain lines produces a better effect.

Even a filled design with underlay stitches can be particularly effective if the underlay is an open stitch and if it follows the rule of running across the grain line. The underlay draws in those grain lines and tends to hold the wood together, providing a place for those parallel stitches to anchor. Just as a topper is used when embroidering plush fabrics, it may be used on wood as well. Be sure to carefully remove the excess topper and sparingly use water on a cotton swab to dab away the remaining wash-away topper. Never run the embroidery under running water or submerge in a bowl of water. Too much water could cause the wood to warp.

Halloween embroidery on wood

In the Halloween design pictured, most of the letters were digitized with the stitches at a slight angle. However, the *A* and the *L* fell on the grain line and the orange thread got lost in the wood. Notice the second *L* over the yellow moon. That *L* was stitched in the same direction as the first one, but the moon acted like an underlay and kept the orange threads on top of the surface, preventing them from being drawn down. No topper was used to stitch out this design.

Design Size

Another point to consider is the size of the design on the wood. When a design comes too close to the edge, the wood tends to split, especially the 1/32” thick pieces. A minimum of ¼ to ½” should be left unstitched around all sides. Be careful about simply reducing the size of the design. To decrease the size, most machines keep the same number of stitches and bring them closer together making the design more dense. Depending on the original density of the design and the amount of reduction, this could lead to too many stitches too close together, thus perforating the wood and causing sections to pop out. A design that starts out with pop-outs can be enlarged to spread out the stitches. Coverage will be less, but seeing the wood peeking through often produces a nice effect.

Why Embroider on Wood?

Now that you know it can be done, you may be thinking, but WHY? What could I possibly use it for? The Happy Halloween design was intended to be hung on a door for the holiday. Something of a similar size could also be stitched for inclusion in a wreath. How about a wooden front of a Christmas card? You can also back embroidered designs with felt and add to the holiday tree.

Embroidery on wood

Designs can also be mounted in frames and become wall art. The designs can be coated with a decoupage medium or polyurethane (check colorfastness of thread) to protect the stitching and used to decorate boxes and other wooden craft containers. To dress up a bland serving tray, stitch out a design and place it under glass in the bottom of the tray. Christine Pillarella stitched out these designs on wood blanks, trimmed them to size, then adhered them to the sides of a cigar box for a stunning effect.

Embroidered wood box

Embroidery on woodThe chipmunk crossing design was placed on the top of a box to create a shadow box. Or how about creating place cards for your holiday table? The uses are only limited by your imagination. Go ahead, give it a try, and let us know how you used your embroidery on wood.

ASG members can view a video on embroidering on wood in the Members Only area. Not a member? Join today!


~ Rosemary Fajgier and Christine Pillarella, Princeton Chapter of ASG

Did you enjoy this article?
Are you an ASG member?
This field is for validation purposes and should be left unchanged.

Tagged With: machine embroidery

  • « Previous Page
  • 1
  • …
  • 24
  • 25
  • 26
  • 27
  • 28
  • …
  • 82
  • Next Page »

Become a Member

Join the only national organization dedicated to Advancing Sewing as an Art and Life Skill.

Join Now button

Blog Article Categories

  • ASG Conference
  • Chapter Stories
  • Embroidery
  • Fitting
  • Learn to Sew
  • National Sewing Month
  • Products, Books, & Patterns
  • Projects
  • Quilting
  • Sewing
  • Sewing Techniques
  • Sewing Tips
  • Sewing Tours
  • Videos
  • Disclaimer
  • Privacy Policy

American Sewing Guild
National Headquarters
9660 Hillcroft, Suite 230
Houston TX 77096
713-729-3000 | 713-721-9230 Fax
www.ASG.org

ASG wordcloud - education, conference, discounts, videos, special offers, tours and more

Copyright © 1998–2025 · American Sewing Guild · All Rights Reserved