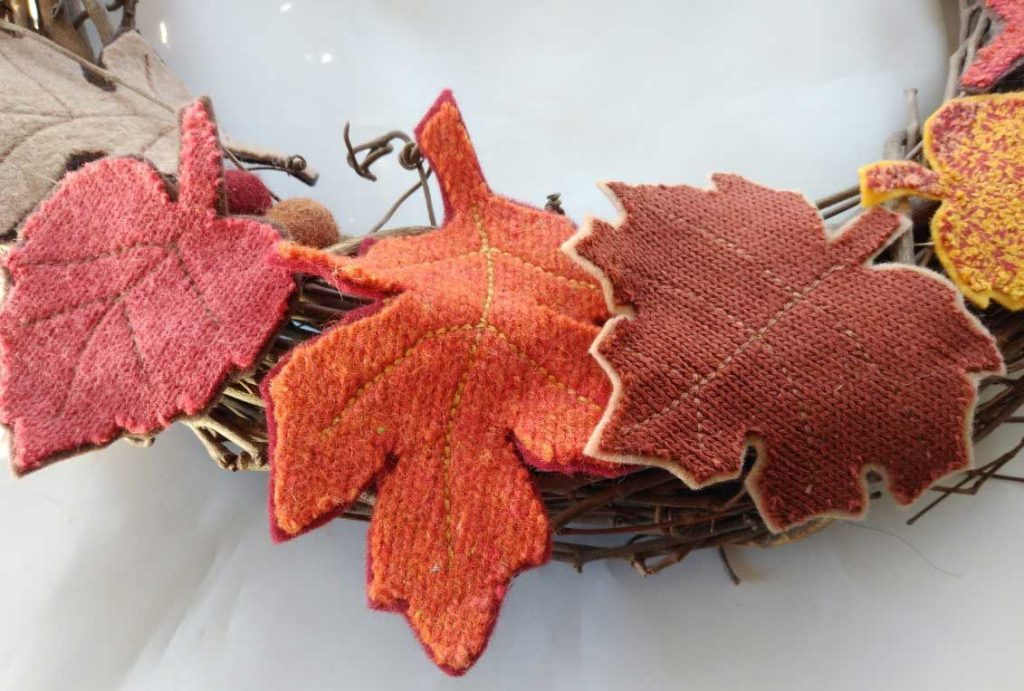
Who doesn’t love a bit of fall color?
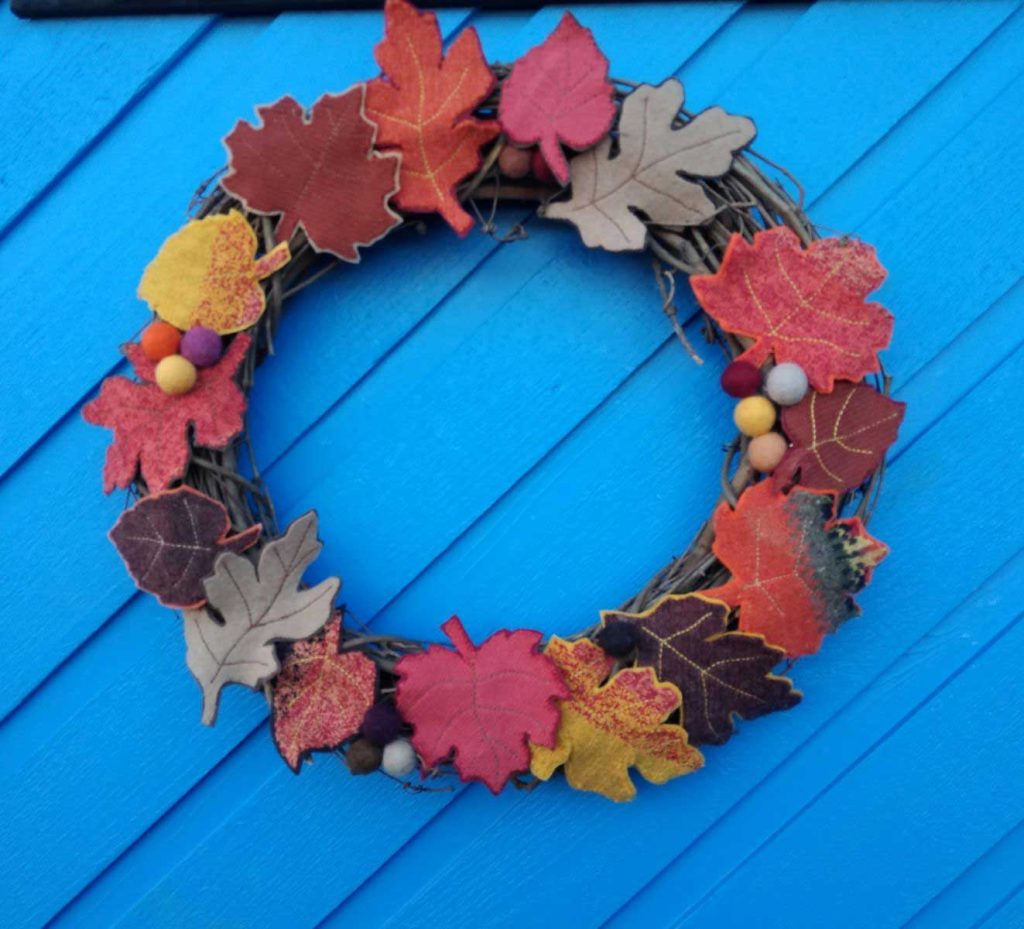
If you’ve followed my blog posts for any length of time, you know that I love repurposing things in unexpected ways, and this sweater wreath is the perfect project for that mantra.
Get started by gathering some fall-color-no-longer-worn sweaters from your closet, from friends, or visit thrift stores. Look for color gradations or stripes within the sweater so you have more tonal options from a single pick.
If the sweaters are wool, throw them in the washer and dryer to felt them, creating a denser fabric to work with.
Supplies
- One 10-12” wicker wreath form
- Assorted fall color sweaters
- Assorted fall color felt
- Assorted fall color threads
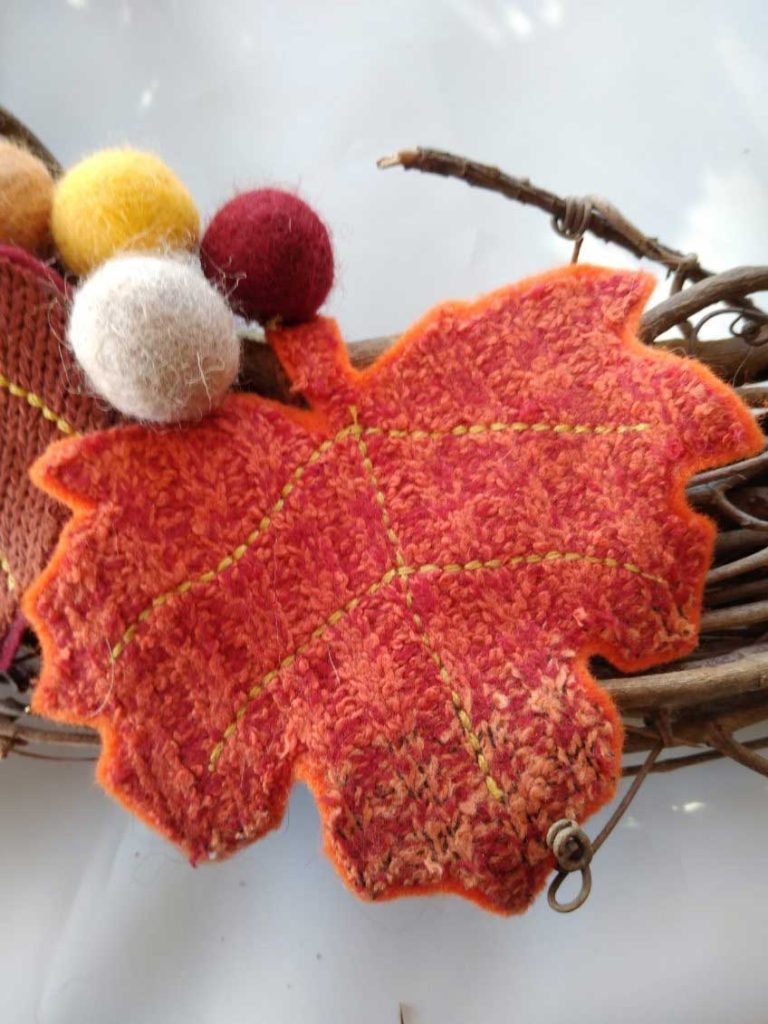
- Assorted fall color felt balls, 1- 1½” diameter
- Fusible web
- Hot glue/glue gun
- Large bow (optional)
Putting it together
- Download some free leaf shapes from the Internet. One site is https://worldofprintables.com/leaf-template/. Oak and maple shapes are ideal, but any basic leaf shapes will work.
- Trace the leaves onto the paper side of the fusible web and rough-cut the shapes.
- Following the manufacturer’s instructions, fuse the shapes to the wrong side of the sweaters, positioning them according to your color selection and varying placement for interest.
- Cut out the sweater leaves on the drawn lines.
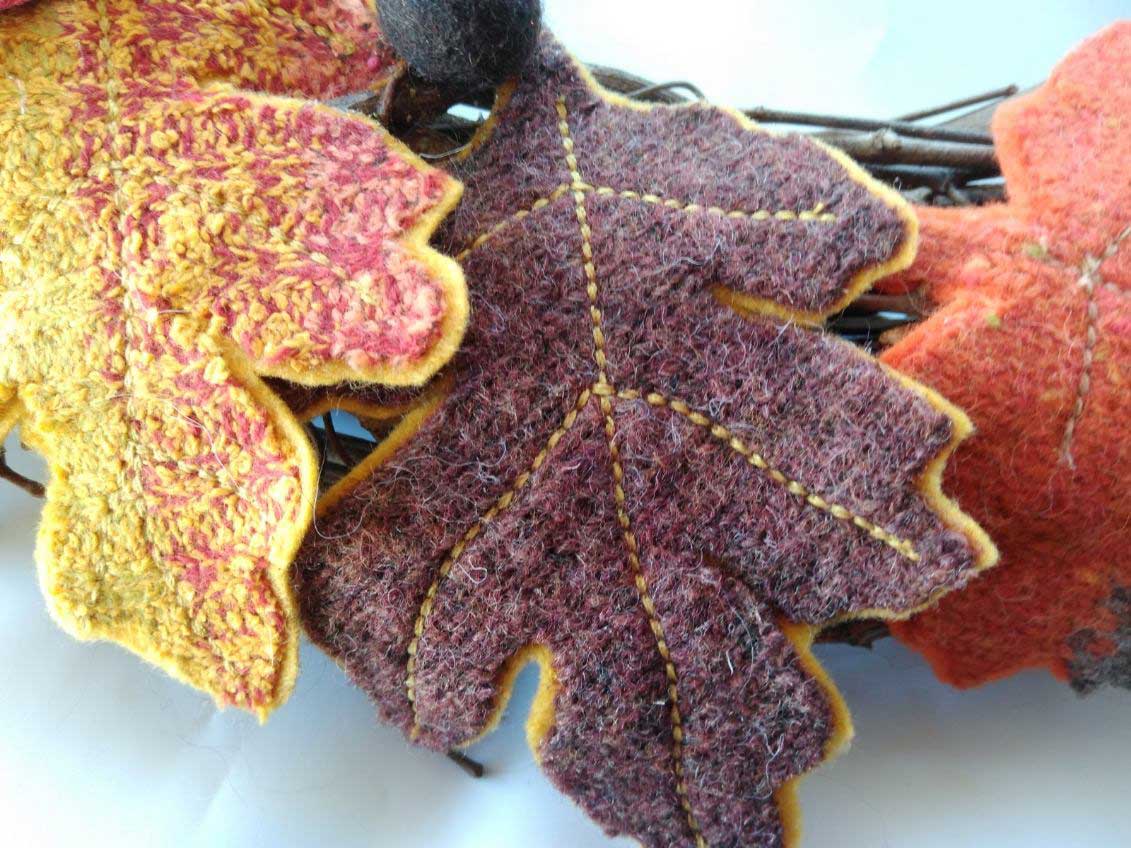
- Peel off the protective paper and fuse the leaf shapes to a contrasting felt color. Cut out the shapes ¼” from the sweater edges, leaving a narrow felt border around each leaf.
- Using a straight stretch stitch or a narrow zigzag stitch, detail the leaf veining to mimic the natural leaf configuration. A narrow zigzag shows up better on bulkier fabrics.
- Position the leaves as desired on the wreath form and glue in place.
- Group together multiple felt balls and glue in place among the leaves.
- Let the glue dry thoroughly before moving the wreath.
- Add a bow if desired.

Options: Instead of all leaf shapes, cut some pumpkins, witch hats or turkey shapes to add to the mix.
Don’t throw away the sweater scraps—they’re ideal for another project—perhaps some winter mittens! The sweater ribbing is perfect to use as-is for the cuffs on mittens.
~Linda Griepentrog is the owner of G Wiz Creative Services and she does writing, editing and designing for companies in the sewing, crafting and quilting industries. In addition, she escorts fabric shopping tours to Hong Kong. She lives at the Oregon Coast with her husband Keith, and three dogs, Yohnuh, Abby, and Lizzie. Contact her at gwizdesigns@aol.com.

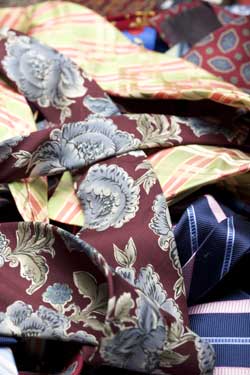
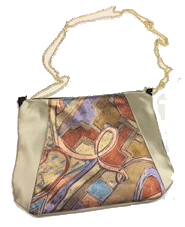 Since I love making purses, I decided to go in that direction. The deconstructed tie yielded a piece of fabric that was 7 ½ inches at its widest point. I took two foundation pieces of fabric and laid the wide points of the ties centered on the foundation. Then I played with the remaining pieces and tried to match the swirls of color on either side of the main sections. Luckily the ties were close enough to being identical that I was able to get both the front and back to look similar. But how could I attach the pieces and make them look attractive and not just patched?
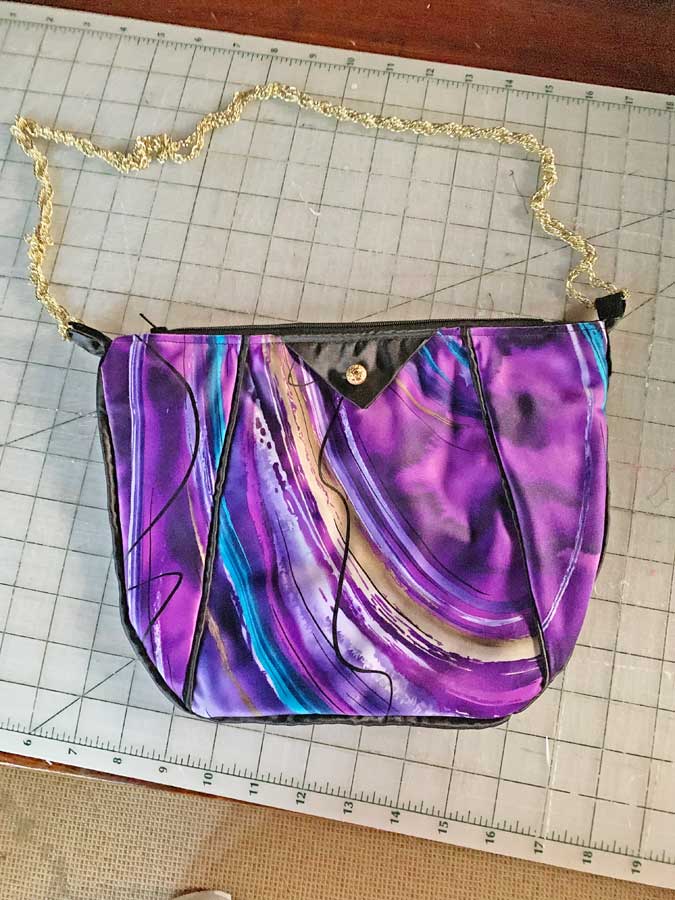


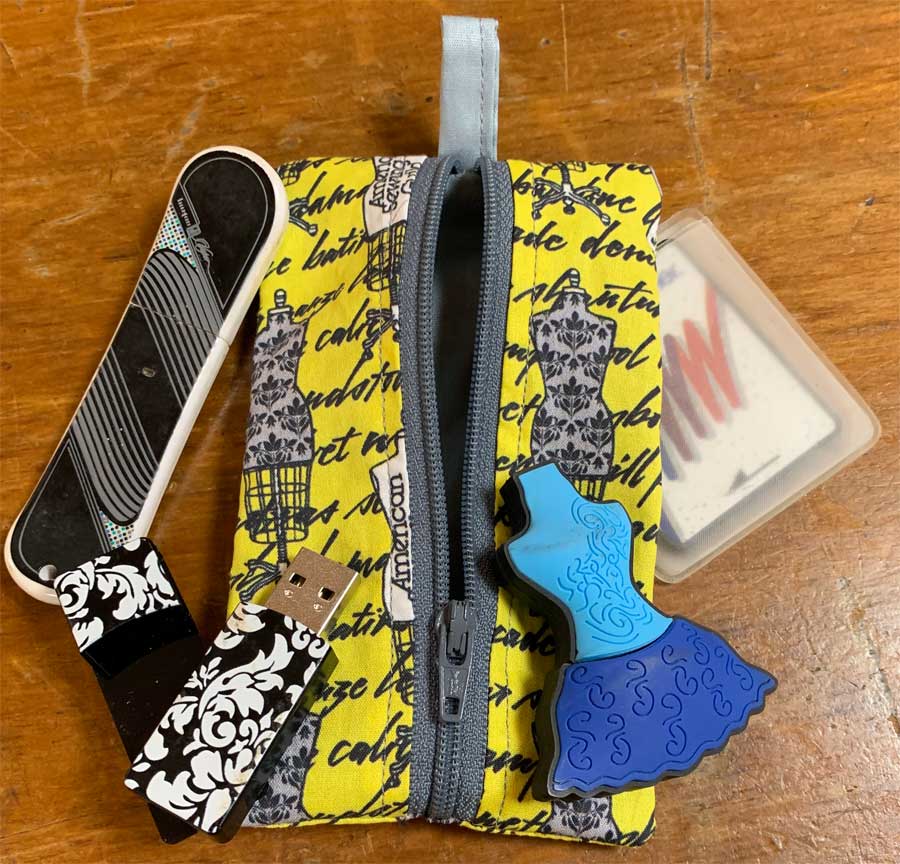
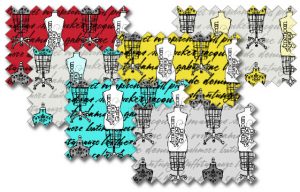 What have you been making from our ASG fabric? We are currently looking for original designs that our members created from our very own unique fabric—the one with the dress forms and the ASG logo.