American Sewing Guild (ASG)

Visit our blog Visit the ASG Facebook page Visit ASG on Pinterest Visit ASG's YouTube channel Visit ASG on Instagram
  • Home
  • Join ASG
    • Join Online
    • Chapter Locations
    • Member Benefits
    • Member Brochure
    • Join by Mail
  • Conference & Education
  • Resources
    • Contests & Awards
    • Giving Back
    • Hall of Fame
    • Links
    • Travel and Tours
    • Measurement Chart
  • Shop
    • ASG Store
    • Chapter Products
    • Video Resources
  • Blog
  • About
    • About Us
    • Donate to ASG
    • ASG Sensitivity Statement
    • FAQ’s
    • Start a Chapter
  • Contact
  • Member Login
    • Login First!
    • Members Only
    • Leadership Only
    • Website FAQ’s
    • Logout
  •  

April 8, 2022

Rib-it!

Sometimes a hem just doesn’t cut it—maybe you want something a little snugger, a little warmer, or even a contrast color. Look no further than ribbed cuffs to make all those things happen. They add a professional looking finish to any garment from outerwear to sport and loungewear, including our beloved joggers.
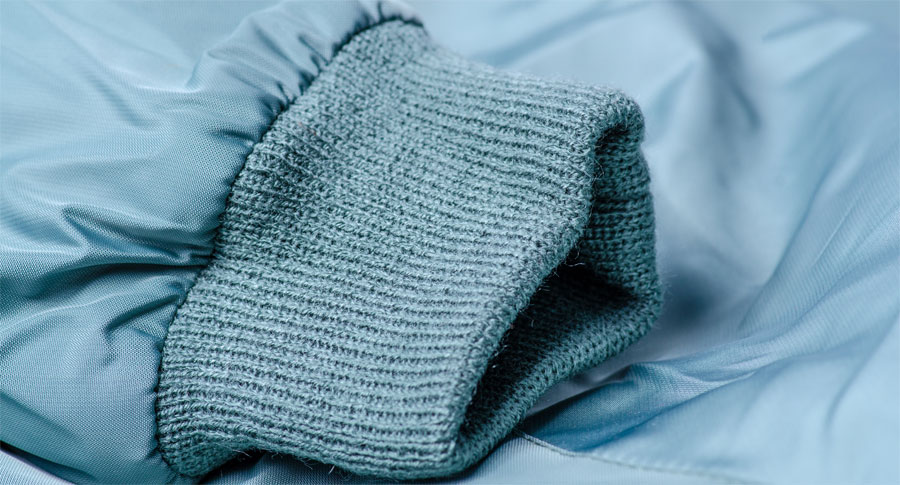
Ribbing on a jacket cuff

But, how do you work with them?

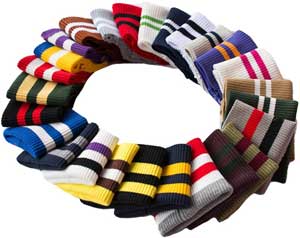
Striped cuffs from Amazon.. Note this an affiliate link.

Ribbed cuffs can be purchased ready-made in a myriad of colors and varying textures of rib, both solid and striped patterning. They’re available in nylon, polyester, cotton and blends of those fibers, depending on what you’re putting them on, and they come in different weights—heavier for outerwear, lighter for T-shirts.

Cotton ribbings offer a more matte appearance, while synthetic fibers can add a bit of a sheen to the finished cuff. Cotton is less resilient to go back to its original shape after wearing, so it’s often paired with a synthetic to aid in that recovery.

If you’re purchasing ready-made cuffs, be sure to check the size, as many brands come in sizes for both children’s garments and adult sleeve finishing. Note not only the height of the cuff, but also the circumference, keeping in mind that ribbing stretches to allow for a snug fit.

Most ready-made ribbed cuffs are seamless as they’re knitted on a round-needle machine.

Adding Cuffs
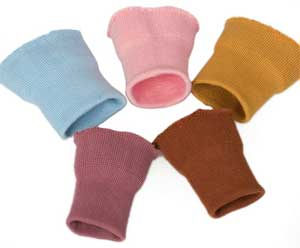
Ribbed cuffs from Amazon. Note this an affiliate link.

Ribbed cuffs can be applied to both woven and knit fabrics, and to sleeves or pant legs for a snugger, warmer fit than just a hem. If your pattern calls for ribbed cuffs, chances are good that the pattern length has been shortened to allow for the cuff length. If not, you may need to trim the length to accommodate the cuff length. For ease of instructions, we’ll be applying the cuff to a sleeve, but the same details apply if you’re applying a cuff to pant legs.

The lower sleeve edge will be larger than your cuff for proper fit. Starting at the underarm seam, divide the lower sleeve opening into quarters and pin-mark. Divide the upper edges (two layers) of the cuff into quarters and pin-mark. With right sides together, match the folded cuff quarters to the quarters of the sleeve opening. There should be more garment than cuff.

Using a narrow zigzag or serger stitch, sew around the upper cuff/sleeve edge stretching the ribbed cuff to fit the sleeve fabric. Sew with the ribbing side facing you. Sewing one quarter at a time allows for even distribution of the sleeve fullness as it’s attached to the cuff. If you’re using a serger, trim off the knit cuff/sleeve edges at the seamline; if you’re using a zigzag, sew along the seam allowance, trim if needed, and sew again over the knit edges to finish.

To add a sportier look, finger-press the seam toward the sleeve and topstitch 1/8” beyond the seamline.

D-I-Y Rib Cuffs
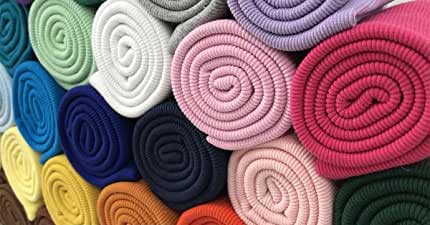
Ribbing fabricIf you prefer to make your own cuffs, look for ribbing at your local fabric store or online resource to match or contrast with the garment. Generally, ribbing is narrower than fashion fabrics, and the rib patterning may vary depending on the weight. Note the fiber content as mentioned above. Ribbing can be sold by the yard or by the inch.

• You don’t need much rib to make cuffs—just twice the finished cuff length, plus seam allowances.

• To cut the cuffs, measure your wrist (or ankle for pants) and add 1”. Make a paper pattern for the cuffs using that measurement for the width and about 7” for the length—this will make a 3”-tall cuff using a ½” seam allowance.

• Cut the cuff so that the greatest amount of stretch goes across the width of the pattern and the ribs go vertically.

• Fold each cuff in half width-wise with right sides together and sew a ½” seam down the rib line. Trim the seam allowance and finger-press open. Try on the cuff to check for fit, and resew if necessary, depending on how snugly you want the cuff to fit.

• Fold the cuff wrong sides together, matching the seamlines and pin the upper edges together.

• Apply the cuff as noted above for ready-made versions.

WARDROBE TIP: Adding ribbed cuffs to either sleeves or pant legs is a way to extend the wearing life of garment for a growing child. As these areas get too short, just add a few extra inches of cuff to change the look of the garment and allow the item to be worn longer.


~Linda Griepentrog is the owner of G Wiz Creative Services and she does writing, editing and designing for companies in the sewing, crafting and quilting industries. In addition, she escorts fabric shopping tours to Hong Kong. She lives at the Oregon Coast with her husband Keith, and two dogs, Yohnuh and Abby. Contact her at .

Did you enjoy this article?
Are you an ASG member?
This field is for validation purposes and should be left unchanged.

April 1, 2022

The Gilded Chain of Chanel

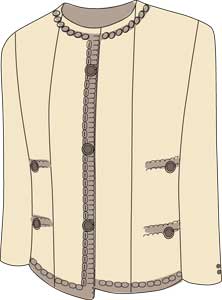
The gilded chain is an attractive, decorative trim on the inside of most Chanel jackets at the hemline, and is one of the most Chanelisms (the term used by the editors of Vogue Magazine to describe distinctive Chanel techniques). The chain is generally made of brass or heavy metal and is used instead of inexpensive lead weights that are hidden between the hem allowance and outer shell in traditional tailored jackets.

The chain is an essential component and plays an integral role in controlling the drape of Chanel’s distinctive jackets. Many of these featherweight designs have only two fabric layers — a lightweight fashion fabric and a blouse-weight lining that have been quilted together. They are often assembled without the usual interfacings, underlinings, facings, and linings.

Read more (requires member login)

The complete version of this article is available on the ASG Members Only blog.
CLICK HERE to read the full article. Not a member? Join online!

Tagged With: chain weight, chanel jacket

March 25, 2022

S-T-R-E-T-C-H-I-N-G it! Everything you need to know about choosing elastic

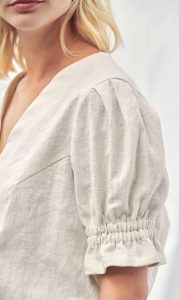
Elastic sleeves
Photo courtesy of Bernina

We all know the convenience of elastic—it allows us flexibility around the waistline for that extra helping of dessert and also holds up our undies in style. But there are so many types of elastic it’s hard to know which one to choose for what. Some elastics are hidden inside casings, while others show themselves with aplomb.

So, let’s talk about this supreme stretchiness and some elastics that may be new to you.

Elastic Types

For encased stretch, look for braided, knitted or woven elastics. They come in a variety of widths starting at 1/8”, depending on their use. You can purchase elastic by the yard or in pre-cut, packaged lengths and usually only in black or white. Braided elastic gets narrower and curls as it stretches, while woven and knitted elastics hold their width during sewing and wearing. Braided elastic looks ribbed due to its construction process and should be used in casings only, not sewn through, as it easily distorts.

Braided elastic
Braided elastic
Woven elastic
Woven elastic


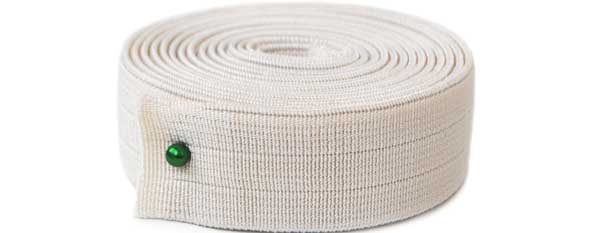
Non-roll elastic from Amazon
Non-roll elastic available on Amazon.

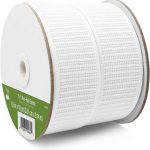
Non-roll elastic is woven with extra ribs to help it hold its shape and to prevent twisting. It’s ideal inside waistband casings.

Pajama elastic is a soft, lightweight woven elastic, designed to be used against the skin, like at the waistline of your favorite pj’s, as the name suggests.

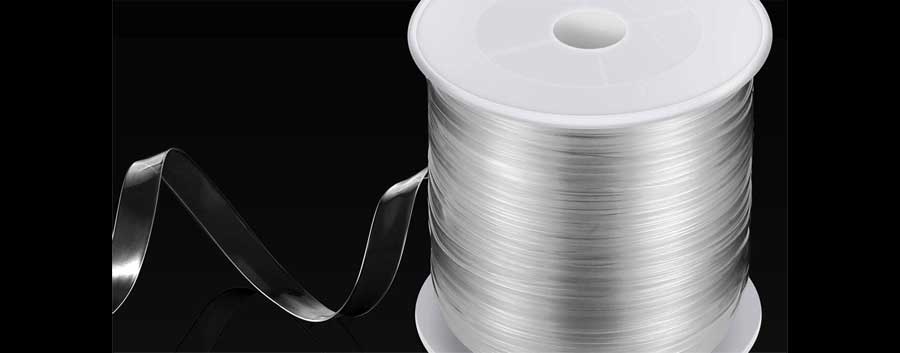
Clear elastic is an extruded product that can be stretched up to three times its original length. Also available in a variety of widths, you’ll find this sometimes used for bra straps to create an invisible look, in swimsuits and often to stabilize shoulder and neckline seams in knit garments. It’s easily sewn through without distorting and you can even cut it along the length if a narrower piece is needed—there’s no raveling. The serger knife can easily trim it during application.

Clear elastic from Amazon
Clear elastic available on Amazon

Plush-back elastic is made to be seen. It’s applied to waistlines, sleeves and leg openings in lingerie with the soft fuzzy side toward the body for comfort.

Picot-edge elastic has a looped edge that extends decoratively beyond the garment edge when the elastic is applied. Look for it on lingerie and sometimes on childrenswear as a neckline or armhole finish.

Picot edge elastic from Amazon

Ruffle-edge elastic has a woven in ruffle that extends beyond its edge(s). Single-edge ruffles can be used like picot-edge elastic, and double-edge ruffles are often used for straps, belts or pony-tail holders.

Ruffle edge elastic
Ruffle edge elastic available on Amazon.

Fold-over elastic is made specifically for finishing the edge of knit or woven fabric. A special channel down the center creates a built-in fold line to encase a fabric edge. It can be applied with a 1:1 ratio or with a slight stretch to help ease a neckline or other curved edge, while still maintaining flexibility. This elastic is available in myriad solid colors and prints, and it’s often used for binding infantwear edges.

Fold-over elastic from Amazon
Fold-over elastic available on Amazon

Round or oval cord elastic looks like a very large thread. These are ideal for small areas that benefit from stretch, like button loops, mask earpieces, jewelry making, etc. Round elastic can also be used for flexible gathering—just zigzag over it, being careful not to catch the elastic, then pull the elastic to the desired size and tie off.

Elastic thread is a stretchable thread. Sewing parallel lines with elastic thread in the bobbin and matching fabric colored thread in the top creates a shirred look that can be adjusted as desired.

Buttonhole elastic is woven with evenly placed slits in it to match buttons. When used to back a waistline, it creates size options—especially handy for maternity wear or children’s clothing.

Buttonhole elastic from Amazon
Buttonhole elastic available on Amazon

Gripper elastic has silicone on the wrong side to help keep garments in place when the silicone is placed next to the skin. Look for this type of elastic in bike shorts (along the leg hems) and in evening wear bodices to help keep them from slipping out of place. Available in multiple widths and colors.

Gripper elestic on Amazon
Gripper elastic available on Amazon

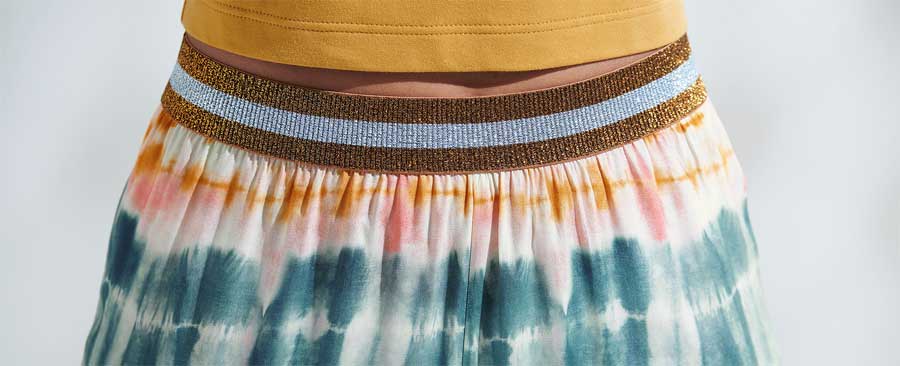
Novelty waistband elastic is wide and designed to be seen. It comes in myriad colors, some metallics, and also with stripes woven into it. This elastic is applied to the outside of the garment in lieu of a waistband. It can also be used for belting.

Novelty waistband elastic
Novelty waistband elastic. Photo courtesy of Bernina.

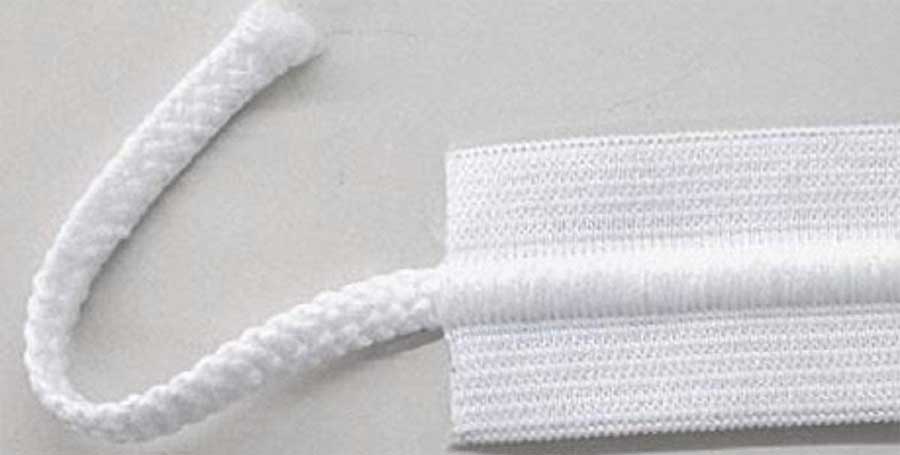
Drawstring elastic offers a built-in cord down the center that can be pulled and tied to snug up the fit of pants or shorts at the waistline. The cord is embedded in the elastic as it’s constructed and is accessible as this elastic is applied directly to the garment wrong side, not inside a casing.

Drawcord (drawstring) elastic from Amazon
Drawcord/drawstring elastic available from Amazon

Swimwear elastic, available in narrow and wider widths, is made to withstand chlorine and salt without damage to it. It’s used in the legs, armholes and neckline of bathing suits. Regular elastic is damaged by exposure to pool chlorine and will rot.


~Linda Griepentrog
Linda is the owner of G Wiz Creative Services and she does writing, editing and designing for companies in the sewing, crafting and quilting industries. In addition, she escorts fabric shopping tours to Hong Kong. She lives at the Oregon Coast with her husband Keith, and two dogs, Yohnuh and Abby. Contact her at .

Did you enjoy this article?
Are you an ASG member?
This field is for validation purposes and should be left unchanged.

Tagged With: elastic

March 18, 2022

Shirt Chic

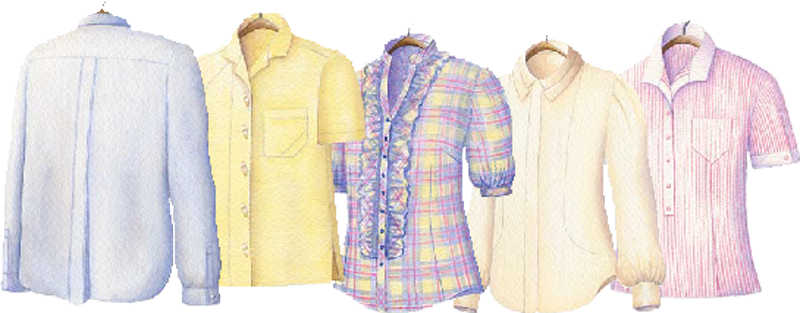
Custom shirt expert, Pamela Erny shares her sewing tips for achieving impeccable results, as well as ideas for adding a personal twist to traditional silhouettes. Pamela told us that many of her techniques can be used with both men’s and women’s shirts. Men’s shirts, women’s shirts, and children’s shirts all present countless opportunities for boundless creativity. Boundless? Yes!

Shirts

“I absolutely enjoy every minute of my profession as a shirtmaker. The fabrics, the patterns, the design details, and the opportunity to bring my own original designs “to life” in fabric make the many hours spent in my studio joyful ones.”

Choosing Fabrics

Shirtmaking creativity begins right at the get-go when you are picking the fabric. Sure, there are fabrics actually labeled “shirting fabrics” and they are lovely to sew on, but if you cannot find “official” shirting fabrics, there are plenty of other options. Consider luxury sheets for fabric yardage. Beautiful high-thread-count Egyptian cotton sheets are available at reasonable prices from many online sources. And what about other fabrics? Here’s where the excitement begins. Silk dupioni, washed in hot water until the color fades, the slubs swell, and the shine is barely there, becomes wonderful “unexpected” fabric for shirts for both men and women. Or perhaps some linen tossed into a washer filled with hot water and some clean tennis balls (yes, tennis balls) and run through a few wash cycles, then tossed — tennis balls included — into a hot dryer, for a lovely distressed look fabric that’s perfect for making a fun, stylish shirt.

Hanging shirts

Pamela designs and hand-drafts many of the shirts that she sews, but she also uses commercial patterns as well. There are some fabulous patterns available for shirts for both men and women. Sources range from the major pattern companies to wonderful shirt designs from the small independent pattern lines. Vintage patterns, particularly when sewing men’s shirts, provide even more options.

Fine-Tuning the Construction

By and large, the most frequently asked questions about shirtmaking are about constructing collars, adjusting a pattern to accommodate a prominent abdomen, and the use of interfacing.

Interfacing: It is important to interface all areas of a shirt that experience stress and/or require added body. Of course, that includes the collar, front button band, and the cuffs. If any shirt details are cut on the bias, such as the front placket, be sure to cut the interfacing on the straight grain so that the bias is completely stabilized.

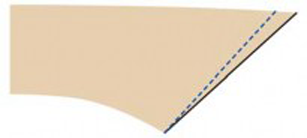
Collars: One hallmark of a poorly made shirt is a collar with lumpy points that refuse to lay flat. The solution is to ever-so-slightly change the angle of the point. This allows the seam allowances to have more room to settle flat and smooth when the collar is stitched, turned, and pressed. This simple method will work with any pointed collar, including shirt collars that are attached to a stand.

In this diagram of a collar pattern, the black line is the original pattern. The dotted blue line shows how to alter the angle of the point. The method is easy:

  • Trace a copy of the pattern, without seam allowances.
  • Make a mark on the outer edge of the collar, 1⁄8″ to 1⁄4″ in from the point.
  • Draw a line from the collar’s center front neck edge to the mark at the outer edge.
  • Cut along this newly drawn line to establish the new front edge of the collar.
  • Add the appropriate seam allowances and cut out your collar.

Center front

Since you haven’t changed the length or shape of the neck edge, all the “parts” will stitch together as usual.

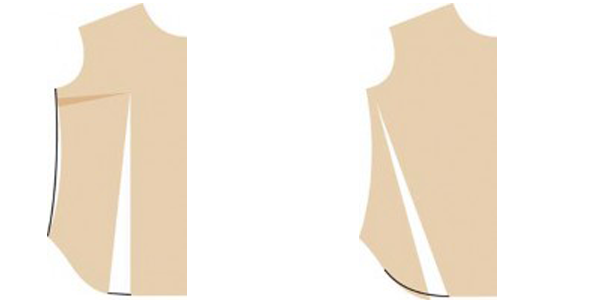
Full Abdomen and Hip Adjustment: One of the most common shirt fitting problems for both men and women is a garment that fits fine in the chest and shoulders but is too tight in the hip and/or stomach area. The alteration, which is quite simple, eliminates all the problems that would occur by moving up to the next larger pattern size. After slashing and spreading the pattern the necessary amount (as indicated in the illustrations below), “true” the lines of the pattern as shown.

LEFT image shows full abdomen alternation made on front pattern piece only. RIGHT image shows full hip alternation made on both front and back pattern pieces.

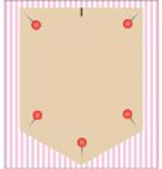
V-Bottom Patch Pocket: Here’s an easy way to achieve perfectly symmetrical results when constructing this classic shirt pocket.

  • First, change your pocket pattern by reducing the side and bottom seam allowances to 3⁄8″ or less.
  • To help with accuracy while cutting, place your fabric on a stable padded surface, such as your ironing board. Stab-pin the pattern through the fabric and into the padded surface, so that the fabric will not shift. Cut out your pocket. Mark the center at the upper edge of the pocket.
  • With wrong side up, press the seam allowances in on one side and one angle edge.
  • With right sides together, fold the pocket lengthwise from the point of the V to the center mark on the upper edge. Press the remaining bottom and side seam allowances under so that the two halves of the pocket match. Don’t worry if the seam allowances vary in width.
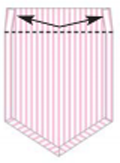
  • PocketNow we need to address the pocket’s top (hem) edge. Before folding and pressing it into position, slide the top edges of the seam allowances in a scant 1⁄8″. By doing this, you have less bulk when the pocket is stitched to the garment.
  • Finish the top raw edge of the pocket hem as desired. Fold down to the wrong side and press.

Adding Designer Details: One of the delights of shirtmaking is adding your own designer details. Over the years, Pamela has developed some favorites that transform even the simplest shirt into one that is fashionably chic.

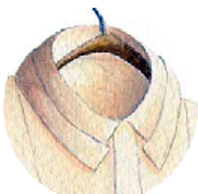
Pleated Collar: This detail works well on a woman’s shirt with a flat collar, i.e., one that has no “stand.” It is very simple to do because the collar is pleated after it is constructed and attached to the neckline of the shirt. Just fold out a 1⁄2″ to 3⁄4″ deep pleat on each front edge of the collar and pin to hold the pleat temporarily. Adjust, if needed, so that the pleat is smooth and a consistent depth all around the collar, then hand stitch the pleat folds in place on the underside of the collar.
Note: Some collars are too narrow for this technique. To test, make a muslin collar before cutting out your shirt. If necessary, increase the depth of your collar pattern.

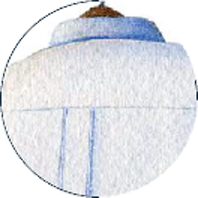
shirt- backEdge-Stitched Back Pleat: Shirt patterns for men and women may have a center back pleat below the yoke. If not, you can create one by adding 3″ at the center of the shirt back pattern piece. This will give you a 11⁄2″ box pleat, the standard size on most shirts. Then, why not make it more of a design detail by edgestitching the folds? Before attaching the yoke, press the back pleat folds from the top edge to the hem, the entire length of the shirt back. Now, very carefully, edge-stitch along each pressed fold. Attach the yoke and proceed with the construction of the shirt.
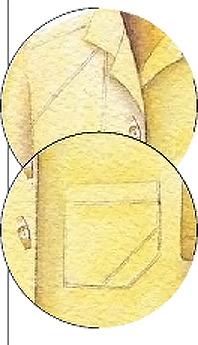
Accent Mini Tucks: Check out the details on these illustrations. What appear to be black lines are actually minute tucks on yellow distressed linen. These tiny tucks, which add dramatic accents to your shirts, require no pattern alterations!
On this shirt, a diagonal mini tuck was added near the shoulder, another on the pocket, and a vertical tuck near the center front. If you limit your tucks to no more than two per main pattern piece, it won’t affect the size or shape of the shirt.

After the pattern pieces are cut out, decide where you want to place your tucks and draw a chalk line to mark each placement. Then, working at the ironing board, fold the fabric wrong sides together along your marked lines and press. Edge stitch along the pressed fold, no more than 1⁄16″ inch from the edge. Your mini tuck is complete, and you can continue with the construction of your shirt.

Pleated Sleeve Hem: Here is a nice detail to add interest to a short sleeve. It’s also an easy fix if you decide that the sleeves are too wide after you’ve finished sewing the shirt.

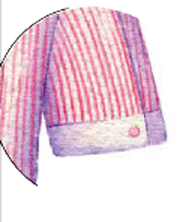
CuffFind the mid-point of the sleeve hem by pressing the sleeve in half. At that mid-point, pinch out a pleat that is 1⁄2″ to 1″ wide. Fold it toward the back or the front (your choice), and secure with a button.

Mother-of-Pearl Buttons: Mother-of-pearl buttons on shirts and blouses are beautiful, but they can vary widely in price from elegant, antique ones to thin, decorative ones (sometimes found in a bulk bag near the regular buttons). The thinner ones are more fragile, and usually don’t survive the washer and dryer unless you give them some help. Using a liquid glue that’s made to attach embellishments to fabric, coat the back side of the button, being careful to avoid filling in the holes. The glue will look “milky” when wet, but will be clear (and strong) when dry.


~Pamela Erny designs menswear fashions including custom-made shirts. She also enjoys designing fashions for children and sharing creative sewing and design techniques with others through articles, classes, and studio workshops. You can find her professional interfacing products at https://www.fashionsewingsupply.com, while www.offthe- cuff-style.blogspot.com is full of tips, techniques, and useful shirtmaking information. This article was adapted from an article printed in a previous issue of Notions.

Did you enjoy this article?
Are you an ASG member?
This field is for validation purposes and should be left unchanged.

March 16, 2022

How to use the Piping Foot (video)

Watch this 60 second video on how to use a piping foot.


Did you enjoy this article?
Are you an ASG member?
This field is for validation purposes and should be left unchanged.

Tagged With: piping foot

  • « Previous Page
  • 1
  • …
  • 31
  • 32
  • 33
  • 34
  • 35
  • …
  • 82
  • Next Page »

Become a Member

Join the only national organization dedicated to Advancing Sewing as an Art and Life Skill.

Join Now button

Blog Article Categories

  • ASG Conference
  • Chapter Stories
  • Embroidery
  • Fitting
  • Learn to Sew
  • National Sewing Month
  • Products, Books, & Patterns
  • Projects
  • Quilting
  • Sewing
  • Sewing Techniques
  • Sewing Tips
  • Sewing Tours
  • Videos
  • Disclaimer
  • Privacy Policy

American Sewing Guild
National Headquarters
9660 Hillcroft, Suite 230
Houston TX 77096
713-729-3000 | 713-721-9230 Fax
www.ASG.org

ASG wordcloud - education, conference, discounts, videos, special offers, tours and more

Copyright © 1998–2025 · American Sewing Guild · All Rights Reserved