American Sewing Guild (ASG)

Visit our blog Visit the ASG Facebook page Visit ASG on Pinterest Visit ASG's YouTube channel Visit ASG on Instagram
  • Home
  • Join ASG
    • Join Online
    • Chapter Locations
    • Member Benefits
    • Member Brochure
    • Join by Mail
  • Education & Classes
  • Resources
    • Contests & Awards
    • Giving Back
    • Hall of Fame
    • Links
    • Travel and Tours
    • Measurement Chart
  • Shop
    • ASG Store
    • Chapter Products
    • Video Resources
  • Blog
  • About
    • About Us
    • Donate to ASG
    • ASG Sensitivity Statement
    • FAQ’s
    • Start a Chapter
  • Contact
  • Member Login
    • Login First!
    • Members Only
    • Leadership Only
    • Website FAQ’s
    • Logout
  •  

April 24, 2020

Fishy Flounces: Flounced Hem

Normally, fishing line would be found in the tackle box or with rods and reels in the garage, but why not try bringing a spool of it into your sewing room to create awesome ruffled edges and hems with your serger? The secret is encasing the fishing line in the stitching to create undulating edges with aplomb.

Flounced hem

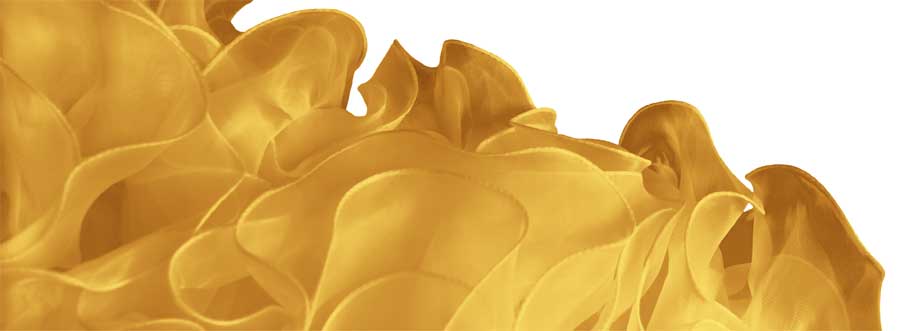
Ruffled edges are ideal for eveningwear, costumes and skirt hems. This technique works best on bias edges and on the crosswise of knit fabrics, but it will also work on lengthwise or crosswise edges to a lesser extent.

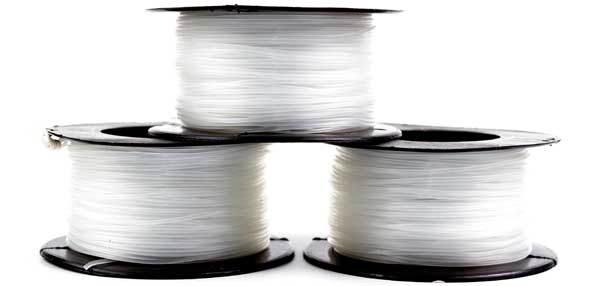
What kind of fishing line?

Fishing line comes in a variety of weights, types and colors, but for sewing purposes look for a clear, monofilament line between 12 and 60 weight. The larger the number, the thicker the line. If you’re buying one specifically for sewing ruffles, 25-30 is a happy medium, though you might want a lighter weight for thin fabrics like chiffon.

fishing line

Although not required, check to see if your serger has a beading or other foot that has a top center guide that the fishing line can slide through.

It’s important to test-stitch before you begin serging on the actual project, as this process can be a bit tricky. If you have trouble with uneven feeding and squirmy fabric, add some water-soluble stabilizer under the fabric and serge through it as a temporary aid to even feeding.

  • Set your machine for a rolled hem setting. Each machine differs slightly, so consult your owner’s manual for specifics.
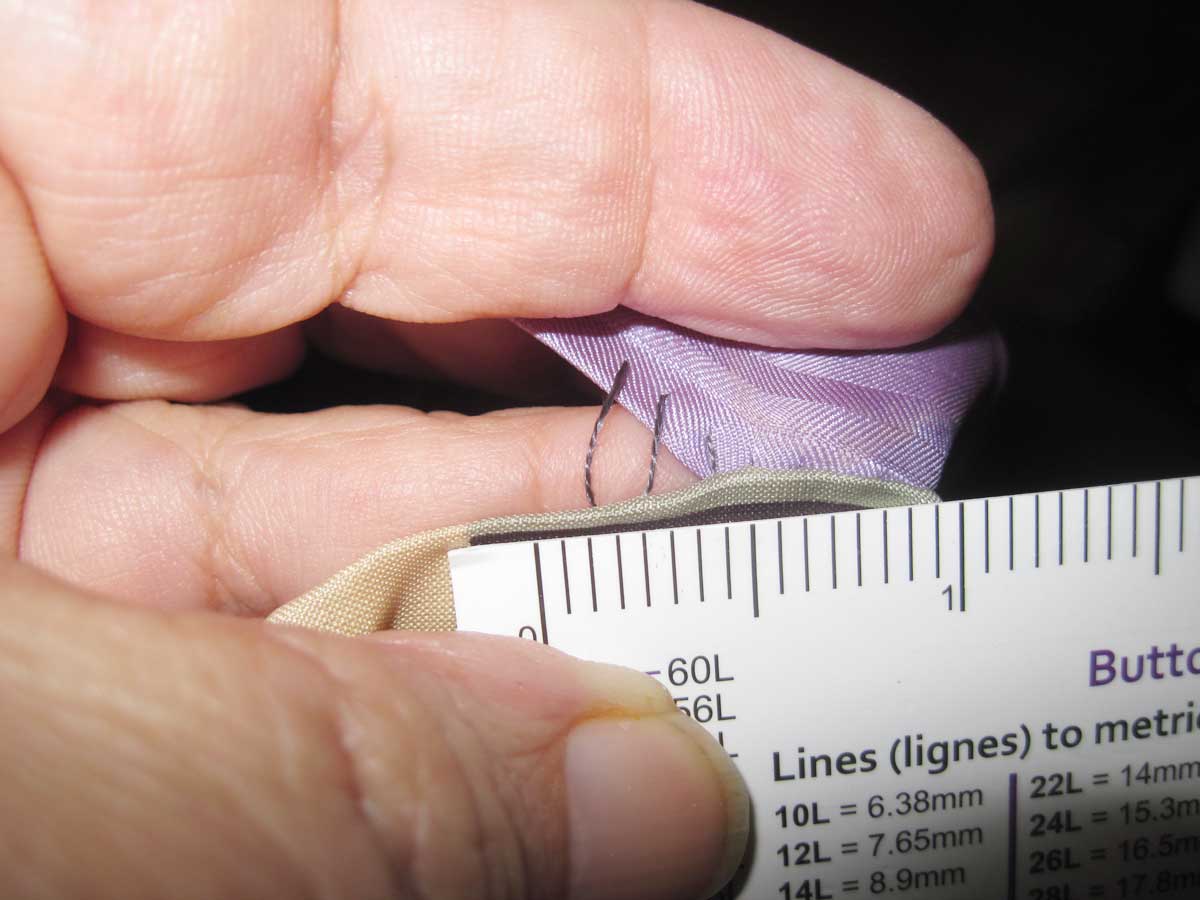
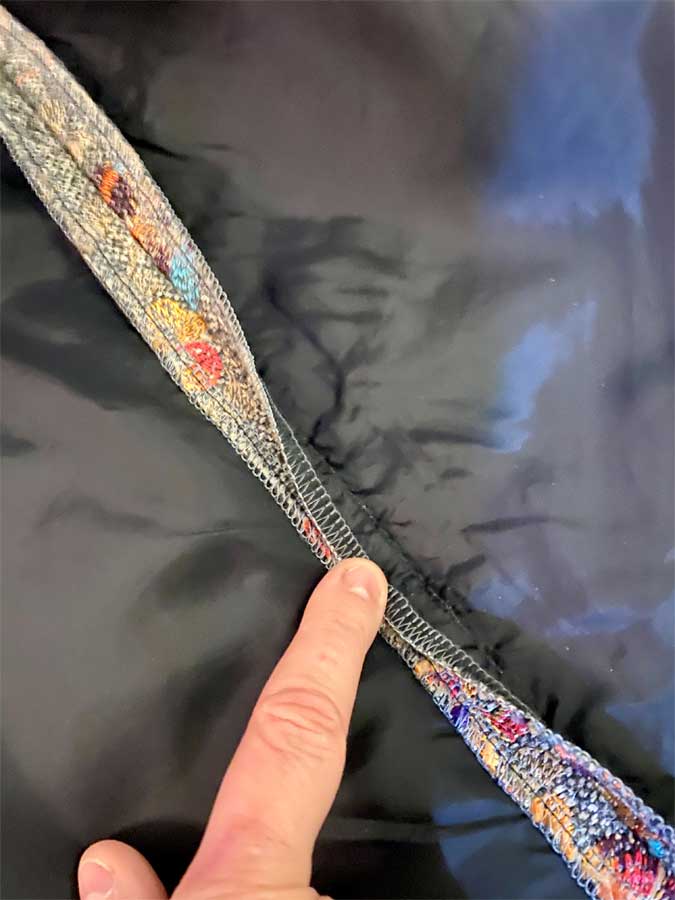
  • Leave a 12” tail of fishing line, then begin stitching over only the fishing line. After you’ve serged for about an inch, lift the foot and place the edge of your fabric wrong side up under the line, then continue stitching. It’s helpful to actually serge about ¼” inside the cut fabric edge rather than trying to align the monofilament with the actual fabric edge. Hold the line to guide it along the seamline, but don’t stretch the fabric. The line must rest between the needle and the cutting blade as it’s very important not to cut it.
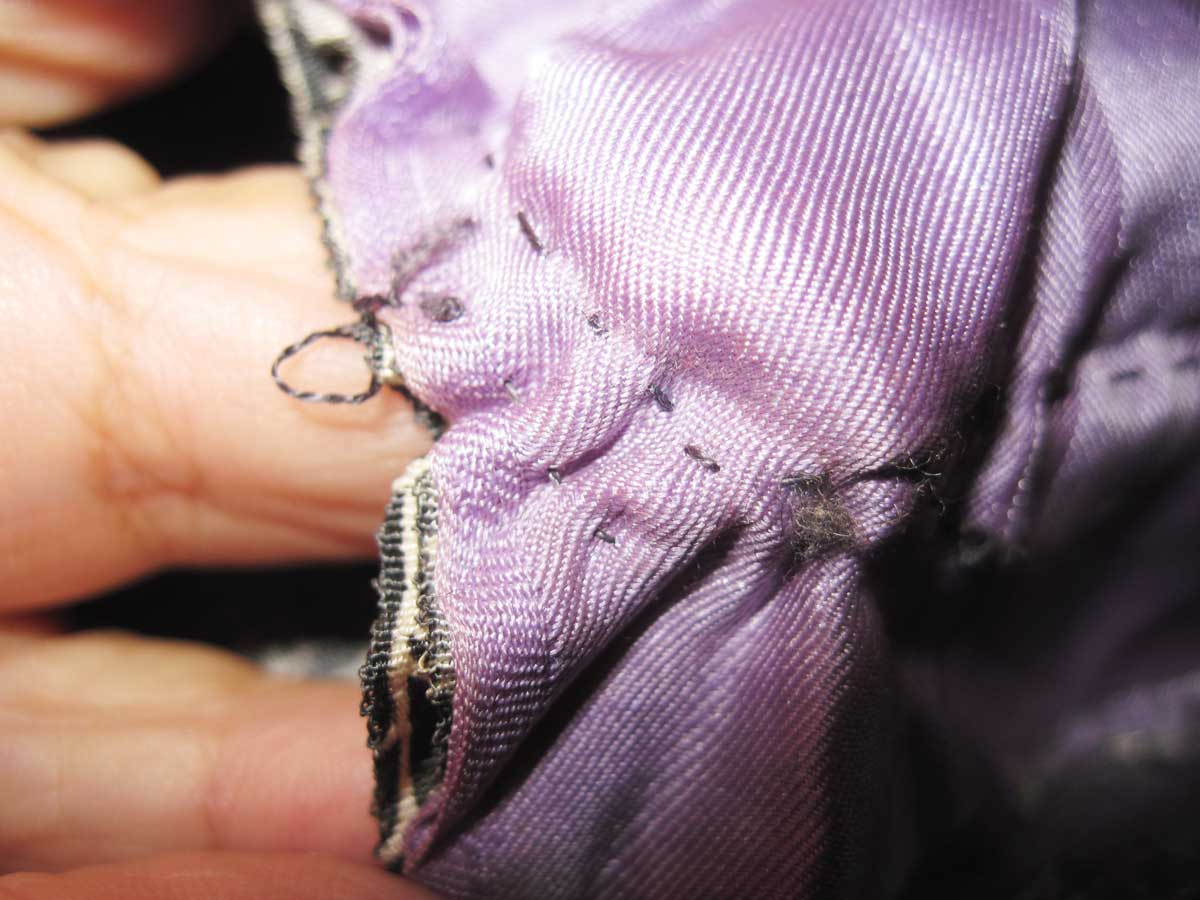
  • Serge slowly encasing the fishing line as you stitch. If you accidentally cut into the line, you’ll need to stop, remove some stitches and begin again with a new portion of line, so make every effort not to nick it and maintain one continuous piece around the entire hemline or ruffle edge.
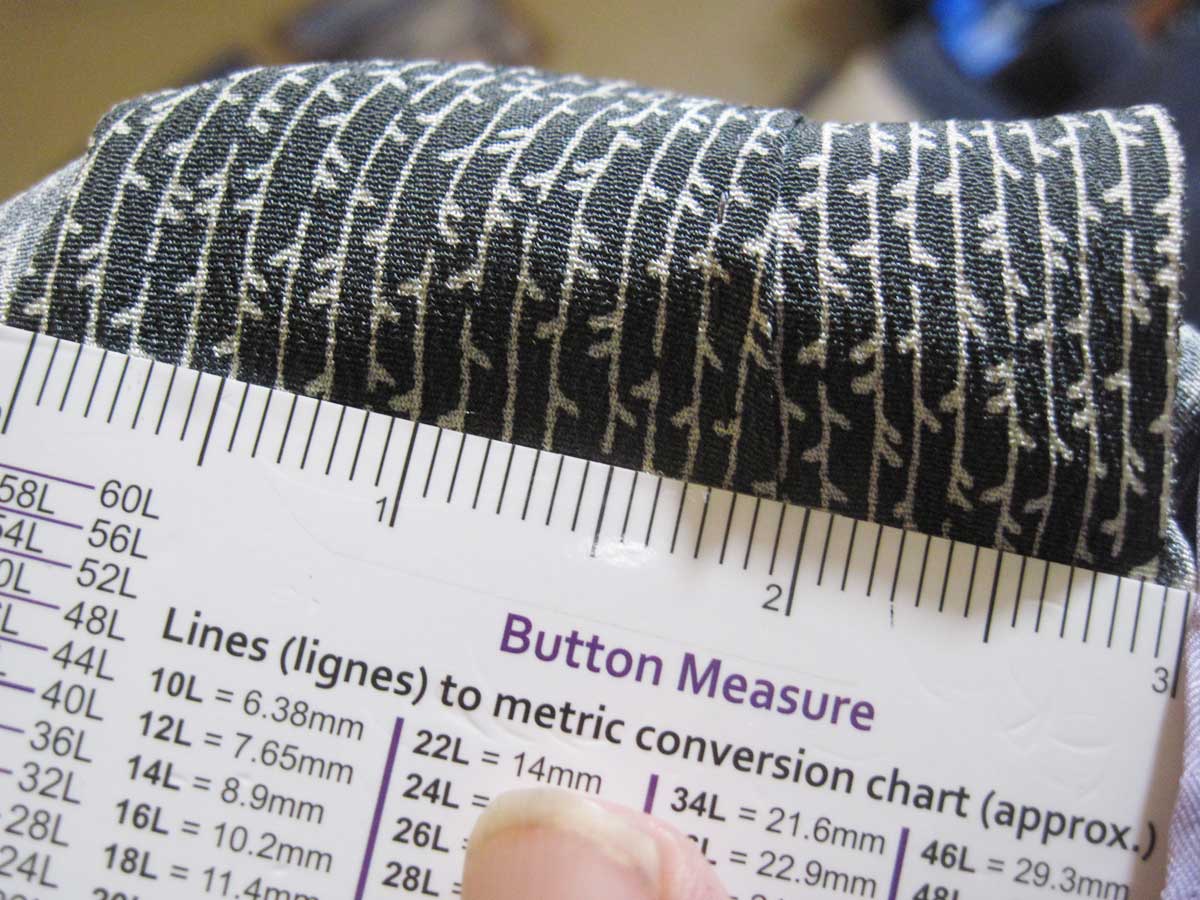
  • When you reach the end of the edge you’re working with, leave another 12” tail of fishing line. Remove the project from the serger and gently stretch the encased fabric edge for maximum ruffling. Thread some of the fishing line tails back into your stitching, or if it’s a soft, flexible line, tie a knot to secure.

Tip: Be careful pressing over the fishing line, as some of it is nylon and will melt easily.

For more information on serger sewing, see the Serger videos in the Members Only area.


~Linda Griepentrog
Linda is the owner of G Wiz Creative Services and she does writing, editing and designing for companies in the sewing, crafting and quilting industries. In addition, she escorts fabric shopping tours to Hong Kong. She lives at the Oregon Coast with her husband Keith, and two dogs, Yohnuh and Abby. Contact her at .

Did you enjoy this article?
Are you an ASG member?
This field is for validation purposes and should be left unchanged.

Tagged With: flounces, hems

April 17, 2020

Shelter in Place, Save Money and Sew!

You are living your best quarantine life, sewing up a storm and suddenly realize you are out of… or can’t find… or never had… something you need to finish your project. No matter what it is, you have no interest in going out into COVID world to pick up a spool of thread, a rotary cutter blade or a new pair of thread snips to replace the ones you must have dropped into the trash because they are nowhere to be found.

Now what?

Did you realize just how many of these things you can order online with a member discount?

We combed through the entire list of Special Offers just for members on ASG.org and created this table with the companies who carry some frequently needed sewing notions for you to have at your fingertips. Be sure you visit the members only Special Offers page to get the discount code to use when you place your order. Now it’s your turn! Go replenish your supply from the safety of your own home and enjoy great discounts while you do.

Click to open full size pdf file
Click the image to open full size pdf file

~Sheryl Belson

Did you enjoy this article?
Are you an ASG member?
This field is for validation purposes and should be left unchanged.

Tagged With: discounts, sewing supplies, shopping

April 10, 2020

Time to Make the Masks

I relate to life in music, TV shows, movies, and media in general. For the past few weeks, when I woke up, I felt as though my life was the movie Groundhog Day. Remember when Bill Murray relived his day over and over again and couldn’t get out of the loop? That’s the way I feel with this Coronavirus quarantine. I am reliving the same day — OK, different date — but the same bad dream EVERY DAY.

Then, this morning I awoke with the old tv commercial from Dunkin’ Donuts bouncing through my thoughts. Do you remember the one where the baker rose every morning with the mantra, “Time to make the donuts. Time to make the donuts?”

My mantra is
“Time to make the masks.”

In the Groundhog Day movie, Bill Murray tried to vary his loop by doing different things and even improved himself along the way. It got me thinking, “How can I vary my mask making?” How can I remove the hum-drum from this mass production sewing project? What can I do to get creative?

Did I forget something?

Another thought also crossed my mind. I have been so focused on making masks to donate to an organization with which I am affiliated, I hadn’t even made any for my family. So now I was on a mission. Masks for the grandkids, kids, hubby, in-laws and maybe even me.

Hubby had already made it very clear that he was far too careful (substitute macho here) for the virus to get him. The teenage granddaughter thought it just wasn’t cool (my word, not hers). And the four year old grandson—a  mask wouldn’t make it to his face unless it had an aspect of play involved. Sew, what’s a “sew’r” to do? Customize, of course!

Fabric Stash to the Rescue

I pulled out my fabrics and matched fabric to people.

  • My youngest grandson at 4 is crazy about dinosaurs and I just happened to have a scrap of dinosaur fabric that was large enough to make the face part of the mask. One down!
  • Middle grandchild is 9, loves Mickey Mouse and the color red. My stash proved useful again with the themed fabric.
  • What about that 16 year old? I had made her pajama pants for Christmas, so there were still some scraps of Dr. Who fabric left. It might not be cool to wear a mask, but Dr. Who anything was definitely cool. Since her dad was also a fan of the Doctor, they soon had matching masks.
  • Mom loves Tigger from Winnie the Pooh and I know there must be some Tigger fabric somewhere (I’m still searching). If that doesn’t turn up, my other son just had me make him pillows with the Marauders’ Map fabric from the Harry Potter movies. Those leftovers would be good for the both of them.
  • I can’t forget my sister-in-law. She loves chocolate. What would be better than Hershey’s Miniatures fabric?
  • Finally, what about hubby? He teaches chemistry, but I know I just don’t have anything in the way of test tubes or chemical symbols. What to do, what to do? Just as I was about to give up, I found some fabric with eagles on it. Both our sons are eagle scouts and he works with the scouts on advancement of the eagle candidates. Sounds like another match.

custom face masks

Rosemary matching outfit
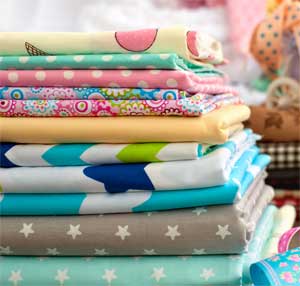
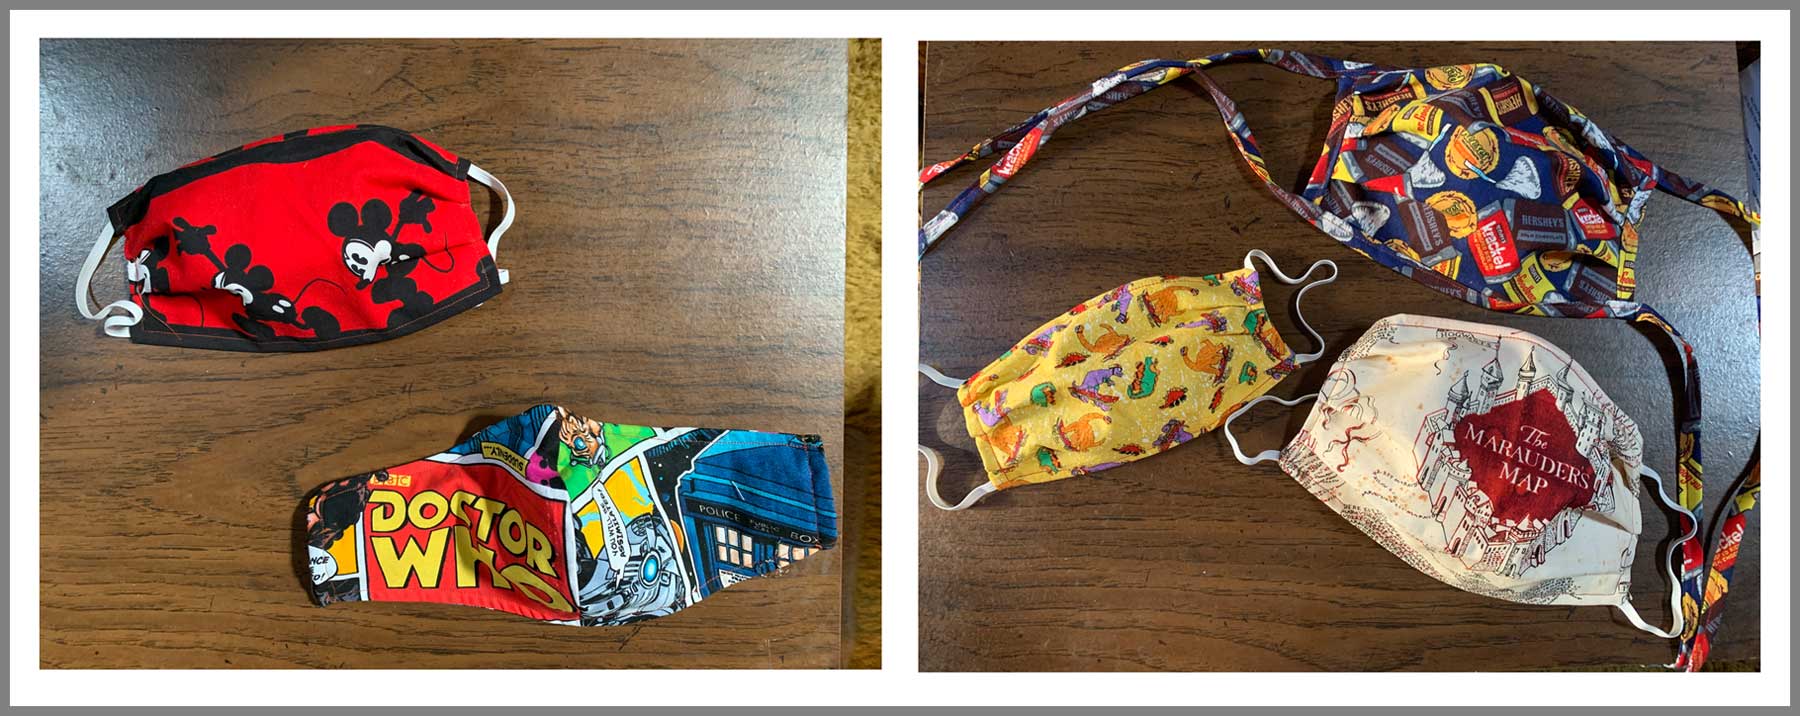
I spent the rest of my day “playing” with my fabric stash. It was fun — really fun remembering all the things I had made with the original purchases and it brought variety to what had been a boring mass production effort. And the results were very special, very unique masks that matched everyone’s personalities. With fashion statements like these, perhaps masks will be viewed as a fashion accessory instead of a health necessity. Can you see it now, designer masks that everyone will soon be wearing? Or perhaps the next challenge in your chapter fashion show?  Maybe it will even be the first challenge on next season’s Project Runway.

Oh, and for me, if this virus situation continues, I will soon have a mask to match every outfit!

Stay safe, stay healthy and keep on sewing!


~Rosemary Fajgier

Did you enjoy this article?
Are you an ASG member?
This field is for validation purposes and should be left unchanged.

Tagged With: Fabric masks

April 3, 2020

Can Silks be Washed?

One of my college classmates was a very recent immigrant from Korea and she once asked me to help her wash her “dance kimono.” Naturally I was eager as it is “common” knowledge that silks should never be washed. What I learned continues to influence my sewing today.

Her kimono was pieced of over 50 strips (up to 3″ in width) of silks, plus bindings (such as strips edging the collar) in different colors. Because the dyes were not colorfast, she had to take the entire kimono apart and wash every color separately, then press and sew back together with long stitches.

Lesson 1

Wash all fabrics separately until you determine whether the dyes are colorfast (like sweatshirts!).

Lesson 2

Don’t complain if a Western-style garment needs to be pressed after washing ─ doing laundry really could be worse.

The collar area was doubled fabric; it did not have a separate interfacing material and the excess was not secured so kimono collar would wrinkle and bunch up if washed.

Lesson 3

Baste or quilt any intact original kimono collar to wash. If making western style garments, make sure interfacings are secured. If deconstructing kimono to re-purpose fabrics, the collar probably has double the visible fabric.

Obi (belt) is generally the most elaborate part of the costume. It is also very stiff, the purpose is partly like a corset. For a light-weight silk, the stiffness is provided by covering a very dense canvas-like fabric, which is always blocked to retain the original size – unless you don’t plan to reassemble the obi.

Stitch lengths

Lesson 4

Unseen construction materials affect whether silk (or any) garments can be washed, so pre-shrink.

Some silks reveal textures that may not be apparent until wet. These fabrics may have quite subtle matte/shiny differences due to threads that are spun differently and thus shrink at different rates. All of these silks are intended to be blocked when washed.

Lesson 5

If you like texture, enjoy, even if you now have less fabric! Better to adjust plans than to finish and then shrink.

The following are things I’ve learned from deconstructing and re-purposing obi and kimono.

Both obi and kimono fabrics are woven in widths of 10-14 inches, and the garments utilize that to the fullest. The rounded corners of sleeves are left square and not trimmed, with the excess fabrics bunched up in the curved area.

Curved corner on a sleeve

If smaller sizes of kimono are made, seams are made extra wide but not cut off. If extra width is needed an entire extra panel of fabric may be sewn into the side and is not cut or could be half the width, with very wide seam allowances. Extra length will probably be turned up on the inside to replace some of the lining fabric. All of this is to take advantage of taking apart garments to wash, as when re-assembled fabrics can be turned to even out wear or to change the fit/size. No worries if you gain or lose a little weight; alter each time you wash!

Seam allowances

Most of the rolls of fabric were made specifically for either obi or kimono, with pre-planned cutting marks. Bolts of fabric are a new concept. This means that the fancy portions of obi could be in the only area(s) that show, while plain fabric is woven for the rest. Do not assume the entire length is what is seen on the outside.

Some fabrics such as brocades and jacquards may fall apart or unravel if cut. This is not a problem for kimono or obi as the fabrics are nearly always left with selvages intact, with the exception of obviously pieced dance and fancy garments.

INSPIRED? Antique Pattern Library has antique kimono fabric designs and stencils in the “J” and “K” sections.

Lesson 6

Test a small cut before re-purposing kimono or obi; particularly be careful if threads are carried on the back. Also examine carefully to locate any possible embroidery and avoid cutting through that area. Embroidery threads may not be colorfast so know it could possibly bleed when washed, particularly true on ornate garments.

Examine carefully if there are any metallics. If painted/stenciled it could be metallic leaf that is not washable as it will flake off. If the metallic is woven in, test first but the threads are probably washable if of the same weight as the other threads. If the metallic threads are heavier or if embroidered, it is probably NOT washable due to the construction method of heavier metallic threads.

There are several ways to use for garments: (1) kimono are wrapped and tied, so many people can wear as open jackets/vests without altering; (2) side inserts can be added to keep the front area intact: use the bottom of long kimono, sleeves, linings, parts from a second kimono, other fabrics; (3) I’ve taken kimono apart completely and re-sewed into large enough blocks to cut Western-style blouses and jackets.


~Hope Wright, ASG Member, Springfield Lincolnland Chapter

Did you enjoy this article?
Are you an ASG member?
This field is for validation purposes and should be left unchanged.

Tagged With: kimono, sewing tip, silk, texture

March 27, 2020

What’s a Lining to Do? (Part 2)

In Part 2 of this article on linings, we’ll be reviewing Interlining and Underlining and why you might choose each one for your project. (Review Part 1)

While you can find all sorts of various definitions for these terms, for the purpose of this article we will define them as follows:

  • Underlining is cut from the same pattern pieces as the garment fabric. The two are then sewn to one another so the two layers act as one piece, reducing opacity or adding body/stability to the fashion fabric.
  • Interlining refers to material added between the outer fabric and the lining of a garment. You would typically use it to add extra warmth, but it can also ramp up the body or change the drape of a piece.

Underlining

When do you choose it?

Example of underlining a garmentChoose underlining when you want to add body or stability to your fashion fabric or when you fashion fabric is thin and needs more opacity. If an underlined garment is also lined, you have basically moved to interlining instead of underlining. I personally use this technique as a quick and easy replacement to both traditional lining and flat lining. I don’t like the feel of a free hanging lining as I wear a garment. By underlining with Bemberg or China Silk, I get the feel and garment protection of lining without that pesky lining crawl each time I stop at the restroom.

What fabrics work best?

  • Choose a fabric with a similar or lighter hand to the fashion fabric unless you want to change it.
  • If underlining a thin knit fabric or stretch lace, consider using nude swimsuit lining

How does it get constructed?

The construction method for underlining mirrors the information already described for interlining.  The primary difference is that when underlining you seldom trim the underlining fabric out of the seam allowance since it is rarely a bulkier fabric.  Plus, since underlining in the context of this article is not covered with lining, you will want to serge or otherwise finish the seams.

No matter which lining process you use, always remember to pre-treat and press both your fashion fabric and your lining fabric in the manner you plan to launder it after construction to be sure you don’t have shrinkage, especially uneven shrinkage, which would cause distortion in the shape of your garment.

And when hemming your garment, take advantage of the extra fabric layer to hide your hemming stitches in the lining fabric instead of the fashion fabric.

Interlining

When do you choose it?

Choose interlining when you need to add warmth or stability to your garment. This method is in essence a third layer of lining as the garment usually also has a traditional lining that covers the interlining.

What fabrics work best?

  • Add warmth by using Primaloft, Thinsulate, batting, flannel or fleece.
  • Add body and prevent fabric stretch with Silk organza
  • Prevent creasing with light nylon net
  • Add drape with thin fabrics made with acetate fibers
  • Add density with cotton lawn
  • Change shade with light weight cotton lawn in a contrast or darker color

Consider using different interlining fabrics in different parts of a garment. For example, flannel in the jacket front and back, but a batiste or lightweight broadcloth in the sleeves to maintain drape and movement in a silk jacket.

How does it get constructed?

Simply cut the interlining fabric using the same pattern pieces and baste to the wrong side of the fashion fabric or the lining fabric inside the seam allowance then proceed with the construction treating the two fabrics as one. It is advisable to not only baste the outer edges of each pattern piece, but also the center of any darts to prevent them from shifting when sewn.

Tip for basting around corners: When you come to a corner, back stitch and clip your thread. Then start your basting on the next side with a new thread. Continuing around the corners with a single thread can cause distortion and make it harder to remove your basting later.

The decision of whether to attach the interlining to the fashion fabric or the lining depends on the garment type. For a fitted or semi-fitted garment, attach the interlining to the fashion fabric, especially if it needs more body or stability. For a loosely fitted garment, you may prefer to attach the interlining to the lining which will still add the warmth without reducing the fluidity of the fashion fabric.

While the basting can be done with a sewing machine, this sometimes results in a fabric “bubble” due to fabric creep as it travels through the feed dogs. Hand basting will often be more effective in achieving a truly flat alignment of the two fabrics. You may find it helpful to pin the pieces together not only along the edge but also down the center and along the darts. And it is important to baste these together while lying on a flat surface, not holding them in your lap. These tips can help prevent distortion and a potential “bubble” effect in either the fashion fabric or the lining.

Once your basting is complete, give the pieces a good press with plenty of steam to assure they are joined nice and smooth without bubbling. If you find any bubbling, now is the time to remove some basting stitches and correct it before you move forward with the construction process.

Trim interlining seam allowance close to the stitching line to reduce bulk. Depending on the garment and the interlining fabric; you may also want to trim the interlining away from facings and hems as well.

Enjoy your newly lined garment!


~Sheryl Belson

Did you enjoy this article?
Are you an ASG member?
This field is for validation purposes and should be left unchanged.

Tagged With: garment construction, interlining, lining, sewing, underlining

  • « Previous Page
  • 1
  • …
  • 60
  • 61
  • 62
  • 63
  • 64
  • …
  • 83
  • Next Page »

Become a Member

Join the only national organization dedicated to Advancing Sewing as an Art and Life Skill.

Join Now button

Blog Article Categories

  • ASG Conference
  • Chapter Stories
  • Embroidery
  • Fitting
  • Learn to Sew
  • National Sewing Month
  • Products, Books, & Patterns
  • Projects
  • Quilting
  • Sewing
  • Sewing Techniques
  • Sewing Tips
  • Sewing Tours
  • Videos
  • Disclaimer
  • Privacy Policy

American Sewing Guild
National Headquarters
9660 Hillcroft, Suite 230
Houston TX 77096
713-729-3000 | 713-721-9230 Fax
www.ASG.org

ASG wordcloud - education, conference, discounts, videos, special offers, tours and more

Copyright © 1998–2025 · American Sewing Guild · All Rights Reserved