American Sewing Guild (ASG)

Visit our blog Visit the ASG Facebook page Visit ASG on Pinterest Visit ASG's YouTube channel Visit ASG on Instagram
  • Home
  • Join ASG
    • Join Online
    • Chapter Locations
    • Member Benefits
    • Member Brochure
    • Join by Mail
  • Conference & Education
  • Resources
    • Contests & Awards
    • Giving Back
    • Hall of Fame
    • Links
    • Travel and Tours
    • Measurement Chart
  • Shop
    • ASG Store
    • Chapter Products
    • Video Resources
  • Blog
  • About
    • About Us
    • Donate to ASG
    • ASG Sensitivity Statement
    • FAQ’s
    • Start a Chapter
  • Contact
  • Member Login
    • Login First!
    • Members Only
    • Leadership Only
    • Website FAQ’s
    • Logout
  •  

July 12, 2019

Sewing Enthusiasts are “Sew” into the Cricut!

It’s likely that you’ve spotted a Cricut machine while browsing your local fabric and craft store. At first glance, it’s difficult to figure out what the Cricut actually does, and even more difficult to figure out how it can help you with your sewing projects. But many sewing enthusiasts are calling the Cricut a must-have for their sewing rooms. Why?

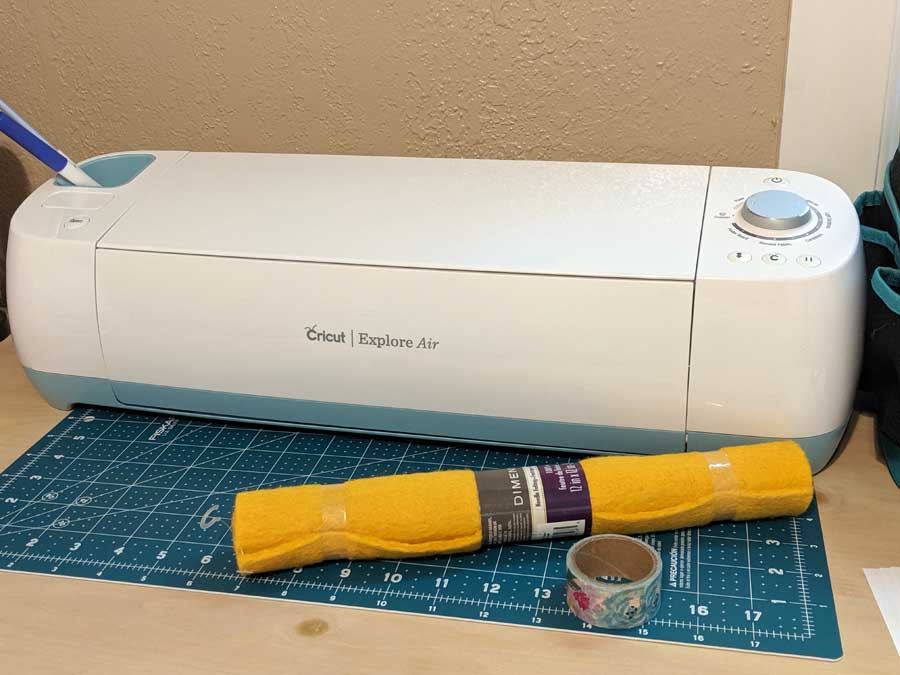
It’s important to note that there are several Cricut models. The current models are the Cricut Explore One, Cricut Explore Air, Cricut Explore Air 2, and the Cricut Maker. The Cricut Explore One is the most simplistic of the machines, with the most limited abilities. The Cricut Maker is the most advanced machine available.

At their core, Cricut machines are die-cutting machines, often used for scrapbooking and paper projects. But Cricut has taken the idea of a die-cutting machine and adapted it to work for a variety of handicrafts. With the Cricut, you can cut, score, draw and write using top-quality Cricut tools that are easy to switch out between projects. The Cricut Maker can cut paper, vinyl, leather, faux leather, fabric, cardstock, poster board, aluminum, canvas, cork, denim, felt, washi tape, wrapping paper, and much more. (Note: Be sure to check what materials your machine can cut based on the model you purchase.)


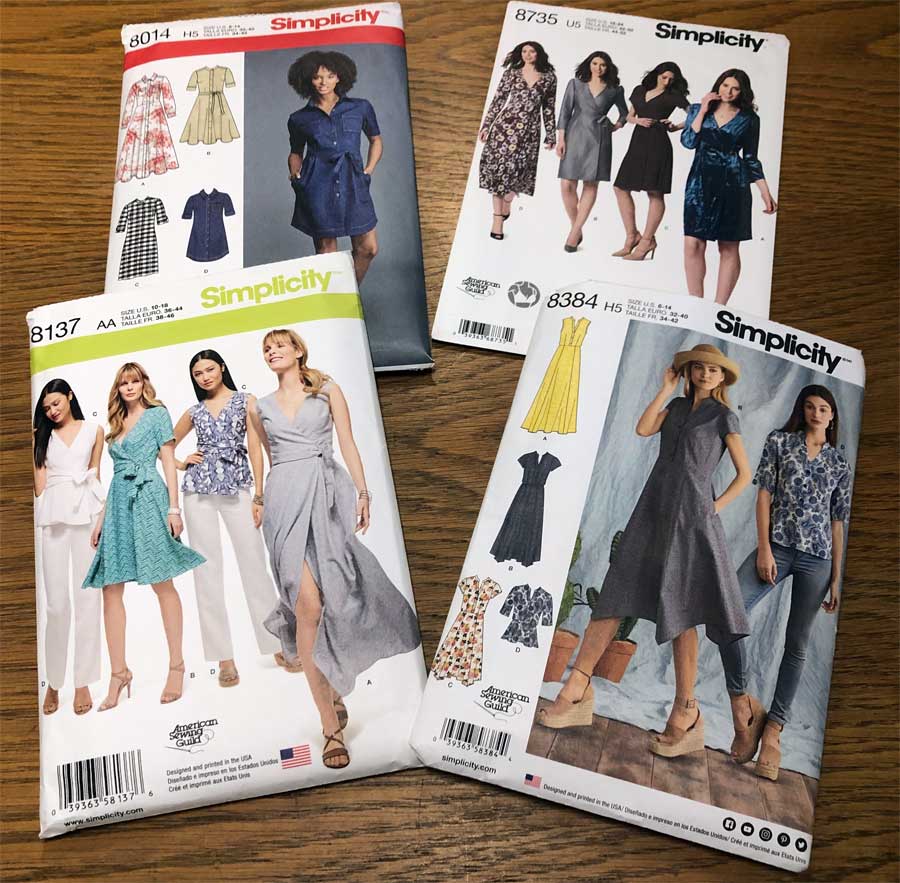
Cricut has also teamed up with Simplicity to offer hundreds of patterns for small sewing projects through Cricut’s digital design program, Design Space!

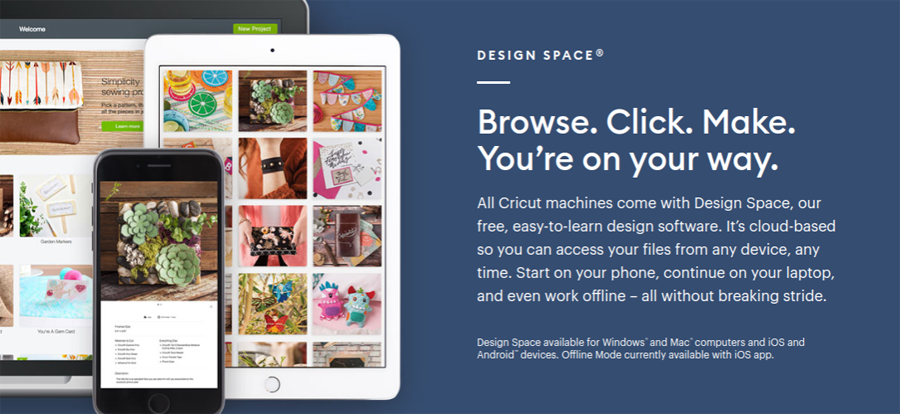
The Design Space program is downloaded to your computer and you plug your Cricut into your computer as well. To start a project, simply open the program, choose the project you want to work on, and follow Cricut’s simple step-by-step directions. You can also upload your own patterns to Design Space to complete custom projects.

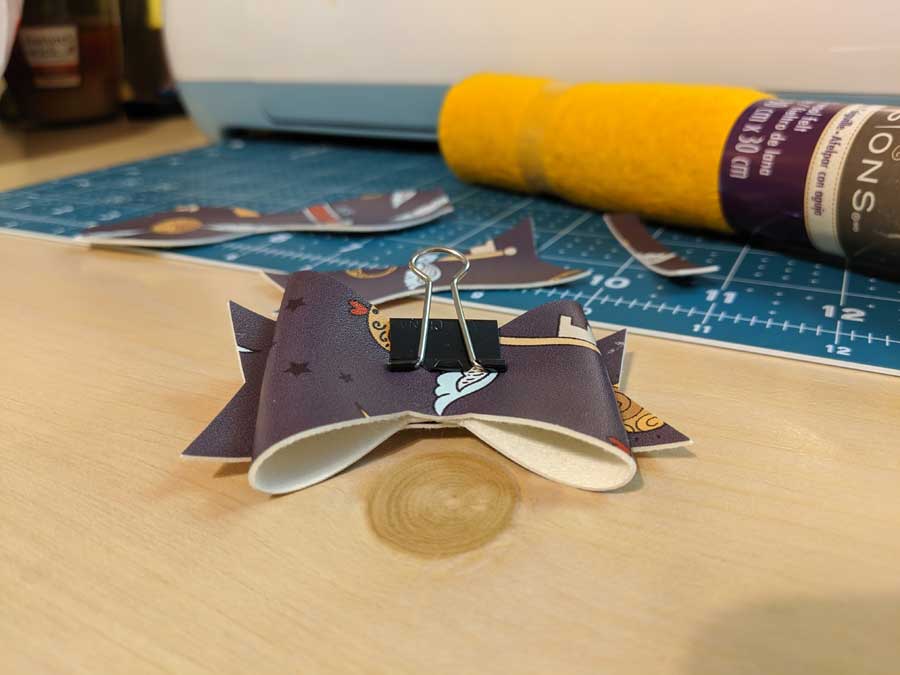
The standard Cricut cutting mat is 12” x 12”, and you can purchase a cutting mat up to 24” x 12”. Because of this, you are limited to the size of fabric you can cut, which is why the Cricut works best on small projects like baby or doll clothing, clutches, stuffed animals, ornaments, etc.

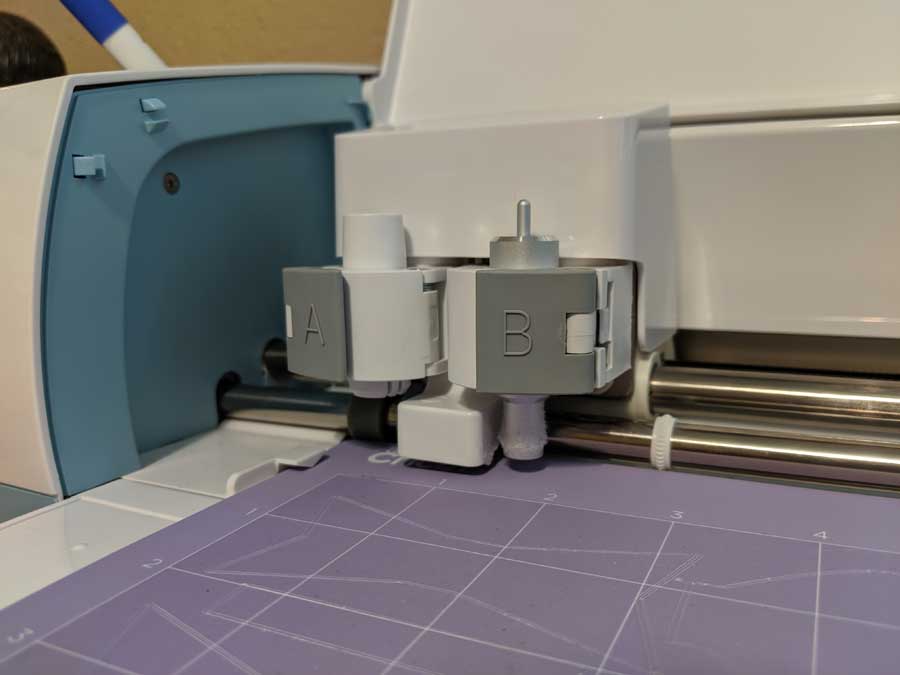
Design Space allows you to upload or use a pattern that aligns perfectly with the Cricut cutting mat, which is how the machine is able to cut so precisely. Once you’ve completed your design and installed the proper tool, like a cutting knife or rotary blade, all you have to do is place your fabric on the sticky cutting mat, enter it into the machine and push a few buttons. Forget all of the hand measuring and cutting, Cricut does the work for you!

Cricut is constantly offering new tools and projects for users. They partnered with Riley Blake designs to offer quilt patterns and offer a variety of free and paid fabric projects on their own. They even have their own line of designer fabrics that are pre-cut to the size of their mats! But whatever you have in your stockpile will work just fine.

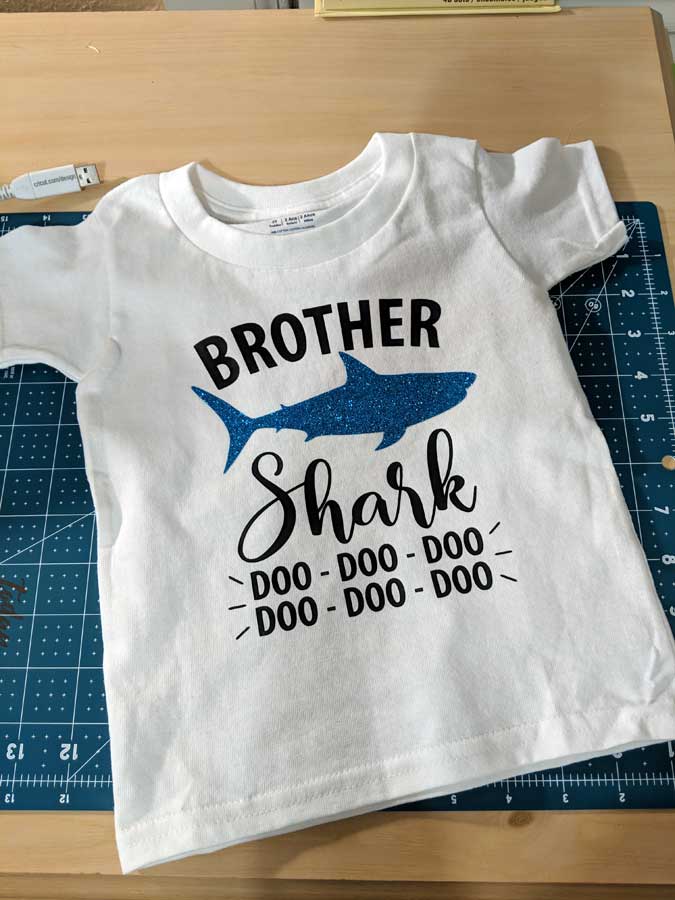
Not only can you cut fabric to make your sewing projects simpler, but you can use the Cricut to truly customize your projects with iron-on vinyl.

  • As an example, maybe you’ve just completed a pair of baby overalls as a gift. You used your Cricut maker to cut the denim and sewed the project to perfection. But you’d really like to make the project unique by adding the baby’s name to the front of the bibs. You can head back to your computer and open up Design Space, type the baby’s name, choosing your favorite font and sizing it to fit the project, and cut out your design on iron-on vinyl. Then, you simply have to iron on the decal you’ve made for the perfect final touch.

If you’re looking for a new tool to customize your sewing projects, you may just want to add a Cricut Maker to your sewing wishlist. With an ever-expanding library of tools, projects, resources, and products, more sewists are jumping on the Cricut bandwagon! Will you be one of them?

July 6, 2019

ASG Conference 2020 – the big reveal!

The American Sewing Guild annual conference is heading to San Antonio in 2020. Mark your calendar for July 9-12 and join us for our annual sewing get together!


Location of ASG Conference 2020


Riverwalk and Alamo images from https://www.visitsanantonio.com/


July 5, 2019

Travel Iron Caddy

Travel Iron CaddyWhether you are packing supplies to take to ASG Conference, or heading to a chapter stitching event, this caddy is the perfect way to safely and easily take your travel iron with you. I made the caddy to fit my Sun Beam Compact Travel Iron model #GCSBT-100, but there are similar size models by Dritz, Rowenta, and other Iron makers.  It also fits nicely in my sewing machine caddy along with my 9”x 12” Omnigrid combination cutting and pressing board.

Materials

  • 24” x 11” body fabric
  • 3” x 11”   body fabric for handle strap
  • 24” x 11” lining fabric
  • 24” x 11” Insul Brite fabric (insulated to protect from heat)
  • 7”  ¾” Hook & Loop Velcro
  • 3” piece of Wonder Under
  • Quilter Ruler with 45 degree angle marking

Legend

  • RS = right side of fabric
  • WS = wrong side of fabric

Instructions

Strap: Fold 3” x 11” strip of fabric in half lengthwise WS together and press. Open and press both long edges in, ½” to WS then fold again 1” to WS overlapping, giving you a 1” wide strap.  Now stitch lengthwise to reinforce the strap along both edges and up the middle.  Set strap aside for next step.

Body of Bag: Layer Insul Brite, lining fabric RS up and then body fabric WS up. Insul Brite will be your bottom layer against the needle plate when you sew. Pin layers together around the inside of the rectangle to hold the layers together. Place long top edge of the strap to RS of body fabric layer 3 ½” down from top edge, double check your fabrics if using a one way directional fabric for your body fabric to make sure the direction of your strap and body are going the same way (Image 1). Stitch around all four edges using a 3/8” seam allowance but leaving a 3’ opening for turning on the bottom edge. Run an extra row of stitching over the strap edges to reinforce (Image 2).

Before turning, clip off the corners outside the corner stitching to allow for less bulk at the corners, be careful not to clip your stitches (Image 3). Turn and press, using a piece of Wonder Under to close the opening.

Iron Caddy 3
Image 3
« ‹ 3 of 3 › »


Travel Iron Caddy

Closure: With panel facing RS up, place hook side of Velcro centered at bottom, ¼” up from edge and stitch in place. Leave at least ¾” on each end to accommodate your side seams, trim Velcro if necessary. Lining side up, place the loop Velcro at the top and stitch in place ¼” from top edge, lining up with the bottom edge placement.

With WS together, fold bottom edge up to 5” below top edge and stitch both side seams using ¼” seam allowance or as small as possible, back stitching at top edge to reinforce. (Image 4)

Turn the bag inside out and box the bottom seams. To box the bottom, use a quilter ruler with a 45 degree angle guide. Pin across bottom of the angle on both edges to create the boxed bottom and sew along pinned edges. (Image 5) Turn RS out.

This little iron caddy, with it’s bucket shape, will hold my iron and a few other small items. It also fits into the open space of my machine for travel.


~Carolyn Meyers,  ASG Member, Bucks County Chapter

June 28, 2019

Zip It Up

Zippers have a bad rap as being difficult to work with; however, they are simple to insert when stitched correctly with the proper feet. I recommend using the All-Purpose Foot and the Edge Stitching Foot. You’ll marvel at the ease of inserting zippers in pockets, pillows, handbags and garments when using the right tool. Consider letting a zipper make a statement on your next project by using decorative zippers. The opportunities are endless and the results so much fun. Whether for garments or bags, you can insert zippers trouble free, the easy way.

Ghee's zippers

Did you know that zippers were originally designed for closure on boots? As time progressed zippers were added to garments for closure instead of the traditional buttons. Today, zippers can be seen everywhere, not only garments, but shoes, luggage, sports and outdoor products like tents, sleeping bags, home décor, jewelry, trims and the list goes on and on. The sky is the limit.

Zippers are available in many configurations

  • They may be purchased by the yard or in a roll, closed end (C/E), open end or separating (O/E) to name a few.
  • The sliders may have several different options as well — locking, 2-way open-end/separating, double slide, and reversible.
  • They are available in metal, nylon coil, molded plastic teeth and rhinestone.
  • They are also available in a variety of sizes
    • #3 is the tradition size used for a dress, skirt or pants. The coil is approximately ⅛” or 4mm.
    • #5 is a size used in jackets or outer wear. The coil or teeth (chain) are approximately ¼” or 6mm.
  • The size of the chain may be larger for luggage and other sports related products, or smaller for children’s wear, dolls and such.

Of course, much of this has changed, nowadays, with zippers being used in a variety of ways other than the traditional.

My Favorite Zippers

My favorite zippers are #3 coil for inside pockets of handbags or small bags, and #5 for handbag closure, jackets and coats. I particularly love the nylon coil, plastics and rhinestone zippers. In general, I shy away from metal zippers because of the weight, tendency to pull or snag soft fabrics, and possibility to break needles if not properly applied.

Size it Right

Did you know you can shorten a zipper — very carefully, of course — by cutting it? Make sure to purchase the right zipper for your needs though. A separating zipper must be purchased as a separating zipper and can only shortening from the top.  A closed end zipper can never be made into a separating zipper as the home sewer does not have the equipment to add the retainer box and insertion pin to a zipper.

Inserting a Zipper

Now that some of the basics are out of the way, this is my favorite way to insert a zipper when the teeth or coil are exposed. It is by no means the only way to insert a zipper, but it is a basic way that I consistently use in my projects. It is also the beginning way of several zipper insertion techniques that I use.

  1. Align the cut edge of the fabric with the edge of the zipper tape so that the right sides are facing each other (right sides together). The zipper stop and zipper slider may extend from each end for easier insertion. Place the needle to the far left position. Stitch the length of the zipper with the All-Purpose Foot leaning against the zipper coil.
  2. Fold the fabric over to expose the zipper coil. Position the Edge-stitching, Edge Joining or Ditch Quilting Foot with the bar between the zipper coil and the fold of the fabric. Move the needle position slightly left of the fold and stitch across.
  3. Repeat this process on the other side of the zipper.
  4. Option: When using a decorative zipper tape, apply these instructions in reverse. In other words, begin Step 1 with the wrong sides together so that when the zipper tape is folded back the tape is exposed.

Discount ahead! Continue reading for a limited time discount on Zippers at www.Ghees.com


Extra Zipper Tips

  • Ghee'sUse decorative or specialty zippers to enhance the design of the garment or bag.
  • For special effects, create your own look. Choose two zippers in coordinating colors. Unzip them and swap the colors. Zippers must be of the same style, size of teeth and slider for this design idea to work.
  • Many times, the zipper pull is in the way of accurate stitching. To maintain a straight stitching line, stop before reaching the zipper pull, leaving the needle in the down position. Lift the presser foot, unzip the zipper a few inches and stitch past the bulky area.
  • It is much easier to work with zippers that are too long and trim the excess off. Always be certain the slider is included in the project before trimming the excess tape. Refer to how to “Fix a Zipper.”
  • Because of the bulk in many project, use a Jeans Needle to avoid breaking the needle. Be extremely careful while stitching over bulky areas. Stitch slowly.
  • To avoid melting the zipper coil on polyester, nylon, or plastic zippers, or scratching the iron with metal zippers, do not press the zipper chain. Use a medium to cool iron setting when pressing around the zipper area of a project.
  • Use the sewing machine foot that makes the task easier. The Edge Joining Foot, or Ditch Quilting Foot, a foot with a guiding bar in the center of the foot, provides perfect alignment of stitches from the edge of the zipper tape or stitching the binding.

How to Fix a Zipper

It is very easy to “fix a zipper” or add a slider to yardage. Place the slider on one side of the zipper teeth (chain) and hold with your thumb and finger. Place the other side of the zipper teeth into the slider and give it a little tug. You will feel the teeth catch in the slider. Pull the slider to close the zipper. Be sure to stitch over each end of the zipper to protect. The same instruction works with the coil type zippers.

Step 1
How to Fix a Zipper - Step 1
« ‹ 1 of 3 › »

Decorating with Zippers

Ghee's - Heart ZipperThough zippers were designed for function, they can certainly be used for decoration. This 8” rhinestone zipper was stitch on the back shoulder of a vest. Baste along each edge of the zipper tape leaving thread tails at the beginning and end. Open the zipper. Gather the thread to form the heart shape. Miter the ends of the zipper tape to match the shape of the heart. Use a small zigzag stitch to hold the zipper heart shape on the base fabric.

Cut zippers or zipper yardage to create fantasy flowers. Use glue or hand stitching to hold the shape. Glue is easier!

Ghee's - pink zipper braceletMake a bracelet with zippers or yardage. One 18” zipper will make 2 bracelets. Simply use an awl to remove the stop or cut the stop off. Pull the zipper chain apart. Overlap the tape and stitch using an open type decorative stitch to hold the tape together. Add snaps or rhinestones to embellish. Use embroidery stitches to hold the zipper tape together.

Use zippers or zipper yardage instead of corded piping. This photo shows the beginning and ending when a seam allowance is not available to hide the ends. It may be necessary to trim or clip the tape when curves are part of the project as the zipper tape does not have any give. I like to use the Piping Wizard to trim evenly and accurately. This is nylon coil zipper that looks like metal.

Discount

Enjoy a 30% discount on everything in the Zipper category of www.Ghees.com through midnight on July 13, 2019 using code zipit30asgj. After that date, ASG members can log in to the Members Only area for a discount code for 15% off all non-sale items in the Ghee’s store. Discounts cannot be combined.


~Linda McGehee, Ghees

© Copyright 2019 Ghee’s all rights reserved
Ghee’s
PO Box 4424
Shreveport LA 71134
www.ghees.com

June 26, 2019

Join Threads Magazine in Sewing for ASG Conference

Sarah and Erica from Threads Magazine
Sarah, left, and Erica, from the Threads staff, are sewing Simplicity ASG pattern designs for Wear Your ASG Patterns Day at conference. Sarah’s muslin is in yellow rip stop nylon, a stash orphan, if you were wondering.

The American Sewing Guild’s annual conference is always a blast. Every time I attend, I enjoy classes, shopping, the fashion show, the keynote address, and all the sewing camaraderie.

ASG Conference is August 1 through 4, 2019, in the greater Boston area, and the Threads team is raring to go!

We recently started a group project especially for conference: Sewing garments from Simplicity ASG patterns for Wear Your ASG Pattern Day on August 1. To share our progress, and encourage you to sew some of these great patterns too, we’re presenting a monthly Facebook Live posts at Facebook.com/ThreadsMagazine. Tune in to watch our exploits, help us with fabric choices, and keep us on track!

The Patterns

  • Erica is sewing Simplicity ASG 8137, views C and D. What a cute top and pants.
  • Jeannine is sewing Simplicity ASG 8384. She’s making dress view A, with the sleeves from view B.
  • Carol is making up Simplicity ASG 8014, view B, with the collar from view A. She has a head start because she previously sewed a version for a Threads article,” Embellishments: Rickrack Weaving,” by Loretta Kostyk in #196.
  • Christine is sewing Simplicity ASG 8637, a wrap dress with a graceful curved hem. She’s sewing view A, and I can’t wait to see the results in the gorgeous crepe fashion fabric she chose.
  • I’m sewing Simplicity ASG 8735, a wrap dress with a pattern feature I find saves me time: separate pattern pieces for different bust cup sizes.  I haven’t decided on a view yet, but I made my muslin in view C.

Facebook Live Sessions

  • May 31st, 2019:  In our first Threads Live session, we shared our pattern selections and fabric options. Watch the session on our Facebook videos page, Threads Live.
  • June 28, 2019, 11am (Eastern): On Friday, June 28 at 11 a.m. (Eastern), we’re going to talk about muslins and fitting adjustments. We did some preliminary work on muslin-fitting. Erica and Jeannine both needed circumference adjustments, while I needed some length taken out of the back of my muslin. We’ll share more details in the Threads Live session.
  • July 26, 2019, 11am (Eastern): On July 26, we plan to have our finished garments completed to share on Facebook.

Preliminary Fitting

EricaErica’s top muslin was too large in circumference (left). Pinning along the side seams made a difference, but there’s more fitting to be done around the armscye and shoulders (right).
SarahNotice the horizontal crinkling at the back waistline in Sarah’s muslin (left). Pinning out a wedge across the back waistline alleviated that fitting problem (right).


Hope you’ll tune in to Threads Live—and join us in sewing for ASG conference. Cheers!


~ Sarah McFarland, Editor, Threads magazine

Tagged With: ASG Conference, sewing, Threads

  • « Previous Page
  • 1
  • …
  • 69
  • 70
  • 71
  • 72
  • 73
  • …
  • 82
  • Next Page »

Become a Member

Join the only national organization dedicated to Advancing Sewing as an Art and Life Skill.

Join Now button

Blog Article Categories

  • ASG Conference
  • Chapter Stories
  • Embroidery
  • Fitting
  • Learn to Sew
  • National Sewing Month
  • Products, Books, & Patterns
  • Projects
  • Quilting
  • Sewing
  • Sewing Techniques
  • Sewing Tips
  • Sewing Tours
  • Videos
  • Disclaimer
  • Privacy Policy

American Sewing Guild
National Headquarters
9660 Hillcroft, Suite 230
Houston TX 77096
713-729-3000 | 713-721-9230 Fax
www.ASG.org

ASG wordcloud - education, conference, discounts, videos, special offers, tours and more

Copyright © 1998–2025 · American Sewing Guild · All Rights Reserved