


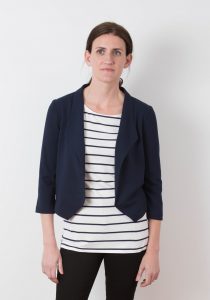
A few years ago, I adapted my knit Grainline Studio Morris blazer pattern so I could make it with some luscious silk matka. I knew I had to adjust the pattern since my fabric of choice had absolutely no stretch in it. I decided to take a tried-and-true (TNT) pattern designed for a woven fabric and “frankenpattern” the knit blazer into a woven blazer. I took some of the pattern pieces from the Archer Buttonup pattern (also designed by Grainline) and came up with new cutting lines for the Morris. I used the Archer upper back, arm scythe, and upper sleeve to redraft the blazer pattern and was just sure I had made all the pattern adjustments to shift from a zero-ease design that works with the stretch of a knit to a design that would work with a non-stretch woven. I finished the blazer and couldn’t wait to put it on only to discover it was a bit too tight across the upper back. I hadn’t added enough EASE! I know I am not the only person who has experienced this.
Can We Put Your Mind at Ease?
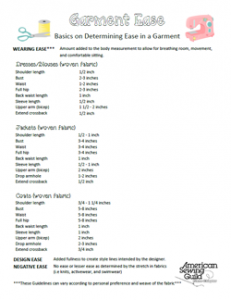 We’d like to put your mind at ease with some information and a free garment ease template created by members of the Plano, TX chapter that shows the minimum amount of ease you’ll need to add in your garment for a comfortable fit. Identifying the correct amount to include is vital to avoid an outcome like the one in my blazer story. We hope this ease cheat-sheet helps you!
What is ease?
In its simplest form, ease is the additional room in a garment in excess of the actual body measurement. There is much more to ease than this simple definition though — there is wearing ease, design ease and negative ease. Each of these impacts the finished measurement of a garment in different ways.
- Wearing ease provides ease of movement. It is the difference between the actual body measurement and the finished garment measurement. The template will help you understand this kind of ease. It gives you guidelines that will help you be sure you have at least enough room in your garment for comfortable movement as you wear it.
- Design ease provides the style. It is also referred to as style ease or fashion ease. It is additional ease added beyond what is needed for movement to create specific styles ranging from close fitting to very loose-fitting garments. It also comes into play when the design of the garment includes things like pleats, gathers, or tucks.
- Negative ease is associated with fabrics that stretch (such as knits or woven fabrics with lycra added) or are cut on the bias, producing a certain degree of stretch. In this case, the finished garment measures the same as the actual body measurements, or more often, even smaller. The degree of stretch produced in each fabric plays a big role in how much negative ease a garment will need for good fit. Negative ease is used in garments like activewear and swimwear.
How do I calculate the right amount of wearing ease?
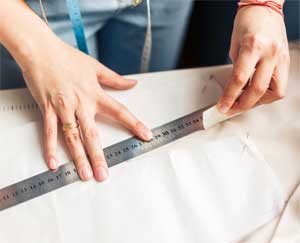
When choosing the size you will make in a pattern, look not only at the body measurements, but also the finished garment measurements. Many patterns will include this information for at least the 3 primary measurements – bust, waist and hips. If your pattern does not include this information on the pattern, you can calculate it yourself by simply measuring the pattern pieces in those locations and removing the amount included for seam allowances. Compare the finished garment size to your personal body measurements to be sure you will have a comfortable fit before you start cutting.
More about Negative Ease
 As already stated, negative ease simply means that your finished garment measurements will be the same or smaller than your actual body measurements. When sewing with knits or stretch woven fabrics, the same accommodation for wearing ease is not required since the fabric will stretch as the body moves. Just because your finished garment is smaller than your actual body measurement doesn’t mean you won’t be able to get it over your head. The more negative ease you incorporate just means you will get a more fitted look in the final garment. In most cases, you will probably target no more than 1”-3” negative ease in your design. More than that and you may wander into that “Incredible Hulk” look that has people wondering if you will burst through the seams at any moment.
Of course, the percentage of stretch in your fabric choice and whether it has 2-way or multi-directional stretch play a huge role in determining the right amount of negative ease. The higher the percentage of stretch built into the fabric you have chosen for your project, the higher the percentage of negative ease you are likely to need in your pattern.
There are lots of “rules” out there for how to calculate the right amount of negative ease for a given fabric, but here is a good starting point:
- Cut a 6”x3” piece of fabric.
- Stretch the fabric to its comfortable maximum length.
- Calculate the percentage of stretch
- Addition stretch length/original length = percentage of stretch
- Examples:
- If the 6” piece stretches to 9”, the fabric has 50% stretch.
- If the 6” piece stretches to 7”, the fabric has 15% stretch
- For a comfortable fit, try starting with the same amount of negative ease at the percentage of stretch in your fabric, up to but not exceeding that 1”-3” guideline mentioned earlier.
- Thinner fabrics do best with less negative ease to avoid a see-through effect. Thicker fabrics can handle more negative ease and give a more acceptable form-fitting look.
Remember, these are starting point rules and you will develop your own that best fit your own personal taste and adapt with each fabric you choose to work with.
Don’t forget Design Ease
With all this talk about negative ease, let’s not leave this discussion without going back to the concept of design ease. Even with stretch fabrics, design ease has a role to play. It is perfectly acceptable to decide to add design ease into a garment made with a very stretchy fabric. It will take your garment from form-fitting to soft, graceful drape and still have a beautiful look. You are the designer and you are in charge!
Now it’s you turn!
We hope this gets you started on your journey of understanding ease and fit. This is a topic often discussed in ASG monthly group meetings around the country. Many groups focus on this kind of topic frequently and would love to meet you. Talk to someone in your local chapter to find out what is happening there. ASG loves to walk alongside fellow sewing friends in their sewing journey!
~Debby Bowles and Sheryl Belson, ASG Plano Chapter

 She continued, “One of my responsibilities as the extension agent was to teach adult sewing classes to rural women. I met lots of people and with my parka on, came many requests to make them for people. I had learned also how to make moccasins/mukluks from some of the Native American ladies I had worked with. So in my spare time I started making parkas and matching mukluks for a never ending line up of customers. I charged them $100 which seemed pretty good at the time! I realized quite quickly that the demand would never end, so I decided to teach people how to do it themselves. That was the start of my business!”
 Today Linda describes herself as “sort of retired” and only does “private gigs.” She has stopped doing major sewing shows, but loves doing her own version of fashion shows using local women as models for her garments. She spends her winter months in Mesa, Arizona and finds fun in doing smaller gigs for the multitude of retirement parks within driving distance. You can check out Linda’s patterns at her website at
 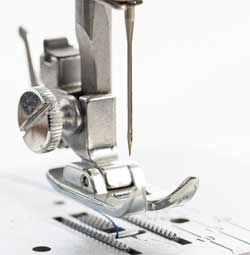 The needle you use in your sewing machine can make the difference between perfection and a disaster. Use the wrong needle, a damaged needle or a worn needle and you could end up with broken threads, holes, uneven stitches, puckers and possibly even permanently damaged fabric. To keep your seams straight and your collars curvy, there are several points to successful stitching.
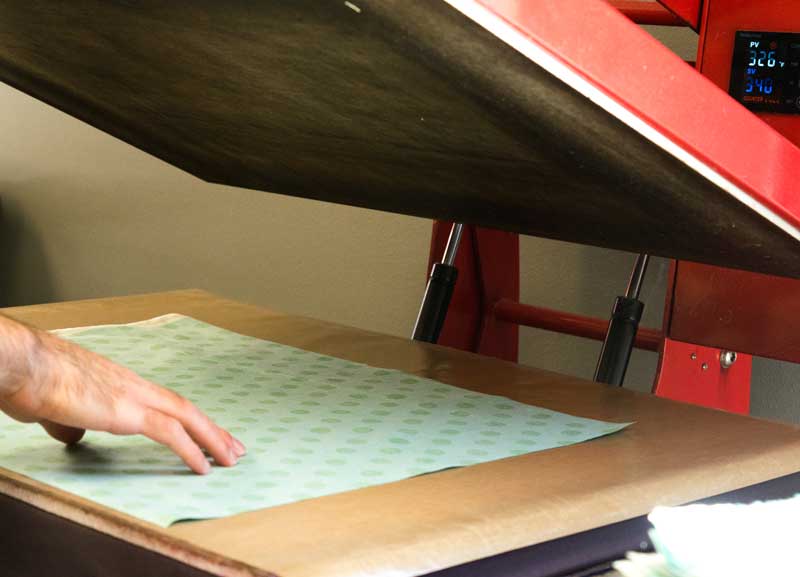

 Different types/brands of interfacings require different fusing techniques, so be sure to read the label. Some require steam, others dry heat, while still others specify a damp press cloth. Note the fusing time and iron temperature for proper adherence.