American Sewing Guild (ASG)

Visit our blog Visit the ASG Facebook page Visit ASG on Pinterest Visit ASG's YouTube channel Visit ASG on Instagram
  • Home
  • Join ASG
    • Join Online
    • Chapter Locations
    • Member Benefits
    • Member Brochure
    • Join by Mail
  • Conference & Education
  • Resources
    • Contests & Awards
    • Giving Back
    • Hall of Fame
    • Links
    • Travel and Tours
    • Measurement Chart
  • Shop
    • ASG Store
    • Chapter Products
    • Video Resources
  • Blog
  • About
    • About Us
    • Donate to ASG
    • ASG Sensitivity Statement
    • FAQ’s
    • Start a Chapter
  • Contact
  • Member Login
    • Login First!
    • Members Only
    • Leadership Only
    • Website FAQ’s
    • Logout
  •  

June 9, 2023

Denim Refresh

Denim is quite possibly the most loved fabric, not only in America, but around the world. Its soft blue, flexible nature is a comfort to daily routines for many…think of your beloved jeans, or that just-warm-enough, wear-everywhere jeans jacket.

Denim jacket
Photo courtesy of Treasured Threadz™, amybarickman.com

But there comes a time when that beloved denim shows signs of wear and tear. It can be a sad day, or it can be a day of new opportunities. For creative sewers, it’s mostly the latter.

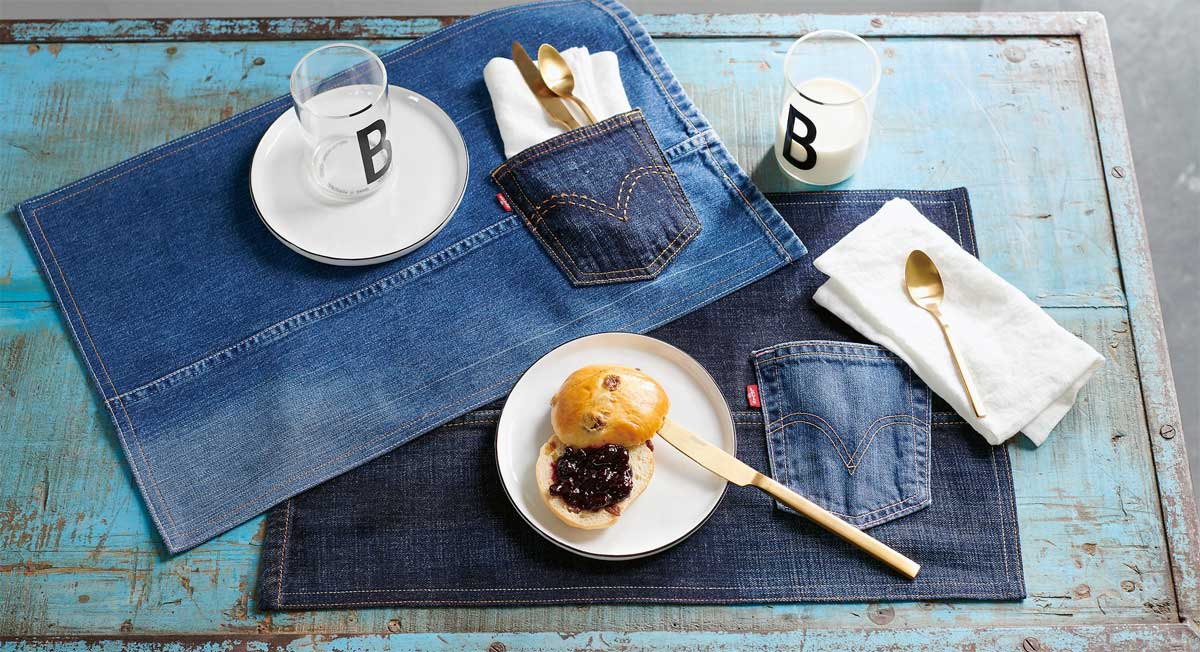
Most parts of denim garments can be salvaged and repurposed. Whether you use those expertly topstitched fly closures for bags, those embroidered or bejeweled pockets for something new, or small parts like labels and belt loops for new embellishments, worn denim can have a new and longer life.
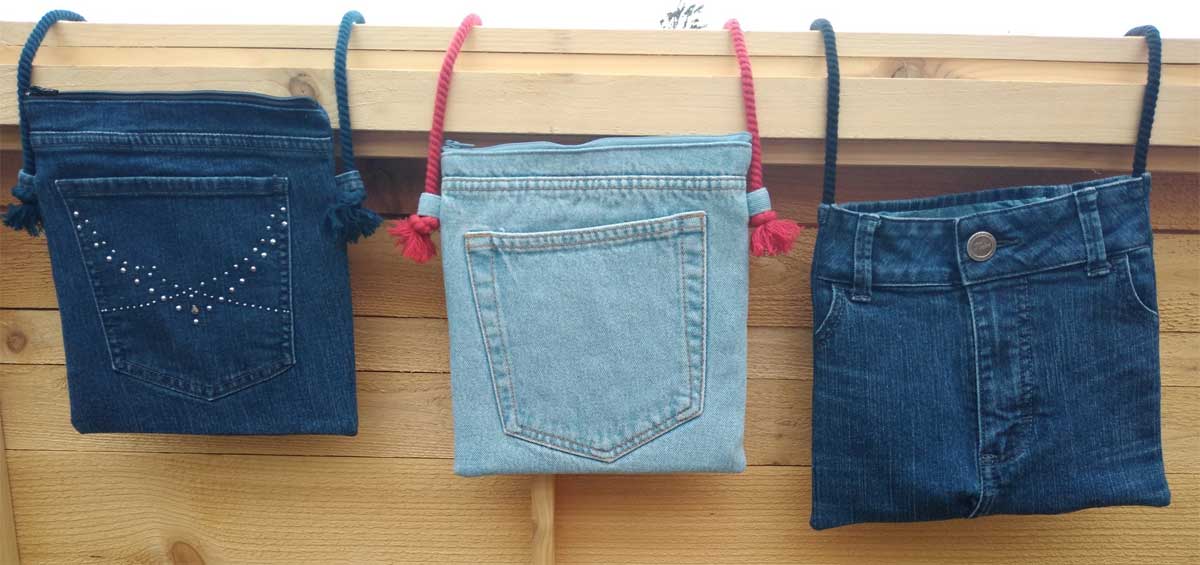
Repurposed jeans made into bags


Pocket Picks

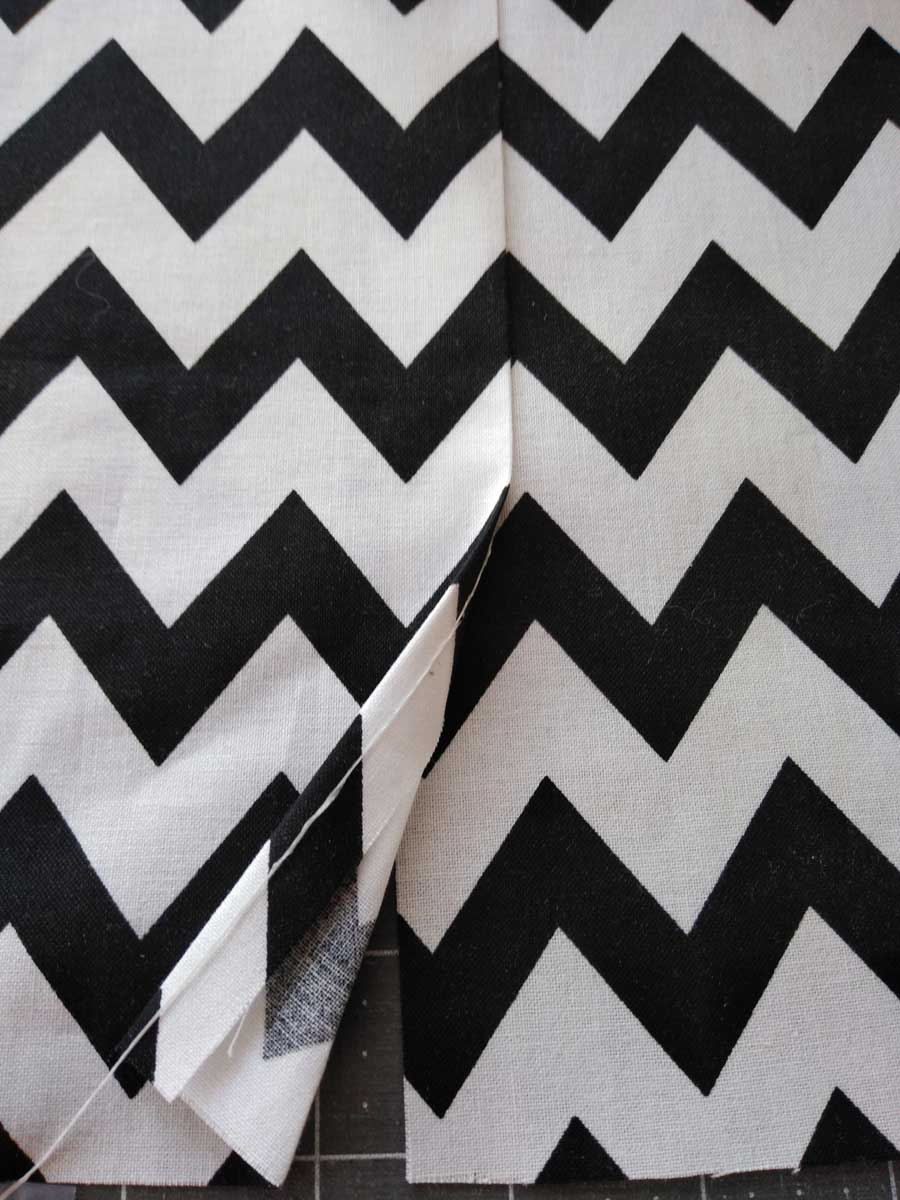
If you want to keep the bold stitching that attaches the pocket to the jeans, use your sharp scissors and carefully cut the chosen back pocket from the jeans just barely outside the perimeter stitching, cutting as close as possible to the stitching without damaging it or the pocket’s folded edges. From the wrong side, trim the backing fabric behind the pocket, also close to the perimeter stitching so that it’s not part of your new use. Voila—a new pocket for your new project!

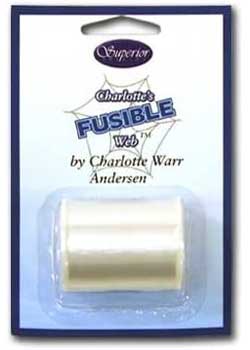
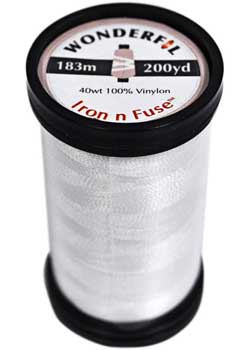
An easy way to utilize the trimmed pocket is to put narrow strips of fusible web behind the sides and bottom edges, then fuse in place on the new project. Use matching thread and stitch as close to the pocket’s folded edges as possible, backstitching at the top edges for added security.

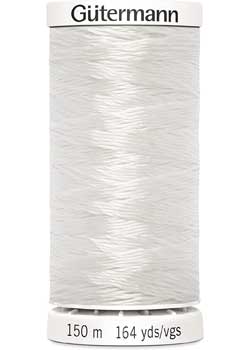
For an almost invisible stitching, look for denim thread, a twisted combination of two navy blue colored strands that matches the denim coloration. Or for feature stitching, choose a bold gold jeans or topstitching weight thread and elongate the stitch length to match the original jeans stitches.

Opening Up

One of the easiest ways to disassemble a pair of jeans is to open the inseam, assuming it’s not a flat-felled seam. Opening up this seam will allow for the most usable fabric without piecing as the legs can then open flat. If you open carefully, the original hem can stay in place, perhaps making it usable for your new item.

If you’re making a pieced project, the flat fabric makes it easy to cut your new piecing sizes, and you can incorporate the center flat-felled seam in the new plan since it’s already stitched.

Photo courtesy of Bernina

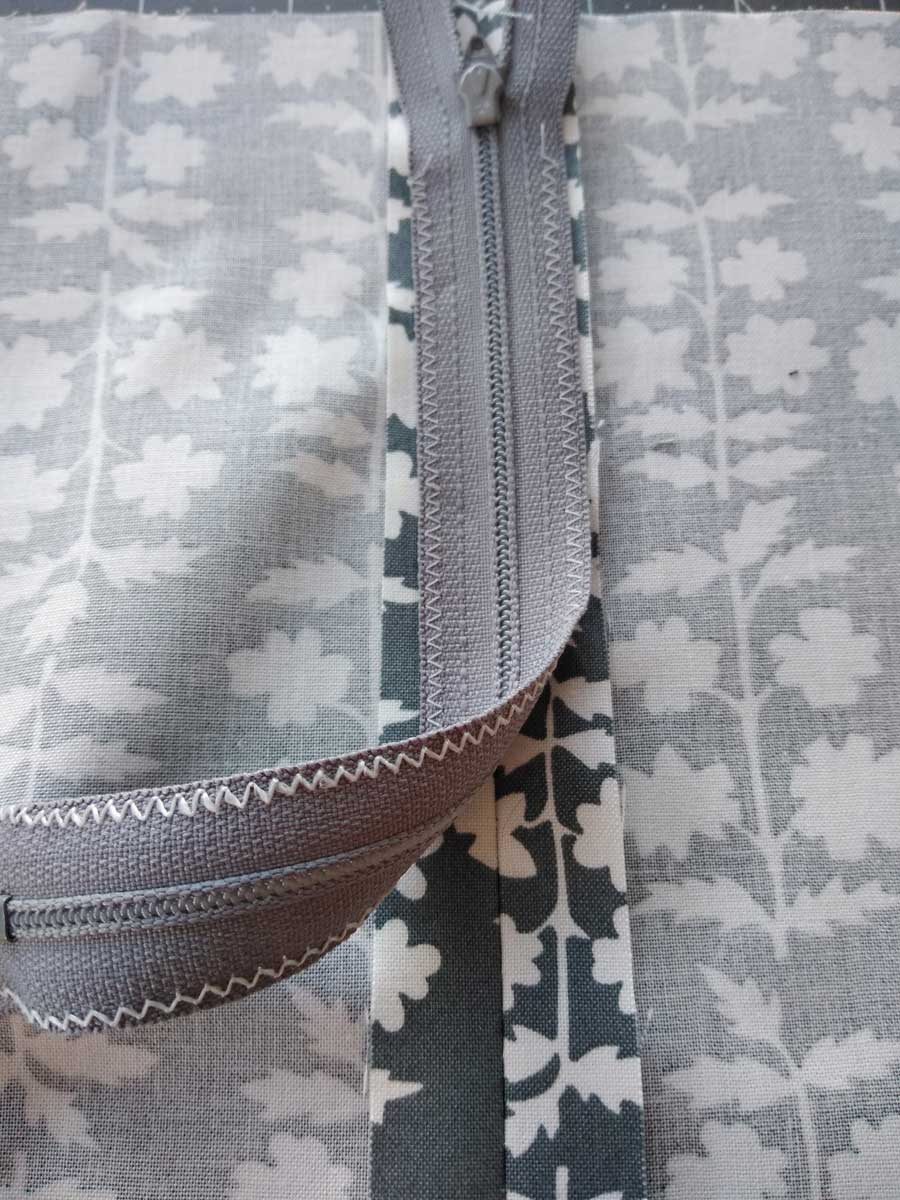
Depending on the size of the jeans you’re working with, the fly-front zipper may become an integral part of another project, so don’t disassemble it unless you want to repurpose the zipper on its own.
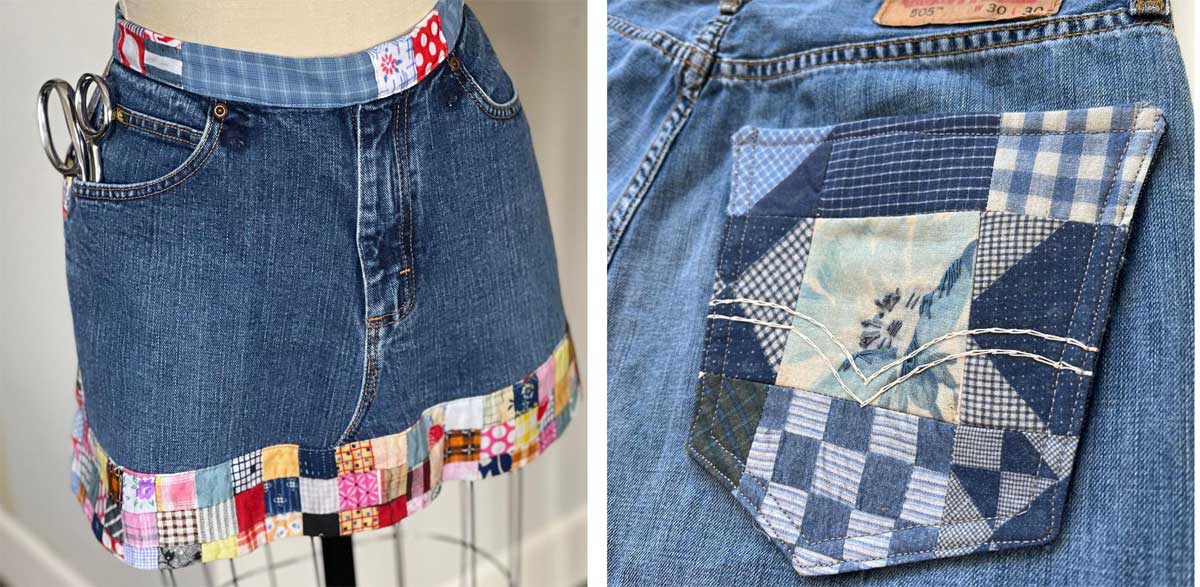
Vintage Vibes

Photo courtesy of Bernina

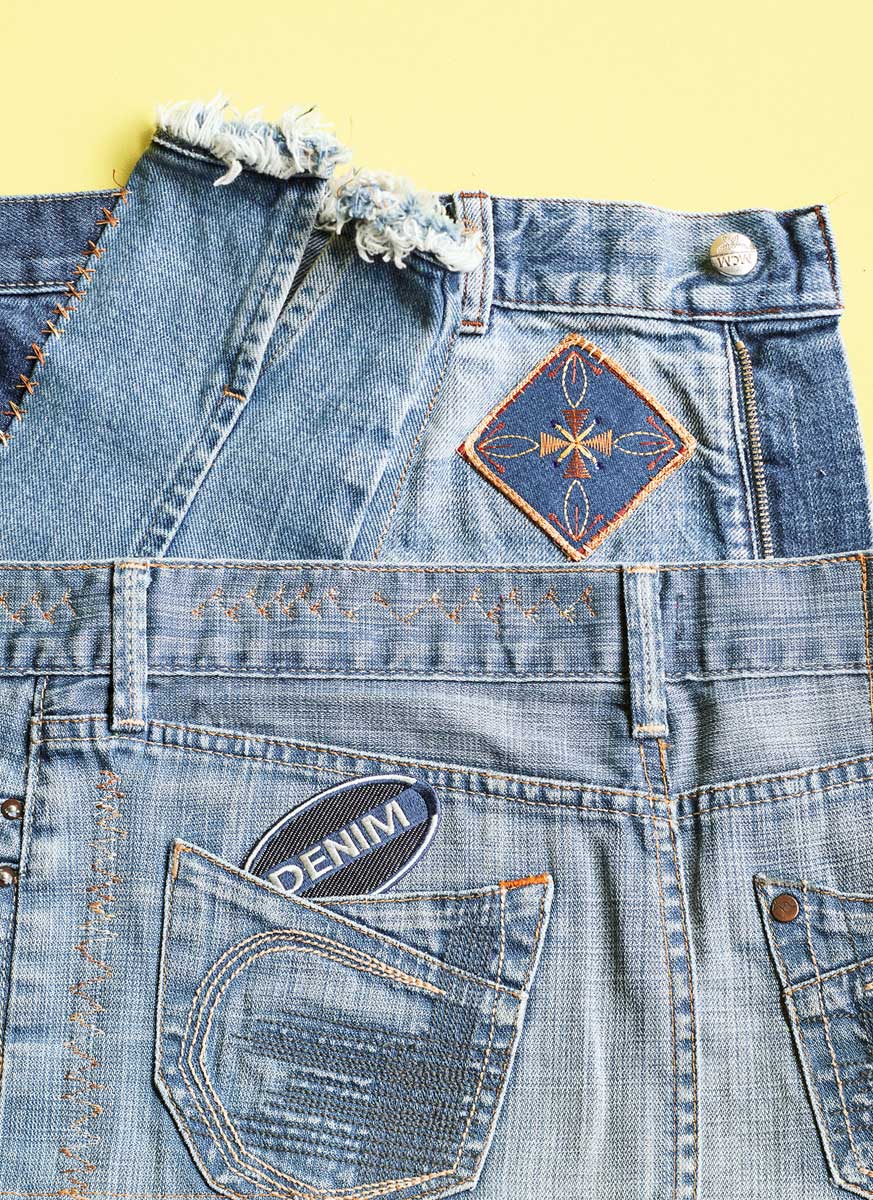
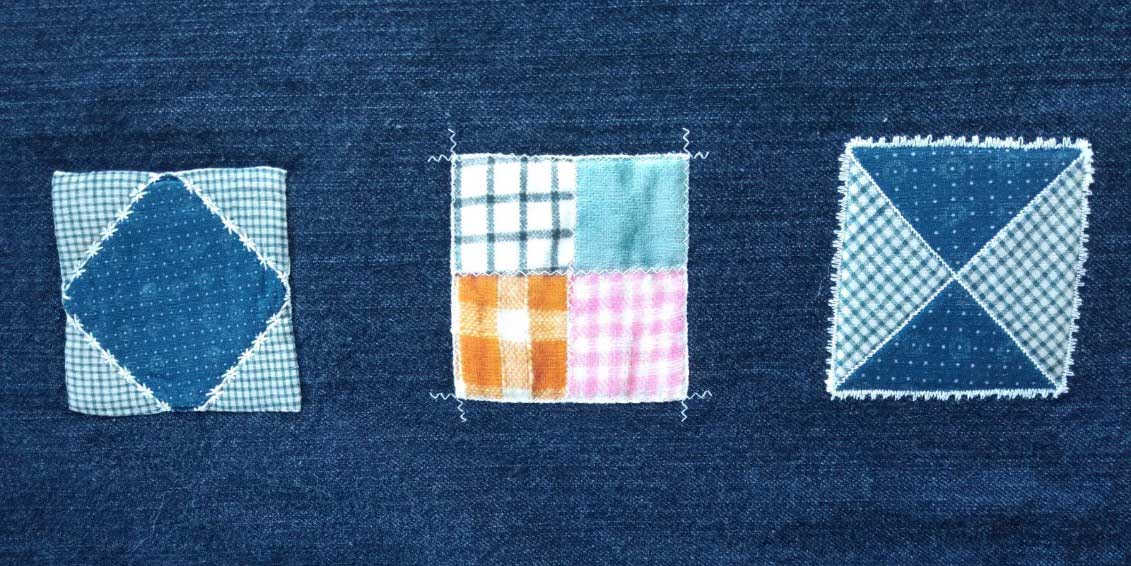
Perhaps the worn or stained spots in your favorite denim garb aren’t to your liking. That’s easy to fix—just cover them up with other fabric or embellishments. If you’ve got an embroidery machine, stitch up some patches to camouflage the holes. Use scraps to make some fun shapes and hand- or machine stitch them over the affected spots.


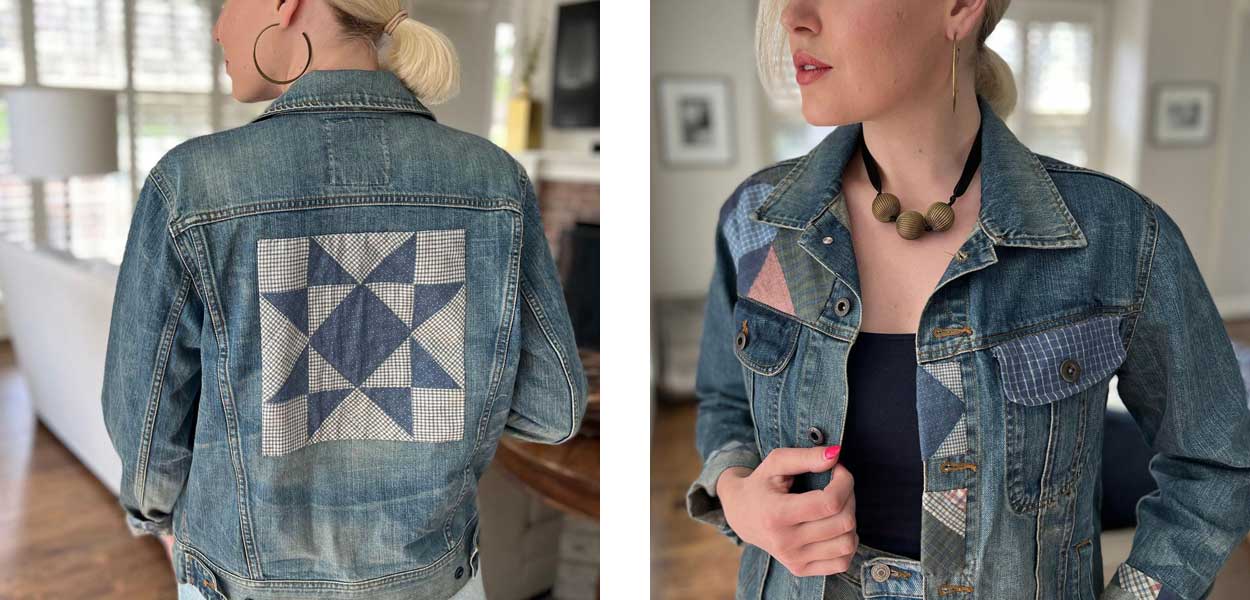
Or, follow the lead of designer Amy Barickman and make your own patches from pre-printed fabric designed with a vintage look. Her Treasured Threadz™ line offers two different print collections—one in soft denim blue quilt blocks and one in brighter color postage-stamp groupings. Each of the 14” x 44” panels have several shapes with room between for seam allowances, perfect to dress up multiple garments. In addition, there’s a video tutorial on ways to use these clever pre-prints.

Whether you’re making your own fabric patches, or using the ready-made print shapes, it’s a good idea to add a backing to the fabric for stability. Fusible fleece, lightweight batting, or a firm interfacing all work well. Then you can go to town with hand stitching, machine stitching, quilting, beading, etc. to embellish the additions.

Denim patches

Depending on the garment location you’re highlighting, you may need to hand-stitch the embellished pieces in place—especially on narrow jean legs or wrist areas. If you have access, like on a jacket back, front placket or collar, machine stitching works fine as well.

Photos courtesy of Treasured Threadz™, amybarickman.com

So, don’t give up on those worn denims—embrace the creative opportunity to give them new life!


~Linda Griepentrog is the owner of G Wiz Creative Services and she does writing, editing and designing for companies in the sewing, crafting and quilting industries. In addition, she escorts fabric shopping tours to Hong Kong. She lives at the Oregon Coast with her husband Keith, and three dogs, Yohnuh, Abby, and Lizzie. Contact her at .

Did you enjoy this article?
Are you an ASG member?
This field is for validation purposes and should be left unchanged.

~Linda Griepentrog Linda is the owner of G Wiz Creative Services and she does writing, editing and designing for companies in the sewing, crafting and quilting industries. In addition, she escorts fabric shopping tours to Hong Kong. She lives at the Oregon Coast with her husband Keith, and two dogs, Yohnuh and Abby. Contact her at .

Did you enjoy this article?
Are you an ASG member?
This field is for validation purposes and should be left unchanged.

June 2, 2023

Eliminating the Waistband: Bandless Waist

If you hate waistbands, bandless waist garments may be your new favorite style. A bandless waist skirt, also known as a waistband-free skirt, is a style of skirt that does not have a separate or visible waistband. Instead, the waistline is created by folding and shaping the fabric itself, and the top edge is finished with a shaped facing or ribbon rather than a waistband. Also called faced or contour waists, this type of skirt offers a clean, streamlined look and can be a versatile addition to your wardrobe.

Regular waistband and bandless waistband

You can purchase patterns without waistbands, such as Vogue 1942 or 1683, or you can adjust your favorite skirt pattern to eliminate the waistband on a fitted pattern with darts.

Vogue Patterns
Vogue patterns with bandless waist.

In this article, we will be converting our traditional waistband finish to a bandless waist. The waist will be finished with scalloped-edge grosgrain ribbon that is turned to the inside. Be sure to read through the instructions before starting.

The grosgrain ribbon you purchase should have tiny, scalloped edges and needs to be 1″ in width. This type of ribbon is commonly known as Hatter’s ribbon and can be molded and shaped with an iron. Grosgrain ribbon with a straight edge cannot be molded and will not conform to the shape of the body.

Fabric Selection

Choose a fabric that is suitable for the desired style of the skirt. Consider factors such as drape, weight, and stretch, depending on the look you want to achieve.

Skirt Construction

Cut and construct your garment through the waistband step.

Step 1:  Before applying the grosgrain, make sure that the waist of the garment measures 1″ to 1 1/2″ larger than your waist.

Step 2: Sew an ease-line around the waist at 5/8″ to ease in the fullness to your waist size.

Step 3: Stabilize the waist by sewing a piece of twill tape to the waistline seam on the wrong side of the fabric. Trim 3/8″ away from raw edge at waistline.

Step 4: Shape grosgrain ribbon with an iron, stretching one outside edge slightly as you press. This will allow the ribbon to sit comfortably on your waist.

Steps 1-4

Step 5: Fold under raw end of ribbon 1/2″ — a conventional seam is not used here to eliminate bulk.

  • Overlay the ribbon, folded edge out, onto the right side of the garment, matching fold of ribbon to the edge of the skirt opening and lining up the unstretched, lengthwise edge of the ribbon with the twill taped stitching line.
  • Topstitch the ribbon into place all around the waist, sewing 1/8″ from the edge of the ribbon, very close to the twill tape stitching line.


Step 6: Fold back 1/2″ on the ribbon end to finish it when you reach the side opening. Turn ribbon to the inside of the garment. Place over tailor’s ham and press. Try on the skirt and feel the comfort. Stretching and molding the ribbon before sewing is the key.

Waistband steps 5 and 6


~ This article was adapted and modified from an article by Sandra Betzina from Power Sewing that appeared in a previous issue of Notions.

Did you enjoy this article?
Are you an ASG member?
This field is for validation purposes and should be left unchanged.

May 26, 2023

Fusible Thread Lines

Most sewers have fusible web in their arsenal of sewing tools, but in areas where you need only a teeny line of adhesive, check out fusible thread. Yes, thread that fuses. The fibers are activated by the heat of the iron, as they have a low melting point.

Fusible thread enables you to place a very thin line of adhesive exactly where you need to, without the mess of glue or trying to trim web narrowly. And, you can sew and serge with it to help get it where you need it. Do note, most fusible threads create only a temporary hold, until you sew permanently.

Name Game

Fusible threads are made by several different companies, and they look slightly different depending on the brand. Some are white, others clearer; some are tightly twisted, others not. Check your favorite sewing or quilting shop for these options: YLI Fusible Thread, Wonderfil Iron ‘n Fuse™, Gütermann Fusible Thread, Superior Charlotte’s Fusible Web and Floriani Press N Bond.

Fuse Use

Fusible thread can be used in the bobbin of a conventional sewing machine or in the lower looper of the serger, depending on the application, but always paired with regular thread. If you use it on a conventional machine, wind the bobbin slower than you would regular thread. Some brands of fusible thread can also be used through the eye of a large needle, but be sure to test-stitch to note any tension adjustments needed.

Fusible thread is always placed on the side of the fabric where fusing is needed for the final application, so note which side is up when stitching.

Fusible Applications

Non-sewing applications include placing a strand of fusible thread inside pleat folds to help create sharp edges. Or, add a thread inside a pant crease to maintain a perfect crease. A fusible thread strand is ideal for quickly “basting” a patch pocket in place for stitching.

If you’re applying narrow trims, fusible thread placed under the trim is just enough to hold it in place for stitching.

Matching plaids or stripes
Figure 1

Matching plaids or stripes is easy peasy with fusible thread. Press under one seam allowance, position the fusible along the folded edge, overlap matching the design, and press. Then open out the seam allowances for regular thread stitching along the seamline. (Figure 1)

For garment sewing, fusible thread can be used in several ways. Use it for understitching—on the facing seam wrong side. After sewing, turn the facing to the inside and press the edge to melt the thread. Topstitch if desired.

When creating a narrow hem, such as at an armhole or on a ruffle, use the fusible thread in the serger lower looper. Position the fusible on the fabric wrong side, press the narrow hem in place, and stitch permanently using regular thread. This works for wider hems as well, as they stay in place for hand or machine finishing.

Figure 2

Do you have issues with zipper insertion, especially those centered applications? With fusible thread in the bobbin, sew a zigzag along the zipper tape edges so that the fusible is on the zipper right side. Center the zipper over the basted placket area and fuse in place. Add the permanent stitching with regular thread and voila—the zipper is perfectly centered without shifting. (Figure 2)

If you’re creating an appliqué, trace the shape onto the appliqué fabric right side. With fusible thread in the bobbin, sew around the appliqué shape. Trim very close to the stitching line, then fuse the appliqué in place on the base fabric. To finish it, use a decorative stitch or zigzag around the appliqué edge.

One advantage of using fusible thread for appliqué, as opposed to fusible web, is that only the outer edge is fused, not the entire shape. So, there’s less stiffness, and to reduce bulk, the area under the appliqué shape can easily be trimmed away if needed, or you can easily cut a slit in it to add stuffing for a dimensional look.

Figure 3

Quilters often use fusible thread for an easy binding application. Binding can be attached from back to front, or front to back. Stitch the binding to the quilt using regular thread. Then, use a zigzag with fusible thread in the bobbin to stitch the binding seam allowances together; the fusible should be on the unfinished side of the binding. Press the binding over the edge and fuse. To finish, topstitch or hand-stitch in place…no pins or clips needed to hold it securely in place while stitching. (Figure 3)

So, be sure that fusible thread stays close in your sewing room, as you’ll find all kinds of tasks to use it for!


~Linda Griepentrog is the owner of G Wiz Creative Services and she does writing, editing and designing for companies in the sewing, crafting and quilting industries. In addition, she escorts fabric shopping tours to Hong Kong. She lives at the Oregon Coast with her husband Keith, and three dogs, Yohnuh, Abby, and Lizzie. Contact her at .

Did you enjoy this article?
Are you an ASG member?
This field is for validation purposes and should be left unchanged.

May 18, 2023

Drape and Shape a One-Hour Vest (Preview)

East vestVests are a popular garment for good reasons — they go many places and serve many purposes, from dressing-up an outfit for the holidays, to giving a skirt or pants a fresh look, to adding a colorful layer to a plain top, and to keeping you warm. With these simple drape-and-shape techniques, you can quickly make vests that flatter your figure and go anywhere, depending on the fabrics and embellishments.

Drape-and-shape construction has been the favored method for making clothes since people started wrapping themselves with animal hides and cloth. From caveman to couturiere, those who create garments know the best is achieved by draping-and-shaping the fabric on the wearer’s body (or on a form of his or her body). The vest uses a few of the simple drape-and-shape methods which means that anyone, regardless of their size or shape, can create gently fitted, graceful clothes. Fit the garments for how you want the final shape.

The vest in this project is long and flowing (Figure 1) and is designed for a medium-large figure (39-42″ bust and 41-44″ hip); however, it is easy to change in length or fullness to fit your particular figure.


The full article is in the Members area of the website. CLICK HERE to read the full article. Not a member? Join online!


Tagged With: drape and shape, vest

May 12, 2023

Bobbin Storage

OK, raise your hand if your bobbin storage area looks like the photo below. Just what I thought…few hands in the air, and certainly not mine! Keeping these pesky little rounds handy and neat is an ongoing chore, but thankfully, there are some notions that can come to our rescue.

Bobbin Storage, available on Amazon
Bobbin Storage, available on Amazon.

How you store your bobbins is a matter of personal choice—Do you like them safely attached to their matching thread spools, or tucked away separately with other like rounds? Either way, it’s possible to keep them neat and tidy.

Before you invest in a bobbin storage item of any kind, note the size of your bobbin, as some containers are specific to a size or bobbin type.

Separate Quarters

Little boxes with foam or molded inserts help to organize bobbins easily. See-through versions allow you to check out the contents without opening, and lids keep bobbins dust-free. Whether you have individual slots or long channels depends on the storage device.

HONEYSEW Bobbin Case for Bernina

Not into rectangles? Perhaps you’d like a donut instead. These pliable plastic containers allow for aligning bobbins around an open center space. Since they come in multiple colors, you can choose one for each machine you own.

Eurotions BobbinSavers

Bobbin racks have wooden pegs that you can fill with your colorful rounds. Hang them on the wall or use a tabletop model, depending on your space. Or, put in a drawer to keep bobbins dust-free.

Bobbin Rack


Some bobbin racks have flexible plastic snap-on holders that can be stacked.

Clover Stack ‘n Store Tower


Plastic storage tubes are yet another idea to keep bobbins organized and dust free. They’re also handy for toting to class when you just need a few for you planned projects.

If your machine has metal bobbins, there’s the option of a magnetic bobbin holder to keep them in place.

Euronotions Grabobbin

Togetherness

If you prefer to keep your thread spools and matching bobbins together, there are a host of options for this neatness. Some devices snap onto the top of the thread spools, while others push into the top hole in the spool.

60 Pieces Bobbin Holder Thread Spool Holder Stack Bobbins on Spool Tops

DIY Options

If you’re sew inclined, there are many ideas for creating your own bobbin storage device.

Empty pill bottles are ideal for dust-free bobbin storage and the clear ones let you see what’s inside. Just be sure to check the size of your bobbins to be sure they fit inside.

Pick up a multi-day medicine dispenser with mini-compartments perfectly sized to fit your bobbins.

Foam toe separators are a quirky option for bobbin storage, but handy if you just need to take a few with you to a class. The foam also keeps the thread ends in place.

bobbin storage toe separator

For storing bobbins with thread spools, simply wrap a rubber band around the spool and around the matching bobbin.

A paper clip can be inserted into the top of a thread spool and through a matching bobbin for inexpensive togetherness. A pipe cleaner can be used in the same manner.

Visit your office supply store for a large metal ring that opens—simply thread the bobbins onto the ring for organized storage.

Wrapping Up

Bobbin Holders for Thread Spool Sewing Bobbin Small Clips Sewing Tool Accessory Clear Thread Clips Holder Tool

No matter how you store your bobbins, there’s always the issue of thread ends. But taming them is easy if you just get one of small wrap clamps available. Clip it over the bobbin thread for neat-as-a-pin storage.

Or, for a DIY option, get some small clear tubing from the hardware store and slice down one side. Cut it into length that fits your bobbin thread height, then snap in place around the loose thread end. {photo}

No matter how you store them, there’s always a cat or dog willing to unroll your bobbins at the most inopportune time, it seems.


~Linda Griepentrog is the owner of G Wiz Creative Services and she does writing, editing and designing for companies in the sewing, crafting and quilting industries. In addition, she escorts fabric shopping tours to Hong Kong. She lives at the Oregon Coast with her husband Keith, and three dogs, Yohnuh, Abby, and Lizzie. Contact her at .

Did you enjoy this article?
Are you an ASG member?
This field is for validation purposes and should be left unchanged.

Tagged With: bobbin storage, bobbins, sewing room

  • « Previous Page
  • 1
  • …
  • 18
  • 19
  • 20
  • 21
  • 22
  • …
  • 63
  • Next Page »

Become a Member

Join the only national organization dedicated to Advancing Sewing as an Art and Life Skill.

Join Now button

Blog Article Categories

  • ASG Conference
  • Chapter Stories
  • Embroidery
  • Fitting
  • Learn to Sew
  • National Sewing Month
  • Products, Books, & Patterns
  • Projects
  • Quilting
  • Sewing
  • Sewing Techniques
  • Sewing Tips
  • Sewing Tours
  • Videos
  • Disclaimer
  • Privacy Policy

American Sewing Guild
National Headquarters
9660 Hillcroft, Suite 230
Houston TX 77096
713-729-3000 | 713-721-9230 Fax
www.ASG.org

ASG wordcloud - education, conference, discounts, videos, special offers, tours and more

Copyright © 1998–2025 · American Sewing Guild · All Rights Reserved